华为路由交换VRRP配置
2014-07-06 12:49
549 查看
VRRP配置学习目的
了解网络负载均衡的功能和作用
理解VRRP协议的工作原理
掌握三层交换环境单组VRRP的配置方法
掌握VRRP认证配置方法
掌握VRRP跟踪接口的配置方法
掌握使用VRRP实现负载均衡的配置方法
拓扑图
场景
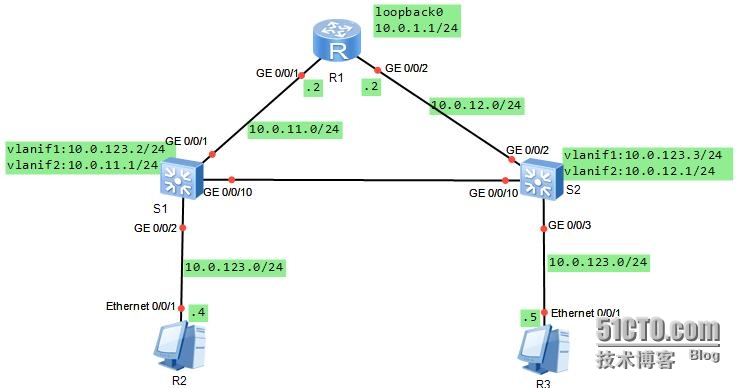
你是公司的网络管理员。当前的网络中有两个用户。用R2、R3标注为公司用户。R1使用回环口模拟为Internet服务器。此时网络中有两个网关,为实现冗余。现在使用VRRP来实现冗余。
学习任务
步骤一.基本配置与IP编址
在实验之前,需要关闭部分设备接口,避免影响本次实验。
本次实验需要关闭S1的G0/0/9、G0/0/13和G0/0/14接口。关闭这些接口之后,开始实验配置。
用户网络使用vlan1,S1使用vlan2与R1相连,S2使用vlan3与R1相连,R1配置loopback接口;R2、R3作为客户,配置IP、缺省网关。
路由器R1模拟为广域网,它的回环模拟为广域网中的一台服务器。
[Huawei]sysname R1
[R1]interface loopback0
[R1-LoopBack0]ip add 10.0.1.1 24
[R1-LoopBack0]interface g0/0/1
[R1-GigabitEthernet0/0/1]ip add 10.0.11.224
[R1-GigabitEthernet0/0/1]desc this portconnect to S1-G0/0/1
[R1-GigabitEthernet0/0/1]interface g0/0/2
[R1-GigabitEthernet0/0/2]ip add 10.0.12.224
[R1-GigabitEthernet0/0/2]desc this portconnect to S2-G0/0/2
[R1-GigabitEthernet0/0/2]q
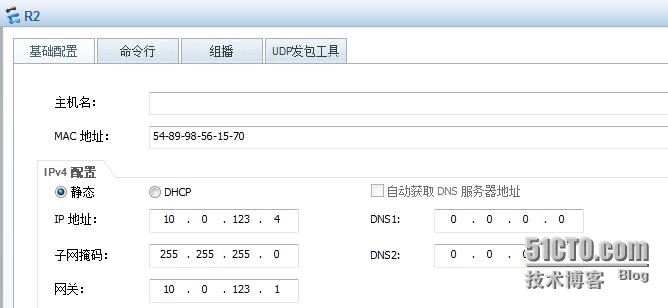
R2是局域网中的一台PC设备,使用网段10.0.123.0/24,网关为10.0.123.1.
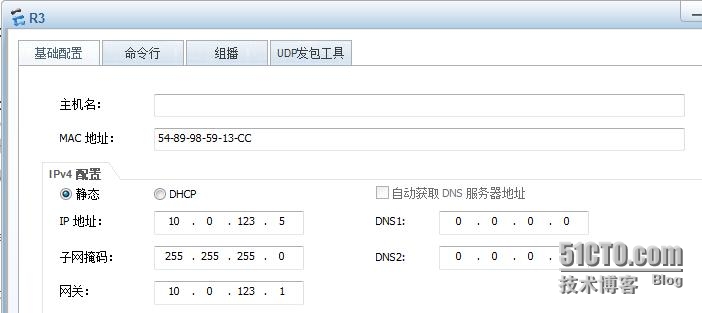
R3是局域网中的另一台PC设备,使用网段为10.0.123.0/24,网关为10.0.123.1.
交换机S1配置vlan1、2、3,接口模式为hybird模式。将接口G0/0/10配置为Trunk接口,允许所有vlan通过,G0/0/1配置为access类型接口,属于vlan2,G0/0/2配置为access类型接口,属于vlan1.配置vlanif1,为vlan1提供网关服务,IP地址为10.0.123.2/24;配置vlanif2,作为与R1连接的三层接口,ip地址为10.0.11.1/24.
[Huawei]sysname S1
[S1]vlan batch 1 to 3
[S1]interface g0/0/10
[S1-GigabitEthernet0/0/10]port link-typetrunk
[S1-GigabitEthernet0/0/10]port trunkallow-pass vlan all
[S1-GigabitEthernet0/0/10]interface g0/0/1
[S1-GigabitEthernet0/0/1]port link-typeaccess
[S1-GigabitEthernet0/0/1]port default vlan2
[S1-GigabitEthernet0/0/1]interface g0/0/2
[S1-GigabitEthernet0/0/2]port link-typeaccess
[S1-GigabitEthernet0/0/2]port default vlan1
[S1-GigabitEthernet0/0/2]interface vlanif 1
[S1-Vlanif1]ip add 10.0.123.2 24
[S1-Vlanif1]interface vlanif 2
[S1-Vlanif2]ip add 10.0.11.1 24
交换机S2配置vlan1、2、3.接口默认为hybired模式。将接口G0/0/10配置成trunk接口,允许所有vlan通过,G0/0/2配置为access类型接口,属于vlan3,G0/0/3配置为access类型接口,属于vlan1.配置vlanif1,为vlan1提供网关服务,IP地址为10.0.123.3/24,配置vlanif3,作为与R1连接的三层接口,IP地址为10.0.12.1/24.
[Huawei]sysname S2
[S2]vlan batch 1 to 3
[S2]interface g0/0/10
[S2-GigabitEthernet0/0/10]port link-typetrunk
[S2-GigabitEthernet0/0/10]port trunkallow-pass vlan all
[S2-GigabitEthernet0/0/10]interface g0/0/2
[S2-GigabitEthernet0/0/2]port link-typeaccess
[S2-GigabitEthernet0/0/2]port default vlan3
[S2-GigabitEthernet0/0/2]interface g0/0/3
[S2-GigabitEthernet0/0/3]port link-typeaccess
[S2-GigabitEthernet0/0/3]port default vlan1
[S2-GigabitEthernet0/0/3]interface vlanif 1
[S2-Vlanif1]ip add 10.0.123.3 24
[S2-Vlanif1]interface vlanif 3
[S2-Vlanif3]ip add 10.0.12.1 24
配置完成后,测试直连链路的连通性,在S2上测试其于S1、R1、R2、R3之间的联通行。(使用ping命令测试,加上参数“-c 1”代表一个ping包进行测试。默认连续发送5个)。
[S2]ping -c 1 10.0.12.2
PING 10.0.12.2: 56 data bytes,press CTRL_C to break
Reply from 10.0.12.2: bytes=56 Sequence=1 ttl=255 time=90 ms
---10.0.12.2 ping statistics ---
1packet(s) transmitted
1packet(s) received
0.00% packet loss
round-trip min/avg/max = 90/90/90 ms
[S2]ping -c 1 10.0.123.2
PING 10.0.123.2: 56 data bytes,press CTRL_C to break
Reply from 10.0.123.2: bytes=56 Sequence=1 ttl=255 time=50 ms
---10.0.123.2 ping statistics ---
1packet(s) transmitted
1packet(s) received
0.00% packet loss
round-trip min/avg/max = 50/50/50 ms
[S2]ping -c 1 10.0.123.4
PING 10.0.123.4: 56 data bytes,press CTRL_C to break
Reply from 10.0.123.4: bytes=56 Sequence=1 ttl=128 time=70 ms
---10.0.123.4 ping statistics ---
1packet(s) transmitted
1packet(s) received
0.00% packet loss
round-trip min/avg/max = 70/70/70 ms
[S2]ping -c 1 10.0.123.5
PING 10.0.123.5: 56 data bytes,press CTRL_C to break
Reply from 10.0.123.5: bytes=56 Sequence=1 ttl=128 time=10 ms
---10.0.123.5 ping statistics ---
1packet(s) transmitted
1packet(s) received
0.00% packet loss
round-trip min/avg/max = 10/10/10 ms
步骤二.配置OSPF路由协议,实现s1、S2、R1之间的路由联通
[S1]ospf 1.
[S1-ospf-1]area 0
[S1-ospf-1-area-0.0.0.0]network 10.0.0.00.255.255.255
[S1-ospf-1-area-0.0.0.0]q
[S1-ospf-1]silent-interface vlanif 1
[S2]ospf 1
[S2-ospf-1]area 0
[S2-ospf-1-area-0.0.0.0]network 10.0.0.00.255.255.255
[S2-ospf-1-area-0.0.0.0]q
[S2-ospf-1]silent-interface vlanif 1
[R1]ospf 1
[R1-ospf-1]area 0
[R1-ospf-1-area-0.0.0.0]network 10.0.0.00.255.255.255
配置完成后,稍等片刻,等待网络收敛后,测试网络的连通性。
[S2]ping -c 1 10.0.11.1
PING 10.0.11.1: 56 data bytes,press CTRL_C to break
Reply from 10.0.11.1: bytes=56 Sequence=1 ttl=254 time=60 ms
---10.0.11.1 ping statistics ---
1packet(s) transmitted
1packet(s) received
0.00% packet loss
round-trip min/avg/max = 60/60/60 ms
[S2]ping -c 1 10.0.1.1
PING 10.0.1.1: 56 data bytes,press CTRL_C to break
Reply from 10.0.1.1: bytes=56 Sequence=1 ttl=255 time=50 ms
---10.0.1.1 ping statistics ---
1packet(s) transmitted
1packet(s) received
0.00% packet loss
round-tripmin/avg/max = 50/50/50 ms
[S2]ping -c 1 10.0.12.2
PING 10.0.12.2: 56 data bytes,press CTRL_C to break
Reply from 10.0.12.2: bytes=56 Sequence=1 ttl=255 time=60 ms
---10.0.12.2 ping statistics ---
1packet(s) transmitted
1packet(s) received
0.00% packet loss
round-trip min/avg/max = 60/60/60 ms
步骤三.配置VRRP,实现网关冗余
S1配置VRRP,使用VRRP组1,默认优先级为100,实验中定义为105.
[S1]interface vlanif 1
[S1-Vlanif1]vrrp vrid 1 virtual-ip10.0.123.1
[S1-Vlanif1]vrrp vrid 1 priority 105
[S2]interface vlanif 1
[S2-Vlanif1]vrrp vri
[S2-Vlanif1]vrrp vrid 1 vir
[S2-Vlanif1]vrrp vrid 1 virtual-ip10.0.123.1
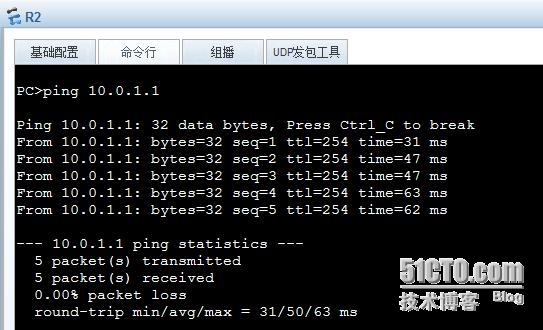
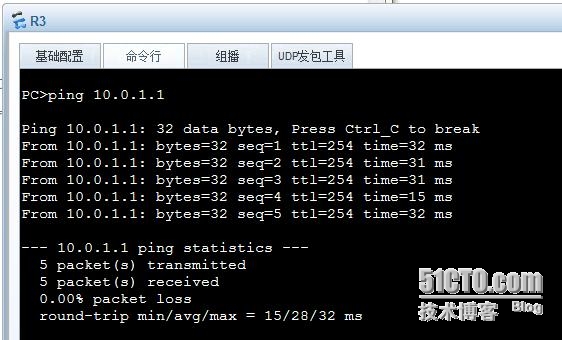
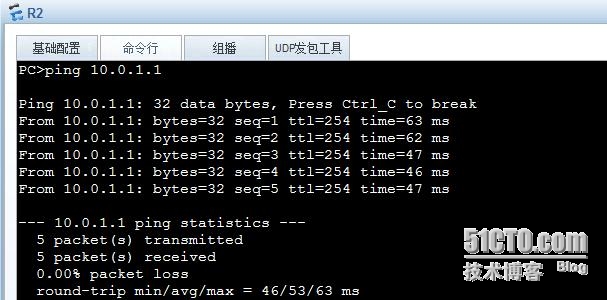
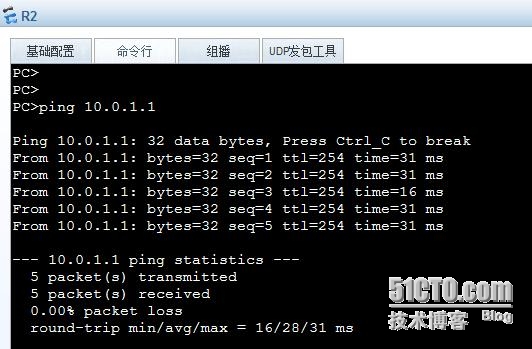
配置完成后,在R2和R3上测试他们与模拟的Internet服务器之间的通讯是否正常。
在S1上查看VRRP当前的状态信息。
[S1]disp vrrp
Vlanif1 | Virtual Router 1
State : Master
Virtual IP : 10.0.123.1
Master IP : 10.0.123.2
PriorityRun : 105
PriorityConfig : 105
MasterPriority : 105
Preempt : YES Delay Time : 0 s
TimerRun : 1 s
TimerConfig : 1 s
Auth type : NONE
Virtual MAC : 0000-5e00-0101
Check TTL : YES
Config type : normal-vrrp
Create time : 2014-07-03 11:58:33 UTC-08:00
Last change time: 2014-07-03 11:58:37 UTC-08:00当前R2与R3都是通过S1将数据包发送至internet的。关闭S1的vlanif 1接口,然后测试网络是否正常切换。
[S1]interface vlanif 1
[S1-Vlanif1]shutdown
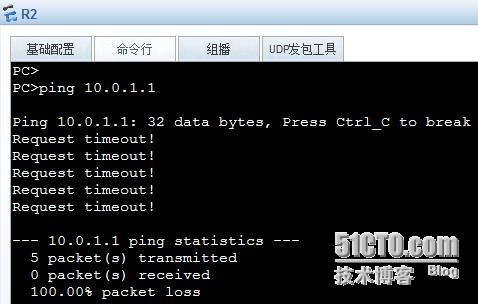
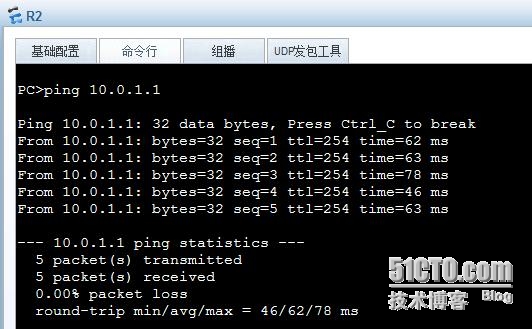
在R2与R3上测试他们与模拟Internet服务器之间的通讯是否正常。
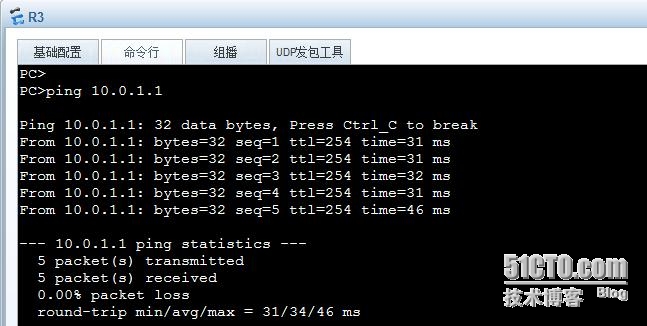
此时相当于S1设备停止工作,查看S1与S2的VRRP状态。
[S1]disp vrrp
Vlanif1 | Virtual Router 1
State : Initialize
Virtual IP : 10.0.123.1
Master IP : 0.0.0.0
PriorityRun : 105
PriorityConfig : 105
MasterPriority : 0
Preempt : YES Delay Time : 0 s
TimerRun : 1 s
TimerConfig : 1 s
Auth type : NONE
Virtual MAC : 0000-5e00-0101
Check TTL : YES
Config type : normal-vrrp
Create time : 2014-07-03 11:58:33 UTC-08:00
Last change time: 2014-07-03 12:09:28 UTC-08:00 <S2>dispvrrp Vlanif1 | Virtual Router 1 State : Master Virtual IP : 10.0.123.1 Master IP : 10.0.123.2 PriorityRun : 100 PriorityConfig : 100 MasterPriority : 100 Preempt : YES Delay Time : 0 s TimerRun : 1 s TimerConfig : 1 s Auth type : NONE Virtual MAC : 0000-5e00-0101 Check TTL : YES Config type : normal-vrrp Create time : 2014-07-03 12:01:18 UTC-08:00 Last change time : 2014-07-03 12:01:21UTC-08:00步骤四.跟踪接口状态 重新打开S1的vlanif1接口,并配置S1、S2踪它们的G0/0/1、G0/0/2接口。[S1]interfacevlanif 1[S1-Vlanif1]undoshutdown 查看S1的vrrp状态。[S1]displ vrrp Vlanif1 | Virtual Router 1 State : Master Virtual IP : 10.0.123.1 Master IP : 10.0.123.2 PriorityRun : 105 PriorityConfig : 105 MasterPriority : 105 Preempt : YES Delay Time : 0 s TimerRun : 1 s TimerConfig : 1 s Auth type : NONE Virtual MAC : 0000-5e00-0101 Check TTL : YES Config type : normal-vrrp Create time : 2014-07-03 11:58:33 UTC-08:00 Last change time : 2014-07-03 12:21:05UTC-08:00 此时R2与R3通过S1发送数据给internet。如果关闭S1的G0/0/1接口,或关闭R1的G0/0/1接口,网络将无法自动切换到通过S2发送数据给internet。 关闭S1的G0/0/1接口[S1]interfaceg0/0/1[S1-GigabitEthernet0/0/1]shutdown[S1]dis vrrp briefVRID State Interface Type Virtual IP ----------------------------------------------------------------1 Master Vlanif1 Normal 10.0.123.1 ----------------------------------------------------------------Total:1 Master:1 Backup:0 Non-active:0注:使用brief参数可以显示简略信息。测试R2与internet的连通性。
显示无法正常通信重新打开S1的G0/0/1接口[S1]interfaceg0/0/1[S1-GigabitEthernet0/0/1]undoshutdownS1和S2上配置VRRP的接口跟踪,定义跟踪G0/0/1接口,如果接口被关闭,则由此岸及降低10.这样的情况下,S2将抢占S1的VRRP主角色[S1]interfacevlanif 1[S1-Vlanif1]vrrpvrid 1 track interface g0/0/1 reduced 10 [S2]interfacevlanif 1[S2-Vlanif1]vrrpvrid 1 track interface g0/0/2 reduced 10此时,测试网络的连通性。网络正常时,R2可以与internet服务器通信。
关闭S1的G0/0/1接口[S1]interfaceg0/0/1[S1-GigabitEthernet0/0/1]shutdown测试R2与internet服务器之间的连通性。
通讯依然正常,查看S1的vrrp状态。[S1]dis vrrp Vlanif1 | Virtual Router 1 State : Backup Virtual IP : 10.0.123.1 Master IP : 10.0.123.3 PriorityRun : 95 PriorityConfig : 105 MasterPriority : 100 Preempt : YES Delay Time : 0 s TimerRun : 1 s TimerConfig : 1 s Auth type : NONE Virtual MAC : 0000-5e00-0101 Check TTL : YES Config type : normal-vrrp Track IF :GigabitEthernet0/0/1 Priority reduced :10 IF state : DOWN Create time : 2014-07-03 11:58:33 UTC-08:00 Last change time : 2014-07-03 14:58:38UTC-08:00
附件:http://down.51cto.com/data/2364614
了解网络负载均衡的功能和作用
理解VRRP协议的工作原理
掌握三层交换环境单组VRRP的配置方法
掌握VRRP认证配置方法
掌握VRRP跟踪接口的配置方法
掌握使用VRRP实现负载均衡的配置方法
拓扑图
场景
你是公司的网络管理员。当前的网络中有两个用户。用R2、R3标注为公司用户。R1使用回环口模拟为Internet服务器。此时网络中有两个网关,为实现冗余。现在使用VRRP来实现冗余。
学习任务
步骤一.基本配置与IP编址
在实验之前,需要关闭部分设备接口,避免影响本次实验。
本次实验需要关闭S1的G0/0/9、G0/0/13和G0/0/14接口。关闭这些接口之后,开始实验配置。
用户网络使用vlan1,S1使用vlan2与R1相连,S2使用vlan3与R1相连,R1配置loopback接口;R2、R3作为客户,配置IP、缺省网关。
路由器R1模拟为广域网,它的回环模拟为广域网中的一台服务器。
[Huawei]sysname R1
[R1]interface loopback0
[R1-LoopBack0]ip add 10.0.1.1 24
[R1-LoopBack0]interface g0/0/1
[R1-GigabitEthernet0/0/1]ip add 10.0.11.224
[R1-GigabitEthernet0/0/1]desc this portconnect to S1-G0/0/1
[R1-GigabitEthernet0/0/1]interface g0/0/2
[R1-GigabitEthernet0/0/2]ip add 10.0.12.224
[R1-GigabitEthernet0/0/2]desc this portconnect to S2-G0/0/2
[R1-GigabitEthernet0/0/2]q
R2是局域网中的一台PC设备,使用网段10.0.123.0/24,网关为10.0.123.1.
R3是局域网中的另一台PC设备,使用网段为10.0.123.0/24,网关为10.0.123.1.
交换机S1配置vlan1、2、3,接口模式为hybird模式。将接口G0/0/10配置为Trunk接口,允许所有vlan通过,G0/0/1配置为access类型接口,属于vlan2,G0/0/2配置为access类型接口,属于vlan1.配置vlanif1,为vlan1提供网关服务,IP地址为10.0.123.2/24;配置vlanif2,作为与R1连接的三层接口,ip地址为10.0.11.1/24.
[Huawei]sysname S1
[S1]vlan batch 1 to 3
[S1]interface g0/0/10
[S1-GigabitEthernet0/0/10]port link-typetrunk
[S1-GigabitEthernet0/0/10]port trunkallow-pass vlan all
[S1-GigabitEthernet0/0/10]interface g0/0/1
[S1-GigabitEthernet0/0/1]port link-typeaccess
[S1-GigabitEthernet0/0/1]port default vlan2
[S1-GigabitEthernet0/0/1]interface g0/0/2
[S1-GigabitEthernet0/0/2]port link-typeaccess
[S1-GigabitEthernet0/0/2]port default vlan1
[S1-GigabitEthernet0/0/2]interface vlanif 1
[S1-Vlanif1]ip add 10.0.123.2 24
[S1-Vlanif1]interface vlanif 2
[S1-Vlanif2]ip add 10.0.11.1 24
交换机S2配置vlan1、2、3.接口默认为hybired模式。将接口G0/0/10配置成trunk接口,允许所有vlan通过,G0/0/2配置为access类型接口,属于vlan3,G0/0/3配置为access类型接口,属于vlan1.配置vlanif1,为vlan1提供网关服务,IP地址为10.0.123.3/24,配置vlanif3,作为与R1连接的三层接口,IP地址为10.0.12.1/24.
[Huawei]sysname S2
[S2]vlan batch 1 to 3
[S2]interface g0/0/10
[S2-GigabitEthernet0/0/10]port link-typetrunk
[S2-GigabitEthernet0/0/10]port trunkallow-pass vlan all
[S2-GigabitEthernet0/0/10]interface g0/0/2
[S2-GigabitEthernet0/0/2]port link-typeaccess
[S2-GigabitEthernet0/0/2]port default vlan3
[S2-GigabitEthernet0/0/2]interface g0/0/3
[S2-GigabitEthernet0/0/3]port link-typeaccess
[S2-GigabitEthernet0/0/3]port default vlan1
[S2-GigabitEthernet0/0/3]interface vlanif 1
[S2-Vlanif1]ip add 10.0.123.3 24
[S2-Vlanif1]interface vlanif 3
[S2-Vlanif3]ip add 10.0.12.1 24
配置完成后,测试直连链路的连通性,在S2上测试其于S1、R1、R2、R3之间的联通行。(使用ping命令测试,加上参数“-c 1”代表一个ping包进行测试。默认连续发送5个)。
[S2]ping -c 1 10.0.12.2
PING 10.0.12.2: 56 data bytes,press CTRL_C to break
Reply from 10.0.12.2: bytes=56 Sequence=1 ttl=255 time=90 ms
---10.0.12.2 ping statistics ---
1packet(s) transmitted
1packet(s) received
0.00% packet loss
round-trip min/avg/max = 90/90/90 ms
[S2]ping -c 1 10.0.123.2
PING 10.0.123.2: 56 data bytes,press CTRL_C to break
Reply from 10.0.123.2: bytes=56 Sequence=1 ttl=255 time=50 ms
---10.0.123.2 ping statistics ---
1packet(s) transmitted
1packet(s) received
0.00% packet loss
round-trip min/avg/max = 50/50/50 ms
[S2]ping -c 1 10.0.123.4
PING 10.0.123.4: 56 data bytes,press CTRL_C to break
Reply from 10.0.123.4: bytes=56 Sequence=1 ttl=128 time=70 ms
---10.0.123.4 ping statistics ---
1packet(s) transmitted
1packet(s) received
0.00% packet loss
round-trip min/avg/max = 70/70/70 ms
[S2]ping -c 1 10.0.123.5
PING 10.0.123.5: 56 data bytes,press CTRL_C to break
Reply from 10.0.123.5: bytes=56 Sequence=1 ttl=128 time=10 ms
---10.0.123.5 ping statistics ---
1packet(s) transmitted
1packet(s) received
0.00% packet loss
round-trip min/avg/max = 10/10/10 ms
步骤二.配置OSPF路由协议,实现s1、S2、R1之间的路由联通
[S1]ospf 1.
[S1-ospf-1]area 0
[S1-ospf-1-area-0.0.0.0]network 10.0.0.00.255.255.255
[S1-ospf-1-area-0.0.0.0]q
[S1-ospf-1]silent-interface vlanif 1
[S2]ospf 1
[S2-ospf-1]area 0
[S2-ospf-1-area-0.0.0.0]network 10.0.0.00.255.255.255
[S2-ospf-1-area-0.0.0.0]q
[S2-ospf-1]silent-interface vlanif 1
[R1]ospf 1
[R1-ospf-1]area 0
[R1-ospf-1-area-0.0.0.0]network 10.0.0.00.255.255.255
配置完成后,稍等片刻,等待网络收敛后,测试网络的连通性。
[S2]ping -c 1 10.0.11.1
PING 10.0.11.1: 56 data bytes,press CTRL_C to break
Reply from 10.0.11.1: bytes=56 Sequence=1 ttl=254 time=60 ms
---10.0.11.1 ping statistics ---
1packet(s) transmitted
1packet(s) received
0.00% packet loss
round-trip min/avg/max = 60/60/60 ms
[S2]ping -c 1 10.0.1.1
PING 10.0.1.1: 56 data bytes,press CTRL_C to break
Reply from 10.0.1.1: bytes=56 Sequence=1 ttl=255 time=50 ms
---10.0.1.1 ping statistics ---
1packet(s) transmitted
1packet(s) received
0.00% packet loss
round-tripmin/avg/max = 50/50/50 ms
[S2]ping -c 1 10.0.12.2
PING 10.0.12.2: 56 data bytes,press CTRL_C to break
Reply from 10.0.12.2: bytes=56 Sequence=1 ttl=255 time=60 ms
---10.0.12.2 ping statistics ---
1packet(s) transmitted
1packet(s) received
0.00% packet loss
round-trip min/avg/max = 60/60/60 ms
步骤三.配置VRRP,实现网关冗余
S1配置VRRP,使用VRRP组1,默认优先级为100,实验中定义为105.
[S1]interface vlanif 1
[S1-Vlanif1]vrrp vrid 1 virtual-ip10.0.123.1
[S1-Vlanif1]vrrp vrid 1 priority 105
[S2]interface vlanif 1
[S2-Vlanif1]vrrp vri
[S2-Vlanif1]vrrp vrid 1 vir
[S2-Vlanif1]vrrp vrid 1 virtual-ip10.0.123.1
配置完成后,在R2和R3上测试他们与模拟的Internet服务器之间的通讯是否正常。
在S1上查看VRRP当前的状态信息。
[S1]disp vrrp
Vlanif1 | Virtual Router 1
State : Master
Virtual IP : 10.0.123.1
Master IP : 10.0.123.2
PriorityRun : 105
PriorityConfig : 105
MasterPriority : 105
Preempt : YES Delay Time : 0 s
TimerRun : 1 s
TimerConfig : 1 s
Auth type : NONE
Virtual MAC : 0000-5e00-0101
Check TTL : YES
Config type : normal-vrrp
Create time : 2014-07-03 11:58:33 UTC-08:00
Last change time: 2014-07-03 11:58:37 UTC-08:00当前R2与R3都是通过S1将数据包发送至internet的。关闭S1的vlanif 1接口,然后测试网络是否正常切换。
[S1]interface vlanif 1
[S1-Vlanif1]shutdown
在R2与R3上测试他们与模拟Internet服务器之间的通讯是否正常。
此时相当于S1设备停止工作,查看S1与S2的VRRP状态。
[S1]disp vrrp
Vlanif1 | Virtual Router 1
State : Initialize
Virtual IP : 10.0.123.1
Master IP : 0.0.0.0
PriorityRun : 105
PriorityConfig : 105
MasterPriority : 0
Preempt : YES Delay Time : 0 s
TimerRun : 1 s
TimerConfig : 1 s
Auth type : NONE
Virtual MAC : 0000-5e00-0101
Check TTL : YES
Config type : normal-vrrp
Create time : 2014-07-03 11:58:33 UTC-08:00
Last change time: 2014-07-03 12:09:28 UTC-08:00 <S2>dispvrrp Vlanif1 | Virtual Router 1 State : Master Virtual IP : 10.0.123.1 Master IP : 10.0.123.2 PriorityRun : 100 PriorityConfig : 100 MasterPriority : 100 Preempt : YES Delay Time : 0 s TimerRun : 1 s TimerConfig : 1 s Auth type : NONE Virtual MAC : 0000-5e00-0101 Check TTL : YES Config type : normal-vrrp Create time : 2014-07-03 12:01:18 UTC-08:00 Last change time : 2014-07-03 12:01:21UTC-08:00步骤四.跟踪接口状态 重新打开S1的vlanif1接口,并配置S1、S2踪它们的G0/0/1、G0/0/2接口。[S1]interfacevlanif 1[S1-Vlanif1]undoshutdown 查看S1的vrrp状态。[S1]displ vrrp Vlanif1 | Virtual Router 1 State : Master Virtual IP : 10.0.123.1 Master IP : 10.0.123.2 PriorityRun : 105 PriorityConfig : 105 MasterPriority : 105 Preempt : YES Delay Time : 0 s TimerRun : 1 s TimerConfig : 1 s Auth type : NONE Virtual MAC : 0000-5e00-0101 Check TTL : YES Config type : normal-vrrp Create time : 2014-07-03 11:58:33 UTC-08:00 Last change time : 2014-07-03 12:21:05UTC-08:00 此时R2与R3通过S1发送数据给internet。如果关闭S1的G0/0/1接口,或关闭R1的G0/0/1接口,网络将无法自动切换到通过S2发送数据给internet。 关闭S1的G0/0/1接口[S1]interfaceg0/0/1[S1-GigabitEthernet0/0/1]shutdown[S1]dis vrrp briefVRID State Interface Type Virtual IP ----------------------------------------------------------------1 Master Vlanif1 Normal 10.0.123.1 ----------------------------------------------------------------Total:1 Master:1 Backup:0 Non-active:0注:使用brief参数可以显示简略信息。测试R2与internet的连通性。
显示无法正常通信重新打开S1的G0/0/1接口[S1]interfaceg0/0/1[S1-GigabitEthernet0/0/1]undoshutdownS1和S2上配置VRRP的接口跟踪,定义跟踪G0/0/1接口,如果接口被关闭,则由此岸及降低10.这样的情况下,S2将抢占S1的VRRP主角色[S1]interfacevlanif 1[S1-Vlanif1]vrrpvrid 1 track interface g0/0/1 reduced 10 [S2]interfacevlanif 1[S2-Vlanif1]vrrpvrid 1 track interface g0/0/2 reduced 10此时,测试网络的连通性。网络正常时,R2可以与internet服务器通信。
关闭S1的G0/0/1接口[S1]interfaceg0/0/1[S1-GigabitEthernet0/0/1]shutdown测试R2与internet服务器之间的连通性。
通讯依然正常,查看S1的vrrp状态。[S1]dis vrrp Vlanif1 | Virtual Router 1 State : Backup Virtual IP : 10.0.123.1 Master IP : 10.0.123.3 PriorityRun : 95 PriorityConfig : 105 MasterPriority : 100 Preempt : YES Delay Time : 0 s TimerRun : 1 s TimerConfig : 1 s Auth type : NONE Virtual MAC : 0000-5e00-0101 Check TTL : YES Config type : normal-vrrp Track IF :GigabitEthernet0/0/1 Priority reduced :10 IF state : DOWN Create time : 2014-07-03 11:58:33 UTC-08:00 Last change time : 2014-07-03 14:58:38UTC-08:00
附件:http://down.51cto.com/data/2364614

相关文章推荐
- 华为路由交换VRRP配置
- 【基础】使用华为三层交换实现vlan间路由配置实战
- 华为交换、路由配置笔记
- 华为路由交换配置命令
- 中小型公司局域网路由备份访问外网路由配置(华为)VRRP虚拟冗余备份
- 华为路由交换QOS配置
- 用Packet Tracer配置基于多层交换的VLAN间路由
- 关于华为的路由和交换
- 网络工程师交换试验手册之二十一:单臂路由的配置实例
- 3com路由,交换配置命令
- 三层交换与路由的综合配置经典案例1
- 华为交换中端产品QACL配置案例集
- 华为路由交换模拟器2.2
- 三层交换实现vlan间路由与dhcp配置 推荐
- 三层交换实现vlan间路由与dhcp配置
- 路由交换配置与查看命令全集
- 华为3com交换路由命令详解
- 思科交换路由配置命令
- 华为3500配置三层交换