OAuth 2.0 Support with WSO2 Identity Server
2014-04-10 17:13
375 查看
转自:http://shavanthaw.blogspot.com/2013/03/how-i-tested-wso2-identity-server.html
In this blog I will discuss how to configure and test the support WSO2 Identity Server has for OAuth 2.0, which was published in the year 2012. OAuth is an open standard for authorization enabling clients to access server resources on behalf of the resource
owner.
As a precondition to follow this blog you need to download the playground2.war file available hear. Once the war file is downloaded, to deploy
this within apache tomcat, place the war file within /apache-tomcat-7.0.37/webapps. Next move to the bin folder /apache-tomcat-7.0.37/bin and issue the command sh catalina.sh run to start the tomcat. This will deploy the war file.
Next, down tomcat and move to the web.xml file of the extracted playground2.0.war within apache-tomcat-7.0.37/webapps/playground2.0/WEB-INF and update the follwing details.
(a.) Service URL should have the port the application is started up with. If you have started the Identity Serve with an off set, then the matching port should be configured hear.
(b.) The UserName is the value used for the super admin.
(c.) The Password is the value used for the supper admin.
<servlet>
<servlet-name>oAuth2ClientServlet</servlet-name>
<servlet-class>com.wso2.identity.oauth.sample.OAuth2ClientServlet</servlet-class>
<init-param>
<description>serverUrl</description>
<param-name>serverUrl</param-name>
<param-value>https://localhost:9443/services/</param-value>
</init-param>
<init-param>
<description>userName</description>
<param-name>userName</param-name>
<param-value>Administrator</param-value>
</init-param>
<init-param>
<description>password</description>
<param-name>password</param-name>
<param-value>Admin1234</param-value>
</init-param>
<load-on-startup>0</load-on-startup>
</servlet>
Once the above configurations are given, restart tomcat for the changes to take effect.
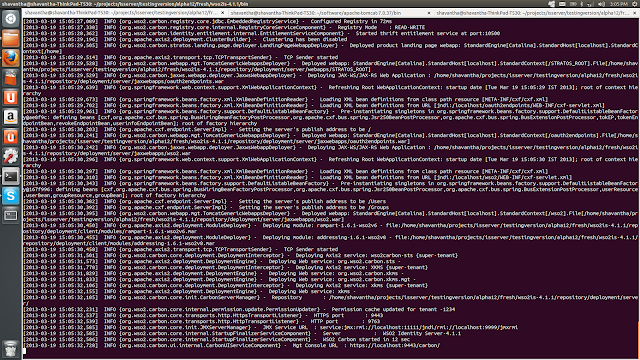
To work with the WSO2 Identity Server, we need to start the application. Go to the location of the Identity Serve ex:wso2is-4.1.1/bin and issue the command ./wso2server.sh. This will start up the application.
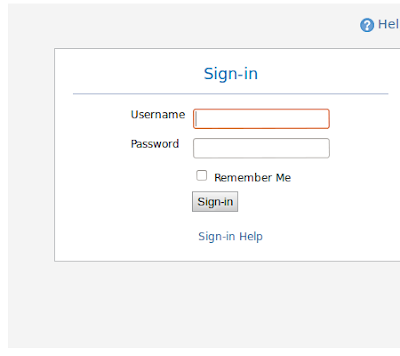
First login to the Identity Server. The default login for this is admin/admin
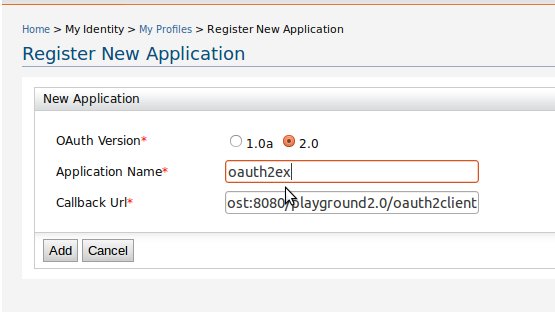
Once logged in, we need to access the OAuth configuration screen and specify the OAuth version, the name of the application and the callback URL to register the application.Ex:http://localhost:8080/playground2.0/oauth2client
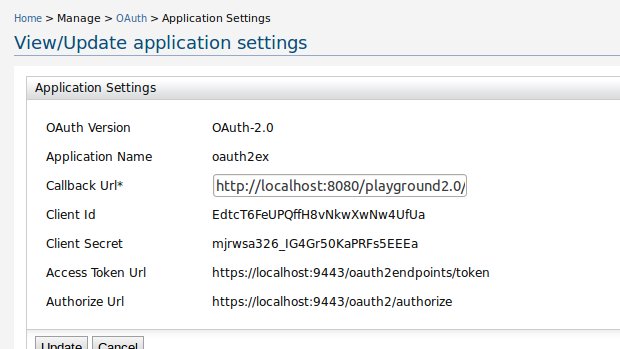
Once the application is registered, next the system will generate the required parameters( client ID, Client Secret the Access Token URL and the Authorization URL) to connect with the external application as shown below.
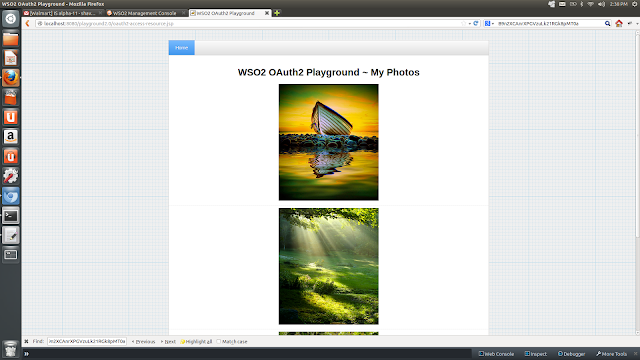
Considering that the tomcat is started as explained above, give the URL http://localhost:8080/playground2.0/ which will load the below web client.
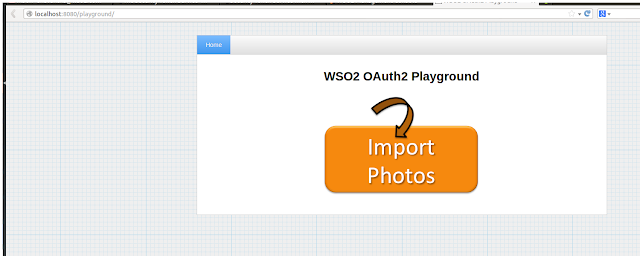
Once the web page as shown above is loaded click on the button labelled "Import Photos". This will load a page where we need to give the 1.Client ID, 2. Callback URL and 3.Authorized End point values that were generated from the Identity Server when the client
application was registered.
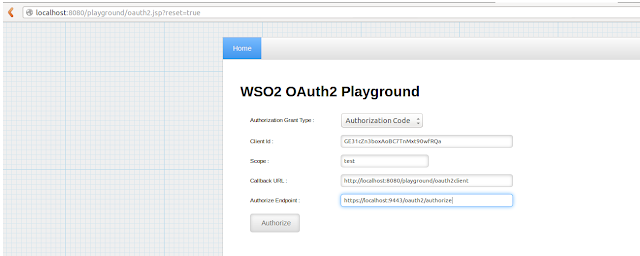
Once the detail for client id, callback url and the authorize end point are specified, clicking on the Authorize button will direct the user to a login screen where we need to specify the credentials that were specified within the web.xml file of the Playground2.0
application.
For this example within the below screen, click on the "Authorize button", to generate the login screen, pass the user name as "Administrator" and the password as "Admin1234" and click on "Login" button.

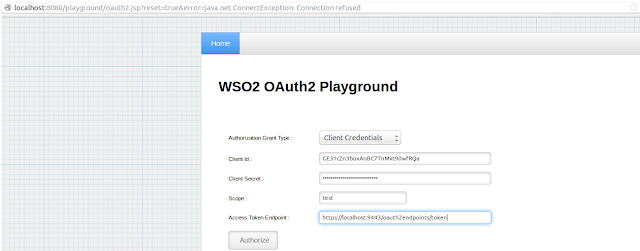
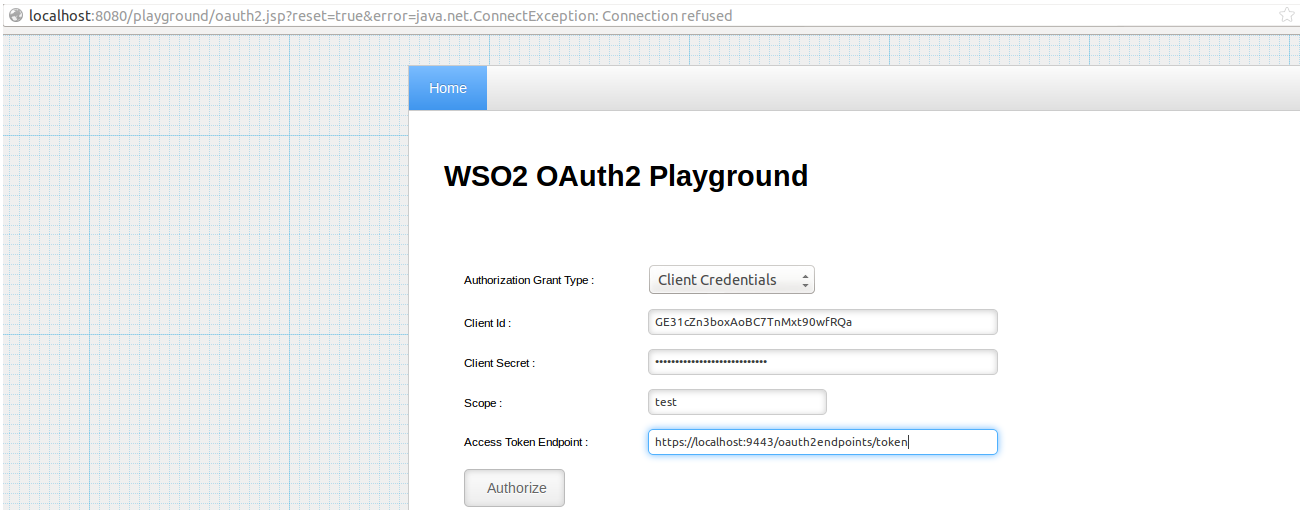
Once, the login credentials are submitted, next we need to obtain the Authorization Token. To obtain this token, specify the 1.Client ID, 2.Client Secret, and the Authorized token endpoint. These details should tally the values generated by the WSO2 Identity
Server when the playground2.0 application was registered as shown below. Once the details are entered click on the "Authorize" button to generate the required authorization key.
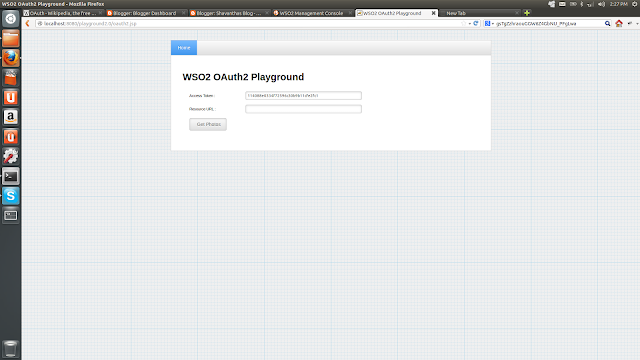
After obtaining the required Authorization, the system requires the user to specify the resource URL as shown below. For the resource URL enter "http://localhost:8080/playground2.0/oauth2-access-resource.jsp" and click on the "Get
Photos" button which will provide access to obtain a set of photos from the client application.
In this blog I will discuss how to configure and test the support WSO2 Identity Server has for OAuth 2.0, which was published in the year 2012. OAuth is an open standard for authorization enabling clients to access server resources on behalf of the resource
owner.
As a precondition to follow this blog you need to download the playground2.war file available hear. Once the war file is downloaded, to deploy
this within apache tomcat, place the war file within /apache-tomcat-7.0.37/webapps. Next move to the bin folder /apache-tomcat-7.0.37/bin and issue the command sh catalina.sh run to start the tomcat. This will deploy the war file.
Next, down tomcat and move to the web.xml file of the extracted playground2.0.war within apache-tomcat-7.0.37/webapps/playground2.0/WEB-INF and update the follwing details.
(a.) Service URL should have the port the application is started up with. If you have started the Identity Serve with an off set, then the matching port should be configured hear.
(b.) The UserName is the value used for the super admin.
(c.) The Password is the value used for the supper admin.
<servlet>
<servlet-name>oAuth2ClientServlet</servlet-name>
<servlet-class>com.wso2.identity.oauth.sample.OAuth2ClientServlet</servlet-class>
<init-param>
<description>serverUrl</description>
<param-name>serverUrl</param-name>
<param-value>https://localhost:9443/services/</param-value>
</init-param>
<init-param>
<description>userName</description>
<param-name>userName</param-name>
<param-value>Administrator</param-value>
</init-param>
<init-param>
<description>password</description>
<param-name>password</param-name>
<param-value>Admin1234</param-value>
</init-param>
<load-on-startup>0</load-on-startup>
</servlet>
Once the above configurations are given, restart tomcat for the changes to take effect.
To work with the WSO2 Identity Server, we need to start the application. Go to the location of the Identity Serve ex:wso2is-4.1.1/bin and issue the command ./wso2server.sh. This will start up the application.

First login to the Identity Server. The default login for this is admin/admin

Once logged in, we need to access the OAuth configuration screen and specify the OAuth version, the name of the application and the callback URL to register the application.Ex:http://localhost:8080/playground2.0/oauth2client

Once the application is registered, next the system will generate the required parameters( client ID, Client Secret the Access Token URL and the Authorization URL) to connect with the external application as shown below.

Considering that the tomcat is started as explained above, give the URL http://localhost:8080/playground2.0/ which will load the below web client.

Once the web page as shown above is loaded click on the button labelled "Import Photos". This will load a page where we need to give the 1.Client ID, 2. Callback URL and 3.Authorized End point values that were generated from the Identity Server when the client
application was registered.

Once the detail for client id, callback url and the authorize end point are specified, clicking on the Authorize button will direct the user to a login screen where we need to specify the credentials that were specified within the web.xml file of the Playground2.0
application.
For this example within the below screen, click on the "Authorize button", to generate the login screen, pass the user name as "Administrator" and the password as "Admin1234" and click on "Login" button.

Once, the login credentials are submitted, next we need to obtain the Authorization Token. To obtain this token, specify the 1.Client ID, 2.Client Secret, and the Authorized token endpoint. These details should tally the values generated by the WSO2 Identity
Server when the playground2.0 application was registered as shown below. Once the details are entered click on the "Authorize" button to generate the required authorization key.
After obtaining the required Authorization, the system requires the user to specify the resource URL as shown below. For the resource URL enter "http://localhost:8080/playground2.0/oauth2-access-resource.jsp" and click on the "Get
Photos" button which will provide access to obtain a set of photos from the client application.


相关文章推荐
- Testing WSO2 Identity Server OAuth 2.0 support with Curl
- OAuth 2.0
- 理解OAuth 2.0
- OAuth 2.0 - 基本介绍
- 理解OAuth 2.0
- 理解OAuth 2.0
- OAuth 2.0简单实战(以新浪开发平台为例)
- 理解OAuth 2.0
- oAuth 2.0协议解析
- 理解OAuth 2.0
- OAuth 2.0 introduction
- 理解OAuth 2.0(转)
- 理解OAuth 2.0
- OAuth 2.0(网转)
- OAuth 2.0系列教程(七) 请求和响应
- Spring Boot实现OAuth 2.0
- OAuth 2.0 原理介绍
- asp.net权限认证:OWIN实现OAuth 2.0 之客户端模式(Client Credential)
- OAuth 2.0协议在SAP产品中的应用