【Linux 操作系统】Ubuntu 基础操作 基础命令 热键 man手册使用 关机 重启等命令使用
2014-03-17 04:25
961 查看
.
作者 : 万境绝尘
转载请注明出处 : http://blog.csdn.net/shulianghan/article/details/21056029
.
-- 0 : 关机, 如果将Linux默认运行等级设置为0, 系统将无法启动;
-- 1 : 单用户模式, 在这个等级下, 只允许 root 用户登陆;
-- 2 : 多用户模式, 在该模式下 网络文件系统(NFS)不能使用;
-- 3 : 多用户模式, 允许使用网络文件系统, 一般不使用图形界面登陆就是这种模式;
-- 4 : 用户可以自定义该运行级别;
-- 5 : 多用户图形界面模式, 该模式下可以启动图形界面;
-- 6 : 重启, 如果将Linux默认运行等级设置为0, 系统将无法重启;
运行等级相关命令操作 :
-- 查看当前运行级别 : runlevel ;
[root@ip28 bin]# runlevel
N 3
-- 设置运行等级 : init 3, 就是将运行等级设置为3;
修改默认运行等级 : 默认的运行级别在 /etc/inittab 文件中设置, 建议童鞋们将默认的运行级别设置为3, 如果想要访问图形化界面, 直接使用 startx 命令即可;
-- 第一行 : id:5:initdefault: , 将其中的 5 修改为 3 即可;
etc/inittab 文件内容 : 该文件有一定的学习参考价值, 在这里贴出来;# inittab This file describes how the INIT process should set up
# the system in a certain run-level.
#
# Author: Miquel van Smoorenburg, <miquels@drinkel.nl.mugnet.org>
# Modified for RHS Linux by Marc Ewing and Donnie Barnes
#
# Default runlevel. The runlevels used by RHS are:
# 0 - halt (Do NOT set initdefault to this)
# 1 - Single user mode
# 2 - Multiuser, without NFS (The same as 3, if you do not have networking)
# 3 - Full multiuser mode
# 4 - unused
# 5 - X11
# 6 - reboot (Do NOT set initdefault to this)
#
id:3:initdefault:
# System initialization.
si::sysinit:/etc/rc.d/rc.sysinit
l0:0:wait:/etc/rc.d/rc 0
l1:1:wait:/etc/rc.d/rc 1
l2:2:wait:/etc/rc.d/rc 2
l3:3:wait:/etc/rc.d/rc 3
l4:4:wait:/etc/rc.d/rc 4
l5:5:wait:/etc/rc.d/rc 5
l6:6:wait:/etc/rc.d/rc 6
# Trap CTRL-ALT-DELETE
ca::ctrlaltdel:/sbin/shutdown -t3 -r now
# When our UPS tells us power has failed, assume we have a few minutes
# of power left. Schedule a shutdown for 2 minutes from now.
# This does, of course, assume you have powerd installed and your
# UPS connected and working correctly.
pf::powerfail:/sbin/shutdown -f -h +2 "Power Failure; System Shutting Down"
# If power was restored before the shutdown kicked in, cancel it.
pr:12345:powerokwait:/sbin/shutdown -c "Power Restored; Shutdown Cancelled"
# Run gettys in standard runlevels
1:2345:respawn:/sbin/mingetty tty1
2:2345:respawn:/sbin/mingetty tty2
#3:2345:respawn:/sbin/mingetty tty3
#4:2345:respawn:/sbin/mingetty tty4
#5:2345:respawn:/sbin/mingetty tty5
#6:2345:respawn:/sbin/mingetty tty6
# Run xdm in runlevel 5
x:5:respawn:/etc/X11/prefdm -nodaemon
-- 切换终端界面 : ctrl + alt + F1 ~ F6 是切换到 tty1 ~ tty6;
-- 切换 X Window 界面 : ctrl + alt + F7 切换到 图形界面;
tty概念 : TeleTypes, tty 1 ~ 6 这六个 终端没有区别, 这六个文本界面运行级别是3;
-- 作用 : 使用多个用户可以同时登陆终端;
-- 登陆图形界面命令 : startx ;
-- tty7界面 : tty7 是图形化界面, 运行级别是 5;
文本界面 -> 图形界面 前提条件 : 这里指的是 使用 startx 命令启动图形化界面的条件;
-- tty7空闲 : 在图形界面中没有软件在运行;
-- 安装图形界面 : 操作系统必须安装了图形界面;
-- 有窗口管理员 : 有窗口管理员 KDE 等;
-- 必要服务运行 : 一些服务必须先启动;
.
配置 : 系统设置 | 亮度和锁屏 如下图 :
-- 系统设置 :
-- 亮度和锁屏 : 调节成 每次唤起 不要使用密码即可;
-- 全屏截图快捷键 : PrtScn 键即可;
-- 徐选区截图快捷键 : shift + PrtScn , 这些截图都是使用该快捷键截图截下来的;
octopus@octopus-Vostro-270s:~$ ssh root@115.28.42.124
root@115.28.42.124's password:
Last login: Fri Mar 14 10:39:09 2014 from 124.42.2.242
Welcome to aliyun Elastic Compute Service!
[root@ip28 ~]#
生成RSA公钥 : 执行 ssh-keygen , 然后一路回车;
octopus@octopus-Vostro-270s:~$ ssh-keygen
Generating public/private rsa key pair.
Enter file in which to save the key (/home/octopus/.ssh/id_rsa):
Enter passphrase (empty for no passphrase):
Enter same passphrase again:
Your identification has been saved in /home/octopus/.ssh/id_rsa.
Your public key has been saved in /home/octopus/.ssh/id_rsa.pub.
The key fingerprint is:
6e:06:49:bd:c5:7c:3f:8c:8d:10:a5:2a:85:59:86:4e octopus@octopus-Vostro-270s
The key's randomart image is:
+--[ RSA 2048]----+
| .o ... |
| E* o o |
| o+ o * . |
| ..o + o * |
| + S o = |
| + . |
| + |
| o |
| |
+-----------------+
创建配置文件 :
-- 配置文件路径 : ~/.ssh/config ;
-- 配置文件内容 :
Host ali
HostName 115.28.42.124
User root
Port 22
2> 服务器端操作
在服务器端创建 : ~/.ssh 目录, 将 id_rsa.pub 上传到这个目录中, 更名为 authorized_keys;
[root@ip28 .ssh]# ls
id_rsa.pub
[root@ip28 .ssh]# mv id_rsa.pub authorized_keys
[root@ip28 .ssh]# ls
authorized_keys
修改配置文件 : vim /etc/ssh/ssh_config , 在文件末尾添加下面的内容;
RSAAuthentication yes
PubkeyAuthentication yes
IdentityFile .ssh/authorized_keys
重启ssh服务命令 : service sshd restart;
[root@ip28 .ssh]# service sshd restart
Stopping sshd: [ OK ]
Starting sshd: [ OK ]
3> 验证无密钥登陆
使用 ssh ali 登陆阿里云的服务器:
octopus@octopus-Vostro-270s:~$ ssh ali
Last login: Fri Mar 14 10:54:12 2014 from 124.42.2.242
Welcome to aliyun Elastic Compute Service!
[root@ip28 ~]#
env UBUNTU_MENUPROXY= /home/octopus/eclipse/eclipse
-- 注意 : "=" 和 后面的eclipse路径之间有一个空格;
-- 此时菜单栏没有在顶部状态栏上, 而是在下面, 此时菜单可用 :

-- 查看语言命令 : echo $LANG ;
-- 修改语言命令 : LANG=en_US.UTF-8 , 注意上面的命令没有空格;
[root@ip28 bin]# echo $LANG
zh_CN.UTF-8
[root@ip28 bin]# LANG=en_US.UTF-8
[root@ip28 bin]# echo $LANG
en_US.UTF-8
显示日期 : date 命令显示日期;
[root@ip28 bin]# date
Sun Mar 16 01:52:04 CST 2014
-- 自定义格式 : %Y(年), %m(月), %d(日), %H(时), %M(分);
-- 注意 : 使用自定义日期格式, 要在 date 后面 加上 "+" 参数, 如 date +%Y-%m-%d ;
-- 学习更多 : 使用 man date 命令, 查看 man 手册查询更多用法和参数;
[root@ip28 bin]# date +%Y-%m-%d-%H:%M
2014-03-16-02:02
[root@ip28 bin]# date +%Y-%m-%d/%H:%M
2014-03-16/02:02
显示日历 :
-- 列出当前月日历 : cal 命令, 列出当前月日历;
-- 列出某一年日历 : cal 2014 命令;
-- 列出某年某月日历 : cal 3 2014 命令;
[root@ip28 bin]# cal
March 2014
Su Mo Tu We Th Fr Sa
1
2 3 4 5 6 7 8
9 10 11 12 13 14 15
16 17 18 19 20 21 22
23 24 25 26 27 28 29
30 31
[root@ip28 bin]# cal 2014
2014
January February March
Su Mo Tu We Th Fr Sa Su Mo Tu We Th Fr Sa Su Mo Tu We Th Fr Sa
1 2 3 4 1 1
5 6 7 8 9 10 11 2 3 4 5 6 7 8 2 3 4 5 6 7 8
12 13 14 15 16 17 18 9 10 11 12 13 14 15 9 10 11 12 13 14 15
19 20 21 22 23 24 25 16 17 18 19 20 21 22 16 17 18 19 20 21 22
26 27 28 29 30 31 23 24 25 26 27 28 23 24 25 26 27 28 29
30 31
April May June
Su Mo Tu We Th Fr Sa Su Mo Tu We Th Fr Sa Su Mo Tu We Th Fr Sa
1 2 3 4 5 1 2 3 1 2 3 4 5 6 7
6 7 8 9 10 11 12 4 5 6 7 8 9 10 8 9 10 11 12 13 14
13 14 15 16 17 18 19 11 12 13 14 15 16 17 15 16 17 18 19 20 21
20 21 22 23 24 25 26 18 19 20 21 22 23 24 22 23 24 25 26 27 28
27 28 29 30 25 26 27 28 29 30 31 29 30
July August September
Su Mo Tu We Th Fr Sa Su Mo Tu We Th Fr Sa Su Mo Tu We Th Fr Sa
1 2 3 4 5 1 2 1 2 3 4 5 6
6 7 8 9 10 11 12 3 4 5 6 7 8 9 7 8 9 10 11 12 13
13 14 15 16 17 18 19 10 11 12 13 14 15 16 14 15 16 17 18 19 20
20 21 22 23 24 25 26 17 18 19 20 21 22 23 21 22 23 24 25 26 27
27 28 29 30 31 24 25 26 27 28 29 30 28 29 30
31
October November December
Su Mo Tu We Th Fr Sa Su Mo Tu We Th Fr Sa Su Mo Tu We Th Fr Sa
1 2 3 4 1 1 2 3 4 5 6
5 6 7 8 9 10 11 2 3 4 5 6 7 8 7 8 9 10 11 12 13
12 13 14 15 16 17 18 9 10 11 12 13 14 15 14 15 16 17 18 19 20
19 20 21 22 23 24 25 16 17 18 19 20 21 22 21 22 23 24 25 26 27
26 27 28 29 30 31 23 24 25 26 27 28 29 28 29 30 31
30
[root@ip28 bin]# cal 3 2014
March 2014
Su Mo Tu We Th Fr Sa
1
2 3 4 5 6 7 8
9 10 11 12 13 14 15
16 17 18 19 20 21 22
23 24 25 26 27 28 29
30 31
# 括号中的 1 代表 1 手册
NAME # 命令名称 - 命令作用
cal - displays a calendar
SYNOPSIS # 命令基本语法
cal [-smjy13] [[month] year]
DESCRIPTION # 对 命令语法 中提到的参数进行详细的说明
Cal displays a simple calendar. If arguments are not specified, the current month is displayed. The
options are as follows:
-1 Display single month output. (This is the default.)
-3 Display prev/current/next month output.
-s Display Sunday as the first day of the week. (This is the default.)
-m Display Monday as the first day of the week.
-j Display Julian dates (days one-based, numbered from January 1).
-y Display a calendar for the current year.
A single parameter specifies(指定) the year (1 - 9999) to be displayed; note the year must be fully specified:
“cal 89” will not display a calendar for 1989. Two parameters denote the month (1 - 12) and year. If no
parameters are specified, the current month’s calendar is displayed.
A year starts on Jan 1.
The Gregorian Reformation is assumed to have occurred in 1752 on the 3rd of September. By this time, most
countries had recognized the reformation (although a few did not recognize it until the early 1900’s.) Ten
days following that date were eliminated by the reformation, so the calendar for that month is a bit
unusual.
HISTORY # 命令历史
A cal command appeared in Version 6 AT&T UNIX.
OTHER VERSIONS # 其它 UNIX 版本中命令介绍
Several much more elaborate versions of this program exist, with support for colors, holidays, birthdays,
reminders and appointments, etc. For example, try the cal from http://home.sprynet.com/~cbag- well/projects.html or GNU gcal.
BSD June 6, 1993 BSD
man手册代号 : 使用 man 7 man, 命令查看下面的 手册对应标号;
-- 1 : shell 环境的 命令 和 可执行文件 查询;
-- 2 : 系统调用, 即 内核可调用的函数;
-- 3 : 常用的函数库查询, 大部分是 C 的函数库;
-- 4 : /dev 下的设备文件说明;
-- 5 : 配置文件 和 某些文件格式;
-- 6 : 游戏查询;
-- 7 : 查询一些惯例与协议, 如 Linnux 文件系统, 网络协议等;
-- 8 : 系统管理员可用的命令;
-- 9 : kernel 相关文件;
man page 内容格式 :
-- NAME : 命令 说明;
-- SYNOPSIS : 命令执行的语法格式;
-- DESCRIPTION : 命令的描述;
-- OPTIONS : 列举 语法 中的每一个 参数 和 选项 的值;
-- COMMANDS : 程序执行的时候, 在程序法中执行的命令;
-- FILES : 程序需要参考的文件;
-- SEE ALSO : 命令相关的其它说明;
-- EXAMPLE : 参考范例;
-- BUGS : 相关错误;
man手册操作查询 :
-- 翻页 : 空格(向下翻页), Page Down(向下翻页), Page Up(向上翻页), Home(第一页), End(最后一页);
-- 查询字符串 : /string 向下查询字符串, ?string 向上查询字符串; n 正向查询, N 反向查询;
-- 结束查询 : q ;
man手册设置 :
-- 数据存放路径 : man手册存放在 usr/share/man 目录中;
[root@ip28 etc]# cd /usr/share/man/
[root@ip28 man]# ls
bg el fr hu it.UTF-8 man1x man3x man5x man7x man9x pl.ISO8859-2 ro sk zh_TW
cs en fr.ISO8859-1 id ja man2 man4 man6 man8 mann pl.UTF-8 ru sl
da es fr.UTF-8 it ko man2x man4x man6x man8x nl pt ru.KOI8-R tr
de fi hr it.ISO8859-1 man1 man3 man5 man7 man9 pl pt_BR ru.UTF-8 zh_CN
-- 配置文件 : /etc/man.config ;
按照命令名称查询相关的说明文件 : 当我们要查询一个命令, 但是不知道到哪个手册中查询, 就可以使用 man -f 查询内容 进行查询, 执行该命令结果会列出相关的手册信息;
-- 查询 更多 与 man 相关的信息 : 执行命令 man -f man , 可以根据结果 查询 man 5 man.config 文件如何配置;
[root@ip28 man]# man -f man
man                  (1)  - format and display the on-line manual pages
man                 (rpm) - A set of documentation tools: man, apropos and whatis.
man [manpath]        (1)  - format and display the on-line manual pages
man.config [man]     (5)  - configuration data for man
-- 执行优先级 : 使用 man 查询内容 只能显示 1~9 中的一个手册中的内容, 在/etc/man.config 中配置查询顺序, 优先查询到的会显示出来, 一般是小号的手册显示;
按照关键字查询相关的说明文件 : man -k 关键字 命令, 查询man手册中 出现关键字的手册;
[root@ip28 man]# man -k printf
curl_maprintf [curl_mprintf] (3)  - formatted output conversion
curl_mfprintf [curl_mprintf] (3)  - formatted output conversion
curl_mprintf         (3)  - formatted output conversion
curl_msnprintf [curl_mprintf] (3)  - formatted output conversion
curl_msprintf curl_mvaprintf [curl_mprintf] (3)  - formatted output conversion
curl_mvfprintf [curl_mprintf] (3)  - formatted output conversion
curl_mvprintf [curl_mprintf] (3)  - formatted output conversion
curl_mvsnprintf [curl_mprintf] (3)  - formatted output conversion
curl_mvsprintf [curl_mprintf] (3)  - formatted output conversion
evbuffer_add_printf [event] (3)  - execute a function when a specific event occurs
evbuffer_add_vprintf [event] (3)  - execute a function when a specific event occurs
printf               (1)  - format and print data
printf [builtins]    (1)  - bash built-in commands, see bash(1)
man的简写方法 :
-- 查询命令 : whatis 等价于 man -f;
[root@ip28 man]# whatis man
man (1) - format and display the on-line manual pages
man (rpm) - A set of documentation tools: man, apropos and whatis.
man [manpath] (1) - format and display the on-line manual pages
man.config [man] (5) - configuration data for man
-- 查询关键字 : apropos 等价于 man -k;
[root@ip28 man]# apropos printf
curl_maprintf [curl_mprintf] (3) - formatted output conversion
curl_mfprintf [curl_mprintf] (3) - formatted output conversion
curl_mprintf (3) - formatted output conversion
curl_msnprintf [curl_mprintf] (3) - formatted output conversion
curl_msprintf curl_mvaprintf [curl_mprintf] (3) - formatted output conversion
curl_mvfprintf [curl_mprintf] (3) - formatted output conversion
curl_mvprintf [curl_mprintf] (3) - formatted output conversion
curl_mvsnprintf [curl_mprintf] (3) - formatted output conversion
curl_mvsprintf [curl_mprintf] (3) - formatted output conversion
evbuffer_add_printf [event] (3) - execute a function when a specific event occurs
evbuffer_add_vprintf [event] (3) - execute a function when a specific event occurs
printf (1) - format and print data
printf [builtins] (1) - bash built-in commands, see bash(1)
-- 建立数据库 : 执行上面的两个特殊命令, 需要使用root用户建立 whatis 数据库;
-- info命令文件路径 : 支持info命令文件默认在 /usr/share/info/ 目录下;
info 页面格式分析 :
-- File : 查询的页面的信息来自于哪个文件;
-- Node : 查询的页面属于哪个节点;
-- Next : 下一个节点的名称, 按 N 到下一个节点;
-- Up : 上一层节点, 按 U 回到上一层节点;
-- Prev : 前一个节点;
File: info.info, Node: Top, Next: Getting Started, Up: (dir)
# File 数据是哪个文件
# Node 代表页面属于哪个节点
# Next 下一个节点的名称
# Up 上一层节点
Info: An Introduction # 节点说明
*********************
The GNU Project distributes most of its on-line manuals in the "Info
format", which you read using an "Info reader". You are probably using
an Info reader to read this now.
There are two primary Info readers: `info', a stand-alone program
designed just to read Info files, and the `info' package in GNU Emacs,
a general-purpose editor. At present, only the Emacs reader supports
using a mouse.
If you are new to the Info reader and want to learn how to use it,
type the command `h' now. It brings you to a programmed instruction
sequence.
To read about expert-level Info commands, type `n' twice. This
brings you to `Info for Experts', skipping over the `Getting Started'
chapter.
* Menu: # 按 Tab 键, 可以在下面的四个menu之间切换, 光标停在 * 上, 按 Enter 键进入对应页面
* Getting Started:: Getting started using an Info reader.
* Expert Info:: Info commands for experts.
* Creating an Info File:: How to make your own Info file.
* Index:: An index of topics, commands, and variables.
Menu菜单 :
-- 切换菜单项 : 使用 Tab 键, 可以切换 Menu项;
-- 菜单跳转 : 将光标移动到 Menu 菜单的 * 或者 文字上, 按 Enter 键, 就可以跳转到该项;
info操作 :
-- 翻页 : 空格 (向下翻页), Page Down (向下翻页), Page Up (向上翻页);
-- Menu操作 : Tab (菜单项切换), Enter (进入节点);
-- 光标跳转 : B (光标 -> 开头), E (光标 -> 结尾);
-- 节点跳转 : N (跳转到下一个节点), P (跳转到上一个节点), U (跳转到上一层节点);
-- 查询关键字 : 按 S 或者 / 键, 输入关键字, 在按 Enter 键, 光标就会定位到查询到关键字的地方;
-- 显示求助菜单 : H ;
-- 查询命令 : ? ;
-- 退出查询 : q ;
-- 列出文件命令列表 : 打出一半文件与命令, 按 两次 Tab 键, 就会列出相关的文件;
[root@ip28 ~]# vim .vim
.viminfo .vimrc -- 命令补齐 : 输入命令一半, 按Tab键, 会将命令补齐;
-- 文件名称补齐 : 输入文件名一半, 按Tab键, 会将文件名补齐;
Ctrl + C键 : 终端目前程序操作;
Ctrl + D键 : 键盘输入结束符, 用于结束文件 和 输入, 相当于 exit 命 和 EOF文件结束符;
-- 查看使用状态 : 使用 who 命令, 查看哪些用户在使用系统;
[root@ip28 ~]# who
root pts/0 2014-03-16 12:04 (114.66.200.219)
root pts/1 2014-03-16 16:09 (114.66.200.219)-- 查看网络状态 : 使用 netstat -a 命令, 查看网络状况;
[root@ip28 ~]# netstat -a
Active Internet connections (servers and established)
Proto Recv-Q Send-Q Local Address Foreign Address State
tcp 0 0 localhost:8005 *:* LISTEN
tcp 0 0 localhost:cslistener *:* LISTEN
tcp 0 0 *:8009 *:* LISTEN
tcp 0 0 *:mysql *:* LISTEN
tcp 0 0 *:http *:* LISTEN
tcp 0 0 *:webcache *:* LISTEN
tcp 0 0 *:hosts2-ns *:* LISTEN
tcp 0 0 *:tproxy *:* LISTEN
tcp 0 0 *:us-cli *:* LISTEN
tcp 0 0 *:8085 *:* LISTEN
tcp 0 0 *:ftp *:* LISTEN
tcp 0 0 *:ssh *:* LISTEN
tcp 0 0 *:8086 *:* LISTEN
tcp 0 0 *:8087 *:* LISTEN
tcp 0 0 ip28.hichina.com:19052 hg-in-f82.1e100.net:https TIME_WAIT -- 查看后台执行程序状况 : 使用 ps -aux 命令;
[root@ip28 ~]# ps -aux
Warning: bad syntax, perhaps a bogus '-'? See /usr/share/doc/procps-3.2.7/FAQ
USER PID %CPU %MEM VSZ RSS TTY STAT START TIME COMMAND
root 1 0.0 0.0 10348 160 ? Ss 2013 0:05 init [3]
root 2 0.0 0.0 0 0 ? S< 2013 0:00 [migration/0]
root 3 0.0 0.0 0 0 ? SN 2013 0:00 [ksoftirqd/0]
root 4 0.0 0.0 0 0 ? S< 2013 0:00 [watchdog/0]
root 5 0.0 0.0 0 0 ? S< 2013 0:20 [events/0]
root 6 0.0 0.0 0 0 ? S< 2013 0:00 [khelper]
root 15 0.0 0.0 0 0 ? S< 2013 0:12 [kthread]
root 19 0.0 0.0 0 0 ? S< 2013 0:01 [kblockd/0]
root 20 0.0 0.0 0 0 ? S< 2013 0:00 [kacpid]
root 64 0.0 0.0 0 0 ? S< 2013 0:00 [cqueue/0]
数据同步写入磁盘 : sync 命令, 将内存中的数据写入磁盘中;
-- 使用前提 : Linux中的数据, 在读写的时候都先在内存中存放, 到达一定条件才会将数据从内存中写入磁盘;
-- 使用场景 : U盘拔出前, 关机 重启之前;
shutdown命令作用 :
-- 选择关机模式 : 可以选择 关机 , 重启 还是 进入单用户模式;
-- 设置关机时间 : 可以按照时间 延迟 设置关机时间;
-- 设置关机消息 : 将关机的信息显示给在线的用户;
-- 发出警告信息 : 使用关机命令可以向在线用户发出信息这个属性, 可以向用户发出一些信息, 并不是要真正关机;
-- 是否检查文件 : 选择是否要用 fsck 检查文件系统;
shutdown命令参数解析 :
-- "-t" : 后面加上秒数, 过多少秒关机;
-- "-k" : 发出警告, 不是真的关机;
-- "-r" : 关机后重启;
-- "-h" : 立即关机;
-- "-n" : 不使用 init 程序, 直接关机;
-- "-f" : 关机并开机后, 掠过 fsck 磁盘检查;
-- "-F" : 重启后执行 fsck 磁盘检查;
-- "-c" : 取消 shutdown 命令;
关机命令示例 :
-- 立即关机 : shutdown -h now ;
-- 定时关机 : shutdown -h 20:00 ;
-- 延时关机 : shutdown -h +10, 10分钟后关机;
-- 立即重启 : shudown -r now;
-- 重启提示 : shutdown -r +30 'The system is reboot after 30 minutes !' , 30分钟后关重启, 并将重启信息发送给所有在线用户;
-- 发出警告 : shutdown -k now 'Fuck !', 现在发出警告, 不关机;
其它命令 :
-- 关机 : halt , poweroff 都是关机命令;
-- 通过改变运行等级关机 : init 0, 也可以进行关机;
-- 重启 : reboot;
-- 通过改变运行等级重启 : init 6 ;
.
作者 : 万境绝尘
转载请注明出处 : http://blog.csdn.net/shulianghan/article/details/21056029
.
作者 : 万境绝尘
转载请注明出处 : http://blog.csdn.net/shulianghan/article/details/21056029
.
1. Linux运行等级介绍
Linux运行等级 :-- 0 : 关机, 如果将Linux默认运行等级设置为0, 系统将无法启动;
-- 1 : 单用户模式, 在这个等级下, 只允许 root 用户登陆;
-- 2 : 多用户模式, 在该模式下 网络文件系统(NFS)不能使用;
-- 3 : 多用户模式, 允许使用网络文件系统, 一般不使用图形界面登陆就是这种模式;
-- 4 : 用户可以自定义该运行级别;
-- 5 : 多用户图形界面模式, 该模式下可以启动图形界面;
-- 6 : 重启, 如果将Linux默认运行等级设置为0, 系统将无法重启;
运行等级相关命令操作 :
-- 查看当前运行级别 : runlevel ;
[root@ip28 bin]# runlevel
N 3
-- 设置运行等级 : init 3, 就是将运行等级设置为3;
修改默认运行等级 : 默认的运行级别在 /etc/inittab 文件中设置, 建议童鞋们将默认的运行级别设置为3, 如果想要访问图形化界面, 直接使用 startx 命令即可;
-- 第一行 : id:5:initdefault: , 将其中的 5 修改为 3 即可;
etc/inittab 文件内容 : 该文件有一定的学习参考价值, 在这里贴出来;# inittab This file describes how the INIT process should set up
# the system in a certain run-level.
#
# Author: Miquel van Smoorenburg, <miquels@drinkel.nl.mugnet.org>
# Modified for RHS Linux by Marc Ewing and Donnie Barnes
#
# Default runlevel. The runlevels used by RHS are:
# 0 - halt (Do NOT set initdefault to this)
# 1 - Single user mode
# 2 - Multiuser, without NFS (The same as 3, if you do not have networking)
# 3 - Full multiuser mode
# 4 - unused
# 5 - X11
# 6 - reboot (Do NOT set initdefault to this)
#
id:3:initdefault:
# System initialization.
si::sysinit:/etc/rc.d/rc.sysinit
l0:0:wait:/etc/rc.d/rc 0
l1:1:wait:/etc/rc.d/rc 1
l2:2:wait:/etc/rc.d/rc 2
l3:3:wait:/etc/rc.d/rc 3
l4:4:wait:/etc/rc.d/rc 4
l5:5:wait:/etc/rc.d/rc 5
l6:6:wait:/etc/rc.d/rc 6
# Trap CTRL-ALT-DELETE
ca::ctrlaltdel:/sbin/shutdown -t3 -r now
# When our UPS tells us power has failed, assume we have a few minutes
# of power left. Schedule a shutdown for 2 minutes from now.
# This does, of course, assume you have powerd installed and your
# UPS connected and working correctly.
pf::powerfail:/sbin/shutdown -f -h +2 "Power Failure; System Shutting Down"
# If power was restored before the shutdown kicked in, cancel it.
pr:12345:powerokwait:/sbin/shutdown -c "Power Restored; Shutdown Cancelled"
# Run gettys in standard runlevels
1:2345:respawn:/sbin/mingetty tty1
2:2345:respawn:/sbin/mingetty tty2
#3:2345:respawn:/sbin/mingetty tty3
#4:2345:respawn:/sbin/mingetty tty4
#5:2345:respawn:/sbin/mingetty tty5
#6:2345:respawn:/sbin/mingetty tty6
# Run xdm in runlevel 5
x:5:respawn:/etc/X11/prefdm -nodaemon
2. 图形界面 (X Window) 与 命令行模式切换
终端界面 与 X Window 界面切换方式 :-- 切换终端界面 : ctrl + alt + F1 ~ F6 是切换到 tty1 ~ tty6;
-- 切换 X Window 界面 : ctrl + alt + F7 切换到 图形界面;
tty概念 : TeleTypes, tty 1 ~ 6 这六个 终端没有区别, 这六个文本界面运行级别是3;
-- 作用 : 使用多个用户可以同时登陆终端;
-- 登陆图形界面命令 : startx ;
-- tty7界面 : tty7 是图形化界面, 运行级别是 5;
文本界面 -> 图形界面 前提条件 : 这里指的是 使用 startx 命令启动图形化界面的条件;
-- tty7空闲 : 在图形界面中没有软件在运行;
-- 安装图形界面 : 操作系统必须安装了图形界面;
-- 有窗口管理员 : 有窗口管理员 KDE 等;
-- 必要服务运行 : 一些服务必须先启动;
.
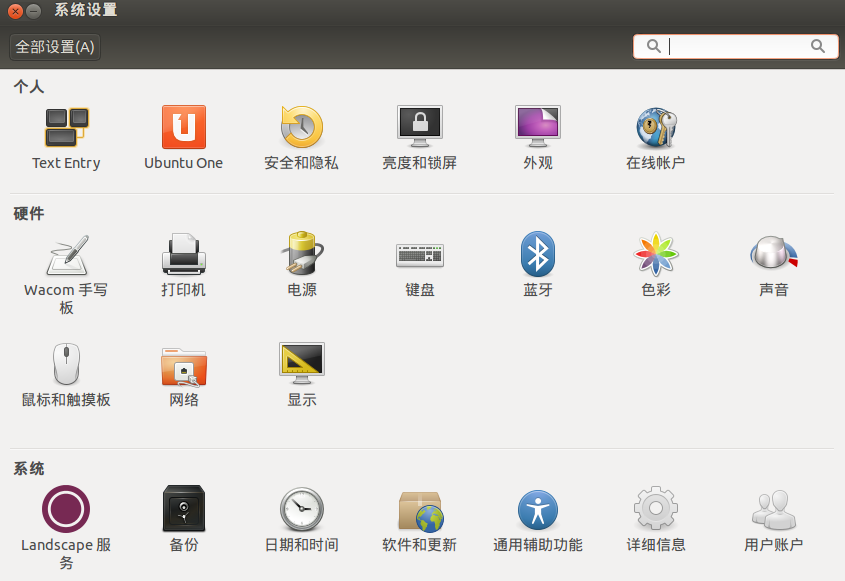
3. 取消 Ubuntu 的待机锁屏
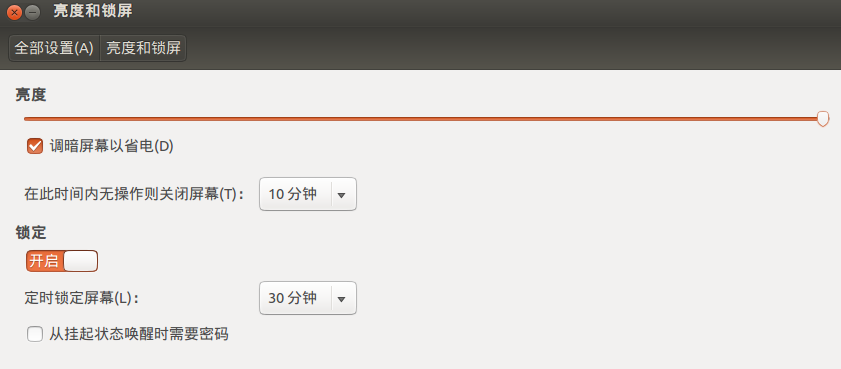
问题 : Ubuntu 待机锁屏非常麻烦, 每次进入都需要输入密码;配置 : 系统设置 | 亮度和锁屏 如下图 :
-- 系统设置 :
-- 亮度和锁屏 : 调节成 每次唤起 不要使用密码即可;
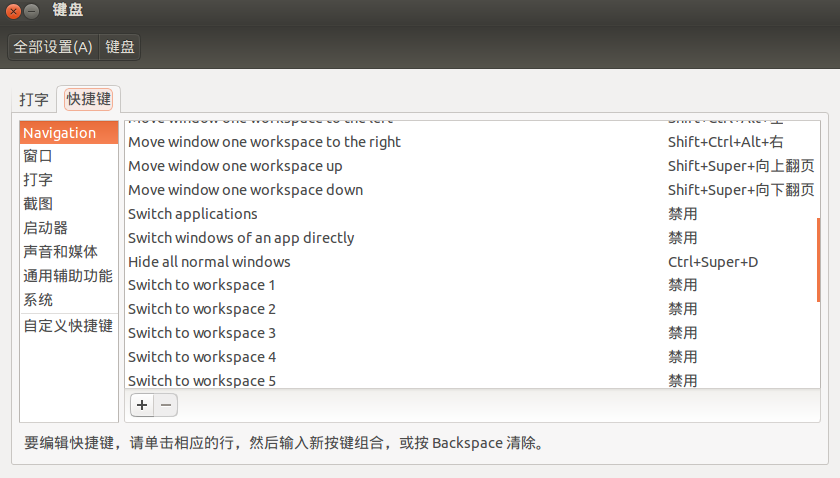
4. Ubuntu开启多窗口 跳转到桌面快捷键
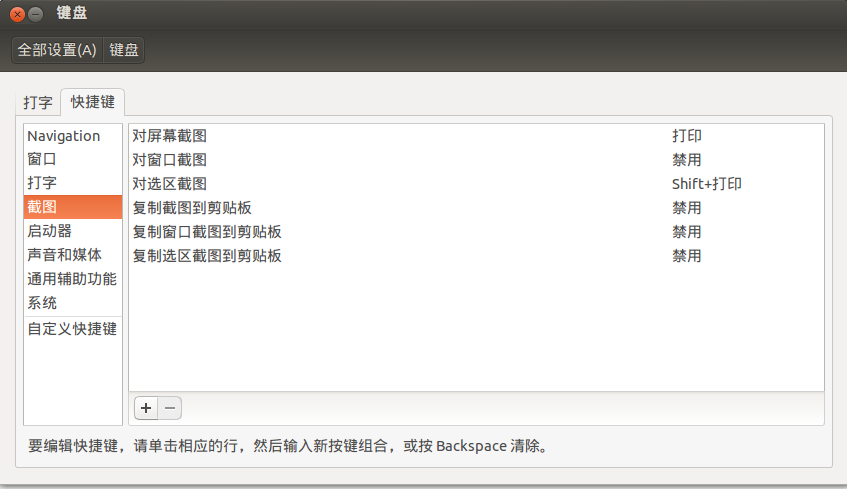
快捷键设置 : 隐藏所有的普通窗口快捷键 : Ctrl + Super + D , 其中的 Super 键是 Windows 键, 时左边的 Ctrl 和 Alt 之间的键;5. 配置截图快捷键
Ubuntu 自带的 gnome screen 截图工具, 可以设置快捷键调用该工具 :-- 全屏截图快捷键 : PrtScn 键即可;
-- 徐选区截图快捷键 : shift + PrtScn , 这些截图都是使用该快捷键截图截下来的;
6. 使用SSH连接远程服务器
(1) 使用密码登陆
使用ssh工具 : ssh root@115.28.42.124 命令即可登陆, 在之后提示的地方输入密码 :octopus@octopus-Vostro-270s:~$ ssh root@115.28.42.124
root@115.28.42.124's password:
Last login: Fri Mar 14 10:39:09 2014 from 124.42.2.242
Welcome to aliyun Elastic Compute Service!
[root@ip28 ~]#
(2) 配置无密钥登陆
1> 本地操作生成RSA公钥 : 执行 ssh-keygen , 然后一路回车;
octopus@octopus-Vostro-270s:~$ ssh-keygen
Generating public/private rsa key pair.
Enter file in which to save the key (/home/octopus/.ssh/id_rsa):
Enter passphrase (empty for no passphrase):
Enter same passphrase again:
Your identification has been saved in /home/octopus/.ssh/id_rsa.
Your public key has been saved in /home/octopus/.ssh/id_rsa.pub.
The key fingerprint is:
6e:06:49:bd:c5:7c:3f:8c:8d:10:a5:2a:85:59:86:4e octopus@octopus-Vostro-270s
The key's randomart image is:
+--[ RSA 2048]----+
| .o ... |
| E* o o |
| o+ o * . |
| ..o + o * |
| + S o = |
| + . |
| + |
| o |
| |
+-----------------+
创建配置文件 :
-- 配置文件路径 : ~/.ssh/config ;
-- 配置文件内容 :
Host ali
HostName 115.28.42.124
User root
Port 22
2> 服务器端操作
在服务器端创建 : ~/.ssh 目录, 将 id_rsa.pub 上传到这个目录中, 更名为 authorized_keys;
[root@ip28 .ssh]# ls
id_rsa.pub
[root@ip28 .ssh]# mv id_rsa.pub authorized_keys
[root@ip28 .ssh]# ls
authorized_keys
修改配置文件 : vim /etc/ssh/ssh_config , 在文件末尾添加下面的内容;
RSAAuthentication yes
PubkeyAuthentication yes
IdentityFile .ssh/authorized_keys
重启ssh服务命令 : service sshd restart;
[root@ip28 .ssh]# service sshd restart
Stopping sshd: [ OK ]
Starting sshd: [ OK ]
3> 验证无密钥登陆
使用 ssh ali 登陆阿里云的服务器:
octopus@octopus-Vostro-270s:~$ ssh ali
Last login: Fri Mar 14 10:54:12 2014 from 124.42.2.242
Welcome to aliyun Elastic Compute Service!
[root@ip28 ~]#
7. Ubuntu 13.10 下 eclipse 菜单栏失效
菜单栏失效 : 刚装上了 eclipse , 发现菜单栏点击失效, 使用下面的命令启动eclipse 就可以使用菜单栏 :env UBUNTU_MENUPROXY= /home/octopus/eclipse/eclipse
-- 注意 : "=" 和 后面的eclipse路径之间有一个空格;
-- 此时菜单栏没有在顶部状态栏上, 而是在下面, 此时菜单可用 :
8. Linux基础操作
语言操作 : 终端输出出现乱码, 无法以中文(zh_CN)输出编码, 就需要将语言改为英文(en_US)的;-- 查看语言命令 : echo $LANG ;
-- 修改语言命令 : LANG=en_US.UTF-8 , 注意上面的命令没有空格;
[root@ip28 bin]# echo $LANG
zh_CN.UTF-8
[root@ip28 bin]# LANG=en_US.UTF-8
[root@ip28 bin]# echo $LANG
en_US.UTF-8
显示日期 : date 命令显示日期;
[root@ip28 bin]# date
Sun Mar 16 01:52:04 CST 2014
-- 自定义格式 : %Y(年), %m(月), %d(日), %H(时), %M(分);
-- 注意 : 使用自定义日期格式, 要在 date 后面 加上 "+" 参数, 如 date +%Y-%m-%d ;
-- 学习更多 : 使用 man date 命令, 查看 man 手册查询更多用法和参数;
[root@ip28 bin]# date +%Y-%m-%d-%H:%M
2014-03-16-02:02
[root@ip28 bin]# date +%Y-%m-%d/%H:%M
2014-03-16/02:02
显示日历 :
-- 列出当前月日历 : cal 命令, 列出当前月日历;
-- 列出某一年日历 : cal 2014 命令;
-- 列出某年某月日历 : cal 3 2014 命令;
[root@ip28 bin]# cal
March 2014
Su Mo Tu We Th Fr Sa
1
2 3 4 5 6 7 8
9 10 11 12 13 14 15
16 17 18 19 20 21 22
23 24 25 26 27 28 29
30 31
[root@ip28 bin]# cal 2014
2014
January February March
Su Mo Tu We Th Fr Sa Su Mo Tu We Th Fr Sa Su Mo Tu We Th Fr Sa
1 2 3 4 1 1
5 6 7 8 9 10 11 2 3 4 5 6 7 8 2 3 4 5 6 7 8
12 13 14 15 16 17 18 9 10 11 12 13 14 15 9 10 11 12 13 14 15
19 20 21 22 23 24 25 16 17 18 19 20 21 22 16 17 18 19 20 21 22
26 27 28 29 30 31 23 24 25 26 27 28 23 24 25 26 27 28 29
30 31
April May June
Su Mo Tu We Th Fr Sa Su Mo Tu We Th Fr Sa Su Mo Tu We Th Fr Sa
1 2 3 4 5 1 2 3 1 2 3 4 5 6 7
6 7 8 9 10 11 12 4 5 6 7 8 9 10 8 9 10 11 12 13 14
13 14 15 16 17 18 19 11 12 13 14 15 16 17 15 16 17 18 19 20 21
20 21 22 23 24 25 26 18 19 20 21 22 23 24 22 23 24 25 26 27 28
27 28 29 30 25 26 27 28 29 30 31 29 30
July August September
Su Mo Tu We Th Fr Sa Su Mo Tu We Th Fr Sa Su Mo Tu We Th Fr Sa
1 2 3 4 5 1 2 1 2 3 4 5 6
6 7 8 9 10 11 12 3 4 5 6 7 8 9 7 8 9 10 11 12 13
13 14 15 16 17 18 19 10 11 12 13 14 15 16 14 15 16 17 18 19 20
20 21 22 23 24 25 26 17 18 19 20 21 22 23 21 22 23 24 25 26 27
27 28 29 30 31 24 25 26 27 28 29 30 28 29 30
31
October November December
Su Mo Tu We Th Fr Sa Su Mo Tu We Th Fr Sa Su Mo Tu We Th Fr Sa
1 2 3 4 1 1 2 3 4 5 6
5 6 7 8 9 10 11 2 3 4 5 6 7 8 7 8 9 10 11 12 13
12 13 14 15 16 17 18 9 10 11 12 13 14 15 14 15 16 17 18 19 20
19 20 21 22 23 24 25 16 17 18 19 20 21 22 21 22 23 24 25 26 27
26 27 28 29 30 31 23 24 25 26 27 28 29 28 29 30 31
30
[root@ip28 bin]# cal 3 2014
March 2014
Su Mo Tu We Th Fr Sa
1
2 3 4 5 6 7 8
9 10 11 12 13 14 15
16 17 18 19 20 21 22
23 24 25 26 27 28 29
30 31
9. man 手册使用
分析man手册内容 : 这里以 man cal 查询的结果为例分析, 该命令查询日历命令相关用法;CAL(1) BSD General Commands Manual CAL(1)# 括号中的 1 代表 1 手册
NAME # 命令名称 - 命令作用
cal - displays a calendar
SYNOPSIS # 命令基本语法
cal [-smjy13] [[month] year]
DESCRIPTION # 对 命令语法 中提到的参数进行详细的说明
Cal displays a simple calendar. If arguments are not specified, the current month is displayed. The
options are as follows:
-1 Display single month output. (This is the default.)
-3 Display prev/current/next month output.
-s Display Sunday as the first day of the week. (This is the default.)
-m Display Monday as the first day of the week.
-j Display Julian dates (days one-based, numbered from January 1).
-y Display a calendar for the current year.
A single parameter specifies(指定) the year (1 - 9999) to be displayed; note the year must be fully specified:
“cal 89” will not display a calendar for 1989. Two parameters denote the month (1 - 12) and year. If no
parameters are specified, the current month’s calendar is displayed.
A year starts on Jan 1.
The Gregorian Reformation is assumed to have occurred in 1752 on the 3rd of September. By this time, most
countries had recognized the reformation (although a few did not recognize it until the early 1900’s.) Ten
days following that date were eliminated by the reformation, so the calendar for that month is a bit
unusual.
HISTORY # 命令历史
A cal command appeared in Version 6 AT&T UNIX.
OTHER VERSIONS # 其它 UNIX 版本中命令介绍
Several much more elaborate versions of this program exist, with support for colors, holidays, birthdays,
reminders and appointments, etc. For example, try the cal from http://home.sprynet.com/~cbag- well/projects.html or GNU gcal.
BSD June 6, 1993 BSD
man手册代号 : 使用 man 7 man, 命令查看下面的 手册对应标号;
-- 1 : shell 环境的 命令 和 可执行文件 查询;
-- 2 : 系统调用, 即 内核可调用的函数;
-- 3 : 常用的函数库查询, 大部分是 C 的函数库;
-- 4 : /dev 下的设备文件说明;
-- 5 : 配置文件 和 某些文件格式;
-- 6 : 游戏查询;
-- 7 : 查询一些惯例与协议, 如 Linnux 文件系统, 网络协议等;
-- 8 : 系统管理员可用的命令;
-- 9 : kernel 相关文件;
man page 内容格式 :
-- NAME : 命令 说明;
-- SYNOPSIS : 命令执行的语法格式;
-- DESCRIPTION : 命令的描述;
-- OPTIONS : 列举 语法 中的每一个 参数 和 选项 的值;
-- COMMANDS : 程序执行的时候, 在程序法中执行的命令;
-- FILES : 程序需要参考的文件;
-- SEE ALSO : 命令相关的其它说明;
-- EXAMPLE : 参考范例;
-- BUGS : 相关错误;
man手册操作查询 :
-- 翻页 : 空格(向下翻页), Page Down(向下翻页), Page Up(向上翻页), Home(第一页), End(最后一页);
-- 查询字符串 : /string 向下查询字符串, ?string 向上查询字符串; n 正向查询, N 反向查询;
-- 结束查询 : q ;
man手册设置 :
-- 数据存放路径 : man手册存放在 usr/share/man 目录中;
[root@ip28 etc]# cd /usr/share/man/
[root@ip28 man]# ls
bg el fr hu it.UTF-8 man1x man3x man5x man7x man9x pl.ISO8859-2 ro sk zh_TW
cs en fr.ISO8859-1 id ja man2 man4 man6 man8 mann pl.UTF-8 ru sl
da es fr.UTF-8 it ko man2x man4x man6x man8x nl pt ru.KOI8-R tr
de fi hr it.ISO8859-1 man1 man3 man5 man7 man9 pl pt_BR ru.UTF-8 zh_CN
-- 配置文件 : /etc/man.config ;
按照命令名称查询相关的说明文件 : 当我们要查询一个命令, 但是不知道到哪个手册中查询, 就可以使用 man -f 查询内容 进行查询, 执行该命令结果会列出相关的手册信息;
-- 查询 更多 与 man 相关的信息 : 执行命令 man -f man , 可以根据结果 查询 man 5 man.config 文件如何配置;
[root@ip28 man]# man -f man man (1) - format and display the on-line manual pages man (rpm) - A set of documentation tools: man, apropos and whatis. man [manpath] (1) - format and display the on-line manual pages man.config [man] (5) - configuration data for man-- 执行优先级 : 使用 man 查询内容 只能显示 1~9 中的一个手册中的内容, 在/etc/man.config 中配置查询顺序, 优先查询到的会显示出来, 一般是小号的手册显示;
按照关键字查询相关的说明文件 : man -k 关键字 命令, 查询man手册中 出现关键字的手册;
[root@ip28 man]# man -k printf curl_maprintf [curl_mprintf] (3) - formatted output conversion curl_mfprintf [curl_mprintf] (3) - formatted output conversion curl_mprintf (3) - formatted output conversion curl_msnprintf [curl_mprintf] (3) - formatted output conversion curl_msprintf curl_mvaprintf [curl_mprintf] (3) - formatted output conversion curl_mvfprintf [curl_mprintf] (3) - formatted output conversion curl_mvprintf [curl_mprintf] (3) - formatted output conversion curl_mvsnprintf [curl_mprintf] (3) - formatted output conversion curl_mvsprintf [curl_mprintf] (3) - formatted output conversion evbuffer_add_printf [event] (3) - execute a function when a specific event occurs evbuffer_add_vprintf [event] (3) - execute a function when a specific event occurs printf (1) - format and print data printf [builtins] (1) - bash built-in commands, see bash(1)
man的简写方法 :
-- 查询命令 : whatis 等价于 man -f;
[root@ip28 man]# whatis man
man (1) - format and display the on-line manual pages
man (rpm) - A set of documentation tools: man, apropos and whatis.
man [manpath] (1) - format and display the on-line manual pages
man.config [man] (5) - configuration data for man
[root@ip28 man]# man -f man man (1) - format and display the on-line manual pages man (rpm) - A set of documentation tools: man, apropos and whatis. man [manpath] (1) - format and display the on-line manual pages man.config [man] (5) - configuration data for man
-- 查询关键字 : apropos 等价于 man -k;
[root@ip28 man]# apropos printf
curl_maprintf [curl_mprintf] (3) - formatted output conversion
curl_mfprintf [curl_mprintf] (3) - formatted output conversion
curl_mprintf (3) - formatted output conversion
curl_msnprintf [curl_mprintf] (3) - formatted output conversion
curl_msprintf curl_mvaprintf [curl_mprintf] (3) - formatted output conversion
curl_mvfprintf [curl_mprintf] (3) - formatted output conversion
curl_mvprintf [curl_mprintf] (3) - formatted output conversion
curl_mvsnprintf [curl_mprintf] (3) - formatted output conversion
curl_mvsprintf [curl_mprintf] (3) - formatted output conversion
evbuffer_add_printf [event] (3) - execute a function when a specific event occurs
evbuffer_add_vprintf [event] (3) - execute a function when a specific event occurs
printf (1) - format and print data
printf [builtins] (1) - bash built-in commands, see bash(1)
[root@ip28 man]# man -k printf curl_maprintf [curl_mprintf] (3) - formatted output conversion curl_mfprintf [curl_mprintf] (3) - formatted output conversion curl_mprintf (3) - formatted output conversion curl_msnprintf [curl_mprintf] (3) - formatted output conversion curl_msprintf curl_mvaprintf [curl_mprintf] (3) - formatted output conversion curl_mvfprintf [curl_mprintf] (3) - formatted output conversion curl_mvprintf [curl_mprintf] (3) - formatted output conversion curl_mvsnprintf [curl_mprintf] (3) - formatted output conversion curl_mvsprintf [curl_mprintf] (3) - formatted output conversion evbuffer_add_printf [event] (3) - execute a function when a specific event occurs evbuffer_add_vprintf [event] (3) - execute a function when a specific event occurs printf (1) - format and print data printf [builtins] (1) - bash built-in commands, see bash(1)
-- 建立数据库 : 执行上面的两个特殊命令, 需要使用root用户建立 whatis 数据库;
10. info page手册
info page简介 : 这是个在线手册, 该手册将文件拆成一个一个的段落, 每个段落一个页面, 每个页面都有超链接跳转, 每个页面都是一个节点(Node);-- info命令文件路径 : 支持info命令文件默认在 /usr/share/info/ 目录下;
info 页面格式分析 :
-- File : 查询的页面的信息来自于哪个文件;
-- Node : 查询的页面属于哪个节点;
-- Next : 下一个节点的名称, 按 N 到下一个节点;
-- Up : 上一层节点, 按 U 回到上一层节点;
-- Prev : 前一个节点;
File: info.info, Node: Top, Next: Getting Started, Up: (dir)
# File 数据是哪个文件
# Node 代表页面属于哪个节点
# Next 下一个节点的名称
# Up 上一层节点
Info: An Introduction # 节点说明
*********************
The GNU Project distributes most of its on-line manuals in the "Info
format", which you read using an "Info reader". You are probably using
an Info reader to read this now.
There are two primary Info readers: `info', a stand-alone program
designed just to read Info files, and the `info' package in GNU Emacs,
a general-purpose editor. At present, only the Emacs reader supports
using a mouse.
If you are new to the Info reader and want to learn how to use it,
type the command `h' now. It brings you to a programmed instruction
sequence.
To read about expert-level Info commands, type `n' twice. This
brings you to `Info for Experts', skipping over the `Getting Started'
chapter.
* Menu: # 按 Tab 键, 可以在下面的四个menu之间切换, 光标停在 * 上, 按 Enter 键进入对应页面
* Getting Started:: Getting started using an Info reader.
* Expert Info:: Info commands for experts.
* Creating an Info File:: How to make your own Info file.
* Index:: An index of topics, commands, and variables.
Menu菜单 :
-- 切换菜单项 : 使用 Tab 键, 可以切换 Menu项;
-- 菜单跳转 : 将光标移动到 Menu 菜单的 * 或者 文字上, 按 Enter 键, 就可以跳转到该项;
info操作 :
-- 翻页 : 空格 (向下翻页), Page Down (向下翻页), Page Up (向上翻页);
-- Menu操作 : Tab (菜单项切换), Enter (进入节点);
-- 光标跳转 : B (光标 -> 开头), E (光标 -> 结尾);
-- 节点跳转 : N (跳转到下一个节点), P (跳转到上一个节点), U (跳转到上一层节点);
-- 查询关键字 : 按 S 或者 / 键, 输入关键字, 在按 Enter 键, 光标就会定位到查询到关键字的地方;
-- 显示求助菜单 : H ;
-- 查询命令 : ? ;
-- 退出查询 : q ;
11. 重要的热键
Tab键 :-- 列出文件命令列表 : 打出一半文件与命令, 按 两次 Tab 键, 就会列出相关的文件;
[root@ip28 ~]# vim .vim
.viminfo .vimrc -- 命令补齐 : 输入命令一半, 按Tab键, 会将命令补齐;
-- 文件名称补齐 : 输入文件名一半, 按Tab键, 会将文件名补齐;
Ctrl + C键 : 终端目前程序操作;
Ctrl + D键 : 键盘输入结束符, 用于结束文件 和 输入, 相当于 exit 命 和 EOF文件结束符;
12. Linux系统关机
关机前执行的操作 :-- 查看使用状态 : 使用 who 命令, 查看哪些用户在使用系统;
[root@ip28 ~]# who
root pts/0 2014-03-16 12:04 (114.66.200.219)
root pts/1 2014-03-16 16:09 (114.66.200.219)-- 查看网络状态 : 使用 netstat -a 命令, 查看网络状况;
[root@ip28 ~]# netstat -a
Active Internet connections (servers and established)
Proto Recv-Q Send-Q Local Address Foreign Address State
tcp 0 0 localhost:8005 *:* LISTEN
tcp 0 0 localhost:cslistener *:* LISTEN
tcp 0 0 *:8009 *:* LISTEN
tcp 0 0 *:mysql *:* LISTEN
tcp 0 0 *:http *:* LISTEN
tcp 0 0 *:webcache *:* LISTEN
tcp 0 0 *:hosts2-ns *:* LISTEN
tcp 0 0 *:tproxy *:* LISTEN
tcp 0 0 *:us-cli *:* LISTEN
tcp 0 0 *:8085 *:* LISTEN
tcp 0 0 *:ftp *:* LISTEN
tcp 0 0 *:ssh *:* LISTEN
tcp 0 0 *:8086 *:* LISTEN
tcp 0 0 *:8087 *:* LISTEN
tcp 0 0 ip28.hichina.com:19052 hg-in-f82.1e100.net:https TIME_WAIT -- 查看后台执行程序状况 : 使用 ps -aux 命令;
[root@ip28 ~]# ps -aux
Warning: bad syntax, perhaps a bogus '-'? See /usr/share/doc/procps-3.2.7/FAQ
USER PID %CPU %MEM VSZ RSS TTY STAT START TIME COMMAND
root 1 0.0 0.0 10348 160 ? Ss 2013 0:05 init [3]
root 2 0.0 0.0 0 0 ? S< 2013 0:00 [migration/0]
root 3 0.0 0.0 0 0 ? SN 2013 0:00 [ksoftirqd/0]
root 4 0.0 0.0 0 0 ? S< 2013 0:00 [watchdog/0]
root 5 0.0 0.0 0 0 ? S< 2013 0:20 [events/0]
root 6 0.0 0.0 0 0 ? S< 2013 0:00 [khelper]
root 15 0.0 0.0 0 0 ? S< 2013 0:12 [kthread]
root 19 0.0 0.0 0 0 ? S< 2013 0:01 [kblockd/0]
root 20 0.0 0.0 0 0 ? S< 2013 0:00 [kacpid]
root 64 0.0 0.0 0 0 ? S< 2013 0:00 [cqueue/0]
数据同步写入磁盘 : sync 命令, 将内存中的数据写入磁盘中;
-- 使用前提 : Linux中的数据, 在读写的时候都先在内存中存放, 到达一定条件才会将数据从内存中写入磁盘;
-- 使用场景 : U盘拔出前, 关机 重启之前;
shutdown命令作用 :
-- 选择关机模式 : 可以选择 关机 , 重启 还是 进入单用户模式;
-- 设置关机时间 : 可以按照时间 延迟 设置关机时间;
-- 设置关机消息 : 将关机的信息显示给在线的用户;
-- 发出警告信息 : 使用关机命令可以向在线用户发出信息这个属性, 可以向用户发出一些信息, 并不是要真正关机;
-- 是否检查文件 : 选择是否要用 fsck 检查文件系统;
shutdown命令参数解析 :
-- "-t" : 后面加上秒数, 过多少秒关机;
-- "-k" : 发出警告, 不是真的关机;
-- "-r" : 关机后重启;
-- "-h" : 立即关机;
-- "-n" : 不使用 init 程序, 直接关机;
-- "-f" : 关机并开机后, 掠过 fsck 磁盘检查;
-- "-F" : 重启后执行 fsck 磁盘检查;
-- "-c" : 取消 shutdown 命令;
关机命令示例 :
-- 立即关机 : shutdown -h now ;
-- 定时关机 : shutdown -h 20:00 ;
-- 延时关机 : shutdown -h +10, 10分钟后关机;
-- 立即重启 : shudown -r now;
-- 重启提示 : shutdown -r +30 'The system is reboot after 30 minutes !' , 30分钟后关重启, 并将重启信息发送给所有在线用户;
-- 发出警告 : shutdown -k now 'Fuck !', 现在发出警告, 不关机;
其它命令 :
-- 关机 : halt , poweroff 都是关机命令;
-- 通过改变运行等级关机 : init 0, 也可以进行关机;
-- 重启 : reboot;
-- 通过改变运行等级重启 : init 6 ;
.
作者 : 万境绝尘
转载请注明出处 : http://blog.csdn.net/shulianghan/article/details/21056029
.

相关文章推荐
- 【Linux 操作系统】Ubuntu 基础操作 基础命令 热键 man手册使用 关机 重启等命令使用
- Ubuntu 基础操作 基础命令 热键 man手册使用 关机 重启等命令使用
- Ubuntu 基础操作 基础命令 热键 man手册使用 关机 重启等命令使用
- (转)Ubuntu 基础操作 基础命令 热键 man手册使用 关机 重启等命令使用
- linux 操作系统中关机、重启命令的使用
- Linux基础知识之man手册的使用
- Linux学习总结(18)——Linux使用init命令关机、重启、切换模式
- Linux-Ubuntu下配置 Github ,使用 git命令操作进行版本控制
- 在Linux系统下,重启Tomcat使用命令操作的!
- linux关机和重启命令 日常操作命令
- linux基础命令学习(一)系统的关机、重启以及注销
- Linux学习总结(18)——Linux使用init命令关机、重启、切换模式
- 如何在Linux操作系统之上的MySQL数据库操作环境中使用清屏命令?
- linux之使用man查看命令手册
- man 命令 linux ubuntu 使用 方法
- LINUX MAN 常用命令/ubuntu man手册完善
- 在Linux系统下,重启Tomcat使用命令操作的
- 在linux操作系统下注销、关机、重启的简单命令
- 在linux操作系统下注销、关机、重启的简单命令
- Ubuntu、linux基础概念及常用操作命令