【转】CUDA5/CentOS6.4
2014-03-05 21:34
471 查看
转载自http://wenzhang.baidu.com/article/view?key=076f36658dd0828c-1393896446
This article explains how to install CentOS 6.4 and CUDA5 on a PC, which is equipped with Tesla K20.

↑
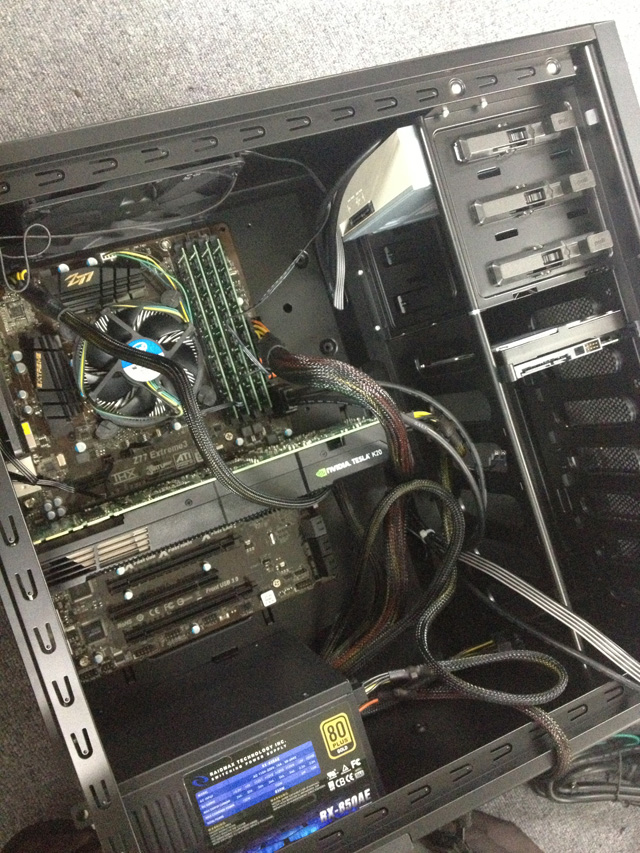
The specification of hardware is shown below
CPU: Core i7 3770(3.4GHz,4core/8thread)
Memory: 32GB(DDR3-12800 8GBx4)
HDD: 1TB(SATA,7200rpm)
GPU: ETSK20-5GER(nvidia Tesla K20c)
Since ETSK20-5GER does not have terminals of display outputs, such as D-SUB, DVI, HDMI, and so on, use the terminals of the mother board are used. To use the terminals, at the configuration of UEFI, the Primary Display is On Board.
↑
The settings of installing CentOS 6.4 are shown below.
Language & Keyboard: Japanese
Package: Standard Desktop Install
HDD Partition: Using whole disk, the standard configuration
Network: DHCP
To install CentOS, there is no customization (modification) on packages.
Please follow the instruction that the installer of CnetOS provides.
Both Firewall and SELinux are configured as Disable.
↑
This part describes how to prepare for installing CUDA after the installation of CentOS is completed.
↑
The Kernel version of CentOS, which has been just installed, is shown below.
$ uname -a
Linux localhost.localdomain 2.6.32-358.el6.x86_64 #1 SMP Fri Feb 22 00:31:26 UTC 2013 x86_64 x86_64 x86_64 GNU/Linux
To update Kernel of CentOS, please apply to yum command.
# yum update
After updating Kernel is completed, please reboot the OS and make sure that the updated Kernel works.
# reboot
After rebooting the CnetOS, please check the newer version of Kernel is installed. The newer version of Kernel is shown below.
$ uname -a
Linux localhost.localdomain 2.6.32-358.6.2.el6.x86_64 #1 SMP Thu May 16 20:59:36 UTC 2013 x86_64 x86_64 x86_64 GNU/Linux
Create a new user. Then, add the new user to sudo account.
# useradd beat
# passwd beat
# /usr/sbin/visudo

...<Omitted>
##      user    MACHINE=COMMANDS
##
## The COMMANDS section may have other options added to it.
##
## Allow root to run any commands anywhere
root    ALL=(ALL)       ALL
beat    ALL=(ALL)       ALL
↑
The addition of packages and modification of configuration are not directly related to install CUDA.
However, to make installing process easier, install ntpd and openssh.
Install ntpd.
# yum install ntp
Add ntp server.
# vi /etc/ntp/step-tickers

# List of servers used for initial synchronization.
ntp.nict.jp
ntp.jst.mfeed.ad.jp
ntp.ring.gr.jp
Boot ntpd.
# /etc/init.d/ntpd start
ntpd is added to the service.
# chkconfig --level 3 ntpd on
# chkconfig --level 5 ntpd on
Install openssh.
If openssh is already installed, please skip this part of the instruction.
# yum install openssh
PermitRootLogin and PermitEmptyPasswords, which are located at the inside of the directory /etc/ssh/sshd_config, are set as No.
# vi /etc/ssh/sshd_config

... <Omitted>
# Authentication:

#LoginGraceTime 2m
PermitRootLogin no
#StrictModes yes
#MaxAuthTries 6
#MaxSessions 10
... <Omitted>
# To disable tunneled clear text passwords, change to no here!
#PasswordAuthentication yes
PermitEmptyPasswords no
PasswordAuthentication yes
...
Boot sshd.
# /etc/init.d/sshd start
Add service to sshd.
# chkconfig --level 5 sshd on
# chkconfig --level 3 sshd on
↑
This section describes how to install the driver for Tesla K20c.
↑
To install the deriver for Tesla K20c, the Developer Tools and packages of CentOS are installed. Then, these packages are configured if they are necessary.
# yum groupinstall 'Development tools'
An error will occur if X is booted during the diver for Tesla K20c and CUDA5, so runlevel is changed to runlevel 3. Then, it is rebooted.
# vi /etc/inittab

...<Omitted>
# Default runlevel. The runlevels used are:
#   0 - halt (Do NOT set initdefault to this)
#   1 - Single user mode
#   2 - Multiuser, without NFS (The same as 3, if you do not have networking)
#   3 - Full multiuser mode
#   4 - unused
#   5 - X11
#   6 - reboot (Do NOT set initdefault to this)
#
id:3:initdefault:

# reboot
↑
After rebooting, NVIDIA-Linux-x86_64-319.23.run is downloaded from the URL shown below.
http://www.nvidia.co.jp/object/linux-display-amd64-319.23-driver-jp.html

Execute
NVIDIA-Linux-x86_64-319.23.run, and if you agree to the license
agreement, then the instillation process of the driver for Tesla K20c is
completed. After the installation is finished, the version file is
created at the directory of /proc/driver/nvidea/.
# chmod +x NVIDIA-Linux-x86_64-319.23.run
# ./NVIDIA-Linux-x86_64-319.23.run

# cat /proc/driver/nvidia/version
NVRM version: NVIDIA UNIX x86_64 Kernel Module  304.54  Sat Sep 29 00:05:49 PDT 2012
GCC version:  gcc version 4.4.7 20120313 (Red Hat 4.4.7-3) (GCC)
Caution:
The driver is needed to be re-built after the kernel update and reboot process are done.
The re-build process is required since the updated kernel cannot read
the nvidea driver. Without updating the driver, the CUDA5 Samples are
not be executed.
For the reference, the version of the new driver and the directory for the new nvidia driver are listed below.
# uname -a
Linux tesla.beatcraft.com 2.6.32-358.18.1.el6.x86_64 #1 SMP Wed Aug 28 17:19:38 UTC 2013 x86_64 x86_64 x86_64 GNU/Linux

# cat /proc/driver/nvidia/version
NVRM version: NVIDIA UNIX x86_64 Kernel Module  319.23  Thu May 16 19:36:02 PDT 2013
GCC version:  gcc version 4.4.7 20120313 (Red Hat 4.4.7-3) (GCC)
To read the driver, create a file at /etc/init.d/nvidea, and let runlevel3 and 5 be executed as the system is booted. For more details of the startup script, please visit the URL shown below.
http://docs.nvidia.com/cuda/cuda-getting-started-guide-for-linux/index.html#install-cuda-software
# vi /etc/init.d/nvidia

#!/bin/bash

/sbin/modprobe nvidia

if [ "$?" -eq 0 ]; then
# Count the number of NVIDIA controllers found.
NVDEVS=`lspci | grep -i NVIDIA`
N3D=`echo "$NVDEVS" | grep "3D controller" | wc -l`
NVGA=`echo "$NVDEVS" | grep "VGA compatible controller" | wc -l`

N=`expr $N3D + $NVGA - 1`
for i in `seq 0 $N`; do
mknod -m 666 /dev/nvidia$i c 195 $i
done

mknod -m 666 /dev/nvidiactl c 195 255

else
exit 1
fi

# cd /etc/rc5.d/
# ln -s S99nvidia ../init.d/nvidia
# cd /etc/rc3.d/
# ln -s S99nvidia ../init.d/nvidia
↑
This section shows how to install CUDA5 and executes a sample CUDA program.
↑
Download CUDA for CentOS6 64bit version (cuda_5.0.35_linux_64_rhel6.x-1.run) from URL below.
Add a PATH for CUDA5 in .bashrc. This is a precautionary measure. If the
sample programs can not find the PATH, the samples cannot be installed
correctly.
$ cd /home/beat
$ vi .bashrc

# .bashrc

# Source global definitions
if [ -f /etc/bashrc ]; then
. /etc/bashrc
fi

# User specific aliases and functions
export PATH=/usr/local/cuda-5.0/bin:$PATH
export LD_LIBRARY_PATH=/usr/local/cuda-5.0/lib64:/usr/local/cuda-5.0/lib:$LD_LIBRARY_PATH

# source .bashrc
↑
To build the samples, these packages listed below are required.
# yum install freeglut-devel.x86_64 libXi-devel.x86_64 mpich2-devel.x86_64 libXmu-devel.x86_64
Execute cuda_5.0.35_linux_64_rhel6.x-1.run. Specify the directory that the sample program is installed at the default directory, which is /usr/local/cuda-05.
# chmod +x cuda_5.0.35_linux_64_rhel6.x-1.run
# ./cuda_5.0.35_linux_64_rhel6.x-1.run
Sample programs are installed at the directories of /usr/local/cuda-5.0/samples and /root/NVUDA-5.0_Samples.
To let a root user build the samples, add ld.so.conf.d/cuda.conf, then, execute ldconfig.
# cat /etc/ld.so.conf.d/cuda.conf

/usr/local/cuda-5.0/lib
/usr/local/cuda-5.0/lib64
# ldconfig
↑
Let a user build and execute NVIDIA_CUDA-5.0_Samples.
Copy the file NVIDIA_CUDA-5.0_Samples from /root/NVIDIA_CUDA-5.0_Samples.
Change the owner of the file NVIDIA_CUDA-5.0_Samples to a user. Then, execute make.
# cp -afr /root/NVIDIA_CUDA-5.0_Samples /home/beat/.
# cd /home/beat
# chown -R beat.beat NVIDIA_CUDA-5.0_Samples
$ cd ~/NVIDIA_CUDA-5.0_Samples
$ make
After the build process is completed, Change the directory to /NVIDIA_CUDA-5.0_Samples/bin/linux/release/. Then, execute sample programs, which are listed on Running the Binaries of the NVIDIA CUDA Getting Started Guide for Linux. The URL of this page is show below. The names of sample programs, which are going to be executed are deviceQuery and bandwidthTest.
http://docs.nvidia.com/cuda/cuda-getting-started-guide-for-linux/index.html#running-binaries
To look at the outputs shown below, both deviceQuery and bandwidthTest recognize Tesla K20c.
$ cd ~/NVIDIA_CUDA-5.0_Samples/bin/linux/release/
$ ./deviceQuery
./deviceQuery Starting...

CUDA Device Query (Runtime API) version (CUDART static linking)

Detected 1 CUDA Capable device(s)

Device 0: "Tesla K20c"
CUDA Driver Version / Runtime Version          5.0 / 5.0
CUDA Capability Major/Minor version number:    3.5
Total amount of global memory:                 4800 MBytes (5032706048 bytes)
(13) Multiprocessors x (192) CUDA Cores/MP:    2496 CUDA Cores
GPU Clock rate:                                706 MHz (0.71 GHz)
Memory Clock rate:                             2600 Mhz
Memory Bus Width:                              320-bit
L2 Cache Size:                                 1310720 bytes
Max Texture Dimension Size (x,y,z)             1D=(65536), 2D=(65536,65536), 3D=(4096,4096,4096)
Max Layered Texture Size (dim) x layers        1D=(16384) x 2048, 2D=(16384,16384) x 2048
Total amount of constant memory:               65536 bytes
Total amount of shared memory per block:       49152 bytes
Total number of registers available per block: 65536
Warp size:                                     32
Maximum number of threads per multiprocessor:  2048
Maximum number of threads per block:           1024
Maximum sizes of each dimension of a block:    1024 x 1024 x 64
Maximum sizes of each dimension of a grid:     2147483647 x 65535 x 65535
Maximum memory pitch:                          2147483647 bytes
Texture alignment:                             512 bytes
Concurrent copy and kernel execution:          Yes with 2 copy engine(s)
Run time limit on kernels:                     No
Integrated GPU sharing Host Memory:            No
Support host page-locked memory mapping:       Yes
Alignment requirement for Surfaces:            Yes
Device has ECC support:                        Enabled
Device supports Unified Addressing (UVA):      Yes
Device PCI Bus ID / PCI location ID:           1 / 0
Compute Mode:
< Default (multiple host threads can use ::cudaSetDevice() with device simultaneously) >

deviceQuery, CUDA Driver = CUDART, CUDA Driver Version = 5.0, CUDA Runtime Version = 5.0, NumDevs = 1, Device0 = Tesla  K20c
$ ./bandwidthTest
[CUDA Bandwidth Test] - Starting...
Running on...

Device 0: Tesla K20c
Quick Mode

Host to Device Bandwidth, 1 Device(s)
PINNED Memory Transfers
Transfer Size (Bytes)        Bandwidth(MB/s)
33554432                     6431.7

Device to Host Bandwidth, 1 Device(s)
PINNED Memory Transfers
Transfer Size (Bytes)        Bandwidth(MB/s)
33554432                     6396.1

Device to Device Bandwidth, 1 Device(s)
PINNED Memory Transfers
Transfer Size (Bytes)        Bandwidth(MB/s)
33554432                     143752.5
↑
After the install and configuration of CUDA, the remaining Hard Disk space is shown below.
# df -h
Filesystem            Size  Used Avail Use% マウント位置
/dev/mapper/vg_beattesla-lv_root
50G  4.3G   45G   9% /
tmpfs                  16G     0   16G   0% /dev/shm
/dev/sda1             485M   66M  394M  15% /boot
/dev/mapper/vg_beattesla-lv_home
852G  1.4G  808G   1% /home

相关文章推荐
- Installing CUDA Toolkit 5.0 on CentOS 6.4
- CentOS-6.4安装配置Nginx【转】
- CentOS6.4 配置DNS服务器
- CentOS6.4 安装jenkins
- 豪鹫闲谈:IBM x3650 m4服务器安装centos6.4系统
- centos6.4配置ip dns
- vmware克隆Centos6.4虚拟机网卡无法启动问题的解决方法
- centos6.4上安装storm0.82
- 为DELL inspiron 14R安装CentOS X64 6.4
- CentOS 6.4安装配置LAMP服务器(Apache+PHP5+MySQL)
- centos 6.4 安装 otp_src_R15B03-1.tar
- centos6.4安装Apache+MySQL+PHP
- Centos 6.4 Mono下使用Petapoco与Oracle数据库
- CentOS 6.4 x64 安装 配置 Redmine 2.4.1
- Windows 7硬盘安装CentOS 6.4 双系统 (WIN7下硬盘安装Linux(Fedora 16,CentOS 6.2,Ubuntu 12.04))
- centos6.4下让oracle开机启动
- centos 6.4 扩容
- RedHat Enterprise Linux 6.4使用Centos 6 的yum源
- CentOS6.4配置163的yum源
- Centos6.4 ping的通,但打不开网页