Linux进程及服务的管理
2014-02-23 23:16
393 查看
大家知道在操作系统中,服务是通过进程提供的。所以了解Linux系统的进程运行情况,能使我们对主机提供更好的管理机制。
(一)进程的管理1,如何查看进程:(1)通过ps aux或ps -elf命令查看某一时刻的进程状态
[root@localhost ~]# ps aux |head
USER PID%CPU %MEM VSZ RSS TTY STAT START TIME COMMAND
root 1 0.0 0.0 10372 696 ? Ss 20:10 0:00 init [5]
root 2 0.0 0.0 0 0 ? S< 20:10 0:00 [migration/0]
root 3 0.0 0.0 0 0 ? SN 20:10 0:00 [ksoftirqd/0]
root 4 0.0 0.0 0 0 ? S< 20:10 0:01 [events/0]
root 5 0.0 0.0 0 0 ? S< 20:10 0:00 [khelper]
root 14 0.0 0.0 0 0 ? S< 20:10 0:00 [kthread]
root 18 0.0 0.0 0 0 ? S< 20:10 0:00 [kblockd/0]
root 19 0.0 0.0 0 0 ? S< 20:10 0:00 [kacpid]
root 192 0.0 0.0 0 0 ? S< 20:10 0:00 [cqueue/0]
(2)通过top命令动态查看进程
P、M:根据 %CPU、%MEM 降序排列 T:根据进程消耗的 TIME降序排列
k、r:杀死指定的进程、重设进程优先级
q:退出 top 程序
[root@localhost ~]# top |head -n 15
top - 21:08:51 up 58 min, 3 users, load average: 0.00, 0.00, 0.00
Tasks: 169 total, 1 running, 167 sleeping, 0stopped, 1 zombie
Cpu(s): 0.6%us, 0.7%sy, 0.1%ni, 96.4%id, 2.0%wa, 0.0%hi, 0.3%si, 0.0%st
Mem: 1023844ktotal, 687024k used, 336820k free, 41960k buffers
Swap: 2096472ktotal, 0k used, 2096472k free, 388836k cached
PID USER PR NI VIRT RES SHR S %CPU %MEM TIME+ COMMAND
1 root 15 0 10372 696 588 S 0.0 0.1 0:00.81 init
2 root RT -5 0 0 0 S 0.0 0.0 0:00.00 migration/0
3 root 34 19 0 0 0 S 0.0 0.0 0:00.00 ksoftirqd/0
4 root 10 -5 0 0 0 S 0.0 0.0 0:01.79 events/0
5 root 10 -5 0 0 0 S 0.0 0.0 0:00.00 khelper
14 root 11 -5 0 0 0 S 0.0 0.0 0:00.00 kthread
18 root 10 -5 0 0 0 S 0.0 0.0 0:00.05 kblockd/0
19 root 20 -5 0 0 0 S 0.0 0.0 0:00.00 kacpid
(3)pgrep 根据特定条件筛选
-l PID连同进程名一起输出
-U 检索指定用户的进程
-t 检索指定终端的进程
[root@localhost ~]# pgrep -l-U root
1 init
2 migration/0
3 ksoftirqd/0
4 events/0
5 khelper
14 kthread
18 kblockd/0
………
(4)pstree 树状结构查看
-a 显示完整命令行
-u 列出各进程所属的用户名
-p 列出对应的PID号
2,如何管理进程:以xsnow为例
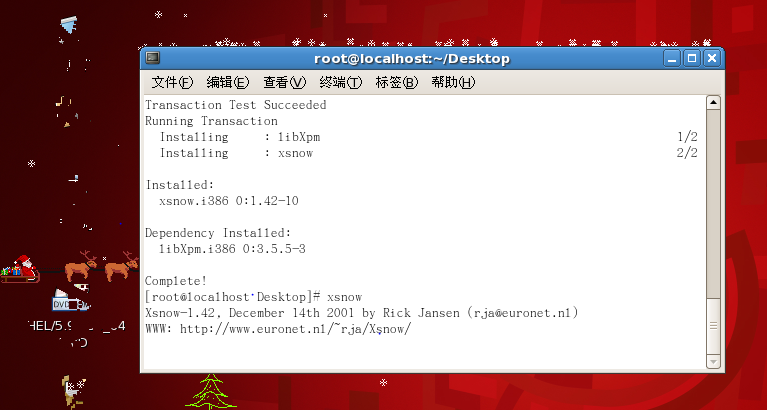
(1)安装此款软件
[root@localhost Desktop]# yumlocalinstall -y xsnow-1.42-10.i386.rpm --nogpgcheck
Loaded plugins: product-id, security,subscription-manager
This system is not registered to Red Hat SubscriptionManagement. You can use subscription-manager to register.
Setting up Local Package Process
Examining xsnow-1.42-10.i386.rpm: xsnow-1.42-10.i386
Marking xsnow-1.42-10.i386.rpm to be installed
Resolving Dependencies
--> Running transaction check
………………………………………
……………..
(2)打开软件,发现软件在前台运行时不能做其他任何操作
[root@localhost Desktop]# xsnow
Xsnow-1.42, December 14th 2001 by Rick Jansen(rja@euronet.nl)
WWW: http://www.euronet.nl/~rja/Xsnow/
(3)Ctrl+Z使当前运行停止并放置到后台,查看后台运行进程
[root@localhost ~]# xsnow
Xsnow-1.42, December 14th 2001 by Rick Jansen(rja@euronet.nl)
WWW: http://www.euronet.nl/~rja/Xsnow/
[1]+ Stopped xsnow
[root@localhost ~]# jobs
[1]+ Stopped xsnow
[root@localhost ~]#
(4)把后台进程调度到前台
[root@localhost ~]# fg xsnow
Xsnow
(5)直接把后台进程放到后台运行
[root@localhost ~]# bg xsnow
[1]+ xsnow &
(6)在程序后面加&可使直接转入后台运行,此时可以操作主机
[root@localhost Desktop]# xsnow&
[1] 7653
[root@localhost Desktop]# Xsnow-1.42, December 14th2001 by Rick Jansen (rja@euronet.nl)
WWW: http://www.euronet.nl/~rja/Xsnow/
[root@localhost Desktop]# ls
xsnow-1.42-10.i386.rpm
(7)打开多个xsnow程序

(8)查看后台进程
[root@localhost ~]# jobs
[1] Running xsnow&
[2] Running xsnow&
[3] Running xsnow&
[4] Running xsnow&
[5] Running xsnow&
[6]- Running xsnow&
[7]+ Running xsnow&
(9)一次性结束xsnow进程
[root@localhost ~]# killallxsnow
[1] Done xsnow
[2] Done xsnow
[3] Done xsnow
[4] Done xsnow
[5] Done xsnow
[6]- Done xsnow
[7]+ Done xsnow
[root@localhost ~]#
进程的管理大体为进程的控制和终止 进程控制 & 放入后台运行,运行在内存中的进程
ctrl +z 将当前的作业放入后台并暂停运行
jobs 查看后台进程
fg 编号把后台进程调到前台
bg 编号让程序在后台运行
终止进程 ctrl +c 终止当前正在运行的进程
kill -9 pid 强制杀掉进程
killall 进程名杀死开启多个的同一进程
pkill [-9] 进程名[也可以是用户]
(二)服务的管理1,服务的分类:服务分为系统服务和临时服务两大类
独立系统服务:响应速度快、占用系统资源;临时服务:响应速度慢、较节省系统资源;2,服务状态:chkconfig--list 显示全部服务的启动状态
chkconfig --list xxx 显示xxx服务的启动状态
区别已安装过的服务是系统服务还是临时服务
rpm -ql httpd | grep init/xinetd
[root@localhost ~]# chkconfig --list | head
NetworkManager 0:off 1:off 2:off 3:off 4:off 5:off 6:off
acpid 0:off 1:off 2:on 3:on 4:on 5:on 6:off
anacron 0:off 1:off 2:on 3:on 4:on 5:on 6:off
atd 0:off 1:off 2:off 3:on 4:on 5:on 6:off
auditd 0:off 1:off 2:on 3:on 4:on 5:on 6:off
[root@localhost ~]# chkconfig --list autofs
autofs 0:off 1:off 2:off 3:on 4:on 5:on 6:off
[root@localhost ~]# rpm -qlautofs | grep xinetd
[root@localhost ~]# rpm -qlautofs | grep init
/etc/rc.d/init.d/autofs
3, 如何区别系统服务和临时服务
(1)看路径:系统服务 /etc/init.d/ 临时服务/etc/xinetd.d/
(2)用chkconfig list 全部列举,可以根据标题看出服务类型
chkconfig list 服务:列举指定的某个服务状态4,手动启动系统服务的两种方法
(1)service 系统服务 stop/restart/start/status/reload
[root@localhost ~]# service autofs restart
Stopping automount: [ OK ]
Starting automount: [ OK ]
(2)/etc/init.d/系统服务 start/stop/restart/status/reload
[root@localhost ~]# /etc/init.d/autofs restart
Stopping automount: [ OK ]
Starting automount: [ OK ]
5,自动启动系统服务的两种方法
(1)chkconfig 服务 on/off 默认级别2345
chkconfig --level 35 系统服务 on/off 指定服务级别
[root@localhost ~]# chkconfig --list NetworkManager
NetworkManager 0:off 1:off 2:off 3:off 4:off 5:off 6:off
[root@localhost ~]# chkconfig --level 35NetworkManager on
[root@localhost ~]# chkconfig --list NetworkManager
NetworkManager 0:off 1:off 2:off 3:on 4:off 5:on 6:off
[root@localhost ~]#
(2)ntsysv --level 35 系统服务指定服务级别
空格 选择开启/关闭服务Tab ok确定[root@localhost ~]# chkconfig --list NetworkManager
NetworkManager 0:off 1:off 2:off 3:off 4:off 5:off 6:off
[root@localhost ~]# ntsysv --level 35
[root@localhost ~]# chkconfig --list NetworkManager

NetworkManager 0:off 1:off 2:off 3:on 4:off 5:on 6:off
[root@localhost ~]#
6,临时服务开启的两种方法
首先需要安装并打开xinetd托管服务[root@localhost~]# rpm -qi xinetdpackage xinetd is not installed[root@localhost~]# yum install -y xinetd Failedto set locale, defaulting to CLoadedplugins: product-id, security, subscription-managerThissystem is not registered to Red Hat Subscription Management. You can usesubscription-manager to register.Settingup Install ProcessResolvingDependencies-->Running transaction check--->Package xinetd.x86_64 2:2.3.14-17.el5 set to be updated-->Finished Dependency Resolution………………………………………..………………………….[root@localhost~]# chkconfig --level 35 xinetd on[root@localhost~]# chkconfig --list xinetd xinetd 0:off 1:off 2:off 3:on 4:on 5:on 6:off(1)chkconfig 临时服务 on
[root@localhost ~]# chkconfig --list rsync
rsync off
[root@localhost ~]# chkconfig rsync on
[root@localhost ~]# chkconfig --list rsync
rsync on
(2)vim /etc/xinetd.d/临时服务
把 disable改为no[root@localhost ~]# chkconfigrsync off
[root@localhost ~]# vim/etc/xinetd.d/rsync
# default: off
# description: The rsync server is a good addition toan ftp server, as it \
# allowscrc checksumming etc.
service rsync
{
disable= no
socket_type = stream
wait = no
user = root
server = /usr/bin/rsync
server_args = --daemon
log_on_failure += USERID
}
~
~
-- INSERT -- 6,14-21 All
[root@localhost ~]# chkconfig--list rsync
rsync on
(一)进程的管理1,如何查看进程:(1)通过ps aux或ps -elf命令查看某一时刻的进程状态
[root@localhost ~]# ps aux |head
USER PID%CPU %MEM VSZ RSS TTY STAT START TIME COMMAND
root 1 0.0 0.0 10372 696 ? Ss 20:10 0:00 init [5]
root 2 0.0 0.0 0 0 ? S< 20:10 0:00 [migration/0]
root 3 0.0 0.0 0 0 ? SN 20:10 0:00 [ksoftirqd/0]
root 4 0.0 0.0 0 0 ? S< 20:10 0:01 [events/0]
root 5 0.0 0.0 0 0 ? S< 20:10 0:00 [khelper]
root 14 0.0 0.0 0 0 ? S< 20:10 0:00 [kthread]
root 18 0.0 0.0 0 0 ? S< 20:10 0:00 [kblockd/0]
root 19 0.0 0.0 0 0 ? S< 20:10 0:00 [kacpid]
root 192 0.0 0.0 0 0 ? S< 20:10 0:00 [cqueue/0]
(2)通过top命令动态查看进程
P、M:根据 %CPU、%MEM 降序排列 T:根据进程消耗的 TIME降序排列
k、r:杀死指定的进程、重设进程优先级
q:退出 top 程序
[root@localhost ~]# top |head -n 15
top - 21:08:51 up 58 min, 3 users, load average: 0.00, 0.00, 0.00
Tasks: 169 total, 1 running, 167 sleeping, 0stopped, 1 zombie
Cpu(s): 0.6%us, 0.7%sy, 0.1%ni, 96.4%id, 2.0%wa, 0.0%hi, 0.3%si, 0.0%st
Mem: 1023844ktotal, 687024k used, 336820k free, 41960k buffers
Swap: 2096472ktotal, 0k used, 2096472k free, 388836k cached
PID USER PR NI VIRT RES SHR S %CPU %MEM TIME+ COMMAND
1 root 15 0 10372 696 588 S 0.0 0.1 0:00.81 init
2 root RT -5 0 0 0 S 0.0 0.0 0:00.00 migration/0
3 root 34 19 0 0 0 S 0.0 0.0 0:00.00 ksoftirqd/0
4 root 10 -5 0 0 0 S 0.0 0.0 0:01.79 events/0
5 root 10 -5 0 0 0 S 0.0 0.0 0:00.00 khelper
14 root 11 -5 0 0 0 S 0.0 0.0 0:00.00 kthread
18 root 10 -5 0 0 0 S 0.0 0.0 0:00.05 kblockd/0
19 root 20 -5 0 0 0 S 0.0 0.0 0:00.00 kacpid
(3)pgrep 根据特定条件筛选
-l PID连同进程名一起输出
-U 检索指定用户的进程
-t 检索指定终端的进程
[root@localhost ~]# pgrep -l-U root
1 init
2 migration/0
3 ksoftirqd/0
4 events/0
5 khelper
14 kthread
18 kblockd/0
………
(4)pstree 树状结构查看
-a 显示完整命令行
-u 列出各进程所属的用户名
-p 列出对应的PID号
2,如何管理进程:以xsnow为例
(1)安装此款软件
[root@localhost Desktop]# yumlocalinstall -y xsnow-1.42-10.i386.rpm --nogpgcheck
Loaded plugins: product-id, security,subscription-manager
This system is not registered to Red Hat SubscriptionManagement. You can use subscription-manager to register.
Setting up Local Package Process
Examining xsnow-1.42-10.i386.rpm: xsnow-1.42-10.i386
Marking xsnow-1.42-10.i386.rpm to be installed
Resolving Dependencies
--> Running transaction check
………………………………………
……………..
(2)打开软件,发现软件在前台运行时不能做其他任何操作
[root@localhost Desktop]# xsnow
Xsnow-1.42, December 14th 2001 by Rick Jansen(rja@euronet.nl)
WWW: http://www.euronet.nl/~rja/Xsnow/
(3)Ctrl+Z使当前运行停止并放置到后台,查看后台运行进程
[root@localhost ~]# xsnow
Xsnow-1.42, December 14th 2001 by Rick Jansen(rja@euronet.nl)
WWW: http://www.euronet.nl/~rja/Xsnow/
[1]+ Stopped xsnow
[root@localhost ~]# jobs
[1]+ Stopped xsnow
[root@localhost ~]#
(4)把后台进程调度到前台
[root@localhost ~]# fg xsnow
Xsnow
(5)直接把后台进程放到后台运行
[root@localhost ~]# bg xsnow
[1]+ xsnow &
(6)在程序后面加&可使直接转入后台运行,此时可以操作主机
[root@localhost Desktop]# xsnow&
[1] 7653
[root@localhost Desktop]# Xsnow-1.42, December 14th2001 by Rick Jansen (rja@euronet.nl)
WWW: http://www.euronet.nl/~rja/Xsnow/
[root@localhost Desktop]# ls
xsnow-1.42-10.i386.rpm
(7)打开多个xsnow程序
(8)查看后台进程
[root@localhost ~]# jobs
[1] Running xsnow&
[2] Running xsnow&
[3] Running xsnow&
[4] Running xsnow&
[5] Running xsnow&
[6]- Running xsnow&
[7]+ Running xsnow&
(9)一次性结束xsnow进程
[root@localhost ~]# killallxsnow
[1] Done xsnow
[2] Done xsnow
[3] Done xsnow
[4] Done xsnow
[5] Done xsnow
[6]- Done xsnow
[7]+ Done xsnow
[root@localhost ~]#
进程的管理大体为进程的控制和终止 进程控制 & 放入后台运行,运行在内存中的进程
ctrl +z 将当前的作业放入后台并暂停运行
jobs 查看后台进程
fg 编号把后台进程调到前台
bg 编号让程序在后台运行
终止进程 ctrl +c 终止当前正在运行的进程
kill -9 pid 强制杀掉进程
killall 进程名杀死开启多个的同一进程
pkill [-9] 进程名[也可以是用户]
(二)服务的管理1,服务的分类:服务分为系统服务和临时服务两大类
独立系统服务:响应速度快、占用系统资源;临时服务:响应速度慢、较节省系统资源;2,服务状态:chkconfig--list 显示全部服务的启动状态
chkconfig --list xxx 显示xxx服务的启动状态
区别已安装过的服务是系统服务还是临时服务
rpm -ql httpd | grep init/xinetd
[root@localhost ~]# chkconfig --list | head
NetworkManager 0:off 1:off 2:off 3:off 4:off 5:off 6:off
acpid 0:off 1:off 2:on 3:on 4:on 5:on 6:off
anacron 0:off 1:off 2:on 3:on 4:on 5:on 6:off
atd 0:off 1:off 2:off 3:on 4:on 5:on 6:off
auditd 0:off 1:off 2:on 3:on 4:on 5:on 6:off
[root@localhost ~]# chkconfig --list autofs
autofs 0:off 1:off 2:off 3:on 4:on 5:on 6:off
[root@localhost ~]# rpm -qlautofs | grep xinetd
[root@localhost ~]# rpm -qlautofs | grep init
/etc/rc.d/init.d/autofs
3, 如何区别系统服务和临时服务
(1)看路径:系统服务 /etc/init.d/ 临时服务/etc/xinetd.d/
(2)用chkconfig list 全部列举,可以根据标题看出服务类型
chkconfig list 服务:列举指定的某个服务状态4,手动启动系统服务的两种方法
(1)service 系统服务 stop/restart/start/status/reload
[root@localhost ~]# service autofs restart
Stopping automount: [ OK ]
Starting automount: [ OK ]
(2)/etc/init.d/系统服务 start/stop/restart/status/reload
[root@localhost ~]# /etc/init.d/autofs restart
Stopping automount: [ OK ]
Starting automount: [ OK ]
5,自动启动系统服务的两种方法
(1)chkconfig 服务 on/off 默认级别2345
chkconfig --level 35 系统服务 on/off 指定服务级别
[root@localhost ~]# chkconfig --list NetworkManager
NetworkManager 0:off 1:off 2:off 3:off 4:off 5:off 6:off
[root@localhost ~]# chkconfig --level 35NetworkManager on
[root@localhost ~]# chkconfig --list NetworkManager
NetworkManager 0:off 1:off 2:off 3:on 4:off 5:on 6:off
[root@localhost ~]#
(2)ntsysv --level 35 系统服务指定服务级别
空格 选择开启/关闭服务Tab ok确定[root@localhost ~]# chkconfig --list NetworkManager
NetworkManager 0:off 1:off 2:off 3:off 4:off 5:off 6:off
[root@localhost ~]# ntsysv --level 35
[root@localhost ~]# chkconfig --list NetworkManager
NetworkManager 0:off 1:off 2:off 3:on 4:off 5:on 6:off
[root@localhost ~]#
6,临时服务开启的两种方法
首先需要安装并打开xinetd托管服务[root@localhost~]# rpm -qi xinetdpackage xinetd is not installed[root@localhost~]# yum install -y xinetd Failedto set locale, defaulting to CLoadedplugins: product-id, security, subscription-managerThissystem is not registered to Red Hat Subscription Management. You can usesubscription-manager to register.Settingup Install ProcessResolvingDependencies-->Running transaction check--->Package xinetd.x86_64 2:2.3.14-17.el5 set to be updated-->Finished Dependency Resolution………………………………………..………………………….[root@localhost~]# chkconfig --level 35 xinetd on[root@localhost~]# chkconfig --list xinetd xinetd 0:off 1:off 2:off 3:on 4:on 5:on 6:off(1)chkconfig 临时服务 on
[root@localhost ~]# chkconfig --list rsync
rsync off
[root@localhost ~]# chkconfig rsync on
[root@localhost ~]# chkconfig --list rsync
rsync on
(2)vim /etc/xinetd.d/临时服务
把 disable改为no[root@localhost ~]# chkconfigrsync off
[root@localhost ~]# vim/etc/xinetd.d/rsync
# default: off
# description: The rsync server is a good addition toan ftp server, as it \
# allowscrc checksumming etc.
service rsync
{
disable= no
socket_type = stream
wait = no
user = root
server = /usr/bin/rsync
server_args = --daemon
log_on_failure += USERID
}
~
~
-- INSERT -- 6,14-21 All
[root@localhost ~]# chkconfig--list rsync
rsync on

相关文章推荐
- 【Linux C】进程环境
- Linux中如何让进程在后台运行
- UNIX/Linux进程间通信IPC系列(四)消息队列
- linux系统版本的查看命令
- linux man使用方法 和centos安装中文man包 --转
- 转--linux启动流程
- centos6.4使用man查找命令时,报错No manual entry for xxxx
- 一步步探究linux进程中的用户ID
- LINUX多线程编程
- 不经不觉用了Linux 5个月了!
- 对最小化安装的CentOS补装图形界面
- VmWare下安装Linux Centos6.0详细过程
- Linux grep和egrep命令
- tiny6410裸机实验第2章--------------点亮LED灯(用C来写)
- 作为一个新人,怎样学习嵌入式Linux?(韦东山)
- linux下使用DNW传数据 进行ARM开发板烧写
- 史上最经典的Linux内核学习方法论
- 让Linux内核不再卡死在DHCP请求上
- Linux makefile 教程 非常详细,且易懂
- centOS 一键php环境安装-php博弈