Launcher2<一>
2013-12-11 19:00
183 查看
本文来自http://blog.csdn.net/chenshaoyang0011
Android系统的一大特色是它拥有的桌面通知系统,不同于IOS的桌面管理,Android有一个桌面系统用于管理和展示APP以及桌面Widget等。Android提供一个默认的桌面应
用,当然我们也可以使用第三方的桌面应用。Android的Launcher的源码在 \packages\apps\Launcher2。Launcher2的主布局文件包括res\layout-land\launcher.xml
, res\layout-port\launcher.xml , res\layout-sw600dp\launcher.xml ,分别适配横屏,竖屏和7寸平板。内容大同小异,这里就以res\layout-port\launcher.xml的为例。
首先让我们看看launcher.xml中的结构:
[html] view
plaincopy
<com.android.launcher2.DragLayer
xmlns:android="http://schemas.android.com/apk/res/android"
xmlns:launcher="http://schemas.android.com/apk/res/com.android.launcher"
android:id="@+id/drag_layer"
...
>
<!-- Keep these behind the workspace so that they are not visible when
we go into AllApps -->
<include
android:id="@+id/dock_divider"
layout="@layout/workspace_divider"
...
/>
<!-- 分页指示器 -->
<include
android:id="@+id/paged_view_indicator"
layout="@layout/scroll_indicator"
...
/>
<!-- The workspace contains 5 screens of cells -->
<com.android.launcher2.Workspace
android:id="@+id/workspace"
...
>
<!-- 五个分屏,默认显示cell3 -->
<include android:id="@+id/cell1" layout="@layout/workspace_screen" />
<include android:id="@+id/cell2" layout="@layout/workspace_screen" />
<include android:id="@+id/cell3" layout="@layout/workspace_screen" />
<include android:id="@+id/cell4" layout="@layout/workspace_screen" />
<include android:id="@+id/cell5" layout="@layout/workspace_screen" />
</com.android.launcher2.Workspace>
<!-- 搜索框/删除框 -->
<include
android:id="@+id/qsb_bar"
layout="@layout/qsb_bar" />
<!-- 显示具体全部应用的界面,包括APPS、WIGHETS的tab标签,以及显示ALL APP的页面和现实APP WIGHETS的页面 -->
<include layout="@layout/apps_customize_pane"
android:id="@+id/apps_customize_pane"
..
/>
<!-- WorkSpace最下面的五个快捷位置 -->
<include layout="@layout/hotseat"
android:id="@+id/hotseat"
..
/>
<!-- 刚启动的时候显示的指导页 -->
<include layout="@layout/workspace_cling"
android:id="@+id/workspace_cling"
...
/>
<!-- 是第一次进入全部应用之后显示的指导页 -->
<include layout="@layout/folder_cling"
android:id="@+id/folder_cling"
...
/>
</com.android.launcher2.DragLayer>
接着我们来一一认识每一个View控件。
1、最外层的DragLayer,是一个继承自FramLayout的View控件,显示的就是整个桌面根容器。桌面的所有控件都是位于DragLayer中。
2、id/dock_divider,使用了布局workspace_divider,其实就是一个ImageView。是Workspace与Hotseat之间的分割线。

3、id/paged_view_indicator,使用了布局scroll_indicator,显示效果是在id/dock_divider上显示一条淡蓝色的横线,来指示当分屏所处的位置
4、id/workspace ,工作空间拥有五个workspace_screen,即有五个分屏,每个分屏都可以放置shortcut和AppWidget,效果如下:
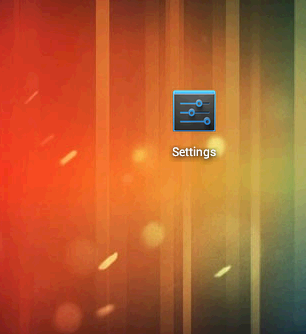
5、id/cell1..cell5 ,分别代表五个分屏
6、id/qsb_bar 搜索框/删除框,根据需要进行切换


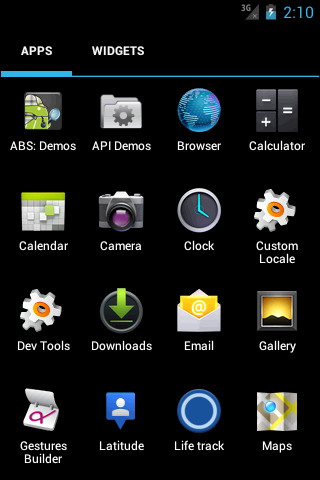
7、id/apps_customize_pane,效果如下
8、id/hotseat 即主屏幕下方的五个快捷位置

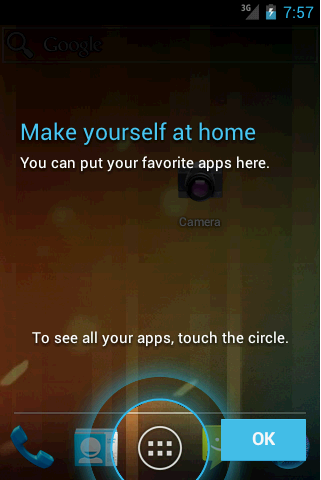
9、id/workspace_cling当第一次运行Launcher2时,会显示的用于指导的动画,以后不再显示
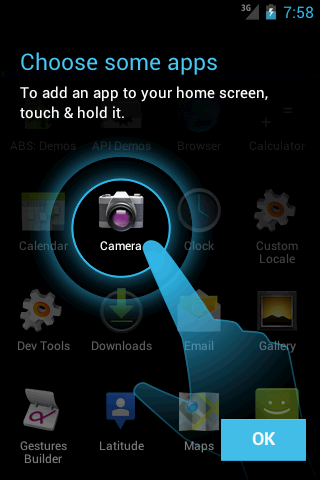
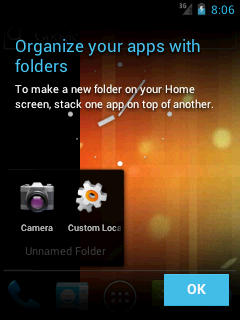
10、id/folder_cling,第一次使用Folder时,展示给用户的指导画面。
这样,我们已经可以使每个UI界面及组件都对号入座,这会使接下来分析的时候更加清晰。
Android系统的一大特色是它拥有的桌面通知系统,不同于IOS的桌面管理,Android有一个桌面系统用于管理和展示APP以及桌面Widget等。Android提供一个默认的桌面应
用,当然我们也可以使用第三方的桌面应用。Android的Launcher的源码在 \packages\apps\Launcher2。Launcher2的主布局文件包括res\layout-land\launcher.xml
, res\layout-port\launcher.xml , res\layout-sw600dp\launcher.xml ,分别适配横屏,竖屏和7寸平板。内容大同小异,这里就以res\layout-port\launcher.xml的为例。
首先让我们看看launcher.xml中的结构:
[html] view
plaincopy
<com.android.launcher2.DragLayer
xmlns:android="http://schemas.android.com/apk/res/android"
xmlns:launcher="http://schemas.android.com/apk/res/com.android.launcher"
android:id="@+id/drag_layer"
...
>
<!-- Keep these behind the workspace so that they are not visible when
we go into AllApps -->
<include
android:id="@+id/dock_divider"
layout="@layout/workspace_divider"
...
/>
<!-- 分页指示器 -->
<include
android:id="@+id/paged_view_indicator"
layout="@layout/scroll_indicator"
...
/>
<!-- The workspace contains 5 screens of cells -->
<com.android.launcher2.Workspace
android:id="@+id/workspace"
...
>
<!-- 五个分屏,默认显示cell3 -->
<include android:id="@+id/cell1" layout="@layout/workspace_screen" />
<include android:id="@+id/cell2" layout="@layout/workspace_screen" />
<include android:id="@+id/cell3" layout="@layout/workspace_screen" />
<include android:id="@+id/cell4" layout="@layout/workspace_screen" />
<include android:id="@+id/cell5" layout="@layout/workspace_screen" />
</com.android.launcher2.Workspace>
<!-- 搜索框/删除框 -->
<include
android:id="@+id/qsb_bar"
layout="@layout/qsb_bar" />
<!-- 显示具体全部应用的界面,包括APPS、WIGHETS的tab标签,以及显示ALL APP的页面和现实APP WIGHETS的页面 -->
<include layout="@layout/apps_customize_pane"
android:id="@+id/apps_customize_pane"
..
/>
<!-- WorkSpace最下面的五个快捷位置 -->
<include layout="@layout/hotseat"
android:id="@+id/hotseat"
..
/>
<!-- 刚启动的时候显示的指导页 -->
<include layout="@layout/workspace_cling"
android:id="@+id/workspace_cling"
...
/>
<!-- 是第一次进入全部应用之后显示的指导页 -->
<include layout="@layout/folder_cling"
android:id="@+id/folder_cling"
...
/>
</com.android.launcher2.DragLayer>
接着我们来一一认识每一个View控件。
1、最外层的DragLayer,是一个继承自FramLayout的View控件,显示的就是整个桌面根容器。桌面的所有控件都是位于DragLayer中。
2、id/dock_divider,使用了布局workspace_divider,其实就是一个ImageView。是Workspace与Hotseat之间的分割线。
3、id/paged_view_indicator,使用了布局scroll_indicator,显示效果是在id/dock_divider上显示一条淡蓝色的横线,来指示当分屏所处的位置
4、id/workspace ,工作空间拥有五个workspace_screen,即有五个分屏,每个分屏都可以放置shortcut和AppWidget,效果如下:
5、id/cell1..cell5 ,分别代表五个分屏
6、id/qsb_bar 搜索框/删除框,根据需要进行切换
7、id/apps_customize_pane,效果如下
8、id/hotseat 即主屏幕下方的五个快捷位置
9、id/workspace_cling当第一次运行Launcher2时,会显示的用于指导的动画,以后不再显示
10、id/folder_cling,第一次使用Folder时,展示给用户的指导画面。
这样,我们已经可以使每个UI界面及组件都对号入座,这会使接下来分析的时候更加清晰。

相关文章推荐
- c语言深入理解<2>
- cmake 学习之路 记录中间所遇到过的所有错误与问题的解决 <一>
- JNI接口函数<一>
- <2> unity3d 分包与上google play 之具体实战
- Java基础--集合框架<一>
- 微软面试题<一>
- LIN总线笔记<2>
- 虚幻4 文档翻译<一> Casting节点
- JS-native交互<一>
- <一>初探js特效魅力之鼠标悬浮事件01
- UITableView使用<2>UITableViewCell的介绍
- IOS通讯录开发<2> 通讯录的获取及应用
- SharpMap源码学习<一>
- 经典SQL语句大全<一>
- windows核心编程<读书笔记一>---重写Onchar函数
- 整理springmvc+mybatis+velocity的整合<一>
- Android NDK学习 <一> 简介
- Android开发工具——ADB(Android Debug Bridge) <一>概览
- Unity手游之路<一>C#版本Protobuf
- JAVA第九弹(继承与多态<一>)