jQuery经过显示图片大图 图片tips效果
2013-11-25 11:30
253 查看
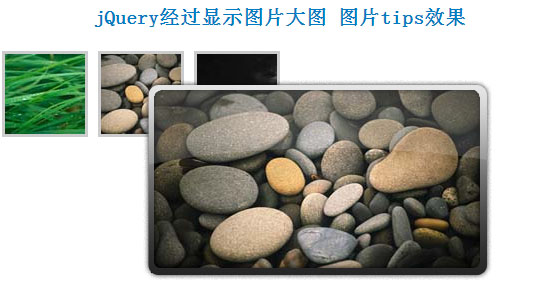
一般tips都是文字,这个可以支持图片,很漂亮
演示 JavaScript Code<script type="text/javascript">
// Load this script once the document is ready
$(document).ready(function () {
// Get all the thumbnail
$('div.thumbnail-item').mouseenter(function(e) {
// Calculate the position of the image tooltip
x = e.pageX - $(this).offset().left;
y = e.pageY - $(this).offset().top;
// Set the z-index of the current item,
// make sure it's greater than the rest of thumbnail items
// Set the position and display the image tooltip
$(this).css('z-index','15')
.children("div.tooltip")
.css({'top': y + 10,'left': x + 20,'display':'block'});
}).mousemove(function(e) {
// Calculate the position of the image tooltip
x = e.pageX - $(this).offset().left;
y = e.pageY - $(this).offset().top;
// This line causes the tooltip will follow the mouse pointer
$(this).children("div.tooltip").css({'top': y + 10,'left': x + 20});
}).mouseleave(function() {
// Reset the z-index and hide the image tooltip
$(this).css('z-index','1')
.children("div.tooltip")
.animate({"opacity": "hide"}, "fast");
});
});
</script>
CSS Code<style>
.thumbnail-item {
/* position relative so that we can use position absolute for the tooltip */
position: relative;
float: left;
margin: 0px 5px;
}
.thumbnail-item a {
display: block;
}
.thumbnail-item img.thumbnail {
border:3px solid #ccc;
}
.tooltip {
/* by default, hide it */
display: none;
/* allow us to move the tooltip */
position: absolute;
/* align the image properly */
padding: 8px 0 0 8px;
}
.tooltip span.overlay {
/* the png image, need ie6 hack though */
background: url(images/overlay.png) no-repeat;
/* put this overlay on the top of the tooltip image */
position: absolute;
top: 0px;
left: 0px;
display: block;
width: 350px;
height: 200px;
}
</style>
XML/HTML Code<div class="thumbnail-item">
<a href="#"><img src="images/small1.jpg" class="thumbnail"/></a>
<div class="tooltip">
<img src="images/big1.jpg" alt="" width="330" height="185" />
<span class="overlay"></span>
</div>
</div>
<div class="thumbnail-item">
<a href="#"><img src="images/small2.jpg" class="thumbnail"/></a>
<div class="tooltip">
<img src="images/big2.jpg" alt="" width="330" height="185" />
<span class="overlay"></span>
</div>
</div>
<div class="thumbnail-item">
<a href="#"><img src="images/small3.jpg" class="thumbnail"/></a>
<div class="tooltip">
<img src="images/big3.jpg" alt="" width="330" height="185" />
<span class="overlay"></span>
</div>
</div>
原文地址:http://www.freejs.net/article_jquerytupiantexiao_97.html

相关文章推荐
- jQuery制作鼠标经过显示图片大图,生成图片tips效果
- jquery插件实现鼠标经过图片右侧显示大图的效果(类似淘宝)
- 分享一个jquery插件:实现类似淘宝上鼠标经过图片右侧显示大图的效果
- jQuery-鼠标经过显示大图并跟随鼠标效果插件
- jQuery实现鼠标经过图片预览大图效果
- Jquery实现鼠标放在图片上面显示大图效果
- jQuery实现鼠标经过图片预览大图效果
- jQuery-鼠标经过显示大图并跟随鼠标效果插件
- jQuery实现鼠标经过图片预览大图效果
- jquery小图片左右滚动点击小图切换显示大图
- Hoverbox.--鼠标经过图片显示大图
- 鼠标滑过显示图片大图效果
- jquery左右滚动焦点图banner图片,鼠标经过显示上下页
- 二进制图片信息存入数据库并用gridview显示图片(添加鼠标移到图片上显示大图效果)后台语言vb.net
- 自己写的jQuery放大镜插件效果(一)(采用一张大图和一张小图片的思路)
- 基于jQuery插件实现点击小图显示大图效果
- jquery简单图片切换显示效果实现方法