pxe实现linux的自动安装
2013-08-12 13:25
330 查看
PXE的工作原理
PXE(Preboot Execution Environment,远程引导技术)是RPL(Remote Initial Program Load,远程启动服务)的升级产品。它们的不同之处为:RPL是静态路由,PXE是动态路由。不难理解:RPL是根据网卡上的ID号加上其它的记录组成的一个帧向服务器发出请求,而服务器那里早已经有了这个ID数据,匹配成功则进行远程启动;PXE则是根据服务器端收到的工作站MAC地址(就是网卡号),使用DHCP服务给这个MAC地址指定一个IP地址,每次重启动可能同一台工作站有与上次启动有不同的IP,即动态分配地址。下面以工作站引导过程说明PXE的原理:工作站开机后, PXE BootROM(自启动芯片) 获得控制权之前先做自我测试,然后 以广播形式发出一个请求FIND帧。
如果服务器收到工作站所送出的要求, 就会送回 DHCP 回应, 内容包括用户端的 IP 地址, 预设通讯通道, 及开机映像文件。 否则, 服务器会忽略这个要求。
工作站收到服务器发回的响应后则会回应一个帧,以请求传送启动所需文件。
之后,将有更多的讯息在工作站与服务器之间作应答, 用以决定启动参数。 BootROM 由 TFTP 通讯协议从服务器下载开机映像档, 这个映像档就是软盘的映象文件。
工作站使用TFTP 协议接收启动文件后,将控制权转交启动块,引导操作系统,完成远程启动。
PXE简介
就构架整个网络来说,PXE 非常简便。
就性能价格比来讲,PXE是RPL 的替代品。无盘启动技术进入了Win98的时代。
就适用范围来讲,有盘Win98能延伸到什么地方,也就是这个技术也可以延伸到的地方。
就可维护性讲,PXE的每个工作站的配置都是从公共的Windows目录下读取,删除了,无非是重新启动一次,不用在工作站作任何的动作,系统将自动复原。
应用软件的安装。当你看中某个新的软件,并且打算把它安装在无盘工作站上时,用PXE安装,比如想在无盘Win98中新加一个游戏,或以前没有Office2000,现在要安装Office2000,很简单:用你那个上传的本地硬盘安装好后,上传一下,所有工作站都可以用了。而Win95的应用软件的安装就没有这么简单。
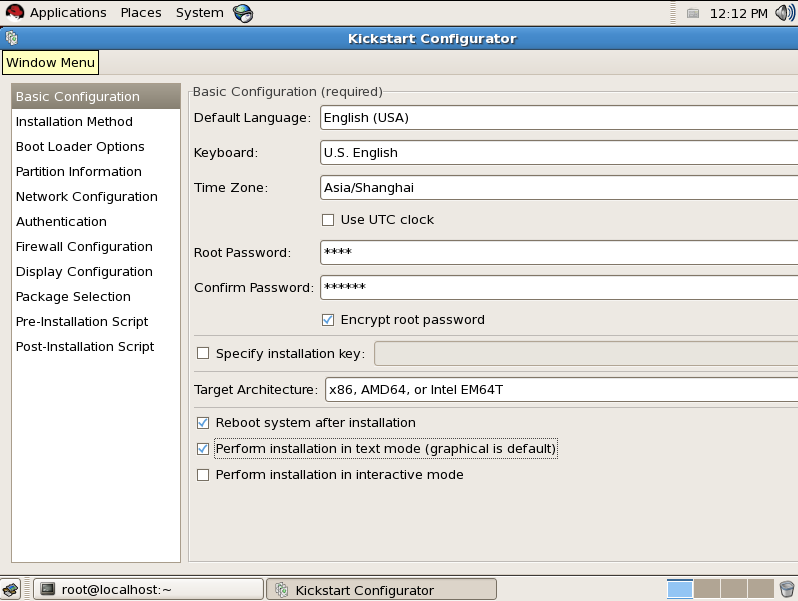
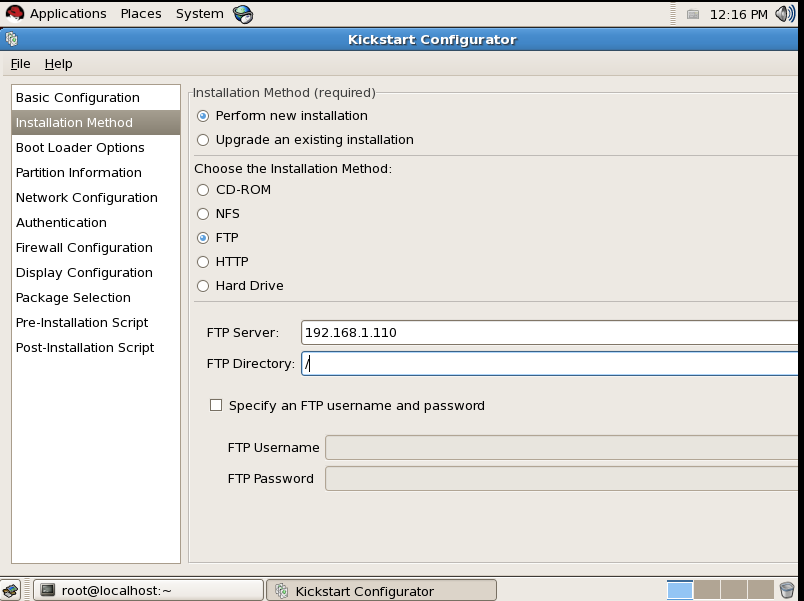
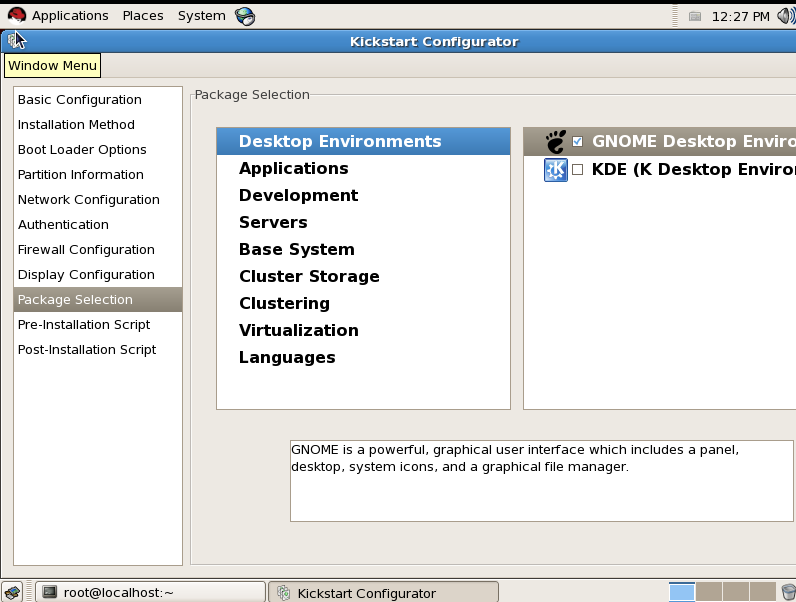
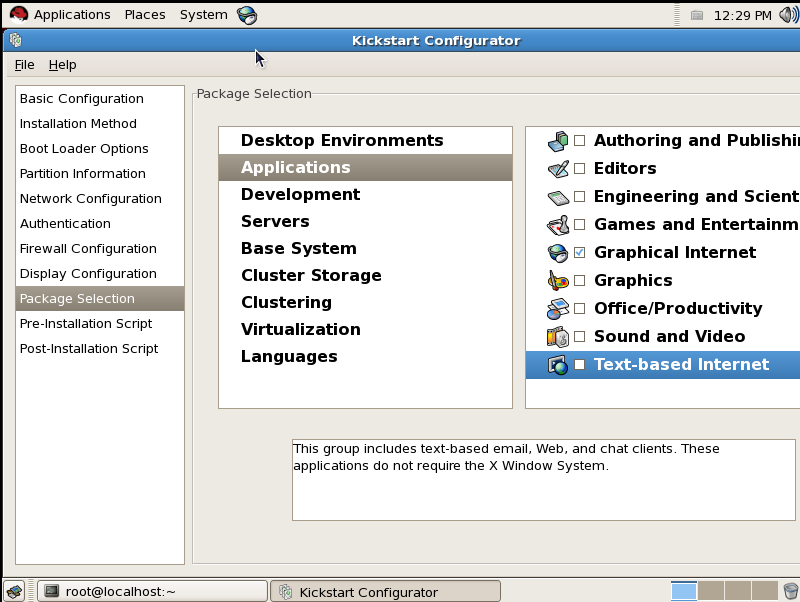
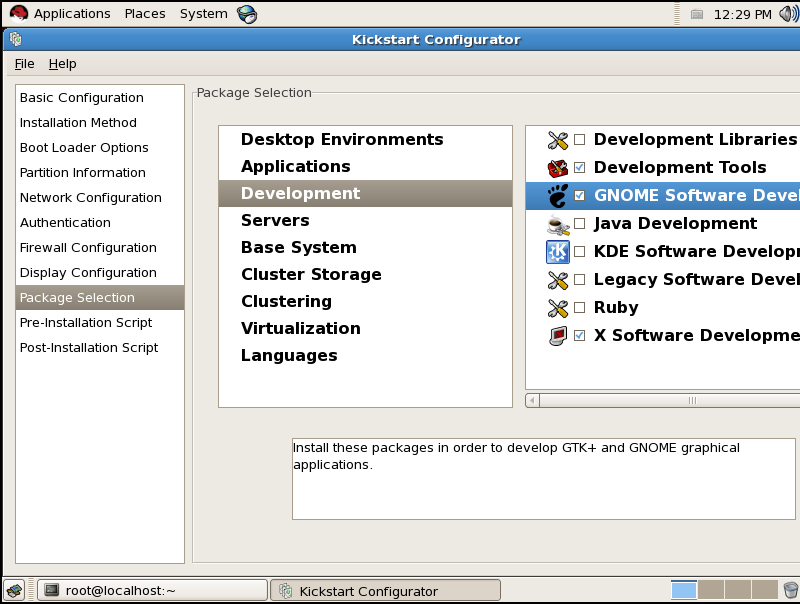
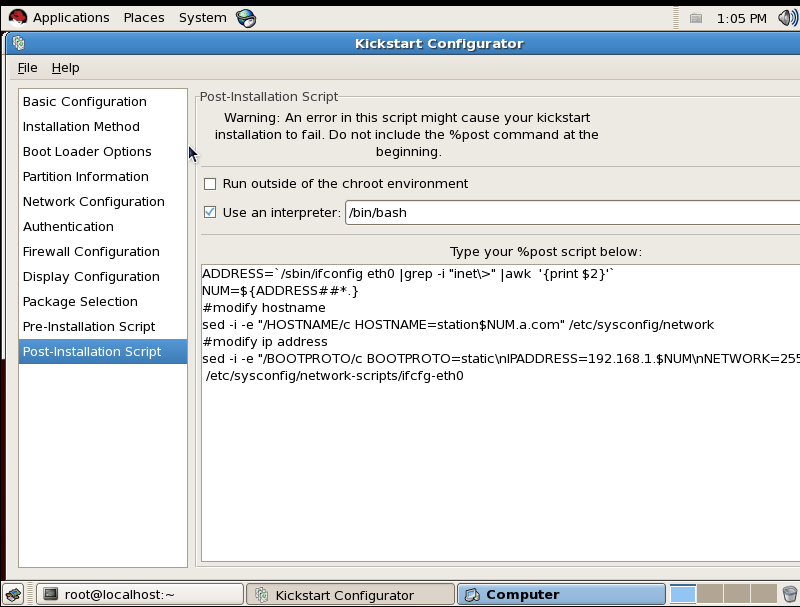
Pxe 实现linux的自动安装实例挂载光盘[root@localhost ~]# mkdir /mnt/cdrom[root@localhost ~]# mount /dev/cdrom /mnt/cdrommount: block device /dev/cdrom is write-protected, mounting read-only安装dhcp服务器 并设置成开机启动[root@localhost ~]# rpm -ivh /mnt/cdrom/Server/dhcp-3.0.5-21.el5.i386.rpm Preparing... ########################################### [100%]package dhcp-3.0.5-21.el5.i386 is already installed[root@localhost ~]# chkconfig dhcpd on安装ftp服务器 并设置开机启动[root@localhost ~]# rpm -ivh /mnt/cdrom/Server/vsftpd-2.0.5-16.el5.i386.rpm Preparing... ########################################### [100%]package vsftpd-2.0.5-16.el5.i386 is already installed[root@localhost ~]# chkconfig vsftpd on配置dhcp服务器[root@localhost ~]# vim /etc/dhcpd.conf ## DHCP Server Configuration file.# see /usr/share/doc/dhcp*/dhcpd.conf.sample ddns-update-style interim;ignore client-updates;subnet 192.168.1.0 netmask 255.255.255.0 {# --- default gateway option routers 192.168.1.254; option subnet-mask 255.255.255.0; option domain-name-servers 222.88.88.88; range dynamic-bootp 192.168.1.2 192.168.1.253; default-lease-time 21600; max-lease-time 43200; # we want the nameserver to appear at a fixed address host ns { next-server marvin.redhat.com; hardware ethernet 12:34:56:78:AB:CD; fixed-address 207.175.42.254; }重启dhcp服务器[root@localhost ~]# service dhcpd restartShutting down dhcpd: [ OK ]Starting dhcpd: [ OK ]编辑tftp文件[root@localhost ~]# vim /etc/xinetd.d/tftp# default: off# description: The tftp server serves files using the trivial file transfer \# protocol. The tftp protocol is often used to boot diskless \# workstations, download configuration files to network-aware printers, \# and to start the installation process for some operating systems.service tftp{ socket_type = dgram protocol = udp wait = yes单进程 如果为no 则为多进程 user = root server = /usr/sbin/in.tftpd server_args = -s /tftpboot disable = no 唤醒的状态 per_source = 11每个来源最多可以和本台机器建立11个连接 cps = 100 2 flags = IPv4}重启超级守候进程[root@localhost ~]# service xinetd restartStopping xinetd: [ OK ]Starting xinetd: [ OK ]查看日志看是否出现错误[root@localhost ~]# tail -f /var/log/messages Aug 9 08:36:48 localhost dhcpd: DHCPOFFER on 192.168.1.252 to 00:0c:29:68:fc:29 via eth0Aug 9 08:36:51 localhost dhcpd: DHCPDISCOVER from 00:0c:29:68:fc:29 via eth0Aug 9 08:36:51 localhost dhcpd: DHCPOFFER on 192.168.1.252 to 00:0c:29:68:fc:29 via eth0Aug 9 08:36:58 localhost dhcpd: DHCPDISCOVER from 00:0c:29:68:fc:29 via eth0Aug 9 08:36:58 localhost dhcpd: DHCPOFFER on 192.168.1.252 to 00:0c:29:68:fc:29 via eth0Aug 9 08:37:12 localhost dhcpd: DHCPDISCOVER from 00:0c:29:68:fc:29 via eth0Aug 9 08:37:12 localhost dhcpd: DHCPOFFER on 192.168.1.252 to 00:0c:29:68:fc:29 via eth0Aug 9 08:38:16 localhost xinetd[2925]: Exiting...Aug 9 08:38:16 localhost xinetd[4355]: xinetd Version 2.3.14 started with libwrap loadavg labeled-networking options compiled in.Aug 9 08:38:16 localhost xinetd[4355]: Started working: 1 available service把启动需要的内核和驱动拷贝到tftp的根目录下[root@localhost tftpboot]# cd /[root@localhost /]# cd tftpboot/[root@localhost tftpboot]# cp /mnt/cdrom/images/pxeboot/initrd.img ./[root@localhost tftpboot]# cp /mnt/cdrom/images/pxeboot/vmlinuz ./查看拷贝是否成功[root@localhost tftpboot]# lltotal 8536-r--r--r-- 1 root root 6855881 Aug 9 08:52 initrd.imgdrwxr-xr-x 4 root root 4096 Aug 8 19:39 linux-install-r--r--r-- 1 root root 1855956 Aug 9 08:53 vmlinuz考呗引导文件到当前目录[root@localhost tftpboot]# cp /usr/lib/syslinux/pxelinux.0 ./[root@localhost tftpboot]# lltotal 8552-r--r--r-- 1 root root 6855881 Aug 9 08:52 initrd.imgdrwxr-xr-x 4 root root 4096 Aug 8 19:39 linux-install-rw-r--r-- 1 root root 13148 Aug 9 09:00 pxelinux.0-r--r--r-- 1 root root 1855956 Aug 9 08:53 vmlinuz在当前目录建一个文件夹放置配置文件,把所需要的配置文件拷贝到当前目录下并命名为default[root@localhost tftpboot]# cp /mnt/cdrom/isolinux/isolinux.cfg pxelinux.cfg/default[root@localhost tftpboot]# lltotal 8556-r--r--r-- 1 root root 6855881 Aug 9 08:52 initrd.imgdrwxr-xr-x 4 root root 4096 Aug 8 19:39 linux-install-rw-r--r-- 1 root root 13148 Aug 9 09:00 pxelinux.0drwxr-xr-x 2 root root 4096 Aug 10 09:58 pxelinux.cfg-r--r--r-- 1 root root 1855956 Aug 9 08:53 vmlinuz对pxe的配置文件进行修改[root@localhost tftpboot]# cd pxelinux.cfg[root@localhost pxelinux.cfg]# lltotal 4-r-xr-xr-x 1 root root 366 Aug 10 09:58 default[root@localhost pxelinux.cfg]# vim default default linuxdefault linuxprompt 1timeout 6display boot.msgdefault linuxprompt 1timeout 6display boot.msgF1 boot.msgF2 options.msgF3 general.msgF4 param.msgF5 rescue.msglabel linux kernel vmlinuz append ks=ftp://192.168.1.110/ks.cfg initrd=initrd.imglabel text kernel vmlinuz append initrd=initrd.img textlabel ks kernel vmlinuz append cfg initrd=initrd.imglabel local localboot 1label memtest86 kernel memtest append -修改dhcp的配置文件 指明ftp服务器的ip地址和引导文件[root@localhost pxelinux.cfg]# cd[root@localhost ~]# vim /etc/dhcpd.conf## DHCP Server Configuration file.# see /usr/share/doc/dhcp*/dhcpd.conf.sample ddns-update-style interim;ignore client-updates;subnet 192.168.1.0 netmask 255.255.255.0 {# --- default gateway option routers 192.168.1.254; option subnet-mask 255.255.255.0; option domain-name-servers 222.88.88.88; next-server 192.168.1.110; filename "pxelinux.0"; range dynamic-bootp 192.168.1.2 192.168.1.253; default-lease-time 21600; max-lease-time 43200; # we want the nameserver to appear at a fixed address host ns { next-server marvin.redhat.com; hardware ethernet 12:34:56:78:AB:CD; fixed-address 207.175.42.254; }}#把光盘上的所有文件拷贝到ftp的 /var/ftp文件下[root@localhost ~]# cd /var/ftp[root@localhost ftp]# cp -r /mnt/cdrom/. ./利用脚本为每一个得到 ip地址的主机配置一个主机名 脚本名称为jiaoben.sh[root@localhost ftp]# vim jiaoben.sh#!/bin/bashADDRESS=`/sbin/ifconfig eth0 |grep -i "inet\>" |awk '{print $2}'`NUM=${ADDRESS##*.}#modify hostnamesed -i -e "/HOSTNAME/c HOSTNAME=station$NUM.a.com" /etc/sysconfig/network#modify ip addresssed -i -e "/BOOTPROTO/c BOOTPROTO=static\nIPADDRESS=192.168.1.$NUM\nNETWORK=255.255.255.0" /etc/sysconfig/network-scripts/ifcfg-eth0~ 配置yum服务器[root@localhost ~]# vim /etc/yum.repos.d/rhel-debuginfo.repo [rhel-server]name=Red Hat Enterprise Linux serverbaseurl=file:///mnt/cdrom/Serverenabled=1gpgcheck=1gpgkey=file:///mnt/cdrom/RPM-GPG-KEY-redhat-release[rhel-vt]name=Red Hat Enterprise Linux vtbaseurl=file:///mnt/cdrom/VTenabled=1gpgcheck=1gpgkey=file:///mnt/cdrom/RPM-GPG-KEY-redhat-release[rhel-cluster]name=Red Hat Enterprise Linux clusterbaseurl=file:///mnt/cdrom/Clusterenabled=1gpgcheck=1用yum安装kick软件包[root@localhost ~]# yum list all |grep kickThis system is not registered with RHN.RHN support will be disabled.pykickstart.noarch 0.43.5-1.el5 rhel-server system-config-kickstart.noarch 2.6.19.8-2.el5 rhel-server [root@localhost ~]# yum install system-config-kickstart -yLoaded plugins: rhnplugin, securityThis system is not registered with RHN.RHN support will be disabled.Setting up Install ProcessResolving Dependencies--> Running transaction check---> Package system-config-kickstart.noarch 0:2.6.19.8-2.el5 set to be updated--> Processing Dependency: pykickstart for package: system-config-kickstart--> Running transaction check---> Package pykickstart.noarch 0:0.43.5-1.el5 set to be updated--> Finished Dependency ResolutionDependencies Resolved============================================================== Package Arch Version Repository Size==============================================================Installing: system-config-kickstart noarch 2.6.19.8-2.el5 rhel-server 985 kInstalling for dependencies: pykickstart noarch 0.43.5-1.el5 rhel-server 128 kTransaction Summary==============================================================Install 2 Package(s) Update 0 Package(s) Remove 0 Package(s) Total download size: 1.1 MDownloading Packages:--------------------------------------------------------------Total 14 MB/s | 1.1 MB 00:00 Running rpm_check_debugRunning Transaction TestFinished Transaction TestTransaction Test SucceededRunning Transaction Installing : pykickstart 1/2 Installing : system-config-kickstart 2/2 Installed: system-config-kickstart.noarch 0:2.6.19.8-2.el5 Dependency Installed: pykickstart.noarch 0:0.43.5-1.el5 Complete!启用kick[root@localhost ~]# system-config-kickstart 查看一下刚刚的设置并加入如下命令[root@localhost ~]# vim ks.cfg 1 #platform=x86, AMD64, or Intel EM64T 2 # System authorization information 3 auth --useshadow --enablemd5 4 # System bootloader configuration 5 key --skip 6 bootloader --append="quiet" --location=mbr 7 # Clear the Master Boot Record 8 zerombr 9 # Partition clearing information 10 clearpart --all --initlabel 11 # Use text mode install 12 text 13 # Firewall configuration 14 firewall --disabled 15 # Run the Setup Agent on first boot 16 firstboot --disable 17 # System keyboard 18 keyboard us 19 # System language 20 lang en_US 21 # Installation logging level


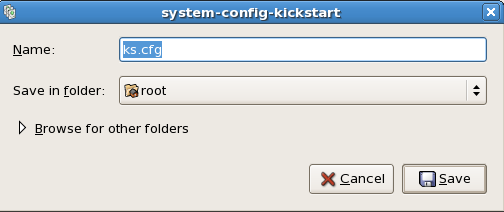
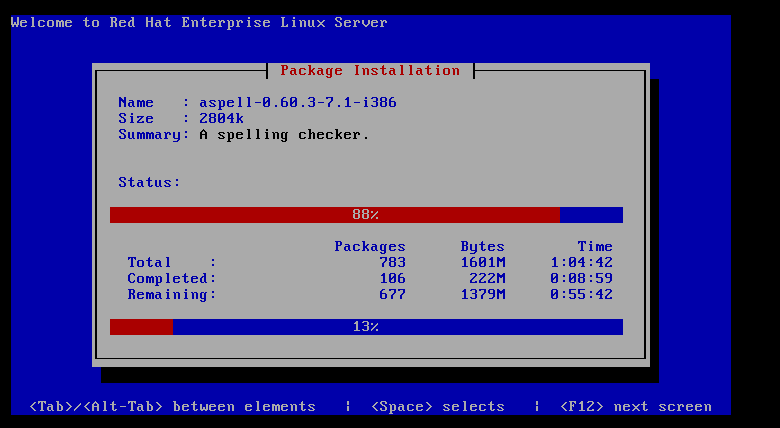
把ks.cfg拷贝到ftp的根目录下[root@localhost ~]# cp ks.cfg /var/ftp/重启ftp和dhcp现在去开启一台新的机器吧 可以看到你的机器已经自己安装了

相关文章推荐
- 利用PXE技术实现Linux操作系统的自动安装
- linux中实现pxe的自动安装
- linux下PXE和KickStart实现Linux下的自动安装
- 使用RHEL6.4部署PXE+kickstart,实现自动安装linux系统
- Kickstart+HTTP+DHCP+TFTP+PXElinux实现RedHat的网络自动安装
- PXE实现linux的自动安装
- PXE实现Linux的自动安装
- PXE+DHCP+TFTP+VSFTP+NFS 实现linux通过网络自动安装
- DHCP+TFTP+VSFTP+pxelinux+kickstart实现RedHat的自动安装
- FTP+DHCP+TFTP+PXElinux实现RHLINUX的网络自动安装
- 在linux中使用pxe实现自动安装
- Linux—图解PXE实现全自动安装系统(1)
- Kickstart+HTTP+DHCP+TFTP+PXElinux实现RedHat的网络自动安装
- Kickstart+NFS+DHCP+TFTP+PXElinux实现CentOS的网络自动安装
- 基于PXE实现全自动安装Linux
- PXE实现Linux的自动安装 推荐
- Kickstart+HTTP+DHCP+TFTP+PXElinux实现RedHat的网络自动安装
- Linux—图解PXE实现全自动安装系统(2)
- Kickstart+NFS+DHCP+TFTP+PXElinux实现CentOS的网络自动安装
- Kickstart+NFS+DHCP+TFTP+PXElinux实现CentOS的网络自动安装