iOS学习之UINavigationController详解与使用(一)添加UIBarButtonItem
2012-06-21 11:10
591 查看
1、UINavigationController导航控制器如何使用
UINavigationController可以翻译为导航控制器,在iOS里经常用到。
我们看看它的如何使用:
下面的图显示了导航控制器的流程。最左侧是根视图,当用户点击其中的General项时 ,General视图会滑入屏幕;当用户继续点击Auto-Lock项时,Auto-Lock视图将滑入屏幕。相应地,在对象管理上,导航控制器使用了导航堆栈。根视图控制器在堆栈最底层,接下来入栈的是General视图控制器和Auto-Lock视图控制器。可以调用pushViewControllerAnimated:方法将视图控制器推入栈顶,也可以调用popViewControllerAnimated:方法将视图控制器弹出堆栈。
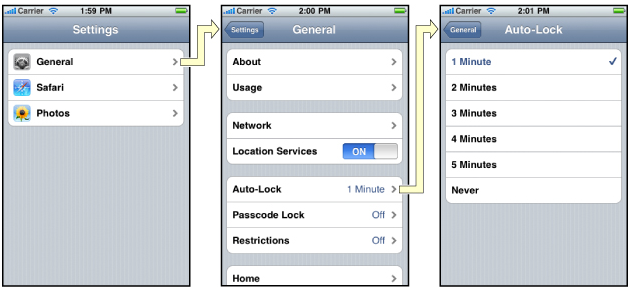
上图来自苹果官网。
2、UINavigationController的结构组成
看下图,UINavigationController有Navigation bar ,Navigation View ,Navigation toobar等组成。

现在我们建立一个例子,看看如何使用UINavigationController
3、新建一个项目
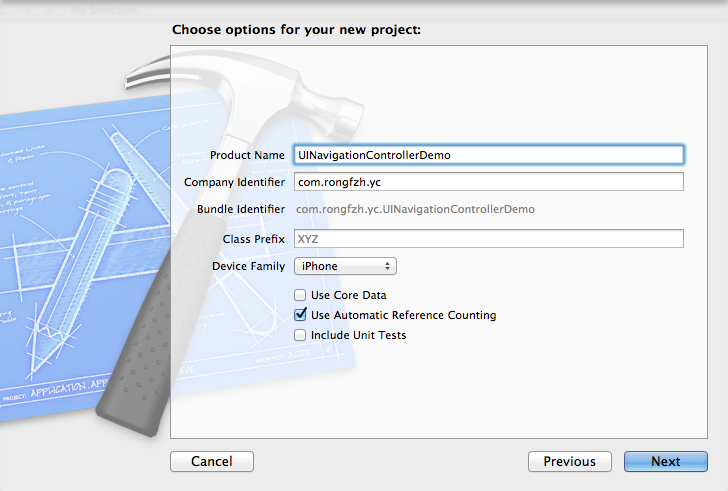
命名为UINavigationControllerDemo,为了更好理解UINavigationController,我们选择Empty Application模板
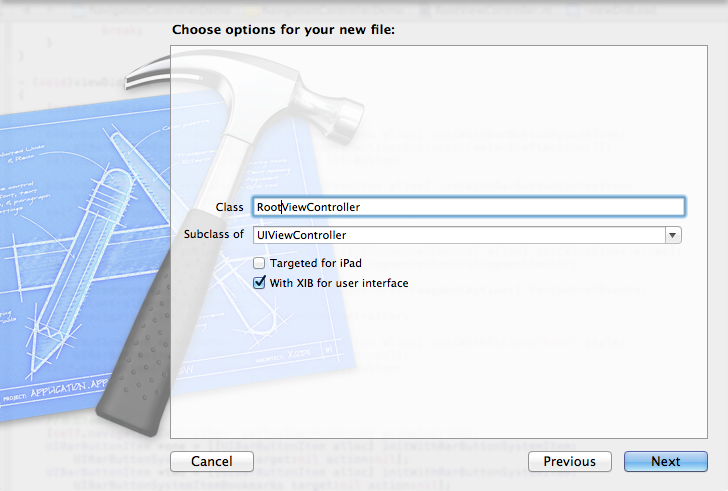
4、创建一个View Controller,命名为RootViewController:依次选择File——New——New File,默认勾上With XIB for user interface.
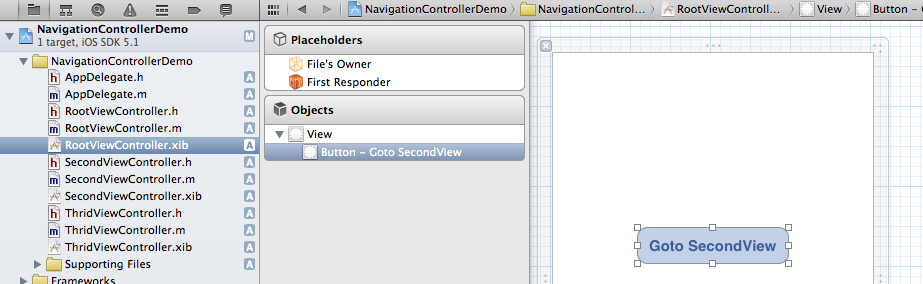
选择正确位置创建完成,这时项目里多了三个文件,分别是RootViewController.h RootViewController.m RootViewController.xib文件。
打开RootViewController.xib,添加一个按钮控件,按钮Button改成 :Goto SecondView,为跳转做准备
5、打开AppDelegate.h,向其中添加属性:
添加后AppDelegate.h文件代码如下:
6、在AppDelegate.m 文件的didFinishLaunchingWithOptions方法中创建添加navController,RootViewController视图。
7、现在Root视图添加完成看看效果:
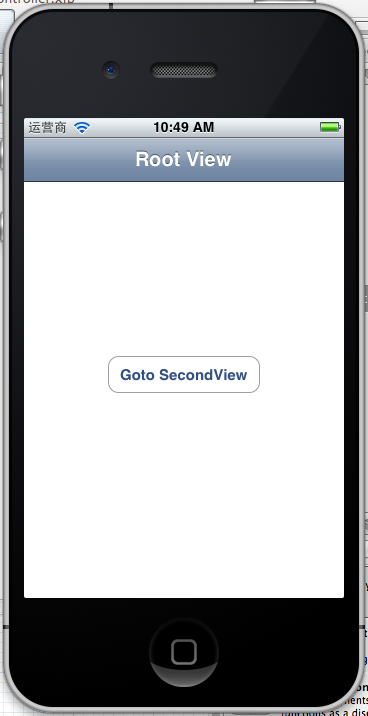
'
现在还没有Navigation bar 。只有title。8、添加UIBarButtonItembar ButtonItem分左右UIBarButtonItem。我们把左右的都添加上去。在RootViewController.m中添加代码如下:

这里重点介绍下
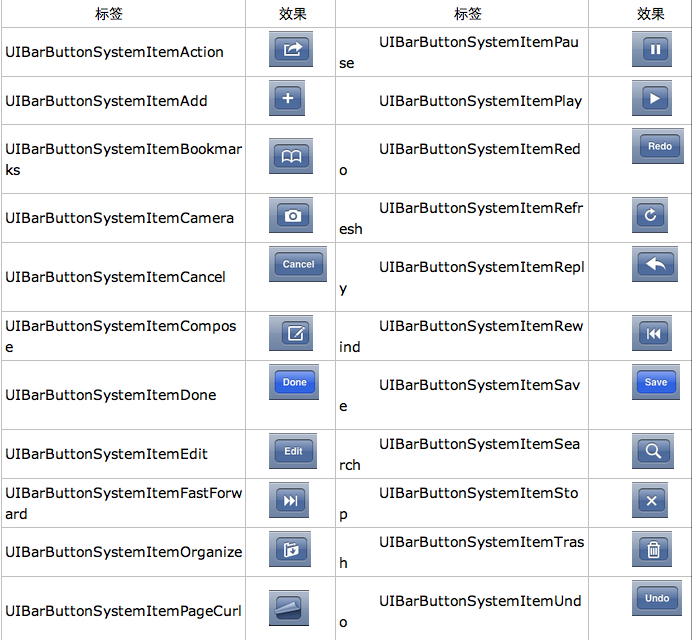
UIBarButtonItem *leftButton = [[UIBarButtonItemalloc]initWithBarButtonSystemItem:UIBarButtonSystemItemActiontarget:selfaction:@selector(selectLeftAction:)];UIBarButtonSystemItemAction的风格,这是系统自带的按钮风格,看下图,你不用一个个试验,你也知道想用那个item,如下图:
9、响应UIBarButtonItem的事件的实现我们在 action:@selector(selectLeftAction:);action添加了selectLeftAction和selectRightAction在RootViewController.m文件中添加代码实现:
这篇先讲添加UIBarButtonItem,下篇讲解页面跳转和添加UISegmentedControl下篇:iOS学习之UINavigationController详解与使用(二)页面切换和segmentedController
例子代码:https://github.com/schelling/YcDemo著作权声明:本文由http://blog.csdn.net/totogo2010/原创,欢迎转载分享。请尊重作者劳动,转载时保留该声明和作者博客链接,谢谢
UINavigationController可以翻译为导航控制器,在iOS里经常用到。
我们看看它的如何使用:
下面的图显示了导航控制器的流程。最左侧是根视图,当用户点击其中的General项时 ,General视图会滑入屏幕;当用户继续点击Auto-Lock项时,Auto-Lock视图将滑入屏幕。相应地,在对象管理上,导航控制器使用了导航堆栈。根视图控制器在堆栈最底层,接下来入栈的是General视图控制器和Auto-Lock视图控制器。可以调用pushViewControllerAnimated:方法将视图控制器推入栈顶,也可以调用popViewControllerAnimated:方法将视图控制器弹出堆栈。
上图来自苹果官网。
2、UINavigationController的结构组成
看下图,UINavigationController有Navigation bar ,Navigation View ,Navigation toobar等组成。
现在我们建立一个例子,看看如何使用UINavigationController
3、新建一个项目
命名为UINavigationControllerDemo,为了更好理解UINavigationController,我们选择Empty Application模板
4、创建一个View Controller,命名为RootViewController:依次选择File——New——New File,默认勾上With XIB for user interface.
选择正确位置创建完成,这时项目里多了三个文件,分别是RootViewController.h RootViewController.m RootViewController.xib文件。
打开RootViewController.xib,添加一个按钮控件,按钮Button改成 :Goto SecondView,为跳转做准备
5、打开AppDelegate.h,向其中添加属性:
@property (strong, nonatomic) UINavigationController *navController;
添加后AppDelegate.h文件代码如下:
#import <UIKit/UIKit.h>

@class ViewController;

@interface AppDelegate : UIResponder <UIApplicationDelegate>

@property (strong, nonatomic) UIWindow *window;

@property (strong, nonatomic) ViewController *viewController;

@property (strong, nonatomic) UINavigationController *navController;
@end
6、在AppDelegate.m 文件的didFinishLaunchingWithOptions方法中创建添加navController,RootViewController视图。
- (BOOL)application:(UIApplication *)application didFinishLaunchingWithOptions:(NSDictionary *)launchOptions
{
    self.window = [[UIWindow alloc] initWithFrame:[[UIScreen mainScreen] bounds]];
    RootViewController *rootView = [[RootViewController alloc] init];
    rootView.title = @"Root View";

    self.navController = [[UINavigationController alloc] init];
    [self.navController pushViewController:rootView animated:YES];
    [self.window addSubview:self.navController.view];
    [self.window makeKeyAndVisible];
    return YES;
}
给rootView的titie命名为 Root View,好识别View直接的切换关系。用pushViewController把rootView加入到navController的视图栈中。7、现在Root视图添加完成看看效果:
'
现在还没有Navigation bar 。只有title。8、添加UIBarButtonItembar ButtonItem分左右UIBarButtonItem。我们把左右的都添加上去。在RootViewController.m中添加代码如下:
- (void)viewDidLoad
{
    [super viewDidLoad];

    UIBarButtonItem *leftButton = [[UIBarButtonItem alloc] initWithBarButtonSystemItem:UIBarButtonSystemItemAction target:self action:@selector(selectLeftAction:)];
    self.navigationItem.leftBarButtonItem = leftButton;

    UIBarButtonItem *rightButton = [[UIBarButtonItem alloc] initWithBarButtonSystemItem:UIBarButtonSystemItemAdd  target:self action:@selector(selectRightAction:)];
self.navigationItem.rightBarButtonItem = rightButton;}这样添加了UIBarButtonItem了,效果如下:这里重点介绍下
UIBarButtonItem *leftButton = [[UIBarButtonItemalloc]initWithBarButtonSystemItem:UIBarButtonSystemItemActiontarget:selfaction:@selector(selectLeftAction:)];UIBarButtonSystemItemAction的风格,这是系统自带的按钮风格,看下图,你不用一个个试验,你也知道想用那个item,如下图:
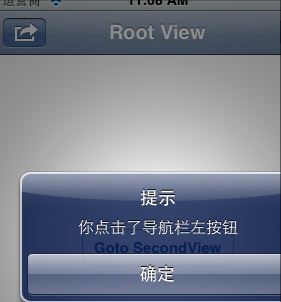
9、响应UIBarButtonItem的事件的实现我们在 action:@selector(selectLeftAction:);action添加了selectLeftAction和selectRightAction在RootViewController.m文件中添加代码实现:
-(void)selectLeftAction:(id)sender
{
    UIAlertView *alter = [[UIAlertView alloc] initWithTitle:@"提示" message:@"你点击了导航栏左按钮" delegate:self  cancelButtonTitle:@"确定" otherButtonTitles:nil, nil];
    [alter show];
}

-(void)selectRightAction:(id)sender
{
    UIAlertView *alter = [[UIAlertView alloc] initWithTitle:@"提示" message:@"你点击了导航栏右按钮" delegate:self  cancelButtonTitle:@"确定" otherButtonTitles:nil, nil];
    [alter show];
}这样在点击左右的UIBarButtonItem时,弹出提示:这篇先讲添加UIBarButtonItem,下篇讲解页面跳转和添加UISegmentedControl下篇:iOS学习之UINavigationController详解与使用(二)页面切换和segmentedController
例子代码:https://github.com/schelling/YcDemo著作权声明:本文由http://blog.csdn.net/totogo2010/原创,欢迎转载分享。请尊重作者劳动,转载时保留该声明和作者博客链接,谢谢

相关文章推荐
- iOS学习之UINavigationController详解与使用(一)添加UIBarButtonItem
- iOS学习之UINavigationController详解与使用(一)添加UIBarButtonItem
- iOS学习之UINavigationController详解与使用(一)添加UIBarButtonItem
- iOS学习之UINavigationController详解与使用(一)添加UIBarButtonItem
- IOS学习之UINavigationController详解与使用(一)添加UIBarButtonItem
- iOS学习之UINavigationController详解与使用(一)添加UIBarButtonItem
- IOS学习之UINavigationController详解与使用:添加UIBarButtonItem
- IOS学习之UINavigationController详解与使用:添加UIBarButtonItem
- IOS学习之UINavigationController详解与使用(一)添加UIBarButtonItem
- (转载)IOS学习之UINavigationController详解与使用:添加UIBarButtonItem
- iOS学习之UINavigationController详解与使用(一)添加UIBarButtonItem
- iOS学习之UINavigationController详解与使用(一)添加UIBarButtonItem
- iOS学习之UINavigationController详解与使用(一)添加UIBarButtonItem
- iOS学习之UINavigationController详解与使用(一)添加UIBarButtonItem
- iOS学习之UINavigationController详解与使用(一)添加UIBarButtonItem
- (转)IOS学习之UINavigationController详解与使用(一)添加UIBarButtonItem
- iOS学习之UINavigationController详解与使用(一)添加UIBarButtonItem
- iOS学习之UINavigationController详解与使用(一)添加UIBarButtonItem
- iOS学习之UINavigationController详解与使用(一)添加UIBarButtonItem
- iOS学习之UINavigationController详解与使用(一)添加UIBarButtonItem