Firefox扩展开发初级教程——开发一个简单的扩展
2012-04-06 19:35
537 查看
作为一篇初学者教程,一般第一个扩展都是hello world扩展,我的例子也不例外,也是一个hello world扩展,但是本扩展要实现的功能不是弹出一个对话框显示hello world。而是实现重启Firefox这个功能。为什么要以这样一个功能为例子呢?因为在开发扩展过程中,我们每次对扩展中的文件作出了修改之后,想看看效果都必须重启Firefox。按照上一篇文章那样建立一个bat文件虽然很方便,但是每次都需要先关闭用于调试的Firefox以及其打开的所有子窗口,然后再双击那个bat文件。有了这个重启Firefox的功能,下次我们调试扩展的时候只需要简单的点击一下这个重启的按钮或者菜单项就OK了。虽然功能简单,但对于扩展开发者非常实用。下面介绍如何一步一步的创建这个重启扩展。
注意,在扩展开发中所有的文件尽量都保存为UTF-8编码格式,特别是本地化所使用到的文件。
content restartfirefox chrome/content/
skin restartfirefox classic/1.0 chrome/skin/
locale restartfirefox en-US chrome/locale/en-US/
这样写之后如果要引用content目录下的a.xul文件则可以用:chrome://restartfirefox/content/a.xul;如果要引用skin目录下的b.css则可以用:chrome://restartfirefox/skin/b.css。
注意skin和locale程序包都包含四个部分,而content包只有三个部分。locale程序包比较特殊,可以定义多个locale包,如在上述定义之后还可以加上如下内容:locale restartfirefox zh-CN chrome/locale/zh-CN/这样如果locale/zh-CN/和locale/en-US/中都有一个c.dtd文件,我们只需要使用chrome://restartfirefox/locale/c.dtd,Firefox就会根据用户的locale自动选择使用en-US或者zh-CN中的c.dtd文件了。
第二个功能就是指定叠加目标,指令为overlay,示例如下:
overlay chrome://browser/content/browser.xul chrome://restartfirefox/content/restartOverlay.xul
overlay指令包括三个部分,第一部分是overlay指令,第二部分是目标XUL文件的chrome URL第三部分是我们创建的XUL文件的chrome URL。上述指令的意思是将我们在content目录建立的restartOverlay.xul文件叠加到浏览器上。
chrome.manifest文件中还可以包含其他指令如:style、component等指令,我们这个例子不需要这些。
下面是本例的chrome.manifest文件的完整内容:
10之后才有的一个属性。
可选属性中比较常用的包括name、description、creator、homepageURL、iconURL。根据需要可以选择optionURL指定选项面板的xul文件和aboutURL指定关于面板的URL。
可以有本地化描述,使用localized属性,注意如果使用localized请确保文件编码为UTF-8。
本例的install.rdf文件完整内容如下:
这里,本地化字符串只有重启按钮的提示文字,我们在zh-CN中的restart.dtd中保存内容:<!ENTITY Restart "重新启动">。在en-US中的restart.dtd保存内容:<!ENTITY Restart "Restart">。实际中一般是需要使用一个本地化字符串的时候创建,当然我习惯首先创建zh-CN的,全部完成之后将其复制到en-US中,并将所有实体翻译成英文的。这两个文件必须为UTF-8编码。
下面来写restartOverlay.xul中的内容,XUL文件的基本框架如下:
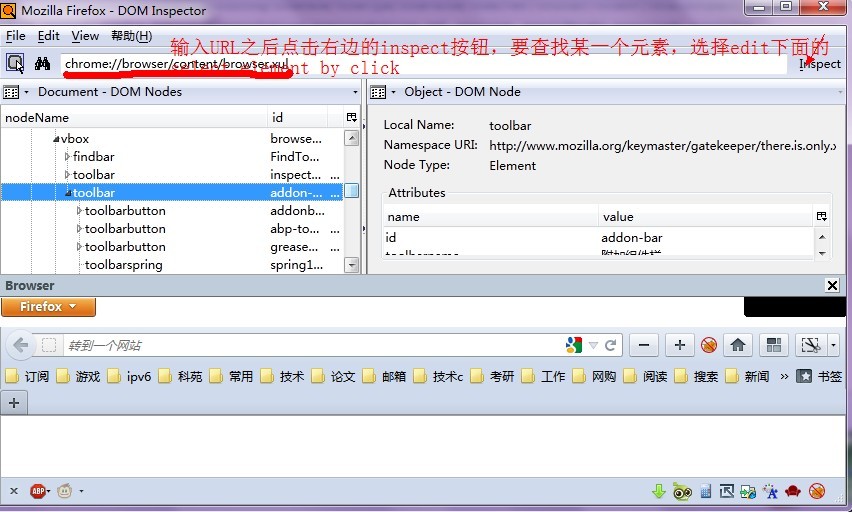
我们使用与Firefox的browser.xul文件中定义的toolbarpalette的id,这样我们创建的按钮就会叠加到浏览器中定制工具栏里面。要获得浏览器窗口上的元素的id就可以用DOM inspector来查看了,也可以参考其使用的CSS样式等等。DOM inspector还可以分析网页的DOM结构。我们使用的XUL代码如下:
Tooltiptext和label都使用dtd文件中定义的Restart实体。如果要将这个按钮直接添加到附加组件栏,可以发现附加组件栏的id是addon-bar。如图:
我们可以像下面这样写:
XUL文件的完整内容如下:
下面来编辑实现功能的js文件。实现重启Firefox需要调用XPCOM的服务,js代码如下所示:
Js代码不详细解释了,如果你将function中的内容改为alert(“hello world”);这个扩展就成了名副其实的hello world扩展了。到这里,还剩最后的css文件没写了,我们来简单的写一个css文件,为按钮设置一个图标。css文件的内容为:
这就是开发扩展的整个过程。与扩展开发相关的技术XUL、JS、CSS、XPCOM、DOM我都不在这里介绍了,学习Firefox扩展的开发的过程中自然就会找到很好的资料,慢慢学习慢慢实践就可以掌握了。最后介绍一下如何运行或者调试自己开发的扩展。
运行扩展,我最开始接触的就是打包为xpi文件然后拖到Firefox中安装、重启Firefox。这个过程很浪费时间,不值得扩展开发者在开发过程中使用,但是我在开始的时候确实用的是这种方式。因为不知道有其他更好的方式。
第二种方式是将扩展的id作为文件夹名称,比如前面这个例子就使用restart@restartfirefox.org为文件夹名称。将这个文件夹放到profile中extensions目录下,这种方式高级一些,但是为了防止Firefox中移除扩展时误操作将文件删除了找不回来。我首先是在其他地方写好或者修改,然后将文件夹拖到extensions目录下,然后重启Firefox看效果。这种方式是目前为止我使用的时间最长的方式。但这个也不是最方便的。前段时间翻译附加组件开发者指南的过程中才发现最实用的方式。
最后一种方式,也是我现在认为最好的方式。在profile中extensions目录下建立一个文件,名称也是扩展的id,其内容是扩展的路径。如,我们这个例子restart@restartfirefox.org文件(没有后缀,id是什么就命名为什么)的内容就为:D:\extensions\restart。这样一来实际文件不用放在extensions文件夹中,就算在Firefox中移除了这个扩展。也只是删除了restart@restartfirefox.org这个文件,不会影响真正的文件。要重新安装这个扩展只需要先将profile中extensions目录下的文件删除,重启Firefox之后再从回收站还原,再重启Firefox即可。
不想下载老版本来调试XUL文件,首先就要有如上所述的一个类似的hello world扩展,假设用上述例子来调试XUL文件,我们在content目录下建立了一个XUL文件为test.xul,在按钮的响应函数中,使用这样的代码:
如果test.xul没有错误,Firefox就可以打开test.xul文件了,有错误则会提示哪里出错了。个人感觉是个不错的方法。如果是对话框,也可以使用window.openDialog(),这些方法的具体使用请参考相关reference。
要调试js代码可以使用firebug或者venkman。对于调试js代码我没有比较好的经验。对Firebug的使用也不怎么熟悉,venkman从没使用过。
注:本教程的xpi包请到我的资源中下载,免积分。
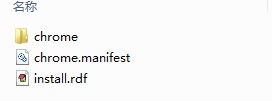
建立文件结构
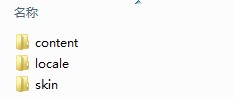
建立一个名为restart的文件夹,其内建立一个文件夹chrome以及两个文件:chrome.manifest和install.rdf;我们建立标准的文件结构,在chrome文件夹中新建三个文件夹:content、locale、skin。如下所示:注意,在扩展开发中所有的文件尽量都保存为UTF-8编码格式,特别是本地化所使用到的文件。
编辑配置文件
文件结构建立好之后,就要对配置文件进行编辑了,编辑之前请想好自己要使用的package名称以及准备使用的ID,这里以package名称restartfirefox和ID:restart@restartfirefox.org为例。我们先来看chrome.manifest文件该如何编辑。chrome.manifest文件
chrome.manifest文件有两个功能,一个功能是指定各种程序包的相对路径,另一个功能是指定扩展中的XUL文件叠加到哪个已有的XUL上。我们建立标准的结构,因此首先指定三个程序包的路径,内容如下:content restartfirefox chrome/content/
skin restartfirefox classic/1.0 chrome/skin/
locale restartfirefox en-US chrome/locale/en-US/
这样写之后如果要引用content目录下的a.xul文件则可以用:chrome://restartfirefox/content/a.xul;如果要引用skin目录下的b.css则可以用:chrome://restartfirefox/skin/b.css。
注意skin和locale程序包都包含四个部分,而content包只有三个部分。locale程序包比较特殊,可以定义多个locale包,如在上述定义之后还可以加上如下内容:locale restartfirefox zh-CN chrome/locale/zh-CN/这样如果locale/zh-CN/和locale/en-US/中都有一个c.dtd文件,我们只需要使用chrome://restartfirefox/locale/c.dtd,Firefox就会根据用户的locale自动选择使用en-US或者zh-CN中的c.dtd文件了。
第二个功能就是指定叠加目标,指令为overlay,示例如下:
overlay chrome://browser/content/browser.xul chrome://restartfirefox/content/restartOverlay.xul
overlay指令包括三个部分,第一部分是overlay指令,第二部分是目标XUL文件的chrome URL第三部分是我们创建的XUL文件的chrome URL。上述指令的意思是将我们在content目录建立的restartOverlay.xul文件叠加到浏览器上。
chrome.manifest文件中还可以包含其他指令如:style、component等指令,我们这个例子不需要这些。
下面是本例的chrome.manifest文件的完整内容:
content restartfirefox chrome/content/
skin restartfirefox classic/1.0 chrome/skin/
locale restartfirefox en-US chrome/locale/en-US/
locale restartfirefox zh-CN chrome/locale/zh-CN/

overlay chrome://browser/content/browser.xul chrome://restartfirefox/content/restartOverlay.xul
install.rdf文件
基本结构如下:<?xml version="1.0"?> <RDF xmlns="http://www.w3.org/1999/02/22-rdf-syntax-ns#" xmlns:em="http://www.mozilla.org/2004/em-rdf#"> <Description about="urn:mozilla:install-manifest"> </Description> </RDF>在description之间定义所需要的属性。必须要有的包括:id、version、type、targetApplication。必须属性写成这样:
<em:id>restart@restartfirefox.org</em:id>
<em:version>0.1 </em:version>
<em:type>2</em:type>

<em:targetApplication>
<Description>
<em:id>{ec8030f7-c20a-464f-9b0e-13a3a9e97384}</em:id>
<em:minVersion>4.0</em:minVersion>
<em:maxVersion>13.0</em:maxVersion>
</Description>
</em:targetApplication>
targetApplication包含三个内容,id表示目标应用程序的UUID,上面这个id就是Firefox的UUID。minVersion和maxVersion表示支持的目标应用程序的最小最大版本号,上面表示可以安装到Firefox 4.0到Firefox 13.0这些版本,当然现在Firefox已经自动默认支持扩展了,因此maxVersion的意义不大,除非你指定:<em:strictCompatibility>true</em:strictCompatibility>,但这是gecko10之后才有的一个属性。
可选属性中比较常用的包括name、description、creator、homepageURL、iconURL。根据需要可以选择optionURL指定选项面板的xul文件和aboutURL指定关于面板的URL。
可以有本地化描述,使用localized属性,注意如果使用localized请确保文件编码为UTF-8。
本例的install.rdf文件完整内容如下:
<?xml version="1.0"?>

<RDF xmlns="http://www.w3.org/1999/02/22-rdf-syntax-ns#"
xmlns:em="http://www.mozilla.org/2004/em-rdf#">

<Description about="urn:mozilla:install-manifest">

<em:id>restart@restartfirefox.org</em:id>
<em:version>0.1 </em:version>
<em:type>2</em:type>

<em:targetApplication>
<Description>
<em:id>{ec8030f7-c20a-464f-9b0e-13a3a9e97384}</em:id>
<em:minVersion>4.0</em:minVersion>
<em:maxVersion>13.0</em:maxVersion>
</Description>
</em:targetApplication>
<em:iconURL>chrome://restartfirefox/skin/icon.png</em:iconURL>
<em:name>FireRestart(simplified)</em:name>
<em:description>Restart Firefox quickly, for extension developers。
Added a toolbarbutton to the customize ToolbarPalette, you can drag it to anywhere you like in the toolbar or addon bar。there is also a full version which had added a menuitem to the file menu。</em:description>
<em:creator>JumuFENG</em:creator>
<em:homepageURL>http://blog.csdn.net/z6482</em:homepageURL>
<em:localized>
<Description>
<em:locale>zh-CN</em:locale>
<em:name>FireRestart(精简版)</em:name>
<em:description>快速重启firefox,定制工具栏中添加了一个按钮,可手动移动到任何地方。完整版在文件菜单中增加了重新启动菜单项。</em:description>
<em:creator>JumuFENG</em:creator>
<em:homepageURL>http://blog.csdn.net/z6482</em:homepageURL>
</Description>
</em:localized>
</Description>
</RDF>
实现功能
我们实现重启Firefox的功能,建立标准的文件结构,我首先列出除上面两个配置文件外的其他文件的路径及其chrome URL;| 文件名 | 保存路径 | chrome URL |
| restartOverlay.xul | chrome\content\ | chrome://restartfirefox/content/restartOverlay.xul |
| restart.js | chrome\content\ | chrome://restartfirefox/content/restart.js |
| restart.dtd | chrome\locale\en-US\ | chrome://restartfirefox/locale/restart.dtd |
| chrome\locale\zh-CN\ | ||
| restartfirefox.css | chrome\skin\ | chrome://restartfirefox/skin/restartfirefox.css |
下面来写restartOverlay.xul中的内容,XUL文件的基本框架如下:
<?xml version="1.0"?>
<?xml-stylesheet href="chrome://global/skin/" type="text/css"?>
<overlay id="restartOverlay"
xmlns="http://www.mozilla.org/keymaster/gatekeeper/there.is.only.xul">

</overlay>
根据需要,overlay标签也可以是其他如window、page等等。我们使用了dtd文件,因此在overlay标签前面添加:
<!DOCTYPE overlay SYSTEM "chrome://restartfirefox/locale/restart.dtd">接着引入我们的css文件(之后创建),在global css的引用之后添加:
<?xml-stylesheet href="chrome://restartfirefox/skin/restartfirefox.css" type="text/css"?>要实现重启Firefox,需要使用一个js文件,在添加其他元素之前加上对脚本的引用:
<script type="application/x-javascript" src="chrome://restartfirefox/content/restart.js" />下面添加一个按钮到Firefox的定制工具栏中,这样用户就可以自己选择将这个图标放到工具栏或者附加组件栏中的任何位置。
我们使用与Firefox的browser.xul文件中定义的toolbarpalette的id,这样我们创建的按钮就会叠加到浏览器中定制工具栏里面。要获得浏览器窗口上的元素的id就可以用DOM inspector来查看了,也可以参考其使用的CSS样式等等。DOM inspector还可以分析网页的DOM结构。我们使用的XUL代码如下:
<toolbarpalette id="BrowserToolbarPalette">
<toolbarbutton id="restartfirefox-button" class="toolbarbutton-1"
oncommand="restartFirefox.ourRestart();" tooltiptext="&Restart;"
label="&Restart;" />
</toolbarpalette>
Tooltiptext和label都使用dtd文件中定义的Restart实体。如果要将这个按钮直接添加到附加组件栏,可以发现附加组件栏的id是addon-bar。如图:
我们可以像下面这样写:
<toolbar id="addon-bar">
<toolbarbutton id="restartfirefox-button" class="toolbarbutton-1"
oncommand="restartFirefox.ourRestart();" tooltiptext="&Restart;"
label="&Restart;" />
</toolbar>
XUL文件的完整内容如下:
<?xml version="1.0"?>
<?xml-stylesheet href="chrome://restartfirefox/skin/restartfirefox.css" type="text/css"?>
<?xml-stylesheet href="chrome://global/skin/" type="text/css"?>
<!DOCTYPE overlay SYSTEM "chrome://restartfirefox/locale/restart.dtd">
<overlay id="restartOverlay"
xmlns="http://www.mozilla.org/keymaster/gatekeeper/there.is.only.xul">

<script type="application/x-javascript" src="chrome://restartfirefox/content/restart.js" />
<!-- Firefox Toolbar Overlay -->
<toolbarpalette id="BrowserToolbarPalette">
<toolbarbutton id="restartfirefox-button" class="toolbarbutton-1"
oncommand="restartFirefox.ourRestart();" tooltiptext="&Restart;"
label="&Restart;" />
</toolbarpalette>

</overlay>
下面来编辑实现功能的js文件。实现重启Firefox需要调用XPCOM的服务,js代码如下所示:
var restartFirefox = {
// main restart logic
ourRestart : function() {
nsIAppStartup = Components.interfaces.nsIAppStartup;
Components.classes["@mozilla.org/toolkit/app-startup;1"].getService(nsIAppStartup)
.quit(nsIAppStartup.eRestart | nsIAppStartup.eAttemptQuit);
}
};
Js代码不详细解释了,如果你将function中的内容改为alert(“hello world”);这个扩展就成了名副其实的hello world扩展了。到这里,还剩最后的css文件没写了,我们来简单的写一个css文件,为按钮设置一个图标。css文件的内容为:
#restartfirefox-button {
list-style-image: url("chrome://restartfirefox/skin/icon.png");
}

toolbar[iconsize="small"] #restartfirefox-button {
list-style-image: url("chrome://restartfirefox/skin/iconsmall.png");
}
这就是开发扩展的整个过程。与扩展开发相关的技术XUL、JS、CSS、XPCOM、DOM我都不在这里介绍了,学习Firefox扩展的开发的过程中自然就会找到很好的资料,慢慢学习慢慢实践就可以掌握了。最后介绍一下如何运行或者调试自己开发的扩展。
运行扩展
要调试扩展,其实就是运行一下看看有没有错误,看看实现了我们想要的功能没。运行扩展,我最开始接触的就是打包为xpi文件然后拖到Firefox中安装、重启Firefox。这个过程很浪费时间,不值得扩展开发者在开发过程中使用,但是我在开始的时候确实用的是这种方式。因为不知道有其他更好的方式。
第二种方式是将扩展的id作为文件夹名称,比如前面这个例子就使用restart@restartfirefox.org为文件夹名称。将这个文件夹放到profile中extensions目录下,这种方式高级一些,但是为了防止Firefox中移除扩展时误操作将文件删除了找不回来。我首先是在其他地方写好或者修改,然后将文件夹拖到extensions目录下,然后重启Firefox看效果。这种方式是目前为止我使用的时间最长的方式。但这个也不是最方便的。前段时间翻译附加组件开发者指南的过程中才发现最实用的方式。
最后一种方式,也是我现在认为最好的方式。在profile中extensions目录下建立一个文件,名称也是扩展的id,其内容是扩展的路径。如,我们这个例子restart@restartfirefox.org文件(没有后缀,id是什么就命名为什么)的内容就为:D:\extensions\restart。这样一来实际文件不用放在extensions文件夹中,就算在Firefox中移除了这个扩展。也只是删除了restart@restartfirefox.org这个文件,不会影响真正的文件。要重新安装这个扩展只需要先将profile中extensions目录下的文件删除,重启Firefox之后再从回收站还原,再重启Firefox即可。
调试XUL文件
在很多比较早的资料中都提到可以将XUL文件直接拖到Firefox中或者在Firefox中选择文件/打开文件来打开XUL文件对XUL文件进行调试。但是这只是在很早的版本中有效,想用这种方式调试XUL文件可以下载较早的版本。我在3.0.19中使用过;但是随着Firefox的升级,为了调试XUL文件下载一个老版本装在电脑上我是不太喜欢这种方式的。不想下载老版本来调试XUL文件,首先就要有如上所述的一个类似的hello world扩展,假设用上述例子来调试XUL文件,我们在content目录下建立了一个XUL文件为test.xul,在按钮的响应函数中,使用这样的代码:
var restartFirefox = {
ourRestart : function() {
window.open(“chrome://restartfirefox/content/test.xul”);
}
};
如果test.xul没有错误,Firefox就可以打开test.xul文件了,有错误则会提示哪里出错了。个人感觉是个不错的方法。如果是对话框,也可以使用window.openDialog(),这些方法的具体使用请参考相关reference。
要调试js代码可以使用firebug或者venkman。对于调试js代码我没有比较好的经验。对Firebug的使用也不怎么熟悉,venkman从没使用过。
注:本教程的xpi包请到我的资源中下载,免积分。

相关文章推荐
- 一个简单php扩展介绍与开发教程
- 一个简单php扩展介绍与开发教程
- 使用 ADD-ON SDK 开发 基于 Html JQuery 和 CSS 的 firefox 插件入门教程1: 创建一个简单的 Add-on
- 计划写一个MyEclipse6.0开发Spring应用的简单教程。
- 【iOS开发】 CoreText 使用教程:以创建一个简单的杂志应用为例
- iOS开发】 CoreText 使用教程:以创建一个简单的杂志应用为例
- 如何创建一个状态栏扩展(火狐插件扩展开发教程)
- 如何在OS X 10.7上开发一个简单的应用教程(一)
- JVMTI开发教程之一个简单的Agent
- JVMTI开发教程之一个简单的Agent
- 快速开发一个PHP扩展图文教程
- 如何在OS X 10.7上开发一个简单的应用教程(二)
- 黄聪:Firefox火狐插件扩展开发教程
- DuiVision开发教程(2)-如何写一个简单的界面程序
- titanium开发教程-04-03创建一个简单的table
- [入门教程]使用Cocos2d-html5游戏引擎编写一个简单的游戏 第一回合: 搭建开发环境
- PHP扩展开发:一个简单的例子
- 黄聪:一、如何创建一个状态栏扩展(火狐插件扩展开发教程)
- iOS开发】 CoreText 使用教程:以创建一个简单的杂志应用为例