CentOS 5.2编译安装LNMP
2012-03-14 15:53
351 查看
系统:CentOS 5.2 64位
Nginx:0.9.5
php:5.3.5
MySQL:5.1.30
一. 安装Nginx
1. 首先确保有gcc环境
#yum install gcc gcc-c++
2. pcre的安装
#tar zxvf pcre-8.00.tar.gz
#cd pcre-8.00
#./configure ; make ;make install
3. nginx的安装
#tar zxvf nginx-0.9.5.tar.gz
#cd nginx-0.9.5
#./configure --user=www --group=www --prefix=/usr/local/nginx --with-http_stub_status_module
#make ;make install
在这里我刚开始安装的时候使用了两个参数“ --with-http_
ssl_module ”“ --with-md5=/usr/lib”后来make的时候一直报错,查了好多资料,纠结了半天,后来去除了这两个参数就好了。
make[1]: *** [/server/openssl/openssl/include/openssl/ssl.h] Error 2
4. 安装gd和lib相关包。
所用包如下:
gd-2.0.35.tar.gz
libiconv-1.12.tar.gz
libmcrypt-2.5.8.tar.gz
mhash-0.9.9.tar.gz
1)安装GD
#tar zxvf gd-2.0.35.tar.gz
#cd gd-2.0.35
#./configure --prefix=/usr/local/gd2 ;make ;make install
2)安装libiconv
#tar zxvf libiconv-1.12.tar.gz ;cd libiconv-1.12
#./configure --prefix=/usr ;make ;make install
3)安装libmcrypt
#tar zxvf libmcrypt-2.5.8.tar.gz ;cd libmcrypt-2.5.8
#./configure --prefix=/usr ;make ;make install
4)安装mhash
#tar zxvf mhash-0.9.9.tar.gz ;cd mhash-0.9.9
#./configure --prefix=/usr ;make ;make install
5)编辑ld.so.conf文件
#vim /etc/ld.so.conf
改正后的文件内容如下:
/usr/lib
include ld.so.conf.d/*.conf
/usr/lib
保存退出!
5. 安装好了之后,我们来测试nginx的安装结果:
#/usr/local/nginx/sbin/nginx -t
返回如下结果,证明nginx没问题:
nginx: the configuration file /usr/local/nginx/conf/nginx.conf syntax is ok
nginx: configuration file /usr/local/nginx/conf/nginx.conf test is successful
我刚装完运行测试报了如下错误:
nginx [emerg]: getpwnam(“www”) failed
解决办法:
编辑nginx配置文件,去掉“user nobody”前面的注释即可!
#vim /usr/local/nginx/conf/nginx.conf
去掉#user nobody前面的“#”,保存退出就可以了!
启动nginx
#/usr/local/nginx/sbin/nginx
查看80端口:
#netstat -tunlp |grep 80
ok
用ie访问出现如下画面:
Welcome to Nginx!
二。安装MySQL-5.1.30
#tar zxvf mysql-5.1.30.tar.gz
#cd mysql-5.1.30
#./configure --prefix=/usr/local/mysql --localstatedir=/data/mysqll/data --with-comment=Source --with-server-suffix=-Linuxtone.Org --with-mysqld-user=mysql --with-out-debug --with-big-tables --with-charset=utf8 --with-collation=utf8_general_ci --with-extra-charsets=all --with-pthread --enable-static --enable-thread-safe-client --with-client-ldflags=-all-static --with-mysqld-ldflags=-all-static --enable-assembler --with-plugins=all --without-ndb-debug
出现如下画面证明编译成功:
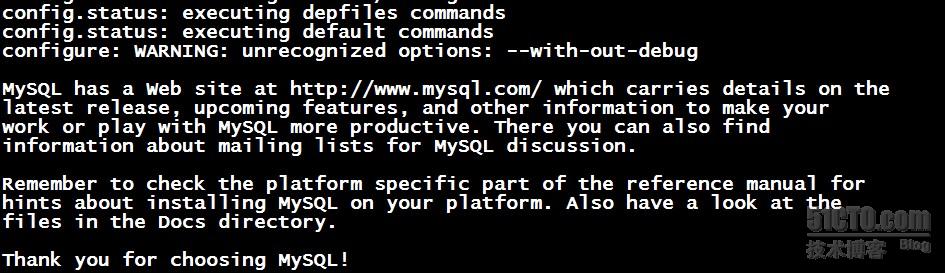
#make ;make install
2. 报错解决:
1)错误1
我刚开始安装选择的参数有一个“--with-collation=utf8_chinese_ci”,在编译时报错如下:
Collation utf8_chinese_ci is not valid for character set utf8.
Valid collations are: utf8_general_ci utf8_bin utf8_czech_ci utf8_danish_ci utf8_esperanto_ci utf8_estonian_ci utf8_hungarian_ci utf8_icelandic_ci utf8_latvian_ci utf8_lithuanian_ci utf8_persian_ci utf8_polish_ci utf8_romanian_ci utf8_slovak_ci utf8_slovenian_ci utf8_spanish2_ci utf8_spanish_ci utf8_swedish_ci utf8_turkish_ci utf8_unicode_ci.
See the Installation chapter in the Reference Manual.
它的意思是对于character set utf8,utf8_chinese_ci 的定序是不可用的,可用的定序是:utf8_general_ci utf8_bin utf8_czech_ci utf8_danish_ci utf8_esperanto_ci utf8_estonian_ci utf8_hungarian_ci utf8_icelandic_ci utf8_latvian_ci utf8_lithuanian_ci utf8_persian_ci utf8_polish_ci utf8_romanian_ci utf8_slovak_ci utf8_slovenian_ci utf8_spanish2_ci utf8_spanish_ci utf8_swedish_ci utf8_turkish_ci utf8_unicode_ci中的任何一种。
解决的办法如下:
我将--with-collation=utf8_chinese_ci更改为“utf8_general_ci”后解决。
2)错误2
报错如下:
checking for termcap functions library... configure: error: No curses/termca
解决的办法:
用yum安装ncurses、ncurses-devel
#yum install ncurses ncurses-devel -y
再次编译就不会报相同的错误了!
3. 配置mysql
1)新建用户
#useradd mysql -d /data/mysql -s/sbin/nologin
2)安装默认数据库
#/usr/local/mysql/bin/mysql_install_db --user=mysql
3)设定相关目录权限
#cd /usr/local/mysql
#chown -R root:mysql .
#mkdir -p /data/mysql/data
#chown -R mysql /data/mysql/data
复制配置文件:
#cp share/mysql/my-huge.cnf /etc/my.cnf
复制启动文件:
#cp share/mysql/mysql.server /etc/rc.d/init.d/mysqld
#chmod 755 /etc/rc.d/init.d/mysqld
添加服务
#chkconfig --add mysqld
启动服务:
#server mysqld start
检测mysql服务启动情况:
#netstat -tunlp |grep 3306
三。PHP的安装:
php和nginx的整合是通过php-FastCGI
FastCGI 是一个可伸缩、高速的在web server和脚本语言间通迅的接口。被许多脚本语言所支持,包括 php
多数流行的web server都支持 FastCGI。
正常情况下,nginx和php直接是完全不认识的,我们就是通过php-fastcgi将二者整合。
php5.3.0之前的版本,php-FastCGI 是需要单独安装的。但是在这之后,php-FastCGI 就整合在了php的源码包中,不必再去单独安装。我用的就是php5.3.5的版本,内置了php-fpm ,编译时开启,并且编译后不存在 php-cgi 文件了
1. 安装php
#tar zxvf php-5.3.5.tar.gz
#./buildconf --force
出现了如下所示的错误:
Forcing buildconf
buildconf: checking installation...
buildconf: autoconf not found.
You need autoconf version 2.13 or newer installed
to build PHP from SVN.
make: *** [buildmk.stamp] 错误 1
原因是安装未安装autoconf或者安装的版本不是2.13,用yum安装即可
#yum install autoconf213
设置环境变量:
#export PHP_AUTOCONF=/usr/bin/autoconf-2.13
然后再次./buildconf --force,出现如下的画面就可以了:

编译:
#./configure --prefix=/usr/local/php --enable-fastcgi --enable-fpm --enable-discard-path --enable-force-cgi-redirect-with-config-file-path=/usr/local/php/etc --enable-zend-multibyte --with-mysql=/usr/local/mysql --with-libxml-dir --with-xmlrpc --with-gd=/usr/local/gd2/ --with-jpeg-dir --with-png-dir --with-bz2 --with-freetype-dir --with-iconv-dir --with-zlib-dir --with-curl --with-curlwrappers --with-openssl --with-mcrypt --with-mhash --enable-pcntl --enable-sockets --enable-sysvsem --enable-inline-optimization --enable-soap --enable-gd-native-ttf --enable-ftp --enable-mbstring --enable-exif --disable-debug --disable-ipv6
make ;make install
2. 修改配置文件
安装完成之后,复制php.ini-production 到安装目录下的etc/目录下
#cp php.ini-production /usr/local/php/etc/
#cd /usr/local/php/etc/ 切换到安装目录下的配置文件目录
#cp php-fpm.conf.default php-fpm.conf
修改php-fpm.conf 启用如下几行,即去掉前面的分号(;)
pid = run/php-fpm.pid
error_log = log/php-fpm.log
log_level = notice
listen = 127.0.0.1:9000
listen.allowed_clients = 127.0.0.1
pm = dynamic
pm.max_children = 50
pm.start_servers = 5
pm.min_spare_servers = 5
pm.max_spare_servers = 35
pm.max_requests = 500
env[HOSTNAME] = $HOSTNAME
env[PATH] = /usr/local/bin:/usr/bin:/bin
env[TMP] = /tmp
env[TMPDIR] = /tmp
env[TEMP] = /tmp
3. 制作启动脚本
vim /etc/init.d/php-fpm
内容如下:
#! /bin/sh
### BEGIN INIT INFO
# Provides: php-fpm
# Required-Start: $remote_fs $network
# Required-Stop: $remote_fs $network
# Default-Start: 2 3 4 5
# Default-Stop: 0 1 6
# Short-Description: starts php-fpm
# Description: starts the PHP FastCGI Process Manager daemon
### END INIT INFO
prefix=/usr/local/php
exec_prefix=${prefix}
php_fpm_BIN=${exec_prefix}/sbin/php-fpm
php_fpm_CONF=${prefix}/etc/php-fpm.conf
php_fpm_PID=${prefix}/var/run/php-fpm.pid
php_opts="--fpm-config $php_fpm_CONF"
wait_for_pid () {
try=0
while test $try -lt 35 ; do
case "$1" in
'created')
if [ -f "$2" ] ; then
try=''
break
fi
;;
'removed')
if [ ! -f "$2" ] ; then
try=''
break
fi
;;
esac
echo -n .
try=`expr $try + 1`
sleep 1
done
}
case "$1" in
start)
echo -n "Starting php-fpm "
$php_fpm_BIN $php_opts
if [ "$?" != 0 ] ; then
echo " failed"
exit 1
fi
wait_for_pid created $php_fpm_PID
if [ -n "$try" ] ; then
echo " failed"
exit 1
else
echo " done"
fi
;;
stop)
echo -n "Gracefully shutting down php-fpm "
if [ ! -r $php_fpm_PID ] ; then
echo "warning, no pid file found - php-fpm is not running ?"
exit 1
fi
kill -QUIT `cat $php_fpm_PID`
wait_for_pid removed $php_fpm_PID
if [ -n "$try" ] ; then
echo " failed. Use force-exit"
exit 1
else
echo " done"
fi
;;
force-quit)
echo -n "Terminating php-fpm "
if [ ! -r $php_fpm_PID ] ; then
echo "warning, no pid file found - php-fpm is not running ?"
exit 1
fi
kill -TERM `cat $php_fpm_PID`
wait_for_pid removed $php_fpm_PID
if [ -n "$try" ] ; then
echo " failed"
exit 1
else
echo " done"
fi
;;
restart)
$0 stop
$0 start
;;
reload)
echo -n "Reload service php-fpm "
if [ ! -r $php_fpm_PID ] ; then
echo "warning, no pid file found - php-fpm is not running ?"
exit 1
fi
kill -USR2 `cat $php_fpm_PID`
echo " done"
;;
*)
echo "Usage: $0 {start|stop|force-quit|restart|reload}"
exit 1
;;
esac
#chmod -R 777 /etc/init.d/php-fpm
启动 php-fpm
/etc/init.d/php-fpm start
4. 查看端口 9000
#netstat -tunlp |grep 9000
5. 最后 需要更改一下nginx的配置文件
vim /usr/local/nginx/conf/nginx.conf
去掉下面语句前的注释
error_log /var/log/nginx/error.default.log; #开启错误日志
pid /usr/local/webserver/nginx/nginx.pid;
fastcgi_connect_timeout 300;
fastcgi_send_timeout 300;
fastcgi_read_timeout 300;
# pass the PHP scripts to FastCGI server listening on 127.0.0.1:9000
#
location ~ .*\.(php|php5)?$
{
fastcgi_pass 127.0.0.1:9000;
fastcgi_index index.php;
include fastcgi.conf;
}
保存退出后 重启nginx
#ps aux |grep nginx
看一下nginx的pid
#kill -9 pid的号码
启动nginx
#/usr/local/nginx/sbin/nginx
6. 报错
1)错误1
错误提示:
configure: error: xml2-config not found. Please check your libxml2 installation
yum 安装libxml2和libxml2-devel两个包
#yum install libxml2 libxml2-devel -y
重新编译就不会出现这个问题了。
本文出自 “DBQ blog” 博客,请务必保留此出处http://naonao.blog.51cto.com/1135983/805896
Nginx:0.9.5
php:5.3.5
MySQL:5.1.30
一. 安装Nginx
1. 首先确保有gcc环境
#yum install gcc gcc-c++
2. pcre的安装
#tar zxvf pcre-8.00.tar.gz
#cd pcre-8.00
#./configure ; make ;make install
3. nginx的安装
#tar zxvf nginx-0.9.5.tar.gz
#cd nginx-0.9.5
#./configure --user=www --group=www --prefix=/usr/local/nginx --with-http_stub_status_module
#make ;make install
在这里我刚开始安装的时候使用了两个参数“ --with-http_
ssl_module ”“ --with-md5=/usr/lib”后来make的时候一直报错,查了好多资料,纠结了半天,后来去除了这两个参数就好了。
make[1]: *** [/server/openssl/openssl/include/openssl/ssl.h] Error 2
4. 安装gd和lib相关包。
所用包如下:
gd-2.0.35.tar.gz
libiconv-1.12.tar.gz
libmcrypt-2.5.8.tar.gz
mhash-0.9.9.tar.gz
1)安装GD
#tar zxvf gd-2.0.35.tar.gz
#cd gd-2.0.35
#./configure --prefix=/usr/local/gd2 ;make ;make install
2)安装libiconv
#tar zxvf libiconv-1.12.tar.gz ;cd libiconv-1.12
#./configure --prefix=/usr ;make ;make install
3)安装libmcrypt
#tar zxvf libmcrypt-2.5.8.tar.gz ;cd libmcrypt-2.5.8
#./configure --prefix=/usr ;make ;make install
4)安装mhash
#tar zxvf mhash-0.9.9.tar.gz ;cd mhash-0.9.9
#./configure --prefix=/usr ;make ;make install
5)编辑ld.so.conf文件
#vim /etc/ld.so.conf
改正后的文件内容如下:
/usr/lib
include ld.so.conf.d/*.conf
/usr/lib
保存退出!
5. 安装好了之后,我们来测试nginx的安装结果:
#/usr/local/nginx/sbin/nginx -t
返回如下结果,证明nginx没问题:
nginx: the configuration file /usr/local/nginx/conf/nginx.conf syntax is ok
nginx: configuration file /usr/local/nginx/conf/nginx.conf test is successful
我刚装完运行测试报了如下错误:
nginx [emerg]: getpwnam(“www”) failed
解决办法:
编辑nginx配置文件,去掉“user nobody”前面的注释即可!
#vim /usr/local/nginx/conf/nginx.conf
去掉#user nobody前面的“#”,保存退出就可以了!
启动nginx
#/usr/local/nginx/sbin/nginx
查看80端口:
#netstat -tunlp |grep 80
ok
用ie访问出现如下画面:
Welcome to Nginx!
二。安装MySQL-5.1.30
#tar zxvf mysql-5.1.30.tar.gz
#cd mysql-5.1.30
#./configure --prefix=/usr/local/mysql --localstatedir=/data/mysqll/data --with-comment=Source --with-server-suffix=-Linuxtone.Org --with-mysqld-user=mysql --with-out-debug --with-big-tables --with-charset=utf8 --with-collation=utf8_general_ci --with-extra-charsets=all --with-pthread --enable-static --enable-thread-safe-client --with-client-ldflags=-all-static --with-mysqld-ldflags=-all-static --enable-assembler --with-plugins=all --without-ndb-debug
出现如下画面证明编译成功:
#make ;make install
2. 报错解决:
1)错误1
我刚开始安装选择的参数有一个“--with-collation=utf8_chinese_ci”,在编译时报错如下:
Collation utf8_chinese_ci is not valid for character set utf8.
Valid collations are: utf8_general_ci utf8_bin utf8_czech_ci utf8_danish_ci utf8_esperanto_ci utf8_estonian_ci utf8_hungarian_ci utf8_icelandic_ci utf8_latvian_ci utf8_lithuanian_ci utf8_persian_ci utf8_polish_ci utf8_romanian_ci utf8_slovak_ci utf8_slovenian_ci utf8_spanish2_ci utf8_spanish_ci utf8_swedish_ci utf8_turkish_ci utf8_unicode_ci.
See the Installation chapter in the Reference Manual.
它的意思是对于character set utf8,utf8_chinese_ci 的定序是不可用的,可用的定序是:utf8_general_ci utf8_bin utf8_czech_ci utf8_danish_ci utf8_esperanto_ci utf8_estonian_ci utf8_hungarian_ci utf8_icelandic_ci utf8_latvian_ci utf8_lithuanian_ci utf8_persian_ci utf8_polish_ci utf8_romanian_ci utf8_slovak_ci utf8_slovenian_ci utf8_spanish2_ci utf8_spanish_ci utf8_swedish_ci utf8_turkish_ci utf8_unicode_ci中的任何一种。
解决的办法如下:
我将--with-collation=utf8_chinese_ci更改为“utf8_general_ci”后解决。
2)错误2
报错如下:
checking for termcap functions library... configure: error: No curses/termca
解决的办法:
用yum安装ncurses、ncurses-devel
#yum install ncurses ncurses-devel -y
再次编译就不会报相同的错误了!
3. 配置mysql
1)新建用户
#useradd mysql -d /data/mysql -s/sbin/nologin
2)安装默认数据库
#/usr/local/mysql/bin/mysql_install_db --user=mysql
3)设定相关目录权限
#cd /usr/local/mysql
#chown -R root:mysql .
#mkdir -p /data/mysql/data
#chown -R mysql /data/mysql/data
复制配置文件:
#cp share/mysql/my-huge.cnf /etc/my.cnf
复制启动文件:
#cp share/mysql/mysql.server /etc/rc.d/init.d/mysqld
#chmod 755 /etc/rc.d/init.d/mysqld
添加服务
#chkconfig --add mysqld
启动服务:
#server mysqld start
检测mysql服务启动情况:
#netstat -tunlp |grep 3306
三。PHP的安装:
php和nginx的整合是通过php-FastCGI
FastCGI 是一个可伸缩、高速的在web server和脚本语言间通迅的接口。被许多脚本语言所支持,包括 php
多数流行的web server都支持 FastCGI。
正常情况下,nginx和php直接是完全不认识的,我们就是通过php-fastcgi将二者整合。
php5.3.0之前的版本,php-FastCGI 是需要单独安装的。但是在这之后,php-FastCGI 就整合在了php的源码包中,不必再去单独安装。我用的就是php5.3.5的版本,内置了php-fpm ,编译时开启,并且编译后不存在 php-cgi 文件了
1. 安装php
#tar zxvf php-5.3.5.tar.gz
#./buildconf --force
出现了如下所示的错误:
Forcing buildconf
buildconf: checking installation...
buildconf: autoconf not found.
You need autoconf version 2.13 or newer installed
to build PHP from SVN.
make: *** [buildmk.stamp] 错误 1
原因是安装未安装autoconf或者安装的版本不是2.13,用yum安装即可
#yum install autoconf213
设置环境变量:
#export PHP_AUTOCONF=/usr/bin/autoconf-2.13
然后再次./buildconf --force,出现如下的画面就可以了:
编译:
#./configure --prefix=/usr/local/php --enable-fastcgi --enable-fpm --enable-discard-path --enable-force-cgi-redirect-with-config-file-path=/usr/local/php/etc --enable-zend-multibyte --with-mysql=/usr/local/mysql --with-libxml-dir --with-xmlrpc --with-gd=/usr/local/gd2/ --with-jpeg-dir --with-png-dir --with-bz2 --with-freetype-dir --with-iconv-dir --with-zlib-dir --with-curl --with-curlwrappers --with-openssl --with-mcrypt --with-mhash --enable-pcntl --enable-sockets --enable-sysvsem --enable-inline-optimization --enable-soap --enable-gd-native-ttf --enable-ftp --enable-mbstring --enable-exif --disable-debug --disable-ipv6
make ;make install
2. 修改配置文件
安装完成之后,复制php.ini-production 到安装目录下的etc/目录下
#cp php.ini-production /usr/local/php/etc/
#cd /usr/local/php/etc/ 切换到安装目录下的配置文件目录
#cp php-fpm.conf.default php-fpm.conf
修改php-fpm.conf 启用如下几行,即去掉前面的分号(;)
pid = run/php-fpm.pid
error_log = log/php-fpm.log
log_level = notice
listen = 127.0.0.1:9000
listen.allowed_clients = 127.0.0.1
pm = dynamic
pm.max_children = 50
pm.start_servers = 5
pm.min_spare_servers = 5
pm.max_spare_servers = 35
pm.max_requests = 500
env[HOSTNAME] = $HOSTNAME
env[PATH] = /usr/local/bin:/usr/bin:/bin
env[TMP] = /tmp
env[TMPDIR] = /tmp
env[TEMP] = /tmp
3. 制作启动脚本
vim /etc/init.d/php-fpm
内容如下:
#! /bin/sh
### BEGIN INIT INFO
# Provides: php-fpm
# Required-Start: $remote_fs $network
# Required-Stop: $remote_fs $network
# Default-Start: 2 3 4 5
# Default-Stop: 0 1 6
# Short-Description: starts php-fpm
# Description: starts the PHP FastCGI Process Manager daemon
### END INIT INFO
prefix=/usr/local/php
exec_prefix=${prefix}
php_fpm_BIN=${exec_prefix}/sbin/php-fpm
php_fpm_CONF=${prefix}/etc/php-fpm.conf
php_fpm_PID=${prefix}/var/run/php-fpm.pid
php_opts="--fpm-config $php_fpm_CONF"
wait_for_pid () {
try=0
while test $try -lt 35 ; do
case "$1" in
'created')
if [ -f "$2" ] ; then
try=''
break
fi
;;
'removed')
if [ ! -f "$2" ] ; then
try=''
break
fi
;;
esac
echo -n .
try=`expr $try + 1`
sleep 1
done
}
case "$1" in
start)
echo -n "Starting php-fpm "
$php_fpm_BIN $php_opts
if [ "$?" != 0 ] ; then
echo " failed"
exit 1
fi
wait_for_pid created $php_fpm_PID
if [ -n "$try" ] ; then
echo " failed"
exit 1
else
echo " done"
fi
;;
stop)
echo -n "Gracefully shutting down php-fpm "
if [ ! -r $php_fpm_PID ] ; then
echo "warning, no pid file found - php-fpm is not running ?"
exit 1
fi
kill -QUIT `cat $php_fpm_PID`
wait_for_pid removed $php_fpm_PID
if [ -n "$try" ] ; then
echo " failed. Use force-exit"
exit 1
else
echo " done"
fi
;;
force-quit)
echo -n "Terminating php-fpm "
if [ ! -r $php_fpm_PID ] ; then
echo "warning, no pid file found - php-fpm is not running ?"
exit 1
fi
kill -TERM `cat $php_fpm_PID`
wait_for_pid removed $php_fpm_PID
if [ -n "$try" ] ; then
echo " failed"
exit 1
else
echo " done"
fi
;;
restart)
$0 stop
$0 start
;;
reload)
echo -n "Reload service php-fpm "
if [ ! -r $php_fpm_PID ] ; then
echo "warning, no pid file found - php-fpm is not running ?"
exit 1
fi
kill -USR2 `cat $php_fpm_PID`
echo " done"
;;
*)
echo "Usage: $0 {start|stop|force-quit|restart|reload}"
exit 1
;;
esac
#chmod -R 777 /etc/init.d/php-fpm
启动 php-fpm
/etc/init.d/php-fpm start
4. 查看端口 9000
#netstat -tunlp |grep 9000
5. 最后 需要更改一下nginx的配置文件
vim /usr/local/nginx/conf/nginx.conf
去掉下面语句前的注释
error_log /var/log/nginx/error.default.log; #开启错误日志
pid /usr/local/webserver/nginx/nginx.pid;
fastcgi_connect_timeout 300;
fastcgi_send_timeout 300;
fastcgi_read_timeout 300;
# pass the PHP scripts to FastCGI server listening on 127.0.0.1:9000
#
location ~ .*\.(php|php5)?$
{
fastcgi_pass 127.0.0.1:9000;
fastcgi_index index.php;
include fastcgi.conf;
}
保存退出后 重启nginx
#ps aux |grep nginx
看一下nginx的pid
#kill -9 pid的号码
启动nginx
#/usr/local/nginx/sbin/nginx
6. 报错
1)错误1
错误提示:
configure: error: xml2-config not found. Please check your libxml2 installation
yum 安装libxml2和libxml2-devel两个包
#yum install libxml2 libxml2-devel -y
重新编译就不会出现这个问题了。
本文出自 “DBQ blog” 博客,请务必保留此出处http://naonao.blog.51cto.com/1135983/805896

相关文章推荐
- Centos 6.8 安装lnmp+ zabbix3.0.2
- centos 下搭建LNMP (源码安装nginx,mysql,php)
- centos7 编译安装新版LNMP环境
- CentOS 6.4安装配置LNMP服务器(Nginx+PHP+MySQL)
- centos7 安装lnmp环境(转)
- centos7 YUM安装lnmp
- 基于centos5.8源码安装nginx之LNMP
- CentOS 6.4安装配置LNMP服务器(Nginx+PHP+MySQL)
- CentOS源码安装搭建LNMP全过程(包括nginx,mysql,php,svn)
- CentOS 6.5 yum安装配置lnmp服务器(Nginx+PHP+MySQL)
- centos LNMP第一部分环境搭建 LAMP LNMP安装先后顺序 php安装 安装nginx 编写nginx启动脚本 懒汉模式 mv /usr/php/{p.conf.default,p.conf} php运行方式SAPI介绍 第二十三节课
- CentOS 6.4安装配置LNMP服务器(Nginx+PHP+MySQL)
- centos6.4下编译安装LNMP环境
- CentOS6.4+Nginx1.4.2+MySQL5.6.13+PHP5.5.3+xCache3.03(最新LNMP编译安装过程)
- centos 6.4 下的lnmp 生产环境搭建及安装脚本
- centos 7.2 一键安装lnmp 成功后通过IP访问不了服务器(已解决)
- CentOS 6.3安装配置LNMP服务器,自定义php,mysql版本
- 编译安装LNMP Centos 6.5 x64 + Nginx1.6.0 + PHP5.5.13 + Mysql5.6.19
- Centos6.2_X86_64 _LNMP安装全程实录
- 阿里云服务器 centos 6.5 安装 LNMP 环境 有修改