[置顶] HTML5 实现小车动画效果(Canvas/CSS3/JQuery)
2012-02-03 19:14
1421 查看
HTML5正在变得越来越流行。在这个移动设备日益增长的时代,对来自Adobe的Flash插件的改造需求也正在快速增长。因为就在最近,Adobe宣布Flash将不再支持移动设备。这意味着,Adobe自身也认为对移动设备来讲HTML5是一项重要的技术。而桌面系统的改变也是迟早的事。
HTML的一大劣势就是对于多媒体技术支持的缺乏。在HTML中,你无法直接显示一个视频或在屏幕上绘画。在HTML5中,随着<video>与<canvas>元素的引进。这些元素给予开发者直接使用“纯粹的”HTML来实现多媒体技术的可能性——仅需要写一些Javascript代码来配合HTML。在多媒体技术中,有一个基本的技术应该被支持——动画。在HTML5中,有不少方式能够实现该功能。
在这篇文章中,我仅将最新的<canvas>元素与即将到来的CSS3动画技术进行比较。其他的可能性包括DOM元素或SVG元素的创建和动画。这些可能性将不在本文中进行讨论。从开始就应该注意到canvas技术在当前发布的大部分主流浏览器都给予了支持,而CSS3动画仅在最新的FireFox与Chrome浏览器中才有实现的可能,下一个版本的IE也将提供对CSS3动画的支持。(所以本文中所有演示代码的效果,在Win 7系统下当前最新版的Chrome浏览器中都可实现,但在其他操作系统与其他浏览器中,并不一定能看到所有演示代码的效果)。
这里我选择了一个比较简单的动画:
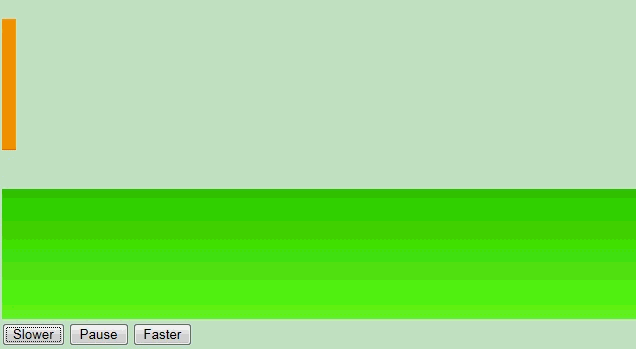
PS:由于显卡、录制的帧间隔,以及可能你电脑处理器的原因,播放过程可能有些不太流畅或者失真!
分三种方式实现:
(1) canvas元素结合JS
(2) 纯粹的CSS3动画(暂不被所有主流浏览器支持,比如IE)
(3) CSS3结合Jquery实现
知道如何使用CSS3动画比知道如何使用<canvas>元素更重要:因为浏览器能够优化那些元素的性能(通常是他们的样式,比如CSS),而我们使用canvas自定义画出来的效果却不能被优化。原因又在于,浏览器使用的硬件主要取决于显卡的能力。目前,浏览器没有给予我们直接访问显卡的权力,比如,每一个绘画操作都不得不在浏览器中先调用某些函数。
让我们从Canvas开始
HTML代码:
JS代码:
定义一些变量:
为了实例化汽车canvas(初始时被隐藏),我们使用下面的自执行的匿名函数
点击“Play”按钮,通过定时重复执行“画汽车”操作,来模拟“帧播放”功能:
加速,减速,通过以下方法,改变移动距离的大小来实现:
页面加载的初始化方法:
主调方法:
画背景:
画车身:
画轮胎:
该是CSS3出场了
你将看到我们未通过一句JS代码就完全实现了和上面一样的动画效果:
HTML代码:
CSS代码:
定义车身与轮胎转到的动画(你会看到基本每一个动画都有四个版本的定义:原生版本/webkit【Chrome|Safari】/ms【为了向后兼容IE10】/moz【FireFox】)
JQuery与CSS3合体
这是一个效果与兼容性俱佳的方式(特别对于IE9暂不支持CSS3而言)
HTML代码(可以看到与CSS3中的HTML代码并无不同):
CSS:
JS代码:
首先引入在线API:
实现动画代码(相当简洁):
简单讲解:prefix首先识别出当前是哪个定义被采用了(-o?-moz?-webkit?-ms?),然后定义了动画的起点位置和终点位置。接着,定义了设置旋转角度的函数(该函数将在在动画的每一步(step)中执行)。然后,定义了一个动画,该定义方式导致了无限自循环调用!
本文,通过一个简单的动画实例,演示了HTML5下,实现动画的几种常见方式。
源码下载
HTML的一大劣势就是对于多媒体技术支持的缺乏。在HTML中,你无法直接显示一个视频或在屏幕上绘画。在HTML5中,随着<video>与<canvas>元素的引进。这些元素给予开发者直接使用“纯粹的”HTML来实现多媒体技术的可能性——仅需要写一些Javascript代码来配合HTML。在多媒体技术中,有一个基本的技术应该被支持——动画。在HTML5中,有不少方式能够实现该功能。
在这篇文章中,我仅将最新的<canvas>元素与即将到来的CSS3动画技术进行比较。其他的可能性包括DOM元素或SVG元素的创建和动画。这些可能性将不在本文中进行讨论。从开始就应该注意到canvas技术在当前发布的大部分主流浏览器都给予了支持,而CSS3动画仅在最新的FireFox与Chrome浏览器中才有实现的可能,下一个版本的IE也将提供对CSS3动画的支持。(所以本文中所有演示代码的效果,在Win 7系统下当前最新版的Chrome浏览器中都可实现,但在其他操作系统与其他浏览器中,并不一定能看到所有演示代码的效果)。
这里我选择了一个比较简单的动画:
PS:由于显卡、录制的帧间隔,以及可能你电脑处理器的原因,播放过程可能有些不太流畅或者失真!
分三种方式实现:
(1) canvas元素结合JS
(2) 纯粹的CSS3动画(暂不被所有主流浏览器支持,比如IE)
(3) CSS3结合Jquery实现
知道如何使用CSS3动画比知道如何使用<canvas>元素更重要:因为浏览器能够优化那些元素的性能(通常是他们的样式,比如CSS),而我们使用canvas自定义画出来的效果却不能被优化。原因又在于,浏览器使用的硬件主要取决于显卡的能力。目前,浏览器没有给予我们直接访问显卡的权力,比如,每一个绘画操作都不得不在浏览器中先调用某些函数。
让我们从Canvas开始
HTML代码:
<html>
<head>
<meta charset="UTF-8" />
<title>Animation in HTML5 using the canvas element</title>
</head>
<body onload="init();">
<canvas id="canvas" width="1000" height="600">Your browser does not support the <code><canvas></code>-element.Please think about updating your brower!</canvas>
<div id="controls">
<button type="button" onclick="speed(-0.1);">Slower</button>
<button type="button" onclick="play(this);">Play</button>
<button type="button" onclick="speed(+0.1)">Faster</button>
</div>
</body>
</html>
JS代码:
定义一些变量:
var dx=5,			//当前速率
rate=1,			//当前播放速度
ani,			//当前动画循环
c,				//画图(Canvas Context)
w,				//汽车[隐藏的](Canvas Context)
grassHeight=130,		//背景高度
carAlpha=0,			//轮胎的旋转角度
carX=-400,			//x轴方向上汽车的位置(将被改变)
carY=300,			//y轴方向上汽车的位置(将保持为常量)
carWidth=400,		//汽车的宽度
carHeight=130,		//汽车的高度
tiresDelta=15,		//从一个轮胎到最接近的汽车底盘的距离
axisDelta=20,		//汽车底部底盘的轴与轮胎的距离
radius=60;			//轮胎的半径
为了实例化汽车canvas(初始时被隐藏),我们使用下面的自执行的匿名函数
(function(){
var car=document.createElement('canvas');	//创建元素
car.height=carHeight+axisDelta+radius;	//设置高度
car.width=carWidth;				//设置宽度
w=car.getContext('2d');
})();
点击“Play”按钮,通过定时重复执行“画汽车”操作,来模拟“帧播放”功能:
function play(s){				//参数s是一个button
if(ani){					//如果ani不为null,则代表我们当前已经有了一个动画
clearInterval(ani);			//所以我们需要清除它(停止动画)
ani=null;
s.innerHTML='Play';			//重命名该按钮为“播放”
}else{
ani=setInterval(drawCanvas,40);		//我们将设置动画为25fps[帧每秒],40/1000,即为二十五分之一
s.innerHTML='Pause';			//重命名该按钮为“暂停”
}
}
加速,减速,通过以下方法,改变移动距离的大小来实现:
function speed(delta){
var newRate=Math.max(rate+delta,0.1);
dx=newRate/rate*dx;
rate=newRate;
}
页面加载的初始化方法:
//init
function init(){
c=document.getElementById('canvas').getContext('2d');
drawCanvas();
}
主调方法:
function drawCanvas(){
c.clearRect(0,0,c.canvas.width, c.canvas.height);	//清除Canvas(已显示的),避免产生错误
c.save();						//保存当前坐标值以及状态,对应的类似“push”操作

drawGrass();						//画背景
c.translate(carX,0);					//移动起点坐标
drawCar();						//画汽车(隐藏的canvas)
c.drawImage(w.canvas,0,carY);			//画最终显示的汽车
c.restore();						//恢复Canvas的状态,对应的是类似“pop”操作
carX+=dx;						//重置汽车在X轴方向的位置,以模拟向前走
carAlpha+=dx/radius;					//按比例增加轮胎角度

if(carX>c.canvas.width){				//设置某些定期的边界条件
carX=-carWidth-10;				//也可以将速度反向为dx*=-1;
}
}
画背景:
function drawGrass(){
//创建线性渐变,前两个参数为渐变开始点坐标,后两个为渐变结束点坐标
var grad=c.createLinearGradient(0,c.canvas.height-grassHeight,0,c.canvas.height);
//为线性渐变指定渐变色,0表示渐变起始色,1表示渐变终止色
grad.addColorStop(0,'#33CC00');
grad.addColorStop(1,'#66FF22');
c.fillStyle=grad;
c.lineWidth=0;
c.fillRect(0,c.canvas.height-grassHeight,c.canvas.width,grassHeight);

}
画车身:
function drawCar(){
w.clearRect(0,0,w.canvas.width,w.canvas.height);		//清空隐藏的画板
w.strokeStyle='#FF6600';					//设置边框色
w.lineWidth=2;						//设置边框的宽度,单位为像素
w.fillStyle='#FF9900';					//设置填充色
w.beginPath();						//开始绘制新路径
w.rect(0,0,carWidth,carHeight);				//绘制一个矩形
w.stroke();							//画边框
w.fill();							//填充背景
w.closePath();						//关闭绘制的新路径
drawTire(tiresDelta+radius,carHeight+axisDelta);		//我们开始画第一个轮子
drawTire(carWidth-tiresDelta-radius,carHeight+axisDelta);	//同样的,第二个

}
画轮胎:
function drawTire(x,y){
w.save();
w.translate(x,y);
w.rotate(carAlpha);
w.strokeStyle='#3300FF';
w.lineWidth=1;
w.fillStyle='#0099FF';
w.beginPath();
w.arc(0,0,radius,0,2*Math.PI,false);
w.fill();
w.closePath();
w.beginPath();
w.moveTo(radius,0);
w.lineTo(-radius,0);
w.stroke();
w.closePath();
w.beginPath();
w.moveTo(0,radius);
w.lineTo(0,-radius);
w.stroke();
w.closePath();
w.restore();

}由于原理简单,并且代码中作了详细注释,这里就不一一讲解!该是CSS3出场了
你将看到我们未通过一句JS代码就完全实现了和上面一样的动画效果:
HTML代码:
<html>
<head>
<meta charset="UTF-8" />
<title>Animations in HTML5 using CSS3 animations</title>
</head>
<body>
<div id="container">
<div id="car">
<div id="chassis"></div>
<div id="backtire" class="tire">
<div class="hr"></div>
<div class="vr"></div>
</div>
<div id="fronttire" class="tire">
<div class="hr"></div>
<div class="vr"></div>
</div>
</div>
<div id="grass"></div>
</div>
<footer></footer>
</body>
</html>
CSS代码:
body
{
padding:0;
margin:0;
}
定义车身与轮胎转到的动画(你会看到基本每一个动画都有四个版本的定义:原生版本/webkit【Chrome|Safari】/ms【为了向后兼容IE10】/moz【FireFox】)
/*定义动画:从-400px的位置移动到1600px的位置 */
@keyframes carAnimation
{
0% { left:-400px; }		/* 指定初始位置,0%等同于from*/
100% { left:1600px; }	/* 指定最终位置,100%等同于to*/
}

/* Safari and Chrome */
@-webkit-keyframes carAnimation
{
0% {left:-400px; }
100% {left:1600px; }
}

/* Firefox */
@-moz-keyframes carAnimation
{
0% {left:-400; }
100% {left:1600px; }
}

/*IE暂不支持,此处定义是为了向后兼容IE10*/
@-ms-keyframes carAnimation
{
0% {left:-400px; }
100%{left:1600px; }
}
@keyframes tyreAnimation
{
0% {transform: rotate(0); }
100% {transform: rotate(1800deg); }
}
@-webkit-keyframes tyreAnimation
{
0% { -webkit-transform: rotate(0); }
100% { -webkit-transform: rotate(1800deg); }
}
@-moz-keyframes tyreAnimation
{
0% { -moz-transform: rotate(0); }
100% { -moz-transform: rotate(1800deg); }
}
@-ms-keyframes tyreAnimation
{
0% { -ms-transform: rotate(0); }
100% { -ms-transform: rotate(1800deg); }
}#container
{
position:relative;
width:100%;
height:600px;
overflow:hidden; /*这个很重要*/
}
#car
{
position:absolute; /*汽车在容器中采用绝对定位*/
width:400px;
height:210px; /*汽车的总高度,包括轮胎和底盘*/
z-index:1; /*让汽车在背景的上方*/
top:300px; /*距顶端的距离(y轴)*/
left:50px; /*距左侧的距离(x轴)*/
/*以下内容赋予该元素预先定义的动画及相关属性*/
-webkit-animation-name:carAnimation; /*名称*/
-webkit-animation-duration:10s; /*持续时间*/
-webkit-animation-iteration-count:infinite; /*迭代次数-无限次*/
-webkit-animation-timing-function:linear; /*播放动画时从头到尾都以相同的速度*/
-moz-animation-name:carAnimation; /*名称*/
-moz-animation-duration:10s; /*持续时间*/
-moz-animation-iteration-count:infinite; /*迭代次数-无限次*/
-moz-animation-timing-function:linear; /*播放动画时从头到尾都以相同的速度*/
-ms-animation-name:carAnimation; /*名称*/
-ms-animation-duration:10s; /*持续时间*/
-ms-animation-iteration-count:infinite; /*迭代次数-无限次*/
-ms-animation-timing-function:linear; /*播放动画时从头到尾都以相同的速度*/
animation-name:carAnimation; /*名称*/
animation-duration:10s; /*持续时间*/
animation-iteration-count:infinite; /*迭代次数-无限次*/
animation-timing-function:linear; /*播放动画时从头到尾都以相同的速度*/
}
/*车身*/
#chassis
{
position:absolute;
width:400px;
height:130px;
background:#FF9900;
border: 2px solid #FF6600;
}
/*轮胎*/
.tire
{
z-index:1; /*同上,轮胎也应置于背景的上方*/
position:absolute;
bottom:0;
border-radius:60px; /*圆半径*/
height:120px; /* 2*radius=height */
width:120px; /* 2*radius=width */
background:#0099FF; /*填充色*/
border:1px solid #3300FF;
-webkit-animation-name:tyreAnimation;
-webkit-animation-duration:10s;
-webkit-animation-iteration-count:infinite;
-webkit-animation-timing-function:linear;
-moz-animation-name:tyreAnimation;
-moz-animation-duration:10s;
-moz-animation-iteration-count:infinite;
-moz-animation-timing-function:linear;
-ms-animation-name:tyreAnimation;
-ms-animation-duration:10s;
-ms-animation-iteration-count:infinite;
-ms-animation-timing-function:linear;
animation-name:tyreAnimation;
animation-duration:10s;
animation-iteration-count:infinite;
animation-timing-function:linear;
}
#fronttire
{
right:20px; /*设置右边的轮胎距离边缘的距离为20*/
}
#backtire
{
left:20px; /*设置左边的轮胎距离边缘的距离为20*/
}
#grass
{
position:absolute; /*背景绝对定位在容器中*/
width:100%;
height:130px;
bottom:0;
/*让背景色线性渐变,bottom,表示渐变的起始处,第一个颜色值是渐变的起始值,第二个颜色值是终止值 */
background:linear-grdaient(bottom,#33CC00,#66FF22);
background:-webkit-linear-gradient(bottom,#33CC00,#66FF22);
background:-moz-linear-gradient(bottom,#33CC00,#66FF22);
background:-ms-linear-gradient(bottom,#33CC00,#66FF22);
}
.hr,.vr
{
position:absolute;
background:#3300FF;
}
.hr
{
height:1px;
width:100%; /*轮胎的水平线*/
left:0;
top:60px;
}
.vr
{
width:1px;
height:100%; /*轮胎的垂直线*/
left:60px;
top:0;
}JQuery与CSS3合体
这是一个效果与兼容性俱佳的方式(特别对于IE9暂不支持CSS3而言)
HTML代码(可以看到与CSS3中的HTML代码并无不同):
<html>
<head>
<meta charset="UTF-8" />
<title>Animations in HTML5 using CSS3 animations</title>
</head>
<body>
<div id="container">
<div id="car">
<div id="chassis"></div>
<div id="backtire" class="tire">
<div class="hr"></div>
<div class="vr"></div>
</div>
<div id="fronttire" class="tire">
<div class="hr"></div>
<div class="vr"></div>
</div>
</div>
<div id="grass"></div>
</div>
<footer></footer>
</body>
</html>
CSS:
<style>
body
{
padding:0;
margin:0;
}

#container
{
position:relative;
width:100%;
height:600px;
overflow:hidden;		/*这个很重要*/
}

#car
{
position:absolute; 		/*汽车在容器中采用绝对定位*/
width:400px;
height:210px;		/*汽车的总高度,包括轮胎和底盘*/
z-index:1;			/*让汽车在背景的上方*/
top:300px;			/*距顶端的距离(y轴)*/
left:50px;			/*距左侧的距离(x轴)*/
}

/*车身*/
#chassis
{
position:absolute;
width:400px;
height:130px;
background:#FF9900;
border: 2px solid #FF6600;
}

/*轮胎*/
.tire
{
z-index:1;			/*同上,轮胎也应置于背景的上方*/
position:absolute;
bottom:0;
border-radius:60px;		/*圆半径*/
height:120px;		/* 2*radius=height */
width:120px;		/* 2*radius=width */
background:#0099FF;		/*填充色*/
border:1px solid #3300FF;
-o-transform:rotate(0deg);	/*旋转(单位:度)*/
-ms-transform:rotate(0deg);
-webkit-transform:rotate(0deg);
-moz-transform:rotate(0deg);
}

#fronttire
{
right:20px;		/*设置右边的轮胎距离边缘的距离为20*/
}

#backtire
{
left:20px;		/*设置左边的轮胎距离边缘的距离为20*/
}

#grass
{
position:absolute;	/*背景绝对定位在容器中*/
width:100%;
height:130px;
bottom:0;
/*让背景色线性渐变,bottom,表示渐变的起始处,第一个颜色值是渐变的起始值,第二个颜色值是终止值 */
background:linear-grdaient(bottom,#33CC00,#66FF22);
background:-webkit-linear-gradient(bottom,#33CC00,#66FF22);
background:-moz-linear-gradient(bottom,#33CC00,#66FF22);
background:-ms-linear-gradient(bottom,#33CC00,#66FF22);
}

.hr,.vr
{
position:absolute;
background:#3300FF;
}

.hr
{
height:1px;
width:100%;		/*水平线*/
left:0;
top:60px;
}

.vr
{
width:1px;
height:100%;	/*垂直线*/
left:60px;
top:0;
}

</style>
JS代码:
首先引入在线API:
<script src="https://ajax.googleapis.com/ajax/libs/jquery/1.7.1/jquery.min.js"></script>
实现动画代码(相当简洁):
<script>
$(function(){
var rot=0;
var prefix=$('.tire').css('-o-transform')?'-o-transform':($('.tire').css('-ms-transform')?'-ms-transform':($('.tire').css('-moz-transform')?'-moz-transform':($('.tire').css('-webkit-transform')?'-webkit-transform':'transform')));

var origin={		/*设置我们的起始点*/
left:-400
};

var animation={		/*该动画由jQuery执行*/
left:1600		/*设置我们将移动到的最终位置*/
};

var rotate=function(){	/*该方法将被旋转的轮子调用*/
rot+=2;
$('.tire').css(prefix,'rotate('+rot+'deg)');
};

var options={		/*将要被jQuery使用的参数*/
easing:'linear',	/*指定速度,此处只是线性,即为匀速*/
duration:10000,	/*指定动画持续时间*/
complete:function(){
$('#car').css(origin).animate(animation,options);
},
step:rotate
};

options.complete();
});
</script>
简单讲解:prefix首先识别出当前是哪个定义被采用了(-o?-moz?-webkit?-ms?),然后定义了动画的起点位置和终点位置。接着,定义了设置旋转角度的函数(该函数将在在动画的每一步(step)中执行)。然后,定义了一个动画,该定义方式导致了无限自循环调用!
本文,通过一个简单的动画实例,演示了HTML5下,实现动画的几种常见方式。
源码下载

相关文章推荐
- HTML5 实现小车动画效果(Canvas/CSS3/JQuery)
- HTML5 实现小车动画效果(Canvas/CSS3/JQuery)
- 用css3和canvas实现的蜂窝动画效果
- 使用HTML5和jQuery插件Reel实现一个超酷的星际争霸2兵种动画360度预览效果
- CSS3结合jQuery实现动画效果及回调函数
- Jquery使用animate实现css3的transform动画效果
- CSS3结合jQuery实现动画效果及回调函数的实例
- 使用HTML5和jQuery插件Reel实现一个超酷的星际争霸2兵种动画360度预览效果
- Html5的CSS3的transition实现简单动画效果
- 用jQuery和css3实现的一个模仿淘宝ued博客左边的菜单切换动画效果
- JS基于HTML5的canvas标签实现炫目的色相球动画效果实例
- 如何使用JQuery和HTML5 Canvas两种方法实现弹幕效果:
- javascript+HTML5的Canvas实现Lab单车动画效果
- HTML5 Canvas动画效果实现原理
- jquery使用CSS3实现文字动画效果插件Textillate.js
- jQuery+HTML5实现WebGL高性能烟花绽放动画效果【附demo源码下载】
- javascript+HTML5的Canvas实现Lab单车动画效果
- HTML5 中的 canvas 标签 实现动画效果
- HTML5 Canvas动画效果实现原理
- HTML5 Canvas动画效果实现原理