在对话框中设置背景的三种方法
2012-01-15 19:44
302 查看
方法一:
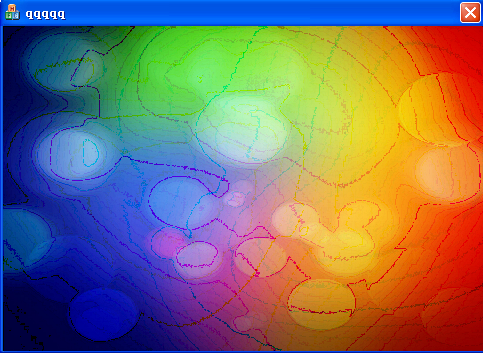
在OnPaint中StretchBlt
具体是:注释掉CDialog::OnPaint()或放到结尾(原因何在呢?),并加入贴图代码
执行效果截图如下:

方法二:
在OnEraseBkgnd中StretchBlt
具体是:注释掉return CDialog::OnEraseBkgnd(pDC);直接返回true(为什么不能返回这个要返回true呢?),代码如下:
效果与方法一相同,图片就不贴了,参见上图。
而且这里还有一个很有意思的现象,若在OnEraseBkgnd贴图,在OnPaint()函数中不调用基类的OnPaint,即注释掉CDialog::OnPaint(),则将界面隐藏后再显示出来则控件全没了,只有对话框以及背景。如下图:
原因见《在OnPaint中必须调用一次BeginPaint和EndPaint,且也只能调用一次。》
方法三:
在OnCtlColor中返回带有背景位图的画刷
具体是:
1、在头文件中定一个背景刷
2、在OnInitDialog中加入以下句
3、在OnCtlColor函数中返回背景画刷
效果如下图所示:
注意这个函数里面的if判断,这个pWnd参数很关键。
我们看看,如果没有这个if判断,直接返回m_brushBk;会是什么结果呢,代码如下:
截图如下:
看图说话,不解释,你懂的。
这种方法的缺点是不具备StretchBlt函数的图片自动适应对话框(目标矩形)大小的功能。
在OnPaint中StretchBlt
具体是:注释掉CDialog::OnPaint()或放到结尾(原因何在呢?),并加入贴图代码
void CqqqqqDlg::OnPaint()
{
if (IsIconic())
{
CPaintDC dc(this); // device context for painting

SendMessage(WM_ICONERASEBKGND, reinterpret_cast<WPARAM>(dc.GetSafeHdc()), 0);

// Center icon in client rectangle
int cxIcon = GetSystemMetrics(SM_CXICON);
int cyIcon = GetSystemMetrics(SM_CYICON);
CRect rect;
GetClientRect(&rect);
int x = (rect.Width() - cxIcon + 1) / 2;
int y = (rect.Height() - cyIcon + 1) / 2;

// Draw the icon
dc.DrawIcon(x, y, m_hIcon);
}
else
{
//CDialog::OnPaint();//注释此句,如果不注释的话,就放到结尾,原因何在呢?
//贴背景图片
CPaintDC dc(this);
CBitmap bmpBk;
bmpBk.LoadBitmapW(IDB_BITMAP_tempbk);
//m_bmpBK.LoadBitmapW(IDB_BMPBK);
BITMAP bmpSize;
bmpBk.GetBitmap(&bmpSize);//获取背景图片尺寸

CRect rect;
GetClientRect(&rect);//获取客户区尺寸

CDC dcMem;
dcMem.CreateCompatibleDC(&dc);
dcMem.SelectObject(&bmpBk);
dc.StretchBlt(0,0,rect.Width(),rect.Height(),&dcMem,0,0,bmpSize.bmWidth,bmpSize.bmHeight,SRCCOPY);//将背景图片拉伸或者压缩copy至客户区
//贴背景图片
}
}
执行效果截图如下:
方法二:
在OnEraseBkgnd中StretchBlt
具体是:注释掉return CDialog::OnEraseBkgnd(pDC);直接返回true(为什么不能返回这个要返回true呢?),代码如下:
BOOL CqqqqqDlg::OnEraseBkgnd(CDC* pDC)
{
// TODO: Add your message handler code here and/or call default
//贴背景图片
CBitmap bmpBk;
bmpBk.LoadBitmapW(IDB_BITMAP_tempbk);
//m_bmpBK.LoadBitmapW(IDB_BMPBK);
BITMAP bmpSize;
bmpBk.GetBitmap(&bmpSize);//获取背景图片尺寸

CRect rect;
GetClientRect(&rect);//获取客户区尺寸

CDC dcMem;
dcMem.CreateCompatibleDC(pDC);
dcMem.SelectObject(&bmpBk);
pDC->StretchBlt(0,0,rect.Width(),rect.Height(),&dcMem,0,0,bmpSize.bmWidth,bmpSize.bmHeight,SRCCOPY);//将背景图片拉伸或者压缩copy至客户区
//贴背景图片
return true;
//return CDialog::OnEraseBkgnd(pDC);
}
效果与方法一相同,图片就不贴了,参见上图。
而且这里还有一个很有意思的现象,若在OnEraseBkgnd贴图,在OnPaint()函数中不调用基类的OnPaint,即注释掉CDialog::OnPaint(),则将界面隐藏后再显示出来则控件全没了,只有对话框以及背景。如下图:
原因见《在OnPaint中必须调用一次BeginPaint和EndPaint,且也只能调用一次。》
方法三:
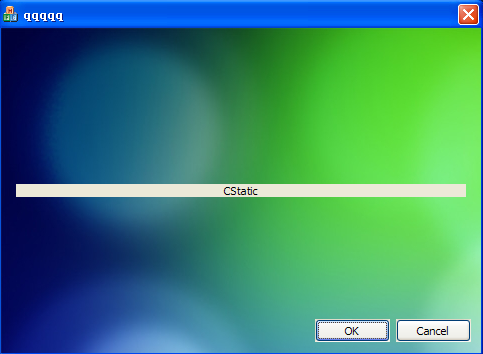
在OnCtlColor中返回带有背景位图的画刷
具体是:
1、在头文件中定一个背景刷
public:
CBrush   m_brushBk;
2、在OnInitDialog中加入以下句
// TODO: Add extra initialization here
CBitmap bmp;
bmp.LoadBitmap(IDB_BITMAP_tempbk);
m_brushBk.CreatePatternBrush(&bmp);
//m_brushBk.CreateSolidBrush(RGB(0,255,0)); //用纯色作为背景
bmp.DeleteObject();
3、在OnCtlColor函数中返回背景画刷
HBRUSH CXXXXXDlg::OnCtlColor(CDC* pDC, CWnd* pWnd, UINT nCtlColor)
{
HBRUSH hbr = CDialog::OnCtlColor(pDC, pWnd, nCtlColor);

// TODO:  Change any attributes of the DC here

// TODO:  Return a different brush if the default is not desired
if(pWnd==this) //this代表当前对话框窗口
{
return   m_brushBk;
}

return hbr;

}
效果如下图所示:
注意这个函数里面的if判断,这个pWnd参数很关键。
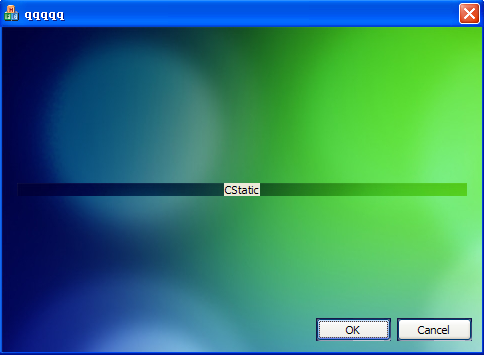
我们看看,如果没有这个if判断,直接返回m_brushBk;会是什么结果呢,代码如下:
HBRUSH CqqqqqDlg::OnCtlColor(CDC* pDC, CWnd* pWnd, UINT nCtlColor)
{
HBRUSH hbr = CDialog::OnCtlColor(pDC, pWnd, nCtlColor);

// TODO:  Change any attributes of the DC here

// TODO:  Return a different brush if the default is not desired

return  m_brushBk;

}
截图如下:
看图说话,不解释,你懂的。
这种方法的缺点是不具备StretchBlt函数的图片自动适应对话框(目标矩形)大小的功能。

相关文章推荐
- 在对话框中设置背景的三种方法 .
- 在对话框中设置背景的三种方法 .
- 在对话框中设置背景的三种方法 .
- Android设置布局背景为白色的三种方法
- MFC中设置对话框颜色、添加背景图片、添加音乐的方法
- MFC中设置对话框颜色、添加背景图片、添加音乐的方法
- C#设置Word文档背景的三种方法(纯色/渐变/图片背景)
- 给对话框整个面板设置背景颜色的方法
- Flex 设置容器背景的三种方法
- MFC中设置对话框颜色、添加背景图片、添加音乐的方法
- Android设置布局背景为白色的三种方法
- VC++中给对话框设置背景图片的方法
- 设置透明背景效果的三种方法
- Android设置布局背景为白色的三种方法
- Android设置布局背景为白色的三种方法
- 设置对话框背景的几种方法
- 模式对话框Dialog背景的透明度&黑暗度设置方法
- VC++对话框加背景图片设置方法
- MFC中设置对话框颜色、添加背景图片、添加音乐的方法
- (转载)Recyclerview | Intent与Bundle在传值上的区别 | 设置布局背景为白色的三种方法