Android状态栏提醒--Notification的使用
2012-01-14 11:06
295 查看
转自:http://blog.csdn.net/Android_Tutor/article/details/5696773
今天简单讲一下Android状态栏提醒,这个在开发中也会经常使用,当我们插上USB会有状态栏提醒,来短信时也会有状态栏的提醒。
而在Android中有提醒功能的也可以用AlertDialog,但是我们要审重的使用,因为当使用AlertDialog 的时候,用户正在进行的操作将会被打断
因为当前焦点被AlertDialog得到。我们可以想像一下,当用户打游戏正爽的时候,这时候来了一条短信。如果这时候短信用AlertDialog提醒,用户必须先去处理这条提醒,从而才能继续游戏。用户可能会活活被气死。而使用Notification就不会带来这些麻烦事,用户完全可以打完游戏再去看这条短信。所以在开发中应根据实际需求,选择合适的控件。
举一个简单的Demo, 教大家如何使用Notification,大致分以下几个步骤:
第一步:新建一个Android工程命名为NotificationDemo.
第二步:修改main.xml代码如下:
[java] view
plaincopy
<?xml version="1.0" encoding="utf-8"?>
<LinearLayout xmlns:android="http://schemas.android.com/apk/res/android"
android:orientation="vertical"
android:layout_width="fill_parent"
android:layout_height="fill_parent"
>
<TextView
android:layout_width="fill_parent"
android:layout_height="wrap_content"
android:text="Welcome to Mr Wei's blog"
/>
<Button
android:id="@+id/showButton"
android:layout_width="fill_parent"
android:layout_height="wrap_content"
android:text="showNotification"
/>
<Button
android:id="@+id/cancelButton"
android:layout_width="fill_parent"
android:layout_height="wrap_content"
android:text="cancelNotification"
/>
</LinearLayout>
第三步:修改NotificationDemo.java代码如下:
[java] view
plaincopy
package com.tutor.notification;
import android.app.Activity;
import android.app.Notification;
import android.app.NotificationManager;
import android.app.PendingIntent;
import android.content.Context;
import android.content.Intent;
import android.os.Bundle;
import android.view.View;
import android.view.View.OnClickListener;
import android.widget.Button;
public class NotificationDemo extends Activity implements OnClickListener{
private Context mContext;
private Button showButton,cancelButton;
private Notification mNotification;
private NotificationManager mNotificationManager;
private final static int NOTIFICATION_ID = 0x0001;
@Override
public void onCreate(Bundle savedInstanceState) {
super.onCreate(savedInstanceState);
setContentView(R.layout.main);
setupViews();
}
//这里是初始化一些操作,可以看到onCreate()方法里代码非常简洁。
public void setupViews(){
mContext = NotificationDemo.this;
showButton = (Button)findViewById(R.id.showButton);
cancelButton = (Button)findViewById(R.id.cancelButton);
mNotification = new Notification(R.drawable.icon,"This is a notification.",System.currentTimeMillis());
//将使用默认的声音来提醒用户
mNotification.defaults = Notification.DEFAULT_SOUND;
mNotificationManager = (NotificationManager)this.getSystemService(NOTIFICATION_SERVICE);
showButton.setOnClickListener(this);
cancelButton.setOnClickListener(this);
}
//按钮点击事件响应
public void onClick(View v) {
if(v == showButton){
Intent mIntent = new Intent(mContext,NotificationDemo.class);
//这里需要设置Intent.FLAG_ACTIVITY_NEW_TASK属性
mIntent.setFlags(Intent.FLAG_ACTIVITY_NEW_TASK);
PendingIntent mContentIntent =PendingIntent.getActivity(mContext,0, mIntent, 0);
//这里必需要用setLatestEventInfo(上下文,标题,内容,PendingIntent)不然会报错.
mNotification.setLatestEventInfo(this,
"我的Notification", "后台计数服务已启动~", mContentIntent);
//这里发送通知(消息ID,通知对象)
mNotificationManager.notify(NOTIFICATION_ID, mNotification);
}else if(v == cancelButton){
//取消只要把通知ID传过来就OK了.
mNotificationManager.cancel(NOTIFICATION_ID);
}
}
}
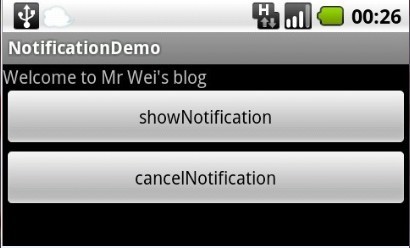
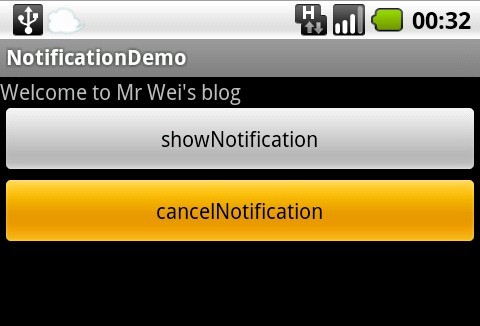
第四步:运行Android工程,效果如下图所示:

今天简单讲一下Android状态栏提醒,这个在开发中也会经常使用,当我们插上USB会有状态栏提醒,来短信时也会有状态栏的提醒。
而在Android中有提醒功能的也可以用AlertDialog,但是我们要审重的使用,因为当使用AlertDialog 的时候,用户正在进行的操作将会被打断
因为当前焦点被AlertDialog得到。我们可以想像一下,当用户打游戏正爽的时候,这时候来了一条短信。如果这时候短信用AlertDialog提醒,用户必须先去处理这条提醒,从而才能继续游戏。用户可能会活活被气死。而使用Notification就不会带来这些麻烦事,用户完全可以打完游戏再去看这条短信。所以在开发中应根据实际需求,选择合适的控件。
举一个简单的Demo, 教大家如何使用Notification,大致分以下几个步骤:
第一步:新建一个Android工程命名为NotificationDemo.
第二步:修改main.xml代码如下:
[java] view
plaincopy
<?xml version="1.0" encoding="utf-8"?>
<LinearLayout xmlns:android="http://schemas.android.com/apk/res/android"
android:orientation="vertical"
android:layout_width="fill_parent"
android:layout_height="fill_parent"
>
<TextView
android:layout_width="fill_parent"
android:layout_height="wrap_content"
android:text="Welcome to Mr Wei's blog"
/>
<Button
android:id="@+id/showButton"
android:layout_width="fill_parent"
android:layout_height="wrap_content"
android:text="showNotification"
/>
<Button
android:id="@+id/cancelButton"
android:layout_width="fill_parent"
android:layout_height="wrap_content"
android:text="cancelNotification"
/>
</LinearLayout>
第三步:修改NotificationDemo.java代码如下:
[java] view
plaincopy
package com.tutor.notification;
import android.app.Activity;
import android.app.Notification;
import android.app.NotificationManager;
import android.app.PendingIntent;
import android.content.Context;
import android.content.Intent;
import android.os.Bundle;
import android.view.View;
import android.view.View.OnClickListener;
import android.widget.Button;
public class NotificationDemo extends Activity implements OnClickListener{
private Context mContext;
private Button showButton,cancelButton;
private Notification mNotification;
private NotificationManager mNotificationManager;
private final static int NOTIFICATION_ID = 0x0001;
@Override
public void onCreate(Bundle savedInstanceState) {
super.onCreate(savedInstanceState);
setContentView(R.layout.main);
setupViews();
}
//这里是初始化一些操作,可以看到onCreate()方法里代码非常简洁。
public void setupViews(){
mContext = NotificationDemo.this;
showButton = (Button)findViewById(R.id.showButton);
cancelButton = (Button)findViewById(R.id.cancelButton);
mNotification = new Notification(R.drawable.icon,"This is a notification.",System.currentTimeMillis());
//将使用默认的声音来提醒用户
mNotification.defaults = Notification.DEFAULT_SOUND;
mNotificationManager = (NotificationManager)this.getSystemService(NOTIFICATION_SERVICE);
showButton.setOnClickListener(this);
cancelButton.setOnClickListener(this);
}
//按钮点击事件响应
public void onClick(View v) {
if(v == showButton){
Intent mIntent = new Intent(mContext,NotificationDemo.class);
//这里需要设置Intent.FLAG_ACTIVITY_NEW_TASK属性
mIntent.setFlags(Intent.FLAG_ACTIVITY_NEW_TASK);
PendingIntent mContentIntent =PendingIntent.getActivity(mContext,0, mIntent, 0);
//这里必需要用setLatestEventInfo(上下文,标题,内容,PendingIntent)不然会报错.
mNotification.setLatestEventInfo(this,
"我的Notification", "后台计数服务已启动~", mContentIntent);
//这里发送通知(消息ID,通知对象)
mNotificationManager.notify(NOTIFICATION_ID, mNotification);
}else if(v == cancelButton){
//取消只要把通知ID传过来就OK了.
mNotificationManager.cancel(NOTIFICATION_ID);
}
}
}
第四步:运行Android工程,效果如下图所示:

相关文章推荐
- Android状态栏提醒(Notification,NotificationManager)的使用!
- android 状态栏提醒 Notification 的使用!
- Android状态栏提醒(Notification,NotificationManager)的使用!
- Android基础教程之---Android状态栏提醒(Notification,NotificationManager)的使用!
- Android状态栏提醒(Notification,NotificationManager)的使用!
- Android基础教程之---Android状态栏提醒(Notification,NotificationManager)的使用!
- Android基础教程之---Android状态栏提醒(Notification,NotificationManager)的使用!
- Android基础教程之---Android状态栏提醒(Notification,NotificationManager)的使用!
- Android基础教程之---Android状态栏提醒(Notification,NotificationManager)的使用!
- Android基础教程之---Android状态栏提醒(Notification,NotificationManager)的使用! .
- android Notification 状态栏通知使用示例
- Android--状态栏的图标和文字提醒/NotificationManager与Notification对象的应用
- Android状态栏通知Notification使用小结
- android 应用图标放在状态栏上之NotificationManager和Notification的使用总结
- Android--状态栏的图标和文字提醒/NotificationManager与Notification对象的应用
- Android中使用Notification实现状态栏的通知
- Android状态栏提醒——Notification
- Android使用Notification在状态栏上显示通知
- Android 状态栏通知Notification的创建与使用
- android Notification 状态栏提醒