分享一下近期在XNA方面的研究和学习的成果(二)
2011-11-16 14:23
211 查看
在上文我大概介绍了一下打算实现一个《魂斗罗》的游戏,以及在实现过程中使用的自己开发的工具,文章最后给出了一个演示,可以看到我们已经可以通过键盘控制主角的各种动作了。今天继续分享这两天我的收获,这包括背景部分的使用以及通过引入一些简单的物理定理来实现跳跃的动作。我在游戏开发方面也还只是刚刚起步,或许我的这些做法和想法方向根本就是错的,不过我还是共享出来,希望得到专家的指点,同时也希望能给需要的朋友提供参考。

不过不幸的是,我的笔记本电脑硬件不支持HiDef的profile,这下尴尬了,只好切回Reach,算了,反正目前也只不过是一个演示,背景也不打算让它动,所以就用截图工具将背景截出一部分,然后使用我上文提到的那个Apworks Xna Tools产生背景的Sprite源代码:
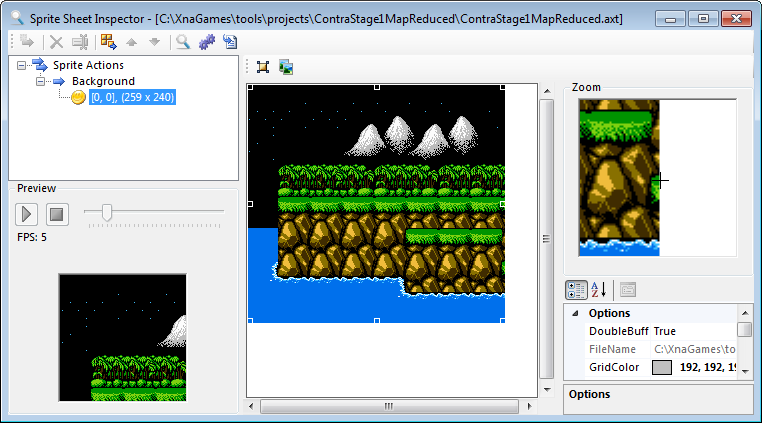
点击“产生输出文件”工具栏按钮以产生Sprite的源代码文件。该Sprite只有一个动作(Action),就是Background。篇幅原因,自动化产生的代码就不贴在这里了。
我的场景类定义非常简单,就是初始化我们的主角Sprite以及背景Sprite,并在场景的Update/Draw方法中分别去更新和重画这两个Sprite,代码如下:
在上面的代码中,有一个有趣的地方就是那个gravity字段(Gravity属性),它定义了当前场景所选用的重力加速度,这个值在后面实现主角跳跃的动作时需要用到。
Vt = V0 + at
St = S0 + 1/2*at2
在跳跃时速度的改变上,我们可以采用上述第一个公式,此时加速度就是我们之前在场景中定义的重力加速度Gravity。由于重力加速度方向与初始速度方向相反,所以a = -g,这将导致速度的变化会慢慢变小直至为0。由于我们的XNA系统采用Y坐标向下的坐标系统,因此我们需要在主角当前的Y坐标上去递减这个变化量以模拟向上跳的过程。随着时间的推移,速度变化量最终为负,于是主角Y的坐标又将继续增加。按理说此处应该根据场景来决定主角是否落到了一个可站立的平面,或者已经掉下悬崖,不过目前这部分还没有实现,所以我也只是简单地给一个下限值来限定跳跃下落的范围。
下面的代码就是处理跳跃的代码,在玩家按下K键时会设置jumping为true,同时记录beginJumpTime的时间,然后时间变化量就是当前游戏时间减去beginJumpTime的时间:
至此,ContraSprite的完整代码如下:
背景
背景的资源是从网上下载的,与红白机相关的游戏的资源可以在http://www.nes-snes-sprites.com/站点下载。考虑到在真正的游戏中,当主角移动到屏幕靠近中心位置时,如果继续往前走,移动的就不是主角本身,而是背景往相反的方向移动,因此背景也被设计成一个特殊的Sprite。但在使用中发现,背景的图片资源在X方向有3800多个像素,超出了Reach模式能够支持的大小,所以无法被ContentManager所使用,于是也不得不将项目类型切换为HiDef类型:
不过不幸的是,我的笔记本电脑硬件不支持HiDef的profile,这下尴尬了,只好切回Reach,算了,反正目前也只不过是一个演示,背景也不打算让它动,所以就用截图工具将背景截出一部分,然后使用我上文提到的那个Apworks Xna Tools产生背景的Sprite源代码:

点击“产生输出文件”工具栏按钮以产生Sprite的源代码文件。该Sprite只有一个动作(Action),就是Background。篇幅原因,自动化产生的代码就不贴在这里了。
场景
场景应该是游戏的核心部分,Sprite的表现和行为都将与场景密切相关。比如场景提示了在整个地图中某些地方有悬崖需要跳过,有些地方是水平面需要Sprite以游泳的动作进行活动;场景还决定了某些事件的产生,比如当Sprite运动到某个位置,将会发生某个事件等。按道理说,好的游戏开发过程应该需要借助场景编辑器来完成部分工作,但目前我还没有来的及去设计这个编辑器。在这里我选用了XNA Game Component来实现一个场景,在Game Component中可以很方便地加载必要的Sprite,不仅如此,当需要进行场景切换时,使用Game Component会变得非常方便。我的场景类定义非常简单,就是初始化我们的主角Sprite以及背景Sprite,并在场景的Update/Draw方法中分别去更新和重画这两个Sprite,代码如下:
public class SceneOne : Microsoft.Xna.Framework.DrawableGameComponent
{
private ContraSprite contra;
private ContraStage1BackgroundSprite background;
private SpriteBatch spriteBatch;

private float gravity = 9.8F;

public SceneOne(Game game)
: base(game)
{
// TODO: Construct any child components here
contra = new ContraSpriteImpl(this, Game);
//contra.X = 100;
//contra.Y = 70;
background = new ContraStage1BackgroundSprite(Game);
spriteBatch = new SpriteBatch(Game.GraphicsDevice);
}

public float Gravity
{
get { return this.gravity; }
}

/// <summary>
/// Allows the game component to perform any initialization it needs to before starting
/// to run.  This is where it can query for any required services and load content.
/// </summary>
public override void Initialize()
{
// TODO: Add your initialization code here

base.Initialize();
}

/// <summary>
/// Allows the game component to update itself.
/// </summary>
/// <param name="gameTime">Provides a snapshot of timing values.</param>
public override void Update(GameTime gameTime)
{
// TODO: Add your update code here
background.Update(gameTime);
contra.Update(gameTime);
base.Update(gameTime);
}

public override void Draw(GameTime gameTime)
{
spriteBatch.Begin();
background.Draw(gameTime, spriteBatch);
contra.Draw(gameTime, spriteBatch);
spriteBatch.End();
base.Draw(gameTime);
}
}
在上面的代码中,有一个有趣的地方就是那个gravity字段(Gravity属性),它定义了当前场景所选用的重力加速度,这个值在后面实现主角跳跃的动作时需要用到。
跳跃的实现
实现跳跃的基本思路就是主角Y方向上的速度随时间递减,在递减完以后更新主角的Y方向的量。为了让跳跃过程更加逼真,我们可以采用牛顿力学的一些思想比如速度变化量(加速度)等,在这方面常用的公式会有:Vt = V0 + at
St = S0 + 1/2*at2
在跳跃时速度的改变上,我们可以采用上述第一个公式,此时加速度就是我们之前在场景中定义的重力加速度Gravity。由于重力加速度方向与初始速度方向相反,所以a = -g,这将导致速度的变化会慢慢变小直至为0。由于我们的XNA系统采用Y坐标向下的坐标系统,因此我们需要在主角当前的Y坐标上去递减这个变化量以模拟向上跳的过程。随着时间的推移,速度变化量最终为负,于是主角Y的坐标又将继续增加。按理说此处应该根据场景来决定主角是否落到了一个可站立的平面,或者已经掉下悬崖,不过目前这部分还没有实现,所以我也只是简单地给一个下限值来限定跳跃下落的范围。
下面的代码就是处理跳跃的代码,在玩家按下K键时会设置jumping为true,同时记录beginJumpTime的时间,然后时间变化量就是当前游戏时间减去beginJumpTime的时间:
if (jumping)
{
this.CurrentAction =
direction == Direction.Left ?
ContraSpriteActions.JumpLeft : ContraSpriteActions.JumpRight;
float elapsed = (float)(gameTime.TotalGameTime.TotalSeconds - beginJumpTime);
float speed = v.Y - this.scene.Gravity * elapsed;
this.Y -= speed;
if (this.Y >= 70)
{
this.Y = 70;
jumping = false;
this.CurrentAction =
direction == Direction.Left ?
ContraSpriteActions.StandLeft : ContraSpriteActions.StandRight;
}
}
至此,ContraSprite的完整代码如下:
public class ContraSpriteImpl : ContraSprite
{
private Direction direction;
private SceneOne scene;
private Velocity v = new Velocity(1.5F, 3F);
private bool jumping = false;
private double beginJumpTime;

public ContraSpriteImpl(GameComponent scene, Game game)
:base(game)
{
this.CurrentAction = ContraSpriteActions.JumpRight;
this.scene = (SceneOne)scene;
this.direction = Direction.Right;
this.X = 50;
this.Y = 15;
beginJumpTime = (float)-v.Y / this.scene.Gravity;
this.jumping = true;
}

public override void Update(GameTime gameTime)
{
KeyboardState state = Keyboard.GetState();

Keys[] keys = state.GetPressedKeys();
if ((keys == null || keys.Length == 0) && !jumping)
{
this.CurrentAction =
direction == Direction.Left ?
ContraSpriteActions.StandLeft : ContraSpriteActions.StandRight;
}

foreach (Keys key in keys)
{
switch (key)
{
case Keys.W:
if (!jumping)
this.CurrentAction =
direction == Direction.Left ?
ContraSpriteActions.UpLeft : ContraSpriteActions.UpRight;
break;
case Keys.S:
if (!jumping)
this.CurrentAction =
direction == Direction.Left ?
ContraSpriteActions.DownLeft : ContraSpriteActions.DownRight;
break;
case Keys.A:
if (!jumping)
this.CurrentAction = ContraSpriteActions.Left;
direction = Direction.Left;
this.X -= v.X;
break;
case Keys.D:
if (!jumping)
this.CurrentAction = ContraSpriteActions.Right;
direction = Direction.Right;
this.X += v.X;
break;
case Keys.K:
if (!jumping)
{
jumping = true;
beginJumpTime = gameTime.TotalGameTime.TotalSeconds;
}
break;
}
}

if (jumping)
{
this.CurrentAction =
direction == Direction.Left ?
ContraSpriteActions.JumpLeft : ContraSpriteActions.JumpRight;
float elapsed = (float)(gameTime.TotalGameTime.TotalSeconds - beginJumpTime);
float speed = v.Y - this.scene.Gravity * elapsed;
this.Y -= speed;
if (this.Y >= 70)
{
this.Y = 70;
jumping = false;
this.CurrentAction =
direction == Direction.Left ?
ContraSpriteActions.StandLeft : ContraSpriteActions.StandRight;
}
}base.Update(gameTime);
}
}
演示动画
以下是已经实现的功能的演示动画,可以看到主角的各种动作,包括跳跃都运行的非常流畅。
相关文章推荐
- 分享一下近期在XNA方面的研究和学习的成果
- [XNA研究强烈推荐]XNA开发雷电类游戏,源代码提供下载学习(提供代码和视频演示)
- 最近开始学习数据库,下了一点资料,分享一下
- 大年初七,分享一下你对数据知识的学习计划吧~
- 我学习以来关注的一些博客和论坛(分享一下)
- [转]分享我对领域驱动设计(DDD)的学习成果
- Web服务器中文URL研究心得(学习所得,跟大家分享)
- Java学习心得(看到后觉得很好,在博客上分享一下,希望对大家有启发)
- 今天又看到了一篇关于程序运行时内存方面的文章,特地来分享一下。
- 近期专业学习成果
- 第一次触电Blog,希望总结一下自己最近的学习成果
- 领域驱动设计学习成果分享
- 分享一下字符串匹配BM算法学习心得。
- 展示一下OpenGL的学习成果
- 分享一下我5个小时学会jQuery的方法,同样适用于学习PHP
- 之前有研究过企业文化与洗脑之间的关系,对洗脑有一些了解,分享一下,可能不全面。
- 分享一下我研究SQLSERVER以来收集的笔记
- 编写学习的java几种常用数组的排序方法,给大家分享一下
- 分享我对领域驱动设计(DDD)的学习成果
- 分享一下很好的WEB学习资料--对新手来说很不错的资料