Android游戏开发之多线程的操作方式(二十六)
2011-08-21 23:31
507 查看
[align=center]Android游戏开发之多线程的操作方式
雨松MOMO原创文章如转载,请注明:转载至我的独立域名博客雨松MOMO程序研究院,原文地址:http://www.xuanyusong.com/archives/344
[/align]

游戏开发与软件开发多线程的重要性
如果程序主线程被阻塞超过5秒,系统会提示“应用程序无响应” 这就是ANR 。 ANR的全称是Application Not Responding,使用多线程可以避免ANR。但是这里要注意一下不要为了避免ANR而过多的使用多线程,除非万不得已的情况。 比如访问网络服务端返回的过慢、数据过多导致滑动屏幕不流畅、或者I/O读取过大的资源等等。这里可以开启一个新线程来处理这些耗时的操作。 如果过多使用多线程会出现数据同步的问题须要程序员去处理,所以使用多线程的时候尽量保持它的独立不会被其它线程干预。java语言提供了一个线程锁的概念 synchronized 可以添加对象锁与方法锁专门避免多线程同时访问一个方法或者一个对象导致的问题,有兴趣的朋友可以去看看这里我不罗嗦啦 。
1.Thread与Handler执行多线程
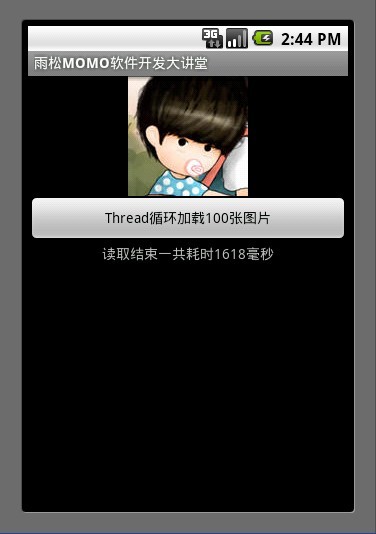
Handler主要用于程序主线程与我们自己创建的线程进行通信。在这个例子中点击按钮后创建一个新的线程去循环的加载100张图片每加载完一张图片在Thread中使用Handler发送消息通知UI线程更新显示,直到加在完毕通知UI显示加载完成一共耗时多少秒。可见Handler的重要性它就是主线程与我们自己创建的线程的桥梁啊~~~
2.TimerTask与Handler延迟多线程
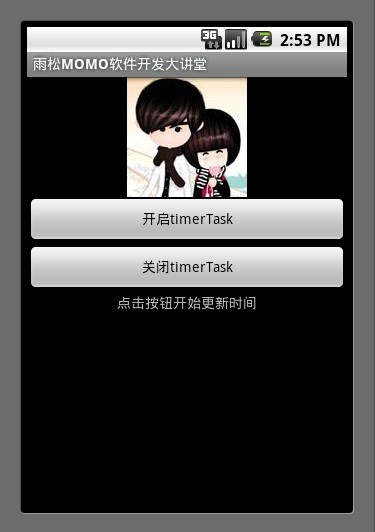
Timer与TimerTask可以构建一个延迟器 就好比开启一个线程每隔一段规定的时间访问一次。可以在这个线程中去关闭这个Timer 与TimerTask ,举个例子比如现在我要做一个网游帐号登录超时客户端的检测 用户输入完帐号密码点击登录这时候我开启一个TimerTask每过1秒检查一下用户是否登录成功,过了10秒如果还没有登录成功提示他登陆超时。这个时候我就须要在这个检测线程中去关闭Timer 与TimerTask 因为不需要它在循环检测了。 调用cancel()就可以关闭,请同学们阅读下面这个例子。
3.AsyncTask执行多线程

[align=left]执行AsyncTask
[/align][align=left]onPreExecute()///首先执行这个方法,它在UI线程中 可以执行一些异步操作 比如初始化一些东西
doInBackground(Object... arg0) //异步后台执行 ,执行完毕可以返回出去一个结果object对象
onPostExecute(Object result) //可以拿到执行中的进度 当然进度须要在doInBackground中手动调用publishProgress()方法返回
通过例子可以清楚的看到计算出读取100张图片的时间,执行的效率上来说AsyncTask 没有Thread效率块,但是AsyncTask 比Thread更规整,它可是时时的拿到异步线程中进度以及最后的结果集,可以让我们的代码更佳规范。这里说一下 Thread能做到的事AsyncTask 都可以做到 但是AsyncTask 能做到的事Thread 不一定能做到就算勉强做到也很麻烦 。我给大家的建议是如果处理大量的异步操作就用AsyncTask 如果少部分的则使用Thread
[/align]
4.多线程Looper的使用

Looper用来管理线程的消息队列与循环队列,在handler中默认为mainlooper来进行消息循环,如果在handler中开启一个新的线程那么在这个新的线程中就没有Looper循环,如果想让这个新的线程具有消息队列与消息循环我们须要调用 Looper.prepare();拿到它的loop ,这样就好比在Thread中创建了消息队列与循环 需要调用 Looper.loop(); 它的意思就是执行这个消息循环,下面我给出一个例子希望大家好好阅读。
老规矩每篇文章都会附带源代码,最后如果你还是觉得我写的不够详细 看的不够爽 不要紧我把源代码的下载地址贴出来 欢迎大家一起讨论学习雨松MOMO希望可以和大家一起进步。
下载地址:http://download.csdn.net/source/3537962
雨松MOMO原创文章如转载,请注明:转载至我的独立域名博客雨松MOMO程序研究院,原文地址:http://www.xuanyusong.com/archives/344
[/align]
游戏开发与软件开发多线程的重要性
如果程序主线程被阻塞超过5秒,系统会提示“应用程序无响应” 这就是ANR 。 ANR的全称是Application Not Responding,使用多线程可以避免ANR。但是这里要注意一下不要为了避免ANR而过多的使用多线程,除非万不得已的情况。 比如访问网络服务端返回的过慢、数据过多导致滑动屏幕不流畅、或者I/O读取过大的资源等等。这里可以开启一个新线程来处理这些耗时的操作。 如果过多使用多线程会出现数据同步的问题须要程序员去处理,所以使用多线程的时候尽量保持它的独立不会被其它线程干预。java语言提供了一个线程锁的概念 synchronized 可以添加对象锁与方法锁专门避免多线程同时访问一个方法或者一个对象导致的问题,有兴趣的朋友可以去看看这里我不罗嗦啦 。
1.Thread与Handler执行多线程
Handler主要用于程序主线程与我们自己创建的线程进行通信。在这个例子中点击按钮后创建一个新的线程去循环的加载100张图片每加载完一张图片在Thread中使用Handler发送消息通知UI线程更新显示,直到加在完毕通知UI显示加载完成一共耗时多少秒。可见Handler的重要性它就是主线程与我们自己创建的线程的桥梁啊~~~
import java.io.InputStream;

import android.app.Activity;
import android.content.Context;
import android.graphics.Bitmap;
import android.graphics.BitmapFactory;
import android.os.Bundle;
import android.os.Handler;
import android.os.Message;
import android.view.View;
import android.view.View.OnClickListener;
import android.widget.Button;
import android.widget.TextView;

public class SingleActivity extends Activity {

/**读取进度**/
public final static int LOAD_PROGRESS = 0;

/**标志读取进度结束**/
public final static int LOAD_COMPLETE = 1;

/** 开始加载100张图片按钮 **/
Button mButton = null;
/** 显示内容 **/
TextView mTextView = null;
/** 加载图片前的时间 **/
Long mLoadStatr = 0L;
/** 加载图片后的时间 **/
Long mLoadEnd = 0L;

Context mContext = null;

//接收传递过来的信息
Handler handler = new Handler() {
@Override
public void handleMessage(Message msg) {
switch (msg.what) {
case LOAD_PROGRESS:
mTextView.setText("当前读取到第" + msg.arg1 + "张图片");
break;
case LOAD_COMPLETE:
mTextView.setText("读取结束一共耗时" + msg.arg1 + "毫秒");
break;
}
super.handleMessage(msg);
}
};

@Override
protected void onCreate(Bundle savedInstanceState) {
setContentView(R.layout.single);
mContext = this;

/** 拿到button 与 TextView 对象 **/
mButton = (Button) findViewById(R.id.button0);
mTextView = (TextView) findViewById(R.id.textView0);
mTextView.setText("点击按钮开始更新时间");
mButton.setOnClickListener(new OnClickListener() {
@Override
public void onClick(View arg0) {
//开始读取图片
LoadImage();
}
});

super.onCreate(savedInstanceState);
}

public void LoadImage() {
new Thread() {
@Override
public void run() {
//得到加载图片开始的时间
mLoadStatr = System.currentTimeMillis();

for (int i = 0; i < 100; i++) {
// 这里循环加载图片100遍
ReadBitMap(mContext, R.drawable.bg);

// 每读取完一张图片将进度甩给handler
Message msg = new Message();
msg.what = LOAD_PROGRESS;
msg.arg1 = i + 1;
handler.sendMessage(msg);
}

//得到加载图片结束的时间
mLoadEnd = System.currentTimeMillis();

//100张图片加载完成
Message msg = new Message();
msg.what = LOAD_COMPLETE;
msg.arg1 = (int) (mLoadEnd - mLoadStatr);
handler.sendMessage(msg);
}
}.start();

}

/**
* 读取本地资源的图片
*
* @param context
* @param resId
* @return
*/
public Bitmap ReadBitMap(Context context, int resId) {
BitmapFactory.Options opt = new BitmapFactory.Options();
opt.inPreferredConfig = Bitmap.Config.RGB_565;
opt.inPurgeable = true;
opt.inInputShareable = true;
// 获取资源图片
InputStream is = context.getResources().openRawResource(resId);
return BitmapFactory.decodeStream(is, null, opt);
}
}
2.TimerTask与Handler延迟多线程
Timer与TimerTask可以构建一个延迟器 就好比开启一个线程每隔一段规定的时间访问一次。可以在这个线程中去关闭这个Timer 与TimerTask ,举个例子比如现在我要做一个网游帐号登录超时客户端的检测 用户输入完帐号密码点击登录这时候我开启一个TimerTask每过1秒检查一下用户是否登录成功,过了10秒如果还没有登录成功提示他登陆超时。这个时候我就须要在这个检测线程中去关闭Timer 与TimerTask 因为不需要它在循环检测了。 调用cancel()就可以关闭,请同学们阅读下面这个例子。
import java.util.Timer;
import java.util.TimerTask;
import android.app.Activity;
import android.content.Context;
import android.os.Bundle;
import android.os.Handler;
import android.os.Message;
import android.view.View;
import android.view.View.OnClickListener;
import android.widget.Button;
import android.widget.TextView;

public class TimerTaskActivity extends Activity {

/**执行Timer进度**/
public final static int LOAD_PROGRESS = 0;

/**关闭Timer进度**/
public final static int CLOSE_PROGRESS = 1;

/** 开始TimerTask按钮 **/
Button mButton0 = null;

/** 关闭TimerTask按钮 **/
Button mButton1 = null;

/** 显示内容 **/
TextView mTextView = null;

Context mContext = null;

/**Timer对象**/
Timer mTimer = null;

/**TimerTask对象**/
TimerTask mTimerTask = null;

/**记录TimerID**/
int mTimerID = 0;

/**接收传递过来的信息**/
Handler handler = new Handler() {
@Override
public void handleMessage(Message msg) {
switch (msg.what) {
case LOAD_PROGRESS:
mTextView.setText("当前TimerID为" + msg.arg1 );
break;
case CLOSE_PROGRESS:
mTextView.setText("当前Timer已经关闭请重新开启" );
break;

}
super.handleMessage(msg);
}
};

@Override
protected void onCreate(Bundle savedInstanceState) {
setContentView(R.layout.timer);
mContext = this;

/** 拿到button 与 TextView 对象 **/
mButton0 = (Button) findViewById(R.id.button0);
mButton1 = (Button) findViewById(R.id.button1);
mTextView = (TextView) findViewById(R.id.textView0);
mTextView.setText("点击按钮开始更新时间");

//开始
mButton0.setOnClickListener(new OnClickListener() {
@Override
public void onClick(View arg0) {
//开始执行timer
StartTimer();
}
});

//关闭
mButton1.setOnClickListener(new OnClickListener() {
@Override
public void onClick(View arg0) {
//停止执行timer
CloseTimer();
}
});

super.onCreate(savedInstanceState);
}

public void StartTimer() {

if (mTimer == null) {
mTimerTask = new TimerTask() {
public void run() {
//mTimerTask与mTimer执行的前提下每过1秒进一次这里
mTimerID ++;
Message msg = new Message();
msg.what = LOAD_PROGRESS;
msg.arg1 = (int) (mTimerID);
handler.sendMessage(msg);
}
};
mTimer = new Timer();

//第一个参数为执行的mTimerTask
//第二个参数为延迟的时间 这里写1000的意思是mTimerTask将延迟1秒执行
//第三个参数为多久执行一次 这里写1000表示每1秒执行一次mTimerTask的Run方法
mTimer.schedule(mTimerTask, 1000, 1000);
}

}

public void CloseTimer() {

//在这里关闭mTimer 与 mTimerTask
if (mTimer != null) {
mTimer.cancel();
mTimer = null;
}
if (mTimerTask != null) {
mTimerTask = null;
}

/**ID重置**/
mTimerID = 0;

//这里发送一条只带what空的消息
handler.sendEmptyMessage(CLOSE_PROGRESS);
}
}
3.AsyncTask执行多线程
[align=left]执行AsyncTask
[/align][align=left]onPreExecute()///首先执行这个方法,它在UI线程中 可以执行一些异步操作 比如初始化一些东西
doInBackground(Object... arg0) //异步后台执行 ,执行完毕可以返回出去一个结果object对象
onPostExecute(Object result) //可以拿到执行中的进度 当然进度须要在doInBackground中手动调用publishProgress()方法返回
通过例子可以清楚的看到计算出读取100张图片的时间,执行的效率上来说AsyncTask 没有Thread效率块,但是AsyncTask 比Thread更规整,它可是时时的拿到异步线程中进度以及最后的结果集,可以让我们的代码更佳规范。这里说一下 Thread能做到的事AsyncTask 都可以做到 但是AsyncTask 能做到的事Thread 不一定能做到就算勉强做到也很麻烦 。我给大家的建议是如果处理大量的异步操作就用AsyncTask 如果少部分的则使用Thread
[/align]
import java.io.InputStream;
import java.util.Timer;
import java.util.TimerTask;
import android.app.Activity;
import android.content.Context;
import android.graphics.Bitmap;
import android.graphics.BitmapFactory;
import android.os.AsyncTask;
import android.os.Bundle;
import android.view.View;
import android.view.View.OnClickListener;
import android.widget.Button;
import android.widget.TextView;

public class AsyncTaskActivity extends Activity {

/**执行Timer进度**/
public final static int LOAD_PROGRESS = 0;

/**关闭Timer进度**/
public final static int CLOSE_PROGRESS = 1;

/** 开始StartAsync按钮 **/
Button mButton0 = null;

/** 显示内容 **/
TextView mTextView = null;

Context mContext = null;

/**Timer对象**/
Timer mTimer = null;

/**TimerTask对象**/
TimerTask mTimerTask = null;

/**记录TimerID**/
int mTimerID = 0;

@Override
protected void onCreate(Bundle savedInstanceState) {
setContentView(R.layout.async);
mContext = this;

/** 拿到button 与 TextView 对象 **/
mButton0 = (Button) findViewById(R.id.button0);
mTextView = (TextView) findViewById(R.id.textView0);
//开始
mButton0.setOnClickListener(new OnClickListener() {
@Override
public void onClick(View arg0) {
//开始执行StartAsync
StartAsync();
}
});

super.onCreate(savedInstanceState);
}

public void StartAsync() {
new AsyncTask<Object, Object, Object>() {

@Override
protected void onPreExecute() {
//首先执行这个方法,它在UI线程中 可以执行一些异步操作
mTextView.setText("开始加载进度");
super.onPreExecute();
}

@Override
protected Object doInBackground(Object... arg0) {
//异步后台执行 ,执行完毕可以返回出去一个结果object对象

//得到开始加载的时间
Long startTime = System.currentTimeMillis();
for (int i = 0; i < 100; i++) {
// 这里循环加载图片100遍
ReadBitMap(mContext, R.drawable.bg);
//执行这个方法会异步调用onProgressUpdate方法,可以用来更新UI
publishProgress(i);
}
//得到结束加载的时间
Long endTime = System.currentTimeMillis();

//将读取时间返回
return endTime - startTime;
}

@Override
protected void onPostExecute(Object result) {
//doInBackground之行结束以后在这里可以接收到返回的结果对象

mTextView.setText("读取100张图片一共耗时" + result+ "毫秒");

super.onPostExecute(result);
}

@Override
protected void onProgressUpdate(Object... values) {
//时时拿到当前的进度更新UI

mTextView.setText("当前加载进度" + values[0]);
super.onProgressUpdate(values);
}
}.execute();//可以理解为执行 这个AsyncTask

}
/**
* 读取本地资源的图片
*
* @param context
* @param resId
* @return
*/
public Bitmap ReadBitMap(Context context, int resId) {
BitmapFactory.Options opt = new BitmapFactory.Options();
opt.inPreferredConfig = Bitmap.Config.RGB_565;
opt.inPurgeable = true;
opt.inInputShareable = true;
// 获取资源图片
InputStream is = context.getResources().openRawResource(resId);
return BitmapFactory.decodeStream(is, null, opt);
}
}
4.多线程Looper的使用
Looper用来管理线程的消息队列与循环队列,在handler中默认为mainlooper来进行消息循环,如果在handler中开启一个新的线程那么在这个新的线程中就没有Looper循环,如果想让这个新的线程具有消息队列与消息循环我们须要调用 Looper.prepare();拿到它的loop ,这样就好比在Thread中创建了消息队列与循环 需要调用 Looper.loop(); 它的意思就是执行这个消息循环,下面我给出一个例子希望大家好好阅读。
import java.io.InputStream;

import android.app.Activity;
import android.content.Context;
import android.graphics.Bitmap;
import android.graphics.BitmapFactory;
import android.os.Bundle;
import android.os.Handler;
import android.os.Looper;
import android.os.Message;
import android.view.View;
import android.view.View.OnClickListener;
import android.widget.Button;
import android.widget.Toast;

public class LooperActivity extends Activity {
/** 发送消息按钮 **/
Button mButton = null;
/** 加载图片前的时间 **/
Long mLoadStatr = 0L;
/** 加载图片后的时间 **/
Long mLoadEnd = 0L;

Context mContext = null;

private Handler handler = new Handler() {
public void handleMessage(Message msg) {
new Thread() {
@Override
public void run() {

//如果handler不指定looper的话
//默认为mainlooper来进行消息循环,
//而当前是在一个新的线程中它没有默认的looper
//所以我们须要手动调用prepare()拿到他的loop
//可以理解为在Thread创建Looper的消息队列
Looper.prepare();

Toast.makeText(LooperActivity.this, "收到消息",Toast.LENGTH_LONG).show();

//在这里执行这个消息循环如果没有这句
//就好比只创建了Looper的消息队列而
//没有执行这个队列那么上面Toast的内容是不会显示出来的
Looper.loop();

//如果没有   Looper.prepare();  与 Looper.loop();
//会抛出异常Can't create handler inside thread that has not called Looper.prepare()
//原因是我们新起的线程中是没有默认的looper所以须要手动调用prepare()拿到他的loop

}
}.start();
}
};

@Override
protected void onCreate(Bundle savedInstanceState) {
setContentView(R.layout.loop);
mContext = this;

/** 拿到button 与 TextView 对象 **/
mButton = (Button) findViewById(R.id.button0);
mButton.setOnClickListener(new OnClickListener() {
@Override
public void onClick(View arg0) {
new Thread() {
@Override
public void run() {

//发送一条空的消息
//空消息中必需带一个what字段
//用于在handler中接收
//这里暂时我先写成0
handler.sendEmptyMessage(0);

}
}.start();
}
});

super.onCreate(savedInstanceState);
}
/**
* 读取本地资源的图片
*
* @param context
* @param resId
* @return
*/
public Bitmap ReadBitMap(Context context, int resId) {
BitmapFactory.Options opt = new BitmapFactory.Options();
opt.inPreferredConfig = Bitmap.Config.RGB_565;
opt.inPurgeable = true;
opt.inInputShareable = true;
// 获取资源图片
InputStream is = context.getResources().openRawResource(resId);
return BitmapFactory.decodeStream(is, null, opt);
}
}
老规矩每篇文章都会附带源代码,最后如果你还是觉得我写的不够详细 看的不够爽 不要紧我把源代码的下载地址贴出来 欢迎大家一起讨论学习雨松MOMO希望可以和大家一起进步。
下载地址:http://download.csdn.net/source/3537962

相关文章推荐
- Android游戏开发之多线程的操作方式(二十六)
- Android游戏开发之多线程的操作方式(二十六)
- Android游戏开发之多线程的操作方式(二十六)
- Android游戏开发之多线程的操作方式
- Android游戏开发之多线程的操作方式
- Android游戏开发之多线程的操作方式
- Android开发之多线程的操作方式Thread,TimerTask,AsyncTask
- 【Android游戏开发十三】(保存游戏数据 [下文])详解SQLite存储方式,并把SQLite的数据库文件存储在SD卡中!!!
- 【Android游戏开发二十六】追加简述SurfaceView 与 GLSurfaceView效率!
- (转)【Android游戏开发十三】(保存游戏数据 [下文])详解SQLite存储方式,并把SQLite的数据库文件存储在SD卡中!!!
- (转)【Android游戏开发之十】(优化处理)详细剖析Android Traceview 效率检视工具!分析程序运行速度!并讲解两种创建SDcard方式!
- 【Android游戏开发十三】(保存游戏数据 [下文])详解SQLite存储方式,并把SQLite的数据库文件存储在SD卡中!!!
- 【Android游戏开发二十六】追加简述SurfaceView 与 GLSurfaceView效率!
- (转)【Android游戏开发二十六】追加简述SurfaceView 与 GLSurfaceView效率!
- 【Android游戏开发十六】Android Gesture之【触摸屏手势识别】操作!利用触摸屏手势实现一个简单切换图片的功能!
- 【Android游戏开发十六】Android Gesture之【触摸屏手势识别】操作!利用触摸屏手势实现一个简单切换图片的功能!
- 【Android游戏开发十三】(保存游戏数据 [下文])详解SQLite存储方式,并把SQLite的数据库文件存储在SD卡中!!!
- Android游戏开发:实现手势操作切换图片的实例
- Android游戏开发基础part4--Bitmap位图的渲染与操作