Windows下快速配置gstreamer开发环境
2010-07-21 18:17
232 查看
Windows下快速配置gstreamer开发环境
杜晶 2010-07-21上海
本文采用OSSBuild快速构建Windows下的GStreamer开发环境,如果想要使用Gtk来开发的朋友们可以参照其他博文。
(本文的完整环境下载)
1.安装GStreamer-WinBuilds-GPL-x86.msi,采用默认组件选项(全装),安装路径中最好不要有空格。
2.做开发的才需安装GStreamer-WinBuilds-SDK-GPL-x86.msi,采用默认组件选项(全装),安装路径被强制在运行时路径的sdk子目录下。
3.把python26.dll复制到 <gst程序目录>/v0.10.6/bin下。刚开始我就是没有复制这个,一运行自己写的测试应用程序总报如下错误,折腾了2天啊:
** (gst-launch-0.10:3528): WARNING **: Failed to loadplugin 'C:/GStreamer/v0.10
.6/lib/gstreamer-0.10/libgstpython-v2.6.dll': `C:/GStreamer/v0.10.6/lib/gstreame
r-0.10/libgstpython-v2.6.dll': 找不到指定的模块。
使用gst-launch.exe命令也会报上述错误,并且弹出如下对话框:

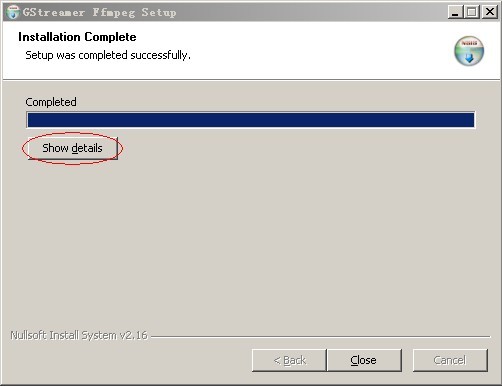
4.安装gst-ffmpeg-0.10.2.exe,安装时注意点开 Show details按钮,如下图,注意里面的dll和目的路径:
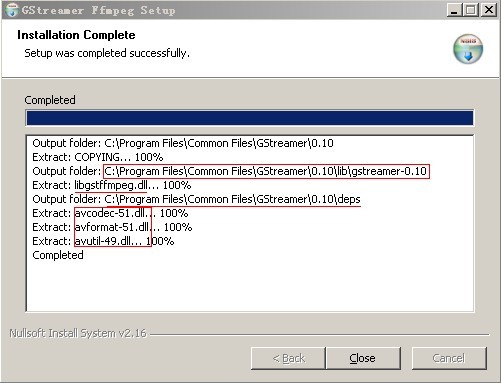
将libgstffmpeg.dll复制到<gst程序目录>/v0.10.6/lib/gstreamer-0.10下,并将avcodec-51.dll,avformat-51.dll,avutil-49.dll复制到
c:/window/system32 下(即系统目录%system32%)。
这个东西折腾了我一天,如果不这么做,一运行自己写的测试应用程序总报Cann't create player。使用gst-launch.exe命令,则会报如下错误:
Setting pipeline to PAUSED ...
Pipeline is PREROLLING ...
ERROR: from element /GstPipeline:pipeline0/GstDecodeBin:decodebin0/GstQueue:queu
e1: Internal data flow error.
Additional debug info:
../../../Source/gstreamer/plugins/elements/gstqueue.c(1212):gst_queue_loop ():
/GstPipeline:pipeline0/GstDecodeBin:decodebin0/GstQueue:queue1:
streaming task paused, reason not-linked (-1)
ERROR: pipeline doesn't want to
preroll.
Setting pipeline to NULL ...
Freeing pipeline ...
这些都说明没有找到合适的解码器导致链路没有链接成功,所以需要装上ffmpeg forGstreamer,而仅拷贝libgstffmpeg.dll,一运行自己写的测试应用程序还会报如下错误:
** (gst-launch-0.10:4324): WARNING **: Failed to loadplugin 'C:/GStreamer/v0.10
.6/lib/gstreamer-0.10/libgstffmpeg.dll': `C:/GStreamer/v0.10.6/lib/gstreamer-0.1
0/libgstffmpeg.dll': 找不到指定的模块。
使用gst-launch.exe命令也会报上述错误,并且弹出如下对话框:


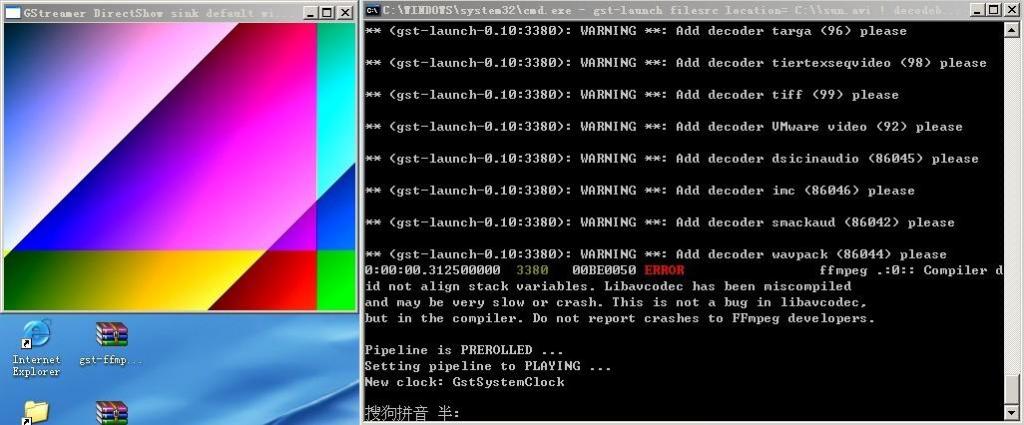
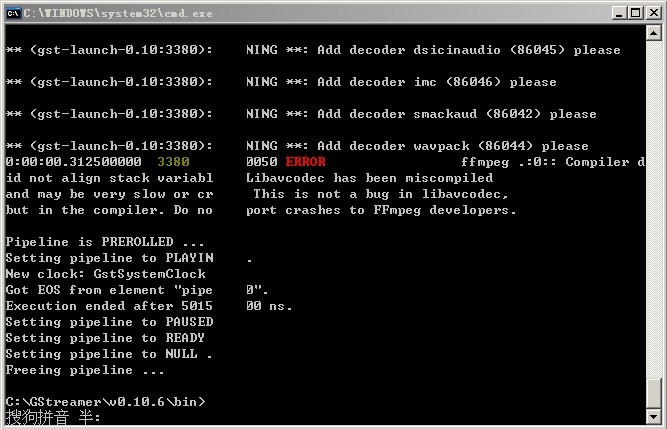
5.做完上述四步,我们的gst环境就基本配置好了,把一个完好的avi文件放在c:/sun.avi(下载后将后缀改名为avi即可),如果使用下面命令可以看到下面的效果图就就说明环境配置正确完成了:
gst-launchfilesrc location= C://sun.avi !
decodebin !
ffmpegcolorspace !
autovideosink
快!上手跑个应用程序试试吧,是不是很兴奋?
综上,关键要注意:
gst-ffmpeg-0.10.2.exe安装时看细节。
命令行:gst-launchfilesrc
location= C://sun.avi ! decodebin !
ffmpegcolorspace !
autovideosink
如何配置VC编译简单工程,请参见我博客里 转载的《windows下gstreamer软件开发环境的搭建过程》一文。
杜晶 2010-07-21上海
本文采用OSSBuild快速构建Windows下的GStreamer开发环境,如果想要使用Gtk来开发的朋友们可以参照其他博文。
(本文的完整环境下载)
1.安装GStreamer-WinBuilds-GPL-x86.msi,采用默认组件选项(全装),安装路径中最好不要有空格。
2.做开发的才需安装GStreamer-WinBuilds-SDK-GPL-x86.msi,采用默认组件选项(全装),安装路径被强制在运行时路径的sdk子目录下。
3.把python26.dll复制到 <gst程序目录>/v0.10.6/bin下。刚开始我就是没有复制这个,一运行自己写的测试应用程序总报如下错误,折腾了2天啊:
** (gst-launch-0.10:3528): WARNING **: Failed to loadplugin 'C:/GStreamer/v0.10
.6/lib/gstreamer-0.10/libgstpython-v2.6.dll': `C:/GStreamer/v0.10.6/lib/gstreame
r-0.10/libgstpython-v2.6.dll': 找不到指定的模块。
使用gst-launch.exe命令也会报上述错误,并且弹出如下对话框:
4.安装gst-ffmpeg-0.10.2.exe,安装时注意点开 Show details按钮,如下图,注意里面的dll和目的路径:
将libgstffmpeg.dll复制到<gst程序目录>/v0.10.6/lib/gstreamer-0.10下,并将avcodec-51.dll,avformat-51.dll,avutil-49.dll复制到
c:/window/system32 下(即系统目录%system32%)。
这个东西折腾了我一天,如果不这么做,一运行自己写的测试应用程序总报Cann't create player。使用gst-launch.exe命令,则会报如下错误:
Setting pipeline to PAUSED ...
Pipeline is PREROLLING ...
ERROR: from element /GstPipeline:pipeline0/GstDecodeBin:decodebin0/GstQueue:queu
e1: Internal data flow error.
Additional debug info:
../../../Source/gstreamer/plugins/elements/gstqueue.c(1212):gst_queue_loop ():
/GstPipeline:pipeline0/GstDecodeBin:decodebin0/GstQueue:queue1:
streaming task paused, reason not-linked (-1)
ERROR: pipeline doesn't want to
preroll.
Setting pipeline to NULL ...
Freeing pipeline ...
这些都说明没有找到合适的解码器导致链路没有链接成功,所以需要装上ffmpeg forGstreamer,而仅拷贝libgstffmpeg.dll,一运行自己写的测试应用程序还会报如下错误:
** (gst-launch-0.10:4324): WARNING **: Failed to loadplugin 'C:/GStreamer/v0.10
.6/lib/gstreamer-0.10/libgstffmpeg.dll': `C:/GStreamer/v0.10.6/lib/gstreamer-0.1
0/libgstffmpeg.dll': 找不到指定的模块。
使用gst-launch.exe命令也会报上述错误,并且弹出如下对话框:
5.做完上述四步,我们的gst环境就基本配置好了,把一个完好的avi文件放在c:/sun.avi(下载后将后缀改名为avi即可),如果使用下面命令可以看到下面的效果图就就说明环境配置正确完成了:
gst-launchfilesrc location= C://sun.avi !
decodebin !
ffmpegcolorspace !
autovideosink
快!上手跑个应用程序试试吧,是不是很兴奋?
综上,关键要注意:
gst-ffmpeg-0.10.2.exe安装时看细节。
命令行:gst-launchfilesrc
location= C://sun.avi ! decodebin !
ffmpegcolorspace !
autovideosink
如何配置VC编译简单工程,请参见我博客里 转载的《windows下gstreamer软件开发环境的搭建过程》一文。

相关文章推荐
- 在Windows下应用AppServ快速配置PHP开发环境
- Poechant 快速安装配置教程:Windows 7下Apache+MySQL+PHP开发环境
- Poechant 快速安装配置教程:Windows 7下Apache+MySQL+PHP开发环境
- Poechant快速安装配置教程:Windows + Cygwin + Boost开发环境
- windows下配置hadoop开发环境
- Delphi for iOS开发指南(2):在Windows PC上配置你的开发环境
- 在windows 7下配置opencv 2.4.3的开发环境
- Android NDK学习(2)Windows下NDK开发环境配置
- Windows 7(64位) 配置Eclipse+Hadoop2.5.1开发环境
- windows下开发环境的配置
- Windows下的java串口开发环境配置
- Windows+Sublime Text3配置Lua开发环境的图文详细步骤
- 配置Windows下的PHP开发环境
- Windows下配置Perl开发环境
- windows下配置PHP+MySQL开发环境
- Windows下JSP开发环境的配置
- windows Android开发环境快速搭建和部署
- 浅谈对主成分分析(PCA)算法的理解 + QT creator+OpenCV2.4.2+MinGW 在windows下开发环境配置
- windows下PHP开发之环境配置:netbeans+jdk+wamp+xdebug
- windows配置c语言开发环境