ListView控件演示03:如何在列表添加项的时候减少UI的刷新
2010-05-29 13:52
465 查看
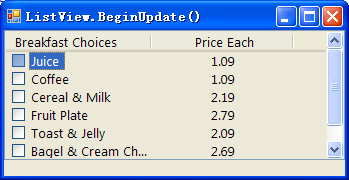
代码示例演示如何初始化ListView控件以包含复选框。它还阐释了如何使用BeginUpdate和EndUpdate方法。
通过对BeginUpdate和EndUpdate方法的使用,可以减少在为列表添加项时UI的重绘次数。如果不使用这2个方法,则每向ListView添加一个列表项时,都会重绘ListView控件。
程序截图
程序代码
通过对BeginUpdate和EndUpdate方法的使用,可以减少在为列表添加项时UI的重绘次数。如果不使用这2个方法,则每向ListView添加一个列表项时,都会重绘ListView控件。
程序截图
程序代码
using System;
using System.Collections.Generic;
using System.ComponentModel;
using System.Data;
using System.Drawing;
using System.Linq;
using System.Text;
using System.Windows.Forms;

namespace Demo03
{
    public partial class MainForm : Form
    {
        ListView listView;

        public MainForm()
        {
            InitializeComponent();

            this.InitializeListView();
        }

        private void InitializeListView()
        {
            this.listView = new System.Windows.Forms.ListView();

            // Set properties such as BackColor and DockStyle and Location.
            this.listView.BackColor = System.Drawing.SystemColors.Control;
            this.listView.Dock = System.Windows.Forms.DockStyle.Top;
            this.listView.Location = new System.Drawing.Point(0, 0);
            this.listView.Size = new System.Drawing.Size(292, 130);
            this.listView.View = System.Windows.Forms.View.Details;
            this.listView.HideSelection = false;

            // Allow the user to select multiple items.
            this.listView.MultiSelect = true;

            // Show CheckBoxes in the ListView.
            this.listView.CheckBoxes = true;

            //Set the column headers and populate the columns.
            listView.HeaderStyle = ColumnHeaderStyle.Nonclickable;

            ColumnHeader columnHeader1 = new ColumnHeader();
            columnHeader1.Text = "Breakfast Choices";
            columnHeader1.TextAlign = HorizontalAlignment.Left;
            columnHeader1.Width = 146;

            ColumnHeader columnHeader2 = new ColumnHeader();
            columnHeader2.Text = "Price Each";
            columnHeader2.TextAlign = HorizontalAlignment.Center;
            columnHeader2.Width = 142;

            this.listView.Columns.Add(columnHeader1);
            this.listView.Columns.Add(columnHeader2);

            string[] foodList = new string[]{"Juice", "Coffee",
			"Cereal & Milk", "Fruit Plate", "Toast & Jelly",
			"Bagel & Cream Cheese"};

            string[] foodPrice = new string[]{"1.09", "1.09", "2.19",
			"2.79", "2.09", "2.69"};

            int count;

            // Members are added one at a time, so call BeginUpdate to ensure
            // the list is painted only once, rather than as each list item is added.

            // 一旦调用了BeginUpdate()这个方法,要直到调用EndUpdate()方法时才会重新绘制ListView。
            // 因此下面连续添加了几个ListViewItem都不会重新绘制ListView。
            listView.BeginUpdate();

            for (count = 0; count < foodList.Length; count++)
            {
                ListViewItem listItem = new ListViewItem(foodList[count]);
                listItem.SubItems.Add(foodPrice[count]);
                listView.Items.Add(listItem);
            }

            //Call EndUpdate when you finish adding items to the ListView.
            // 调用这个方法就会重新绘制ListView了,这是会把前面添加的所有ListViewItem绘制到控件上。
            listView.EndUpdate();

            this.Controls.Add(this.listView);
        }

    }
}

相关文章推荐
- ListView控件演示06:如何实现用户同时选择多个列表项
- Android开发-UI控件:为ListView,GirdView,etc...添加系统自带的下拉刷新功能
- C#:ListView控件如何实现点击列表头进行排序
- 03 关于控件及如何添加
- 安卓开发——ListView控件(初始化ListView、列表刷新、长按添加menu)
- c#中listview控件如何添加信息
- 下拉刷新列表添加SwipeDismissListViewTouchListener实现滑动删除某一列。
- Android UI系统控件进阶(一)之列表控件ListView详解
- 如何利用Featue对特定的文档库或列表添加listviewtoolbar上的button
- ListView控件和如何向ListView控件添加数据适配器
- C# 程序中如何向(DEV)ComboBoxEdit控件中添加下拉列表的值不使用数据绑定,就是使用代码添加
- ios自定义xib的时候,需要如何初始化里面的控件(添加相关的数据到控件)
- ListView控件演示08:获取列表中的所有选定项
- 【Android 开发】:UI控件之 ListView 列表控件的使用
- 如何利用Featue对特定的文档库或列表添加listviewtoolbar上的button
- 最近在做即时通讯,能收到消息的通知,问题是在聊天界面里如何在收到消息的时候刷新聊天listview,找遍sdk也没发现
- winfrom如何在listview中添加控件
- Adroid ListView,GridvVew等列表控件如何只更新指定条目
- android如何为listview的每项中edittext控件添加textwacher
- 如何利用Featue对特定的文档库或列表添加listviewtoolbar上的button