MOSS 2010:Visual Studio 2010开发体验(17)——在Silverlight应用程序中访问客户端对象模型
2010-04-28 10:52
597 查看
上一篇我们开始介绍到了客户端对象模型,这是MOSS 2010提供的一套全新的API,它允许我们在客户端应用程序(包括控制台,Windows Forms,或者Silverlight应用程序)能够方便地访问到SharePoint的数据和组件。典型的引用是列表数据查询。(但不仅限于此)
我们这一篇将继续这个话题,我们来看看在Silverlight应用程序中如何使用客户端对象模型。这与之前的控制台应用程序还是有些不一样的。根本性的区别在于异步操作。
【注意】在Silverlight中使用客户端对象模型访问SharePoint数据的做法有两种,一种是作为Web Part的一部分直接嵌入在SharePoint里面,这种做法相对比较简单。而另外一种做法是在独立的应用程序中,(不在SharePoint站点中),这时会遇到很多复杂的问题,例如跨域访问方面的限制等等。
本篇我们讨论的是第一种做法
.csharpcode, .csharpcode pre
{
font-size: small;
color: black;
font-family: consolas, "Courier New", courier, monospace;
background-color: #ffffff;
/*white-space: pre;*/
}
.csharpcode pre { margin: 0em; }
.csharpcode .rem { color: #008000; }
.csharpcode .kwrd { color: #0000ff; }
.csharpcode .str { color: #006080; }
.csharpcode .op { color: #0000c0; }
.csharpcode .preproc { color: #cc6633; }
.csharpcode .asp { background-color: #ffff00; }
.csharpcode .html { color: #800000; }
.csharpcode .attr { color: #ff0000; }
.csharpcode .alt
{
background-color: #f4f4f4;
width: 100%;
margin: 0em;
}
.csharpcode .lnum { color: #606060; }
然后,我们用少量的代码做一个测试,确认它能够正常工作
先不连接到SharePoint,我们在本地做一个范例
按下F5键调试,我们可以在浏览器中,看到如下的效果
还不错,我们一次就成功了(当然,这没有什么可值得骄傲的,呵呵)
所以,不用多说,添加他们
然后,我们把上一篇的代码复制过来,看看能不能工作
.csharpcode, .csharpcode pre
{
font-size: small;
color: black;
font-family: consolas, "Courier New", courier, monospace;
background-color: #ffffff;
/*white-space: pre;*/
}
.csharpcode pre { margin: 0em; }
.csharpcode .rem { color: #008000; }
.csharpcode .kwrd { color: #0000ff; }
.csharpcode .str { color: #006080; }
.csharpcode .op { color: #0000c0; }
.csharpcode .preproc { color: #cc6633; }
.csharpcode .asp { background-color: #ffff00; }
.csharpcode .html { color: #800000; }
.csharpcode .attr { color: #ff0000; }
.csharpcode .alt
{
background-color: #f4f4f4;
width: 100%;
margin: 0em;
}
.csharpcode .lnum { color: #606060; }
【注意】以上代码几乎和之前在Console里面一模一样
按下F5键运行,我们却收到了一个错误
这其实是我们预见到的错误,之前我就说到过了,Silverlight程序所有的外部资源访问都要求是异步进行的。那就动手改一下吧
首先为了做得更加完善些,我们在布局方面做了一下小的调整添加了错误消息提示的功能
.csharpcode, .csharpcode pre
{
font-size: small;
color: black;
font-family: consolas, "Courier New", courier, monospace;
background-color: #ffffff;
/*white-space: pre;*/
}
.csharpcode pre { margin: 0em; }
.csharpcode .rem { color: #008000; }
.csharpcode .kwrd { color: #0000ff; }
.csharpcode .str { color: #006080; }
.csharpcode .op { color: #0000c0; }
.csharpcode .preproc { color: #cc6633; }
.csharpcode .asp { background-color: #ffff00; }
.csharpcode .html { color: #800000; }
.csharpcode .attr { color: #ff0000; }
.csharpcode .alt
{
background-color: #f4f4f4;
width: 100%;
margin: 0em;
}
.csharpcode .lnum { color: #606060; }
在设计视图中,看起来应该是这样的
然后,我们的代码修改成下面这样
.csharpcode, .csharpcode pre
{
font-size: small;
color: black;
font-family: consolas, "Courier New", courier, monospace;
background-color: #ffffff;
/*white-space: pre;*/
}
.csharpcode pre { margin: 0em; }
.csharpcode .rem { color: #008000; }
.csharpcode .kwrd { color: #0000ff; }
.csharpcode .str { color: #006080; }
.csharpcode .op { color: #0000c0; }
.csharpcode .preproc { color: #cc6633; }
.csharpcode .asp { background-color: #ffff00; }
.csharpcode .html { color: #800000; }
.csharpcode .attr { color: #ff0000; }
.csharpcode .alt
{
background-color: #f4f4f4;
width: 100%;
margin: 0em;
}
.csharpcode .lnum { color: #606060; }
【注意】因为是作为WebPart使用,所以访问SharePoint的地址不能硬编码,而且事实上也没有必要硬编码,因为它有一个ClientContext.Current属性可以获取当前的SharePoint站点的上下文引用
接下来我们部署这个程序。因为我们需要将该Silverlight程序在MOSS中使用,所以需要将输出的结果复制到下面的目录
C:\Program Files\Common Files\Microsoft Shared\Web Server Extensions\14\TEMPLATE\LAYOUTS\ClientBin
然后在页面中添加一个Silverlight WebPart来显示它,部署完成之后,我们看到的效果大致如下

【注意】关于如何在MOSS中使用Silverlight Web Part,我之前也有一篇文章专门介绍。这里就不重复了。如果你还不熟悉,请参考下面的链接
/article/4660860.html
【注意】大家请注意,我的那个目录为什么会有很多个Test.xap呢,其实这也是无奈之举。如果有兴趣测试的朋友会发现,假如你对Silverlight程序做了修改,即便你覆盖掉原来的文件,那么在页面中加载的xap还是之前的那个。这的确是一个很让人诧异的设计(Web Part是不是把那个xap保存起来了呢?),目前也只有这样通过修改名字来刷新Silverlight部件了。这个问题折腾了很久的时间。
下一篇我将继续讲解在独立的Silverlight应用程序中如何访问SharePoint数据。
我们这一篇将继续这个话题,我们来看看在Silverlight应用程序中如何使用客户端对象模型。这与之前的控制台应用程序还是有些不一样的。根本性的区别在于异步操作。
【注意】在Silverlight中使用客户端对象模型访问SharePoint数据的做法有两种,一种是作为Web Part的一部分直接嵌入在SharePoint里面,这种做法相对比较简单。而另外一种做法是在独立的应用程序中,(不在SharePoint站点中),这时会遇到很多复杂的问题,例如跨域访问方面的限制等等。
本篇我们讨论的是第一种做法
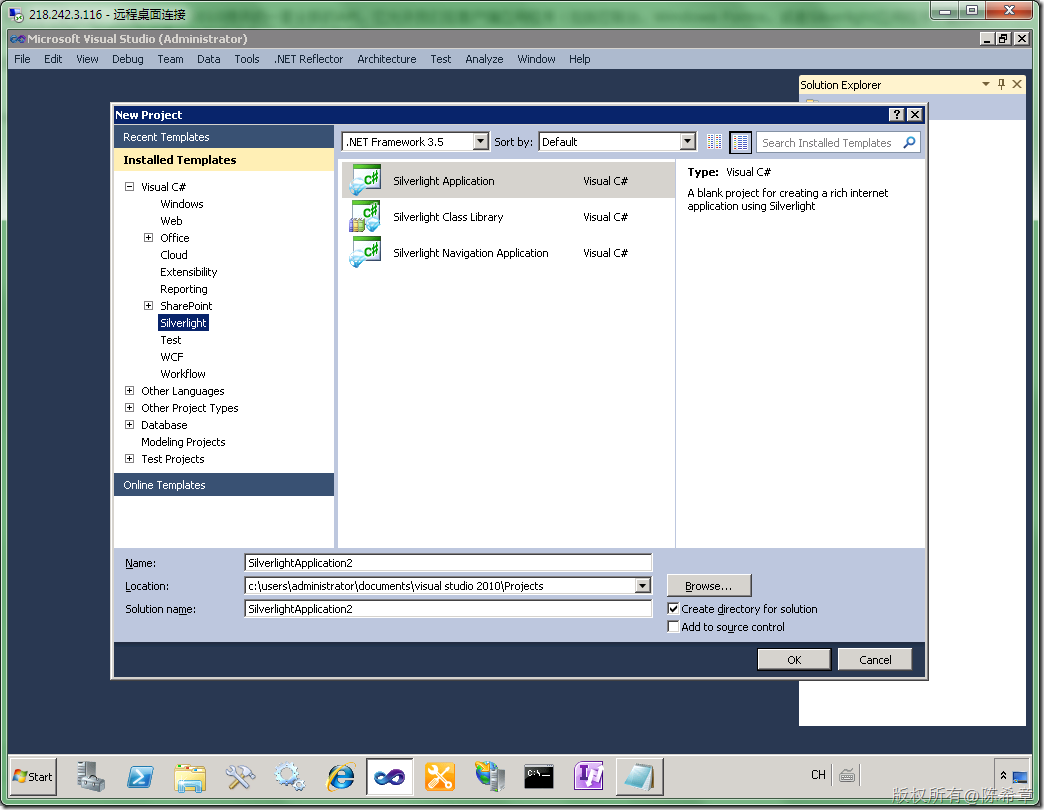
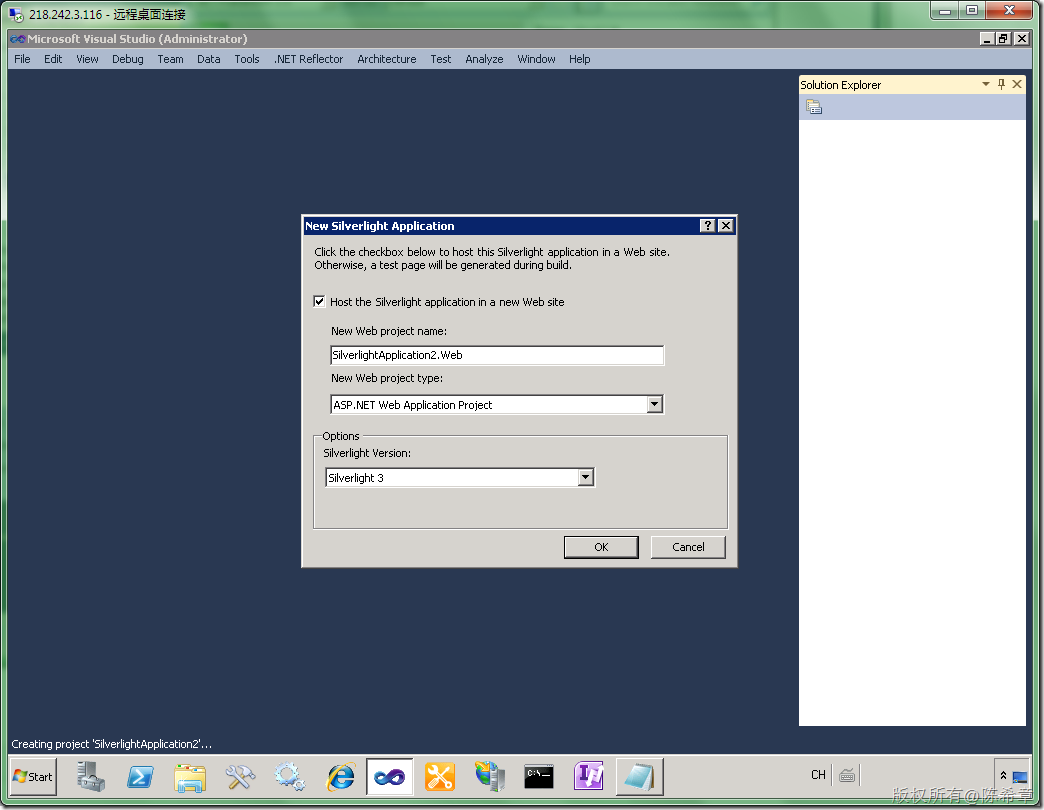
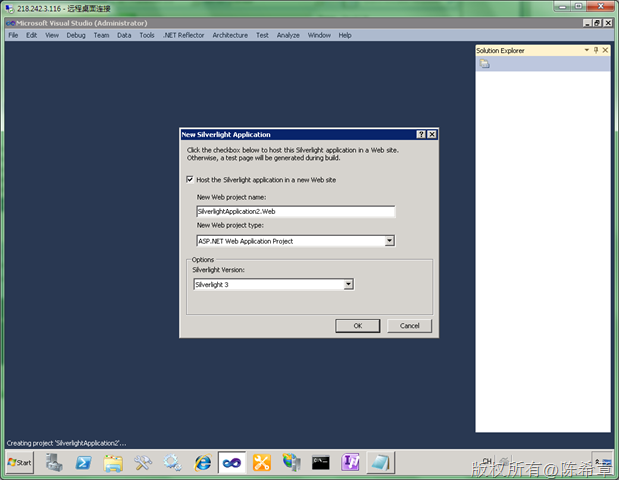
1. 创建一个简单的Silverlight应用程序

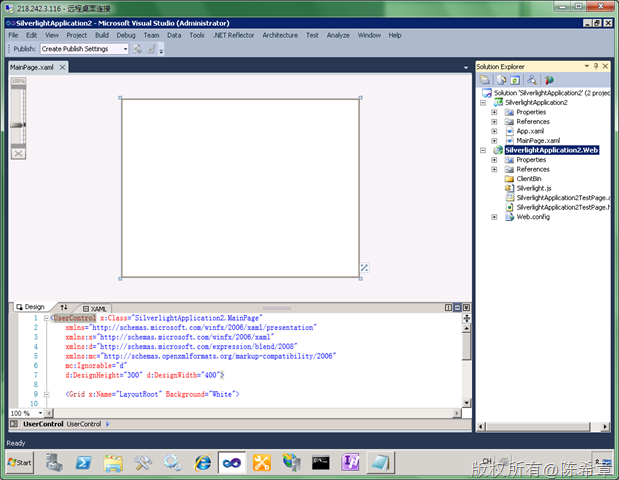
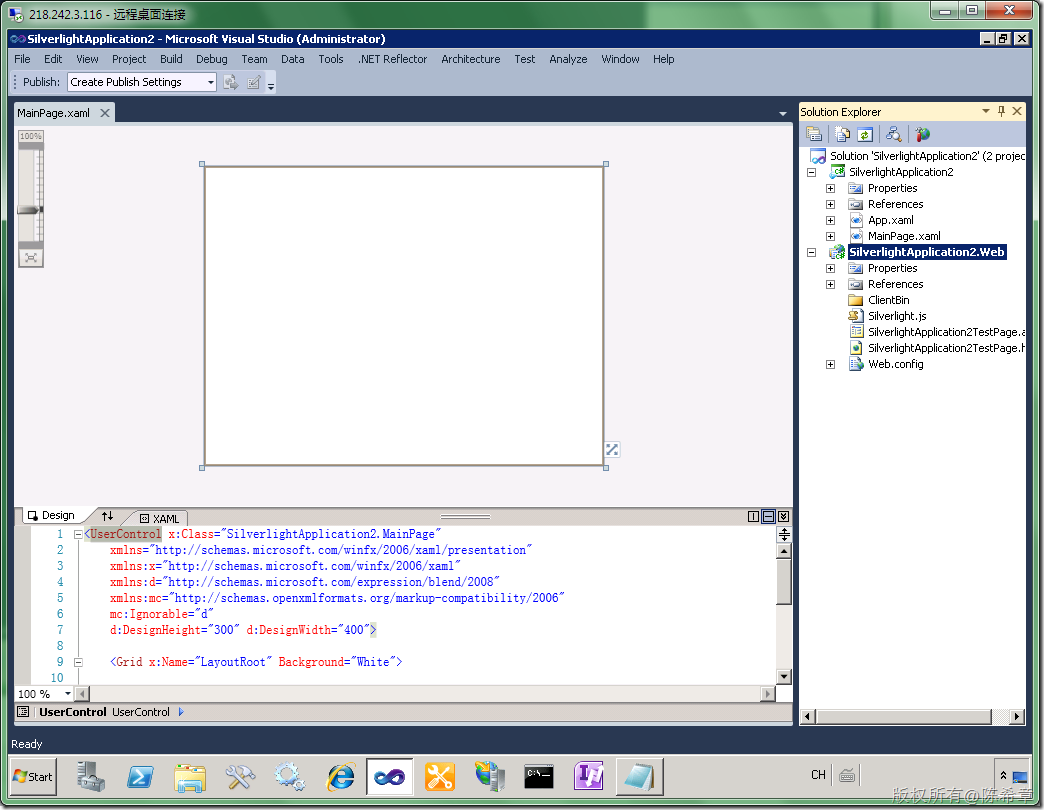
2. 设计界面,我们可以加入一个DataGrid控件来做数据展示。
<UserControl xmlns:my="clr-namespace:System.Windows.Controls;assembly=System.Windows.Controls.Data"  x:Class="SilverlightApplication3.MainPage"
xmlns="http://schemas.microsoft.com/winfx/2006/xaml/presentation"
xmlns:x="http://schemas.microsoft.com/winfx/2006/xaml"
xmlns:d="http://schemas.microsoft.com/expression/blend/2008"
xmlns:mc="http://schemas.openxmlformats.org/markup-compatibility/2006"
mc:Ignorable="d"
d:DesignHeight="300" d:DesignWidth="400">

<Grid x:Name="LayoutRoot" Background="White">

<my:DataGrid x:Name="EmployeeList" Margin="20" />

</Grid>

</UserControl>
.csharpcode, .csharpcode pre
{
font-size: small;
color: black;
font-family: consolas, "Courier New", courier, monospace;
background-color: #ffffff;
/*white-space: pre;*/
}
.csharpcode pre { margin: 0em; }
.csharpcode .rem { color: #008000; }
.csharpcode .kwrd { color: #0000ff; }
.csharpcode .str { color: #006080; }
.csharpcode .op { color: #0000c0; }
.csharpcode .preproc { color: #cc6633; }
.csharpcode .asp { background-color: #ffff00; }
.csharpcode .html { color: #800000; }
.csharpcode .attr { color: #ff0000; }
.csharpcode .alt
{
background-color: #f4f4f4;
width: 100%;
margin: 0em;
}
.csharpcode .lnum { color: #606060; }
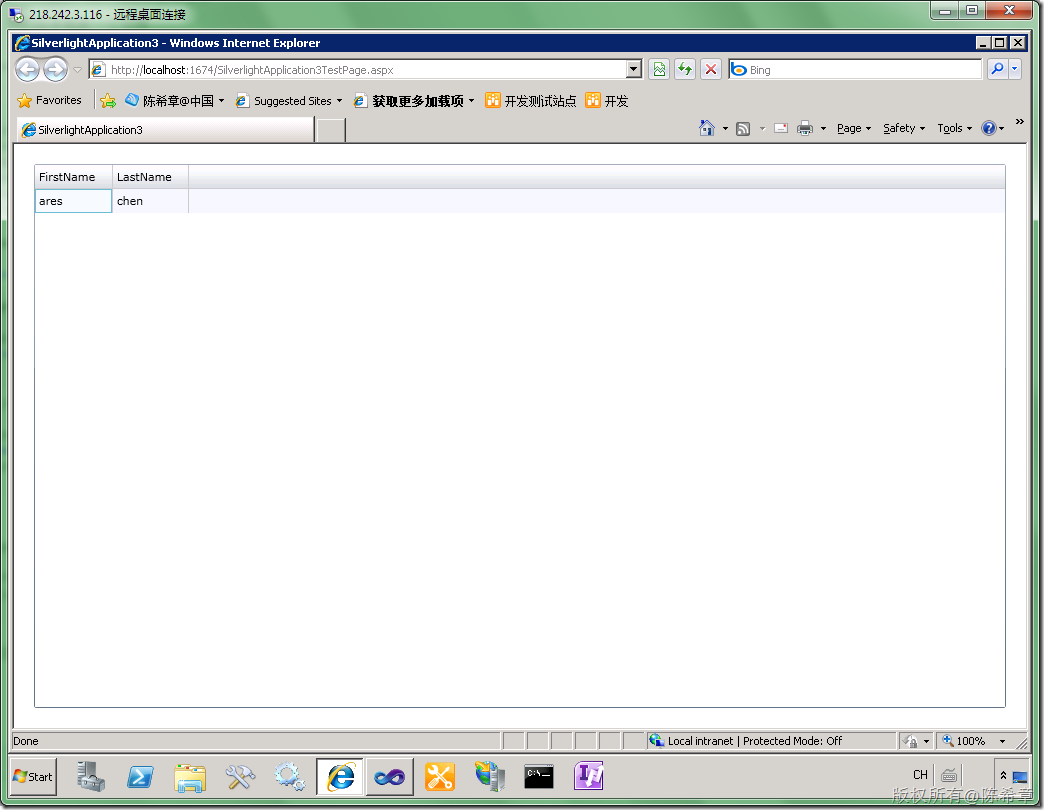
然后,我们用少量的代码做一个测试,确认它能够正常工作
先不连接到SharePoint,我们在本地做一个范例
using System;
using System.Collections.Generic;
using System.Linq;
using System.Net;
using System.Windows;
using System.Windows.Controls;
using System.Windows.Documents;
using System.Windows.Input;
using System.Windows.Media;
using System.Windows.Media.Animation;
using System.Windows.Shapes;

namespace SilverlightApplication3
{
public partial class MainPage : UserControl
{
public MainPage()
{
InitializeComponent();
Loaded += new RoutedEventHandler(MainPage_Loaded);
}

void MainPage_Loaded(object sender, RoutedEventArgs e)
{
List<Employee> emps = new List<Employee>();
emps.Add(new Employee() { FirstName = "ares", LastName = "chen" });
EmployeeList.ItemsSource = emps;
}
}

public class Employee
{
public string FirstName { get; set; }
public string LastName { get; set; }
}
}
按下F5键调试,我们可以在浏览器中,看到如下的效果

还不错,我们一次就成功了(当然,这没有什么可值得骄傲的,呵呵)
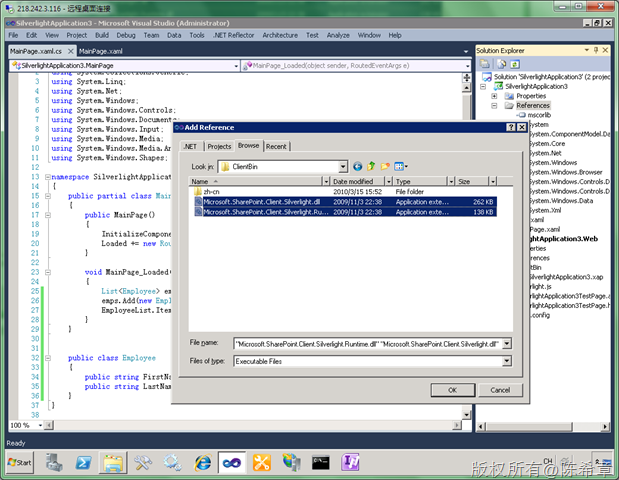
3. 使用专用的客户端模型访问到SharePoint的数据
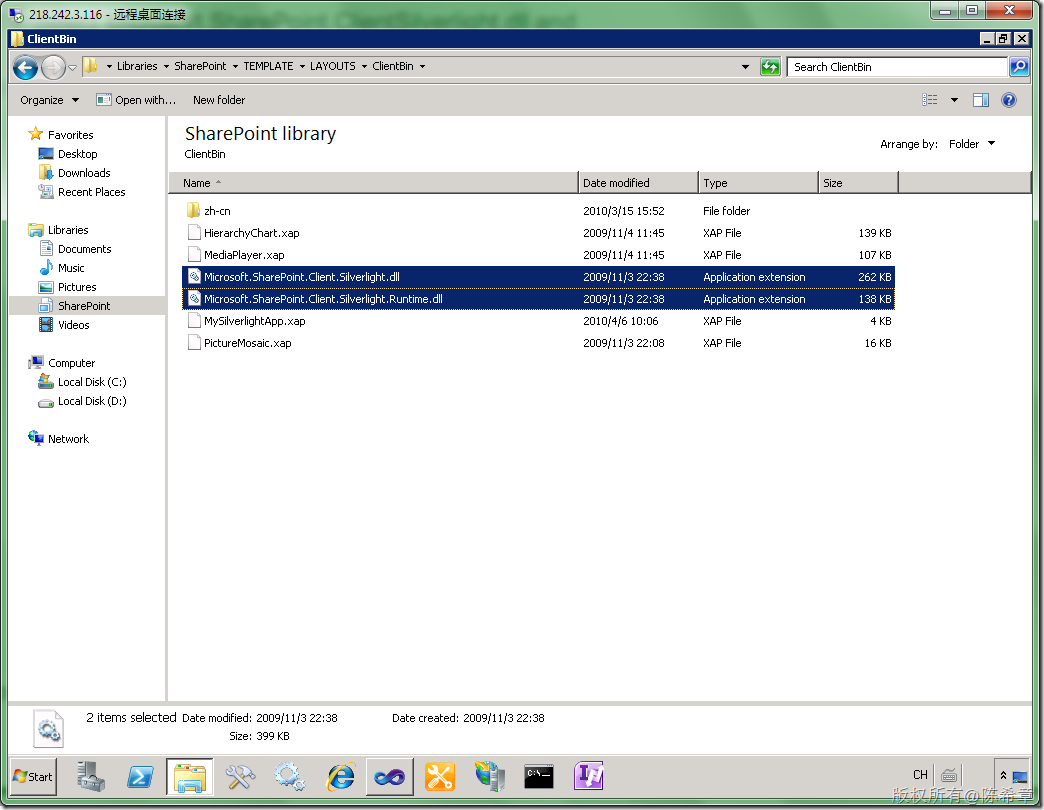
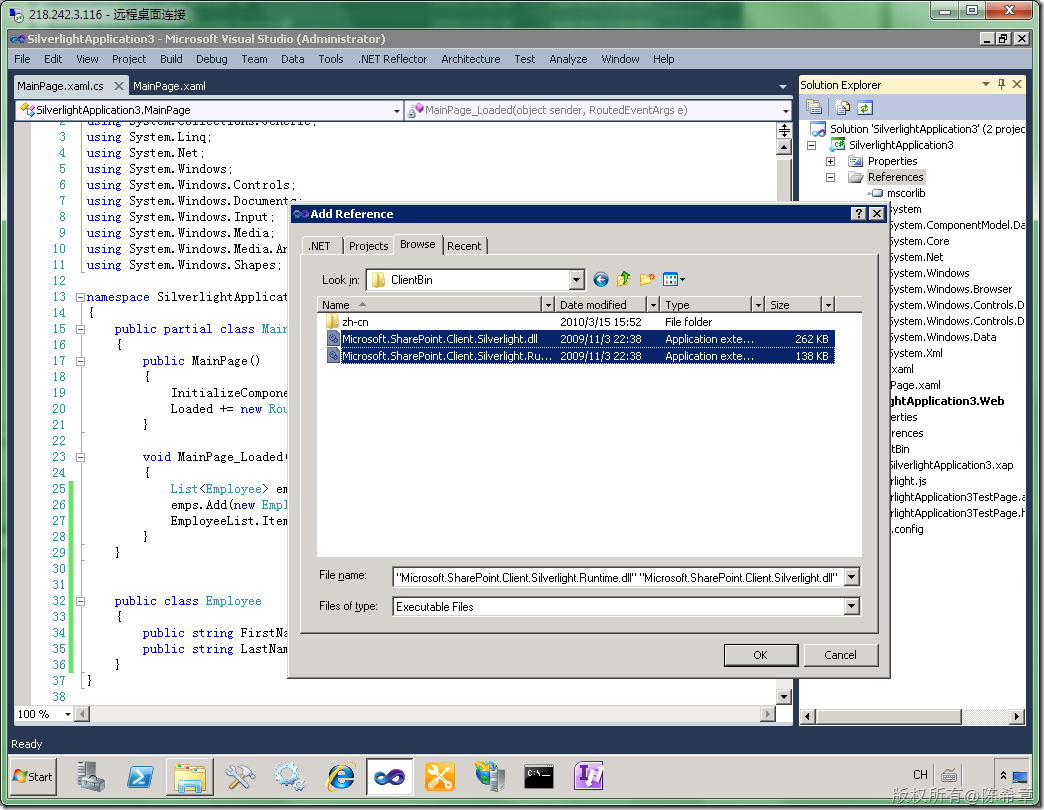
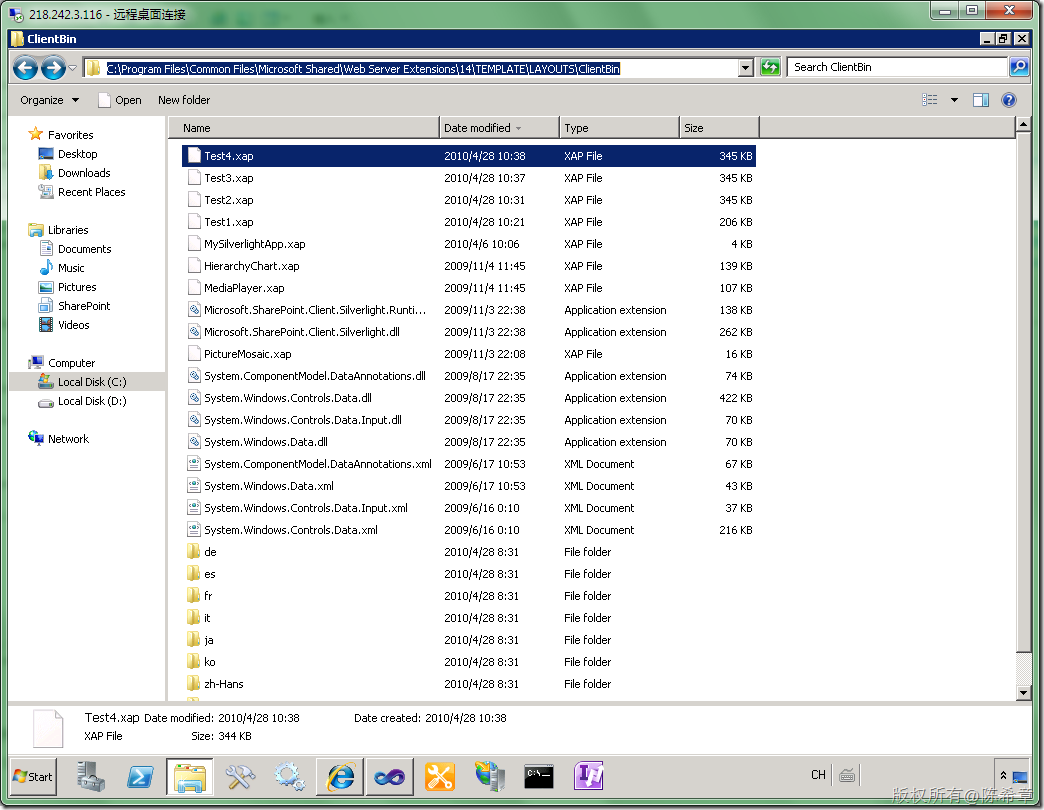
注意,我们这里所说的“专用”二次,这是有两个特殊的程序集需要引用,他们的位置是在下面C:\Program Files\Common Files\Microsoft Shared\Web Server Extensions\14\TEMPLATE\LAYOUTS\ClientBin
所以,不用多说,添加他们
然后,我们把上一篇的代码复制过来,看看能不能工作
using System;
using System.Collections.Generic;
using System.Linq;
using System.Net;
using System.Windows;
using System.Windows.Controls;
using System.Windows.Documents;
using System.Windows.Input;
using System.Windows.Media;
using System.Windows.Media.Animation;
using System.Windows.Shapes;

using Microsoft.SharePoint.Client;

namespace SilverlightApplication3
{
public partial class MainPage : UserControl
{
public MainPage()
{
InitializeComponent();
Loaded += new RoutedEventHandler(MainPage_Loaded);
}

void MainPage_Loaded(object sender, RoutedEventArgs e)
{

var url = "http://localhost:45223/sites/dev";

using (ClientContext ctx = new ClientContext(url))
{
//ctx.Credentials = System.Net.CredentialCache.DefaultNetworkCredentials;
Web web = ctx.Web;
ctx.Load(web);
ctx.Load(web.Lists);
ctx.Load(web, w => w.Lists.Where(l => l.Title == "Employees"));
ctx.ExecuteQuery();

List list = web.Lists[0];
CamlQuery camlQuery = new CamlQuery();
camlQuery.ViewXml = "<View><Query><Where><Lt><FieldRef Name='Age' /><Value Type='Number'>60</Value></Lt></Where></Query><RowLimit>100</RowLimit></View>";

ListItemCollection collListItem = list.GetItems(camlQuery);

ctx.Load(collListItem);
ctx.ExecuteQuery();

var emps = collListItem.Select(i => new Employee()
{
FirstName = i["FirstName"].ToString(),
LastName = i["LastName"].ToString()
});
EmployeeList.ItemsSource = emps;

}
}
}

public class Employee
{
public string FirstName { get; set; }
public string LastName { get; set; }
}
}
.csharpcode, .csharpcode pre
{
font-size: small;
color: black;
font-family: consolas, "Courier New", courier, monospace;
background-color: #ffffff;
/*white-space: pre;*/
}
.csharpcode pre { margin: 0em; }
.csharpcode .rem { color: #008000; }
.csharpcode .kwrd { color: #0000ff; }
.csharpcode .str { color: #006080; }
.csharpcode .op { color: #0000c0; }
.csharpcode .preproc { color: #cc6633; }
.csharpcode .asp { background-color: #ffff00; }
.csharpcode .html { color: #800000; }
.csharpcode .attr { color: #ff0000; }
.csharpcode .alt
{
background-color: #f4f4f4;
width: 100%;
margin: 0em;
}
.csharpcode .lnum { color: #606060; }
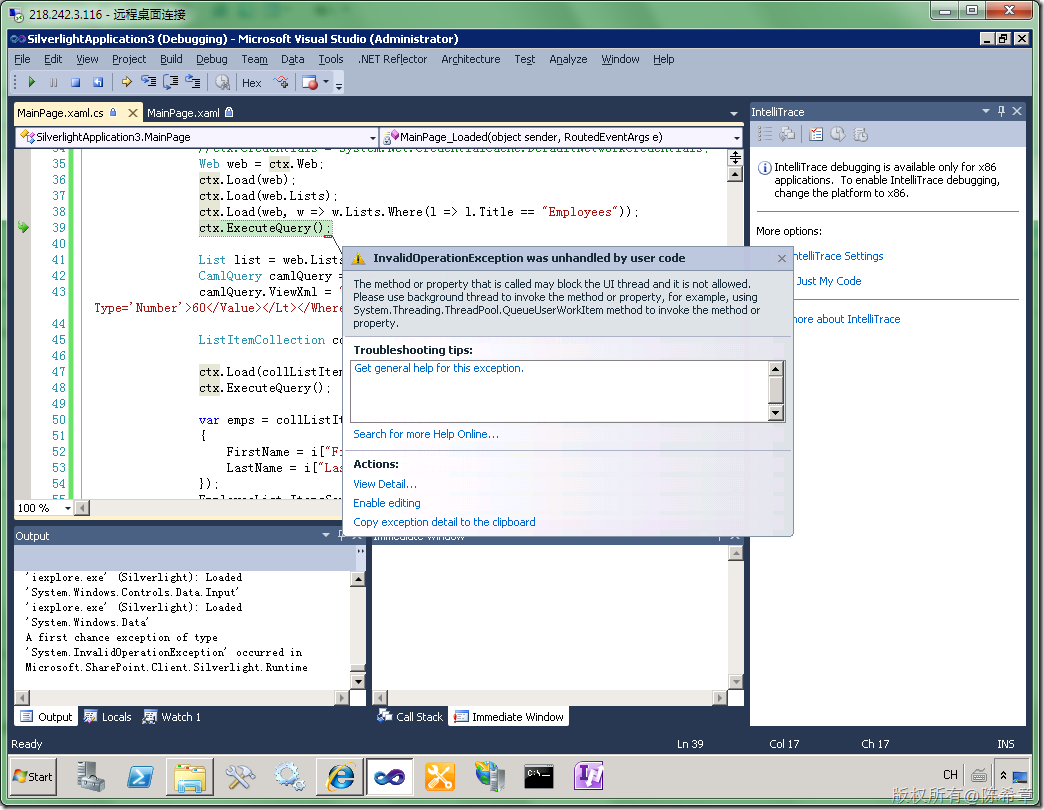
【注意】以上代码几乎和之前在Console里面一模一样
按下F5键运行,我们却收到了一个错误
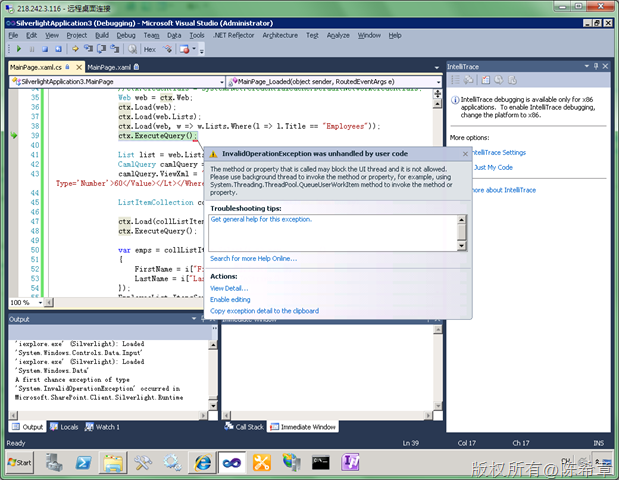
这其实是我们预见到的错误,之前我就说到过了,Silverlight程序所有的外部资源访问都要求是异步进行的。那就动手改一下吧
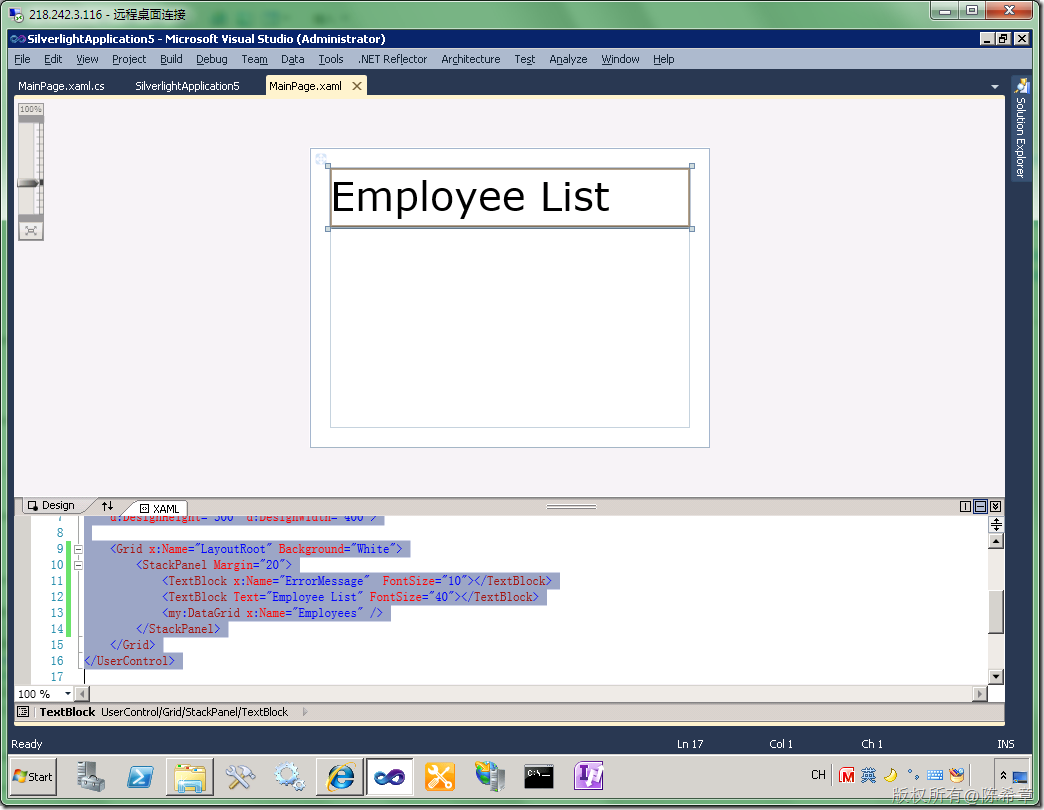
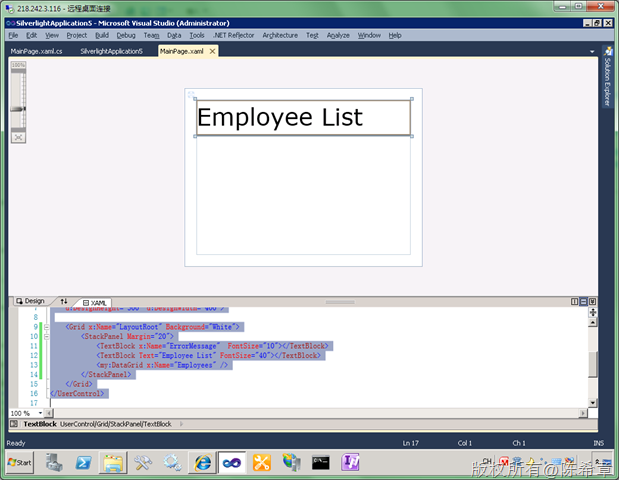
首先为了做得更加完善些,我们在布局方面做了一下小的调整添加了错误消息提示的功能
<UserControl xmlns:my="clr-namespace:System.Windows.Controls;assembly=System.Windows.Controls.Data"  x:Class="SilverlightApplication5.MainPage"
xmlns="http://schemas.microsoft.com/winfx/2006/xaml/presentation"
xmlns:x="http://schemas.microsoft.com/winfx/2006/xaml"
xmlns:d="http://schemas.microsoft.com/expression/blend/2008"
xmlns:mc="http://schemas.openxmlformats.org/markup-compatibility/2006"
mc:Ignorable="d"
d:DesignHeight="300" d:DesignWidth="400">

<Grid x:Name="LayoutRoot" Background="White">
<StackPanel Margin="20">
<TextBlock x:Name="ErrorMessage"  FontSize="10"></TextBlock>
<TextBlock Text="Employee List" FontSize="40"></TextBlock>
<my:DataGrid x:Name="Employees" />
</StackPanel>
</Grid>
</UserControl>
.csharpcode, .csharpcode pre
{
font-size: small;
color: black;
font-family: consolas, "Courier New", courier, monospace;
background-color: #ffffff;
/*white-space: pre;*/
}
.csharpcode pre { margin: 0em; }
.csharpcode .rem { color: #008000; }
.csharpcode .kwrd { color: #0000ff; }
.csharpcode .str { color: #006080; }
.csharpcode .op { color: #0000c0; }
.csharpcode .preproc { color: #cc6633; }
.csharpcode .asp { background-color: #ffff00; }
.csharpcode .html { color: #800000; }
.csharpcode .attr { color: #ff0000; }
.csharpcode .alt
{
background-color: #f4f4f4;
width: 100%;
margin: 0em;
}
.csharpcode .lnum { color: #606060; }
在设计视图中,看起来应该是这样的
然后,我们的代码修改成下面这样
using System;
using System.Collections.Generic;
using System.Linq;
using System.Net;
using System.Windows;
using System.Windows.Controls;
using System.Windows.Documents;
using System.Windows.Input;
using System.Windows.Media;
using System.Windows.Media.Animation;
using System.Windows.Shapes;
using Microsoft.SharePoint.Client;

namespace SilverlightApplication5
{
public partial class MainPage : UserControl
{
public MainPage()
{
InitializeComponent();
Loaded += new RoutedEventHandler(MainPage_Loaded);
}

void MainPage_Loaded(object sender, RoutedEventArgs e)
{

ClientContext ctx = ClientContext.Current;
Web web = ctx.Web;
ctx.Load(web);
ctx.Load(web.Lists);
ctx.Load(web, w => w.Lists.Where(l => l.Title == "Employees"));
ctx.ExecuteQueryAsync(
new ClientRequestSucceededEventHandler((o, e1) =>
{
List list = web.Lists[0];
CamlQuery camlQuery = new CamlQuery();
camlQuery.ViewXml = "<View><Query><Where><Lt><FieldRef Name='Age' /><Value Type='Number'>60</Value></Lt></Where></Query><RowLimit>100</RowLimit></View>";
ListItemCollection collListItem = list.GetItems(camlQuery);
ctx.Load(collListItem);

ctx.ExecuteQueryAsync(
new ClientRequestSucceededEventHandler((obj, e3) =>
{
this.Dispatcher.BeginInvoke(new Action(() =>
{
List<Employee> emps = new List<Employee>();
foreach (var item in collListItem)
{
emps.Add(new Employee()
{
FirstName = item["FirstName"].ToString(),
LastName = item["LastName"].ToString(),
});

}

Employees.ItemsSource = emps;
}));

}),
new ClientRequestFailedEventHandler((obj, e4) =>
{
ErrorMessage.Text = e4.Exception.Message;
}));

}),
new ClientRequestFailedEventHandler((o, e2) =>
{
ErrorMessage.Text = e2.Exception.Message;
}));

}

public class Employee
{
public string FirstName { get; set; }
public string LastName { get; set; }
}
}
}
.csharpcode, .csharpcode pre
{
font-size: small;
color: black;
font-family: consolas, "Courier New", courier, monospace;
background-color: #ffffff;
/*white-space: pre;*/
}
.csharpcode pre { margin: 0em; }
.csharpcode .rem { color: #008000; }
.csharpcode .kwrd { color: #0000ff; }
.csharpcode .str { color: #006080; }
.csharpcode .op { color: #0000c0; }
.csharpcode .preproc { color: #cc6633; }
.csharpcode .asp { background-color: #ffff00; }
.csharpcode .html { color: #800000; }
.csharpcode .attr { color: #ff0000; }
.csharpcode .alt
{
background-color: #f4f4f4;
width: 100%;
margin: 0em;
}
.csharpcode .lnum { color: #606060; }
【注意】因为是作为WebPart使用,所以访问SharePoint的地址不能硬编码,而且事实上也没有必要硬编码,因为它有一个ClientContext.Current属性可以获取当前的SharePoint站点的上下文引用
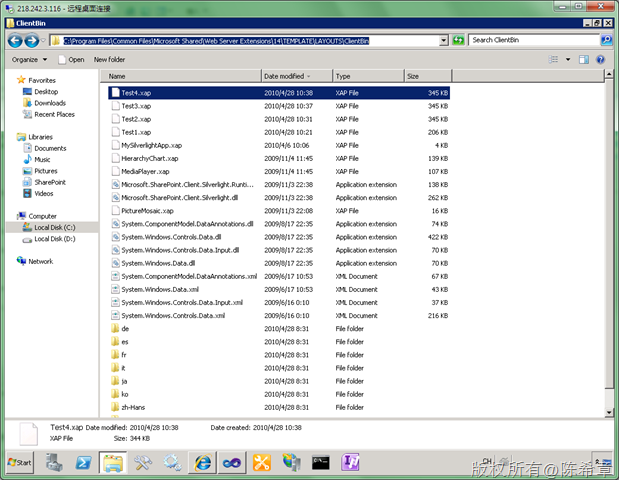
接下来我们部署这个程序。因为我们需要将该Silverlight程序在MOSS中使用,所以需要将输出的结果复制到下面的目录
C:\Program Files\Common Files\Microsoft Shared\Web Server Extensions\14\TEMPLATE\LAYOUTS\ClientBin
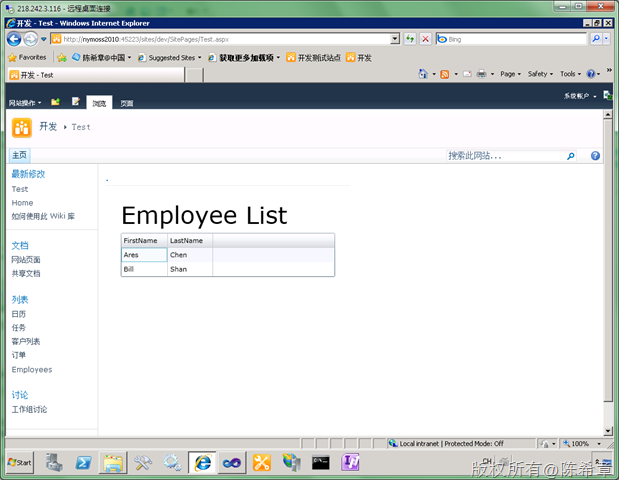
然后在页面中添加一个Silverlight WebPart来显示它,部署完成之后,我们看到的效果大致如下
【注意】关于如何在MOSS中使用Silverlight Web Part,我之前也有一篇文章专门介绍。这里就不重复了。如果你还不熟悉,请参考下面的链接
/article/4660860.html
【注意】大家请注意,我的那个目录为什么会有很多个Test.xap呢,其实这也是无奈之举。如果有兴趣测试的朋友会发现,假如你对Silverlight程序做了修改,即便你覆盖掉原来的文件,那么在页面中加载的xap还是之前的那个。这的确是一个很让人诧异的设计(Web Part是不是把那个xap保存起来了呢?),目前也只有这样通过修改名字来刷新Silverlight部件了。这个问题折腾了很久的时间。
下一篇我将继续讲解在独立的Silverlight应用程序中如何访问SharePoint数据。

相关文章推荐
- MOSS 2010:Visual Studio 2010开发体验(17)——在Silverlight应用程序中访问客户端对象模型
- MOSS 2010:Visual Studio 2010开发体验(17)——在Silverlight应用程序中访问客户端对象模型
- MOSS 2010:Visual Studio 2010开发体验(18)——在独立的Silverlight应用程序中通过WCF访问SharePoint数据
- MOSS 2010:Visual Studio 2010开发体验(16)——客户端对象模型
- MOSS 2010:Visual Studio 2010开发体验(18)——在独立的Silverlight应用程序中通过WCF访问SharePoint数据
- MOSS 2010:Visual Studio 2010开发体验(18)——在独立的Silverlight应用程序中通过WCF访问SharePoint数据
- MOSS 2010:Visual Studio 2010开发体验(16)——客户端对象模型
- MOSS 2010:Visual Studio 2010开发体验(16)——客户端对象模型
- MOSS 2010:Visual Studio 2010开发体验(8)——Silverlight应用
- MOSS 2010:Visual Studio 2010开发体验(4)——应用程序页面(ApplicationPage)
- MOSS 2010:Visual Studio 2010开发体验(20)——使用ADO.NET Data Service快速访问SharePoint列表数据
- MOSS 2010:Visual Studio 2010开发体验(24)——如何在浏览器中直接对BCS模型直接进行编辑和新增操作
- MOSS 2010:Visual Studio 2010开发体验(4)——应用程序页面(ApplicationPage)
- MOSS 2010:Visual Studio 2010开发体验(2)——项目模板和结构
- MOSS 2010:Visual Studio 2010开发体验(6)——开发WebPart
- MOSS 2010:Visual Studio 2010开发体验(15)——LINQ to SharePoint
- MOSS 2010:Visual Studio 2010开发体验(4)——应用程序页面(ApplicationPage)
- MOSS2010 客户端对象模型开发(二)
- MOSS2010 客户端对象模型开发(三)
- MOSS 2010:Visual Studio 2010开发体验(33)——工作流开发最佳实践(五):全局可重用工作流