ASP.net MVC FileUpload 文件上传
2010-04-06 10:40
615 查看
ASP.net MVC的上传文件功能并没有其他模块(action,Controller)那么智能、好用,不过也不是很复杂。
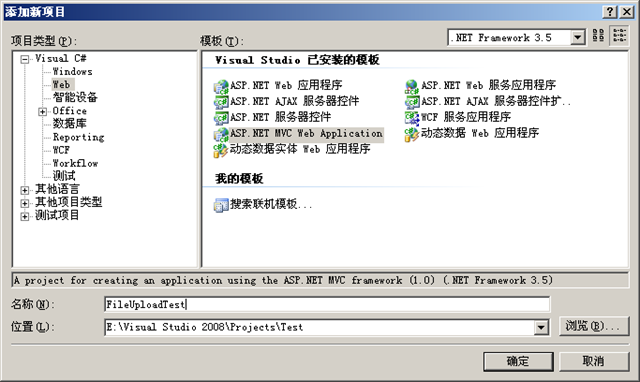
打开vs2008 新建一个MVC工程
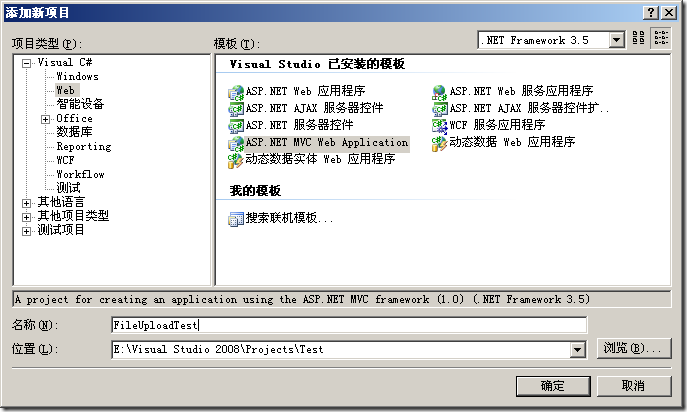
如果web项目没有asp.net mvc web application的话,请下载 .net MVC
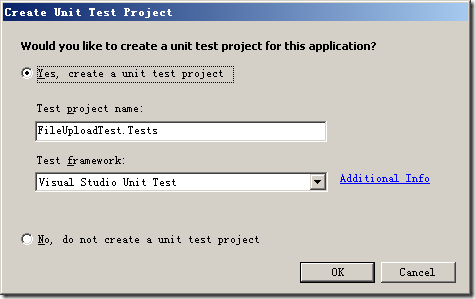
确定后显示Unit Test选项 根据需要选择,这里就选择NO。
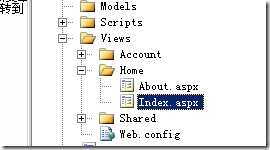
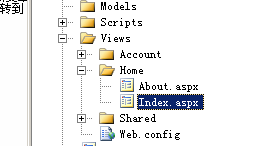
首先建立我们上传文件的form,打开
用HTML helper编写一个form,当然也可以用纯HTML
<asp:Content ID="indexTitle" ContentPlaceHolderID="TitleContent" runat="server">
Home Page
</asp:Content>
<asp:Content ID="indexContent" ContentPlaceHolderID="MainContent" runat="server">
<h2>File Upload Example</h2>
<p>
File 1:<input type="file" name="file1" id="file1" /><br />
<input type="submit" id="upload" value="Upload" />
</p>
</asp:Content>
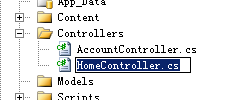
然后编写相应的action,打开

using System;
using System.Collections.Generic;
using System.Linq;
using System.Web;
using System.Web.Mvc;
using System.Text;
using System.IO;
namespace FileUpload.Controllers
{
[HandleError]
public class HomeController : Controller
{
public ActionResult Index()
{
//ViewData["Message"] = "Welcome to ASP.NET MVC!";
return View();
}
public ActionResult Upload()
{
StringBuilder info = new StringBuilder();
foreach (string file in Request.Files)
{
HttpPostedFileBase postFile = Request.Files[file];//get post file
if (postFile.ContentLength == 0)
continue;
string newFilePath = @"D:/";//save path
postFile.SaveAs(newFilePath + Path.GetFileName(postFile.FileName));//save file
info.AppendFormat("Upload File:{0}/r/n", postFile.FileName);//info
}
ViewData["Info"] = info;
return View("Index");
}
public ActionResult About()
{
return View();
}
}
}
保存后直接运行
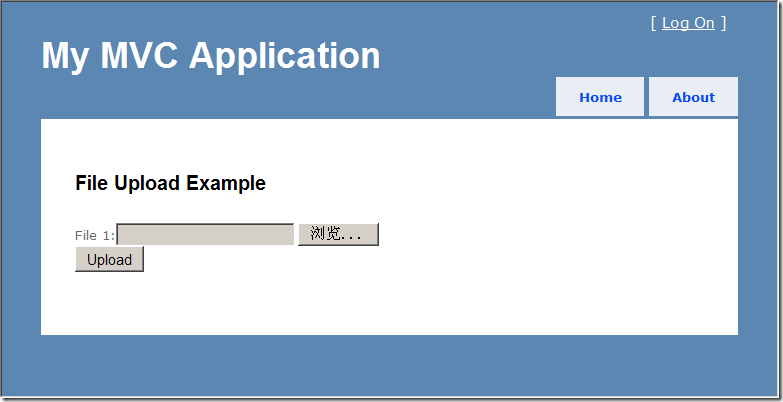
这样就可以测试了。
打开vs2008 新建一个MVC工程
如果web项目没有asp.net mvc web application的话,请下载 .net MVC
确定后显示Unit Test选项 根据需要选择,这里就选择NO。

首先建立我们上传文件的form,打开
用HTML helper编写一个form,当然也可以用纯HTML
<asp:Content ID="indexTitle" ContentPlaceHolderID="TitleContent" runat="server">
Home Page
</asp:Content>
<asp:Content ID="indexContent" ContentPlaceHolderID="MainContent" runat="server">
<h2>File Upload Example</h2>
<p>
File 1:<input type="file" name="file1" id="file1" /><br />
<input type="submit" id="upload" value="Upload" />
</p>
</asp:Content>
然后编写相应的action,打开
using System;
using System.Collections.Generic;
using System.Linq;
using System.Web;
using System.Web.Mvc;
using System.Text;
using System.IO;
namespace FileUpload.Controllers
{
[HandleError]
public class HomeController : Controller
{
public ActionResult Index()
{
//ViewData["Message"] = "Welcome to ASP.NET MVC!";
return View();
}
public ActionResult Upload()
{
StringBuilder info = new StringBuilder();
foreach (string file in Request.Files)
{
HttpPostedFileBase postFile = Request.Files[file];//get post file
if (postFile.ContentLength == 0)
continue;
string newFilePath = @"D:/";//save path
postFile.SaveAs(newFilePath + Path.GetFileName(postFile.FileName));//save file
info.AppendFormat("Upload File:{0}/r/n", postFile.FileName);//info
}
ViewData["Info"] = info;
return View("Index");
}
public ActionResult About()
{
return View();
}
}
}
保存后直接运行

这样就可以测试了。

相关文章推荐
- Asp.net MVC中使用JQuery插件ajaxFileUpload上传文件
- Asp.net MVC中使用JQuery插件ajaxFileUpload上传文件
- Asp.net MVC中使用JQuery插件ajaxFileUpload上传文件
- JQuery文件上传插件ajaxFileUpload在Asp.net MVC中的使用
- 用jQuery-File-Upload上传Excel文件(ASP.NET MVC)[附源码下载]
- JQuery文件上传插件ajaxFileUpload在Asp.net MVC中的使用
- sql server 关于表中只增标识问题 C# 实现自动化打开和关闭可执行文件(或 关闭停止与系统交互的可执行文件) ajaxfileupload插件上传图片功能,用MVC和aspx做后台各写了一个案例 将小写阿拉伯数字转换成大写的汉字, C# WinForm 中英文实现, 国际化实现的简单方法 ASP.NET Core 2 学习笔记(六)ASP.NET Core 2 学习笔记(三)
- asp.net 基于ajaxfileupload.js 实现文件异步上传
- asp.net mvc动态生成file控件批量上传文件
- ASP.NET FileUpload上传图片方法并解决上传文件大小
- jquery.uploadify上传文件配置详解(asp.net mvc)
- Asp.net 文件上传的 FileUpload FileName 和 FileUpload PostedFile.FileName的细节问题
- asp.net mvc中读取input file上传的txt文件内容,但不需要把文件保存到服务器上
- ASP.NET同时上传多个文件,和不使用HTMLFileInput上传的方法(resource about file upload)
- SlickUploadFile控件 实现asp.net文件上传
- jquery.uploadify上传文件配置详解(asp.net mvc)
- ASP.NET 使用ajaxfileupload.js插件出现上传较大文件失败的解决方法(ajaxfileupload.js第一弹)
- Asp.net UploadFile 文件上传
- File Upload using jQuery AJAX in ASP.NET Web API or Http handler (AJAX上传文件通过Web API或 http handler)
- ASP.NET FileUpload不经保存,直接读取上传文件的内容