Spring Session原理解析
前景提要
@EnableRedisHttpSession导入RedisHttpSessionConfiguration.class
Ⅰ、被RedisHttpSessionConfiguration继承的SpringHttpSessionConfiguration中添加了SessionRepositoryFilter(session过滤器);
Ⅱ、SessionRepositoryFilter创建时自动获取到SessionRepository;
Ⅲ、SessionRepositoryFilter的doFilterInternal方法把原生的request和response被包装成wrappedRequest和wrappedResponse,以后获取session将不再通过原生的request.session()方法而是通过wrappedRequest.getsession(),wrappedRequest.getsession()方法,wrappedRequest.getsession()的session是从SessionRepository获取得到的,做到从redis获取session。
一:getSession流程
SessionRepositoryFilter :负责用一个由SessionRepository支持的HttpSession实现包装HttpServletRequest。
当请求进来后会被先进入过滤器进行过滤,SessionRepositoryFilter类的doFilterInternal方法就会生效(代码1-1):
public static final String SESSION_REPOSITORY_ATTR = SessionRepository.class.getName();
@Override
protected void doFilterInternal(HttpServletRequest request, HttpServletResponse response, FilterChain filterChain)
throws ServletException, IOException {
// 设置SessionRepository至Request的“会话存储库请求属性名称【SessionRepository】”属性中。
request.setAttribute(SESSION_REPOSITORY_ATTR, this.sessionRepository);
// 包装原始HttpServletRequest响应至SessionRepositoryRequestWrapper
SessionRepositoryRequestWrapper wrappedRequest = new SessionRepositoryRequestWrapper(request, response);
// 包装原始HttpServletResponse响应至SessionRepositoryResponseWrapper
SessionRepositoryResponseWrapper wrappedResponse = new SessionRepositoryResponseWrapper(wrappedRequest,response);
try {
//将封装好后的request、response置入过滤链中
filterChain.doFilter(wrappedRequest, wrappedResponse);
}
finally {
wrappedRequest.commitSession();
}
}
在将request、response封装好后进入doFilter过滤链中,因为filterChain.doFilter(wrappedRequest, wrappedResponse)方法debugg流程太长,这里只提主要功能:
①、获取当前请求并进行解析为HttpMethod,根据请求方式(GET\POST\PUT\DELETE)分派给在对应的doMethod方法,;
②、当HandlerMethod处理完请求后就会触发SessionFlashMapManager,从HTTP会话中检索保存的FlashMap实例(如果有的话)。FlashMap为一个请求提供了一种方法来存储用于另一个请求的属性。当从一个URL重定向到另一个URL时,这是最常见的需要——例如Post/Redirect/Get模式。一个FlashMap在重定向之前被保存(通常在会话中),在重定向之后可用并立即删除。
③、因为②的原因,服务端会获取一次请求的session,这时候就会使用request.getSession(false)方法【获取但如果不存在不会进行创建】——调用的是SessionRepositoryFilter类中的getSession(boolean create)方法(代码1-2):
@Override
public HttpSessionWrapper getSession(boolean create) {
//获取当前会话中CURRENT_SESSION_ATTR的session属性
HttpSessionWrapper currentSession = getCurrentSession();
if (currentSession != null) {
return currentSession;
}
//获取请求会话的session
S requestedSession = getRequestedSession();
//如果请求会话session不为空
if (requestedSession != null) {
//如果sessionId存在且当前request的attribute中的session未失效
if (getAttribute(INVALID_SESSION_ID_ATTR) == null) {
//设置新的最后访问时间
requestedSession.setLastAccessedTime(Instant.now());
//表示此sessionId的session属性是有效的
this.requestedSessionIdValid = true;
//将session和Servlet上下文环境置入生成currentSession
currentSession = new HttpSessionWrapper(requestedSession, geServletContext());
//表示当前会话并不是第一次建立,防止同一个request频繁访问存储器DB中获取session(有点类似缓存)
currentSession.markNotNew();
//把当前的请求session置入,以便下一次
setCurrentSession(currentSession);
return currentSession;
}
}
           ......

}

@SuppressWarnings("unchecked")
private HttpSessionWrapper getCurrentSession() {
//获取当前会话中CURRENT_SESSION_ATTR的属性
return (HttpSessionWrapper) getAttribute(CURRENT_SESSION_ATTR);
}

private void setCurrentSession(HttpSessionWrapper currentSession) {
//如果当前会话不存在,则清除掉attribute中CURRENT_SESSION_ATTR的属性
if (currentSession == null) {
removeAttribute(CURRENT_SESSION_ATTR);
}
//如果会话存在,则设置CURRENT_SESSION_ATTR的属性
else {
setAttribute(CURRENT_SESSION_ATTR, currentSession);
}
}

private S getRequestedSession() {
//这是针对getRequestedSession()在处理请求期间被调用多次的情况的一种优化。它将立即返回找到的会话,而不是在会话存储库中再次查找它以节省时间。
if (!this.requestedSessionCachedhed) {
//如果requestedSessionCached为false,解析出当前的HttpServletRequest关联的所有会话id。
List<String> sessionIds = SessionRepositoryFilter.this.httpSessionIdResolver.resolveSessionIds(this);
for (String sessionId : sessionIds) {
if (this.requestedSessionId == null) {
this.requestedSessionId = sessionId;
}
//SessionRepository是管理Spring Session的模块,利用sessionId获取session信息
S session = SessionRepositoryFilter.this.sessionRepository.findById(sessionId);
if (session != null) {
this.requestedSession = session;
this.requestedSessionId = sessionId;
break;
}
}
this.requestedSessionCached = true;
}
return this.requestedSession;
}
在以上步骤执行完之后才会正式进入我们编写的自定义拦截器中request.getSession().getAttribute(AuthServerConstant.LONG_USER)。
在执行request.getSession()中会再次执行public HttpSessionWrapper getSession(boolean create)方法,因为上一步已经执行了setCurrentSession(HttpSessionWrapper currentSession)方法,即此时currentSession不再为空直接返回。
最后调用SessionRepositryFilter.commitSession将发生变更的seesion提交到redis中进行存储,实现分布式会话(代码1-3):
    //SessionRepositoryFilter类中的commitSession方法
     private void commitSession() {
//获取当前封装的wrappedSession
HttpSessionWrapper wrappedSession = getCurrentSession();
if (wrappedSession == null) {
if (isInvalidateClientSession()) {
// 如果没有session,并且已经被标记为失效时,指令客户端结束当前会话。当会话无效时调用此方法,并应通知客户端会话id不再有效.
SessionRepositoryFilter.this.httpSessionIdResolver.expireSession(this, this.response);
}
}
else {
//获取session
S session = wrappedSession.getSession();
//将requestedSessionCached置为false,表明当前会话为第一次置入或者已经进行修改
clearRequestedSessionCache();
//调用RedisIndexedSessionRepository中的方法对进行的session在redis中进行保存,保存已更改的所有属性,并更新此会话的到期时间。
SessionRepositoryFilter.this.sessionRepository.save(session);
//获取session唯一Id
String sessionId = session.getId();
//判断之前的session是否失效 或则 当前的sessionId与之前的sessionId不一致
if (!isRequestedSessionIdValid() || !sessionId.equals(getRequestedSessionId())) {
//让Cookie中的seesionId失效
SessionRepositoryFilter.this.httpSessionIdResolver.setSessionId(this, this.response, sessionId);
}
}
}
二:setSession流程
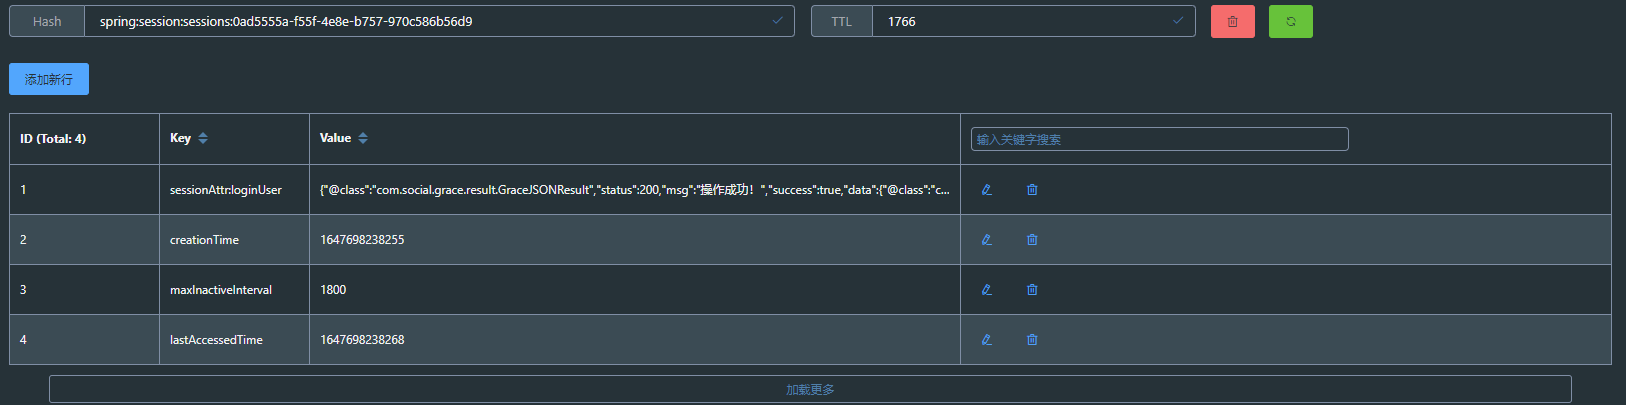
SpringSession在redis中的格式:
最开始步骤也是执行filterChain.doFilter(wrappedRequest, wrappedResponse)方法,之后开始执行我们自己编写的session.setAttribute(AuthServerConstant.LONG_USER,result);(代码2-1)
//HttpSessionAdapte类中的方法和属性
private static final Log logger = LogFactory.getLog(HttpSessionAdapter.class);

private S session;

private final ServletContext servletContext;

private boolean invalidated;

private boolean old;

@Override
public void setAttribute(String name, Object value) {
checkState();
//根据传过来的属性名先在服务器内存中存储的session中获取旧的属性值
Object oldValue = this.session.getAttribute(name);
//新置入服务器内的session
this.session.setAttribute(name, value);
//如果新值与旧值不同表明session已经更新
if (value != oldValue) {
if (oldValue instanceof HttpSessionBindingListener) {
try {
((HttpSessionBindingListener) oldValue)
.valueUnbound(new HttpSessionBindingEvent(this, name, oldValue));
}
catch (Throwable th) {
logger.error("Error invoking session binding event listener", th);
}
}
if (value instanceof HttpSessionBindingListener) {
try {
((HttpSessionBindingListener) value).valueBound(new HttpSessionBindingEvent(this, name, value));
}
catch (Throwable th) {
logger.error("Error invoking session binding event listener", th);
}
}
}
}
这里重点讲解黄色标记的this.session.setAttribute(name, value)方法,它调用的是RedisIndexedSessionRepository类中的setAttribute(String attributeName, Object attributeValue)方法(代码2-2):
  //RedisIndexedSessionRepository类中方法

  //使用构造函数设置session中基本参数
RedisSession(MapSession cached, boolean isNew) {
  this.cached = cached;
   this.isNew = isNew;
   this.originalSessionId = cached.getId();
   Map<String, String> indexes = RedisIndexedSessionRepository.this.indexResolver.resolveIndexesFor(this);
  this.originalPrincipalName = indexes.get(PRINCIPAL_NAME_INDEX_NAME);
//此处可以对比上面的截图
   if (this.isNew) {
   this.delta.put(RedisSessionMapper.CREATION_TIME_KEY, cached.getCreationTime().toEpochMilli());
  this.delta.put(RedisSessionMapper.MAX_INACTIVE_INTERVAL_KEY,
       (int) cached.getMaxInactiveInterval().getSeconds());
   this.delta.put(RedisSessionMapper.LAST_ACCESSED_TIME_KEY, cached.getLastAccessedTime().toEpochMilli());
    //Ⅰ:如果seesion为新的,则将如上的参数置入名为delta的Map函数中
 if (this.isNew || (RedisIndexedSessionRepository.this.saveMode == SaveMode.ALWAYS)) {
  getAttributeNames().forEach((attributeName) -> this.delta.put(getSessionAttrNameKey(attributeName),
cached.getAttribute(attributeName)));
}
}


  static String getSessionAttrNameKey(String attributeName) {
   return RedisSessionMapper.ATTRIBUTE_PREFIX + attributeName;
}

public void setAttribute(String attributeName, Object attributeValue) {
///调用MapSeesion类中setAttribute(String attributeName, Object attributeValue)方法,也是一个Map类型。这里之所以整一个cached是为了起到暂存的作用
this.cached.setAttribute(attributeName, attributeValue);
      //Ⅱ:将以sessionAttr:attributName为Map的key,attribute值为value以Map形式存储在物理内存中
      //getSessionAttrNameKey方法是将key格式拼接成sessionAttr:attributName
this.delta.put(getSessionAttrNameKey(attributeName), attributeValue);
flushImmediateIfNecessary();
}

//MapSeesion类中
public void setAttribute(String attributeName, Object attributeValue) {
if (attributeValue == null) {
removeAttribute(attributeName);
}
else {
//也是以Map方法将以attributName为Map的key,attribute值为value存储在物理内存中
this.sessionAttrs.put(attributeName, attributeValue);
}
}
在此之后依然是调用SessionRepositryFilter.commitSession方法对seesion进行提交到redis进行分布式会话存储,下面着重说以下提交流程:
在SessionRepositryFilter.commitSession中调用了RedisIndexedSessionRepository类中的save(session)方法(具体可以查看代码1-3),关于此方法如下(代码2-3):
  public void save(RedisSession session) {
session.save();
//当seesion更新的时候
if (session.isNew) {
//获取会话通道,session.getId()获取的是cached.Id
String sessionCreatedKey = getSessionCreatedChannel(session.getId());
//根据Key找到通到发布消息,告诉订阅者此sessionId更新了:delta此处为空,
       this.sessionRedisOperations.convertAndSend(sessionCreatedKey, session.delta);
       //置为false下次无更新不需要再进行上面操作
session.isNew = false;
}
}

private void save() {
//保存发生了变化的session
saveChangeSessionId();
//保存session
saveDelta();
}

private void saveDelta() {
if (this.delta.isEmpty()) {
return;
}
String sessionId = getId();
//将物理内存中以sessionAttr:attributName为Map的key,attribute值为value存储入redis中,redis的存储键格式为:spring:session:sessions:UUID
getSessionBoundHashOperations(sessionId).putAll(this.delta);
......
//将delta置空
this.delta = new HashMap<>(this.delta.size());
}

private BoundHashOperations<Object, Object, Object> getSessionBoundHashOperations(String sessionId) {
String key = getSessionKey(sessionId);
    return this.sessionRedisOperations.boundHashOps(key);
}

  String getSessionKey(String sessionId) {
//  namespace=spring:session
   return this.namespace + "sessions:" + sessionId;
  }
至此整个SrpingSession运行原理到此结束,如果本人注释有问题或则理解有偏差请在评论区指出。

- 【Spring】Spring IOC原理及源码解析之scope=request、session
- Spring-Session实现Session共享实现原理以及源码解析
- [置顶] Spring-Session实现Session共享实现原理以及源码解析
- 【Spring】Spring IOC原理及源码解析之scope=request、session
- 关于spring,IOC和AOP的解析原理和举例
- spring 原理及反射 方式生成bean采用BeanWrapper解析
- 会话状态Session解析以及原理分析
- 【状态保持】会话状态Session解析以及原理分析
- SpringMVC源码深度解析之SpringServletContainerInitializer原理分析
- Spring 核心原理解析
- Spring Boot启动原理解析
- spring @Component注解原理解析
- Spring_AOP原理解析
- Spring技术内情——深入解析Spring架设与设计原理(6)Spring ACEGI
- 知识储备:SpringBoot启动运行流程原理解析
- spring大文件分块上传原理解析2
- SpringBoot2.x系列教程73--Web开发中的Session详解及原理分析
- SpringMVC源码深度解析之SpringServletContainerInitializer原理分析
- spring学习笔记(1)IOC核心原理解析
- springMVC源码分析--@SessionAttribute用法及原理解析SessionAttributesHandler和SessionAttributeStore