「后端小伙伴来学前端了」Vuex 安装&基本使用&案例讲解
2021-11-24 08:40
411 查看
前言
上篇文章说了vuex的简单原理,这篇就着重讲讲如何使用简单的vuex,看看它到底有何优秀之处吧。
我们要使用Vuex,使用流程大致是不是就是下面这几步呢?
- npm
- Vue.use()
- store
- 另外就是让所有vc都能够访问到store
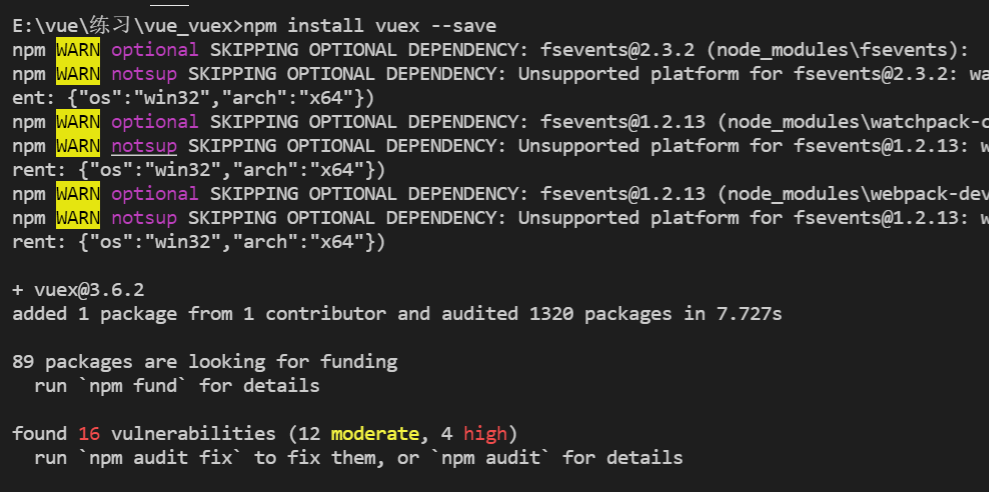
一、安装
npm安装
npm install vuex --save
如果我们直接使用vue脚手架创建项目,可以在创建时就直接选择安装
vuex。
二、入门使用及案例
第二步就是引入vuex,使用插件了。
import Vue from 'vue'
import App from './App.vue'
import Vuex from 'vuex'

Vue.config.productionTip = false
Vue.use(Vuex)

const vm =new Vue({
store: {},
render: h => h(App),
}).$mount('#app')
console.log(vm)
按照以前使用插件的过程,这样理论上是已经完成了。
但是我在后面还输出了
vm,这还有玄机的。
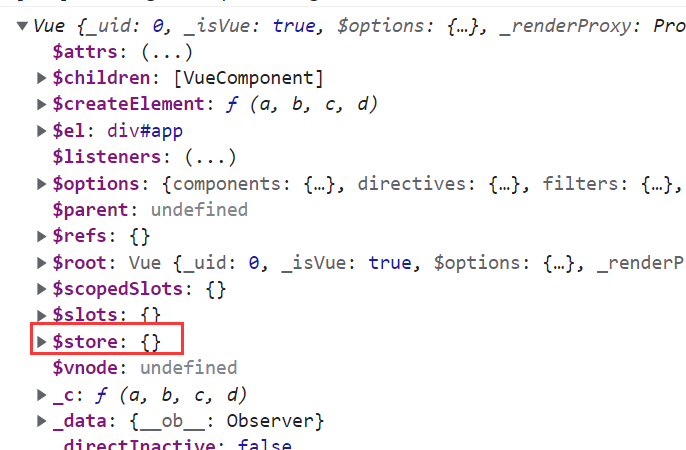
可以看到在 Vue 中的实例上已经有
$store啦,但是在原理图中,底下还有三个对象。
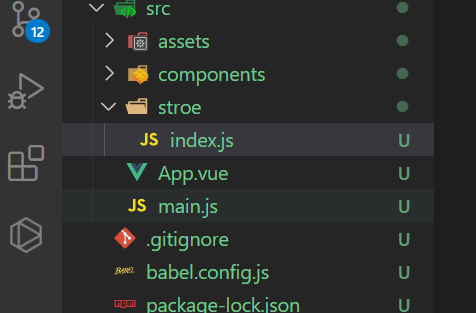
我们在
mian.js是不合适的,我们通常会提取出来,另外建立一个文件夹叫
stroe,大家的习惯,也不是说啥规范吧。
我们在index.js中写
//引入Vue核心库
import Vue from 'vue'
//引入Vuex
import Vuex from 'vuex'
//应用Vuex插件
Vue.use(Vuex)

//准备actions对象——响应组件中用户的动作
const actions = {}
//准备mutations对象——修改state中的数据
const mutations = {}
//准备state对象——保存具体的数据
const state = {}

//创建并暴露store
export default new Vuex.Store({
actions,  // actions:actions, 由es6语法,变量名和对象名相同,可以简写 为 actions。
mutations,
state
})
然后我们在
main.js中进行引入
import Vue from 'vue'
import App from './App.vue'
import store from './store'
Vue.config.productionTip = false
new Vue({
render: h => h(App),
store
}).$mount("#app")
接下来就是如何使用它啦。
就是简单做了一个点击自加的案例
index.js
//引入Vue核心库
import Vue from 'vue'
//引入Vuex
import Vuex from 'vuex'
//应用Vuex插件
Vue.use(Vuex)

//准备actions对象——响应组件中用户的动作
const actions = {
// context 在这里就是 上下文的意思  必须要填写的参数  这里不好说,大家可以打印出来看看
increment(context,value) {
console.log(context)
context.commit("INCREMENT",value)
}
}
//准备mutations对象——修改state中的数据
// 这里方法名大写也只是一种开发习惯,不能说是规范吧,为了能够让人明显分析出是调用了mutations
const mutations = {
INCREMENT(state,value) {
state.sum+=value
}
}
//准备state对象——保存具体的数据
const state = {
sum: 0,
}

//创建并暴露store
export default new Vuex.Store({
actions,
mutations,
state
})
写了一个Sum组件
<template>
<div>
<!-- 用这种太长了,所以可以写成一个计算属性,稍微方便些,后面有更加方便的方法 -->
<h1>{{ $store.state.sum }}</h1>
<h1>
{{ sum }}
</h1>

<button @click="increment">点击自加</button>
</div>
</template>
<script>
export default {
computed:{
sum(){
return this.$store.state.sum
}
},
methods: {
increment(){
this.$store.dispatch("increment",1)
// 也可以直接与 mutations 通信
// this.$store.commit('INCREMENT')
}
}
}
</script>
组件中读取vuex中的数据:
$store.state.sum
我这里用了计算属性。后面会有更加方便的方法。
组件中修改vuex中的数据:
$store.dispatch('action中的方法名',数据)或$store.commit('mutations中的方法名',数据)备注:若没有网络请求或其他业务逻辑,组件中也可以越过actions,即不写
dispatch
,直接编写commit
<template>
<div id="app">
<Sum></Sum>
</div>
</template>
<script>
import Sum from './components/Sum.vue'
export default {
name: 'App',
components: {
Sum
}
}
</script>
实现效果

三、getters的使用
- 概念:当state中的数据需要经过加工后再使用时,可以使用getters加工。
- 在
store.js
中追加getters
配置
const getters = {
bigSum(state){
return state.sum * 10
}
}
//创建并暴露store
export default new Vuex.Store({
actions,
mutations,
state,
getters
})
在组件中的使用方式
$store.getters.bigSum或者用计算属性,会更好一点点。
<template>
<div>
<h1>
{{ sum }}
</h1>
<!-- <h1>
展示一下sum的十倍是多少 {{  $store.getters.bigSum}}
</h1> -->
<h1>
展示一下sum的十倍是多少 {{ bigSum }}
</h1>

<button @click="increment">点击自加</button>
</div>
</template>
<script>
export default {
computed:{
sum(){
return this.$store.state.sum
},
bigSum(){
return this.$store.getters.bigSum
}
},
methods: {
increment(){
this.$store.dispatch("increment",1)
}
}
}
</script>
效果:
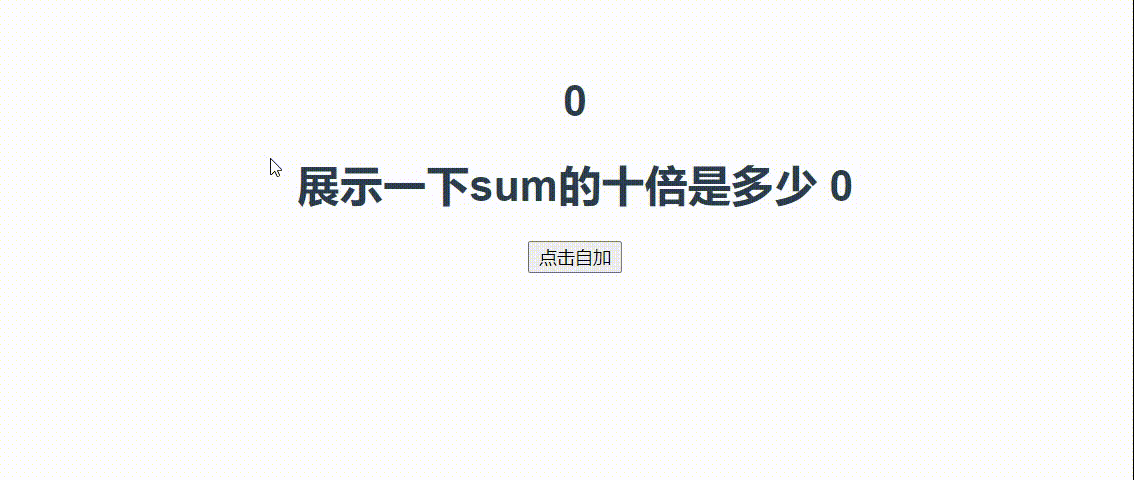
在其他任意组件中都可以这么取值,所以说是vuex实现了任意间组件通信
不过我们每次这么手写计算属性,而且代码是这么相似,难道没有什么简单的方式吗???
有的有的,点这点这👉 vuex进阶 (😁)
后语
大家一起加油!!!如若文章中有不足之处,请大家及时指出,在此郑重感谢。
纸上得来终觉浅,绝知此事要躬行。
大家好,我是博主
宁在春:主页一名喜欢文艺却踏上编程这条道路的小青年。
希望:
我们,待别日相见时,都已有所成。

相关文章推荐
- grub 的安装与使用&&利用grub修改内核启动参数
- <Android>控件Spinner的基本使用
- <python>安装与使用
- Ubuntu SVN安装&使用&命令
- python Sublime Text3的使用基本配置操作&&SublimeREPL插件的安装及快捷键设置
- Git的基本使用方法和安装&心得体会
- GreyBox框架基本使用 - 帮主的空间…
- GNU autotools的安装和使用&n…
- 「后端小伙伴来学前端了」Vuex进阶操作,让你的代码更加高效(简称如何学会偷懒 【手动狗头】)
- phoenix技术(安装部署和基本使用)讲解
- 流式大数据计算实践(6)----Storm简介&使用&安装
- Python-memcached安装&基本使用
- Eclipse打JAR包,插件FatJar安装与使用<转>
- <备份>10月11日系统安装与除错,sudo讲解
- Android实训案例(六)——四大组件之一BroadcastReceiver的基本使用,拨号,短信,SD卡,开机,应用安装卸载监听
- maven配置(安装&使用&私服)文档
- Redis安装部署&&客户端管理工具使用&&.net客户端测试
- Git的基本使用方法和安装&心得体会(使用git命令行)
- spring3 jsp页面使用<form:form modelAttribute="xxxx" action="xxxx">报错,附连接数据库的spring MVC annotation 案例
- <PY><Django>Win下Django安装使用