C#创建并使用DLL文件
2021-05-27 15:45
1436 查看
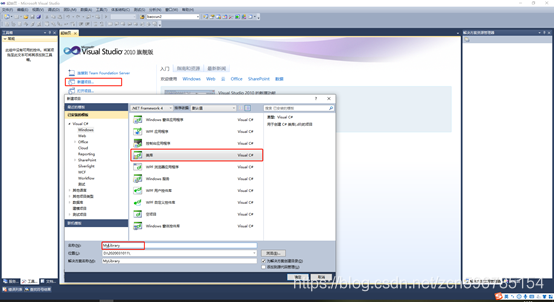
一.创建DLL文件
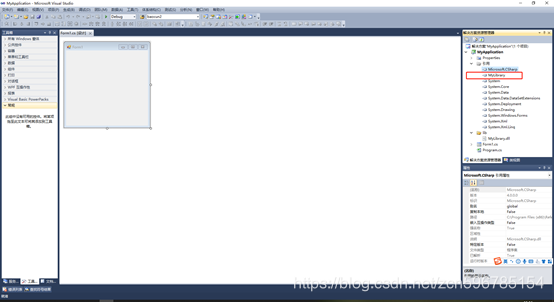
1.新建C#类库项目

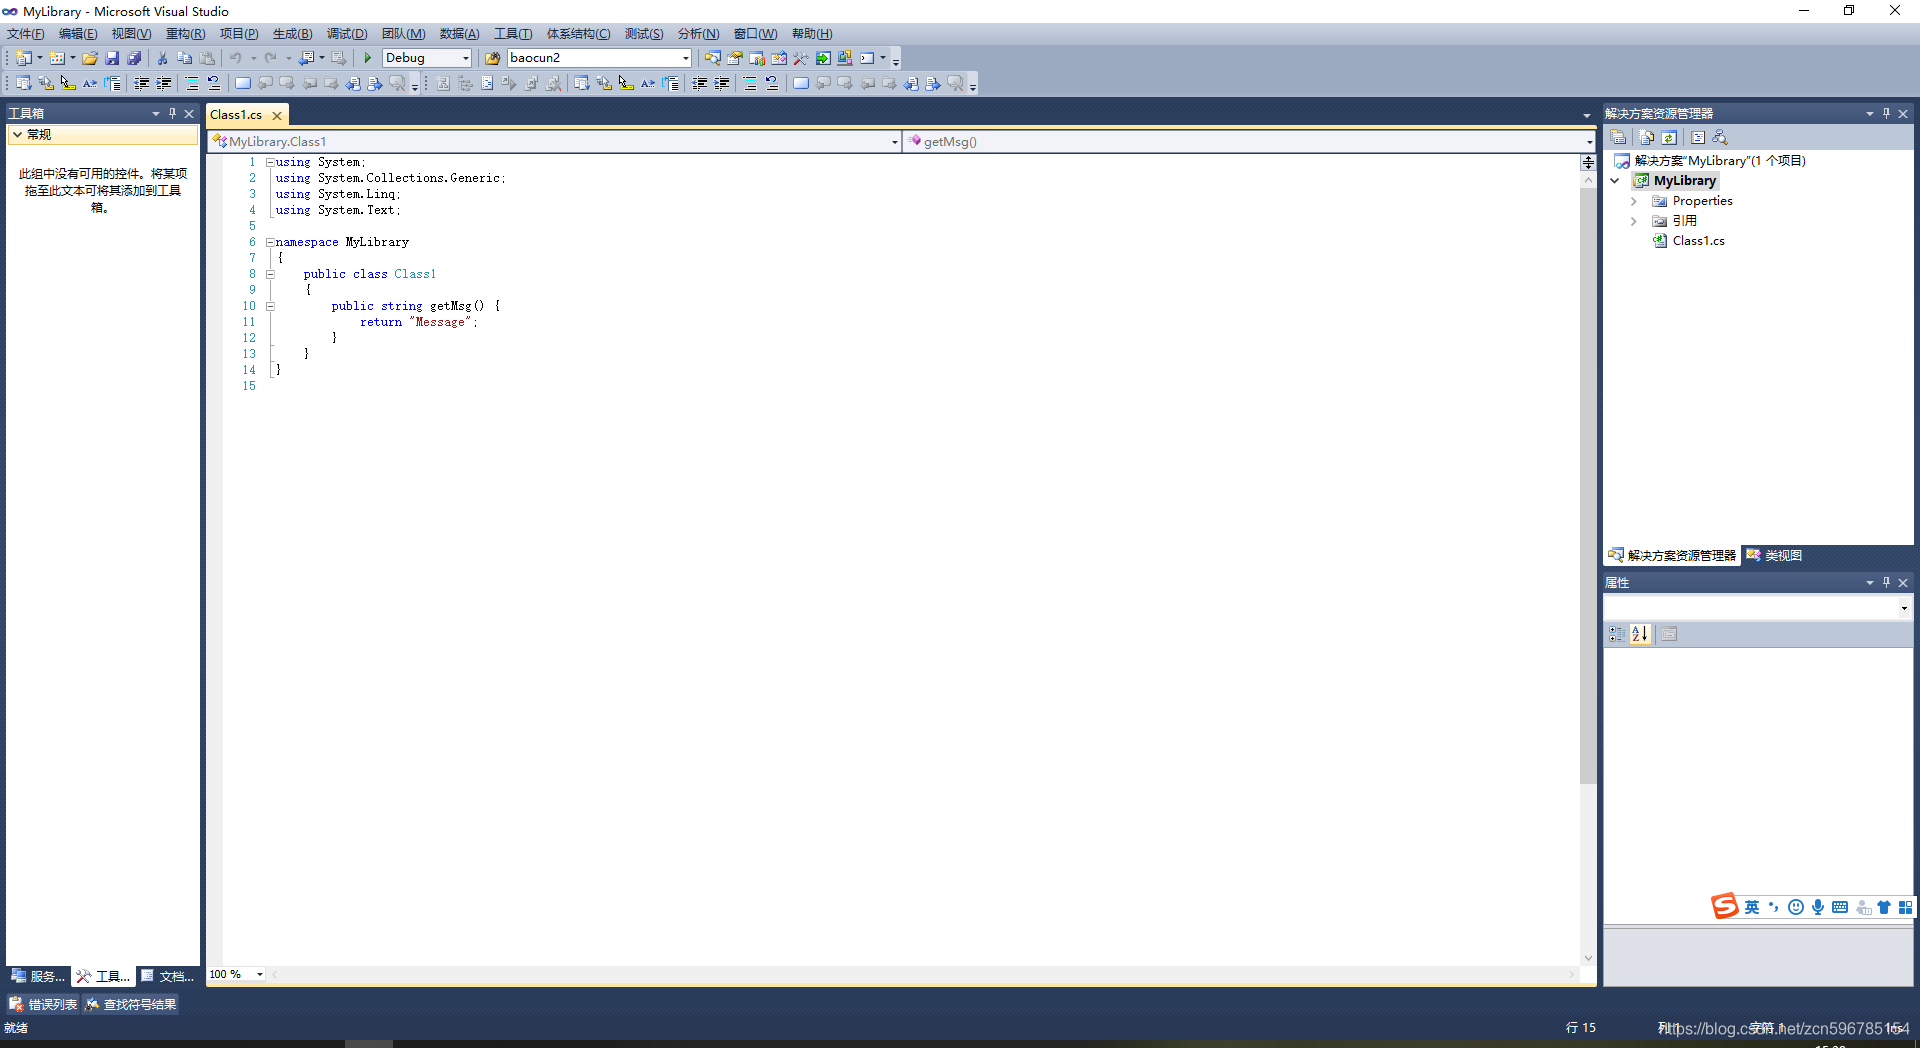
2.编写代码
using System;
using System.Collections.Generic;
using System.Linq;
using System.Text;

namespace MyLibrary
{
public class Class1
{
public string getMsg() {
return "Message";
}
}
}
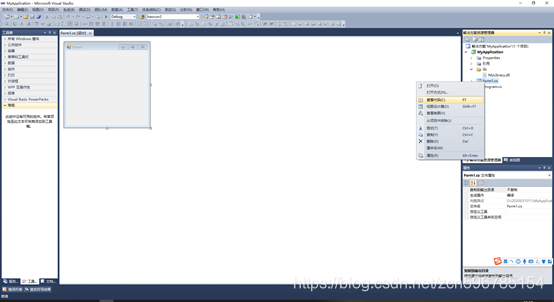
3.生成DLL文件
右键MyLibrary项目,点击生成,生成dll文件。或者选中MyLibrary按F6键生成dll文件。生成的dll文件路径为:…\MyLibrary\bin\Debug\MyLibrary.dll

二.使用DLL文件
1.新建C#窗体应用程序
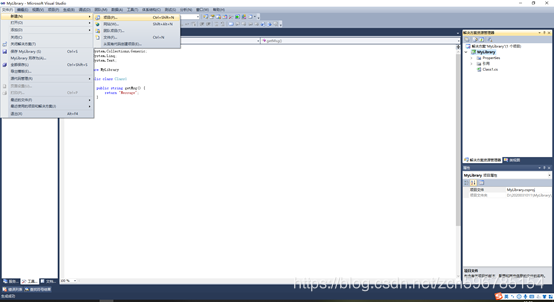
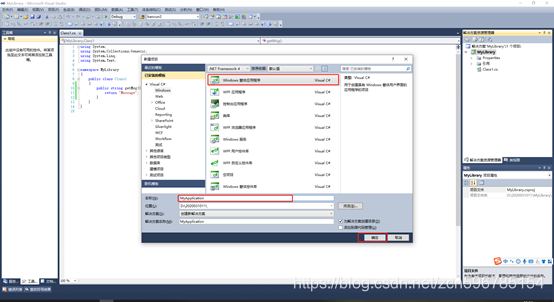
2.添加DLL引用
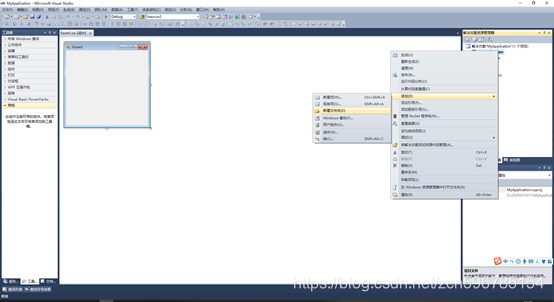
右键MyApplication-添加-新建文件夹。新建lib文件夹,存放刚才已经生成的dll文件。
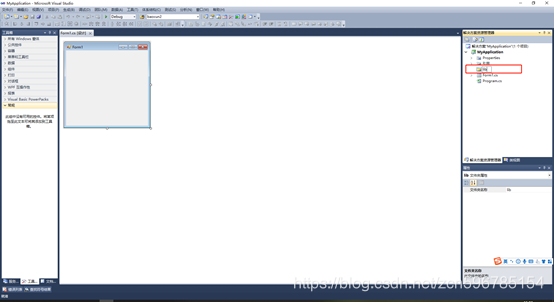
将生成好的dll文件复制到lib文件夹下。

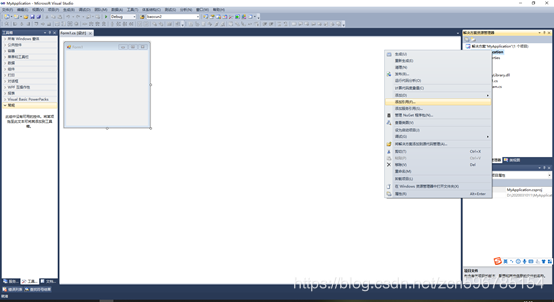
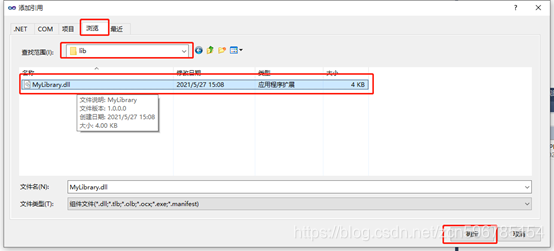
右键MyApplication-添加引用-浏览-lib-MyLibrary.dll,然后点击确定。
接着就可以看见MyLibrary引用已经添加进来了。
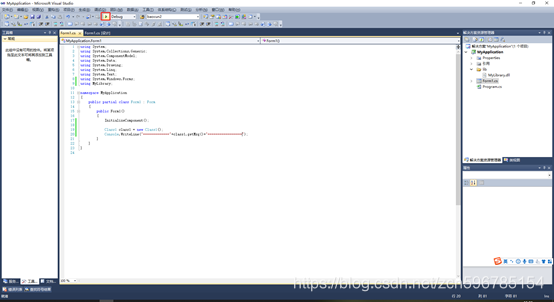
3.编写代码使用库文件
右键Form1-查看代码

添加代码
using System;
using System.Collections.Generic;
using System.ComponentModel;
using System.Data;
using System.Drawing;
using System.Linq;
using System.Text;
using System.Windows.Forms;
using MyLibrary;

namespace MyApplication
{
public partial class Form1 : Form
{
public Form1()
{
InitializeComponent();

Class1 class1 = new Class1();
Console.WriteLine("============="+class1.getMsg()+"=================");
}
}
}

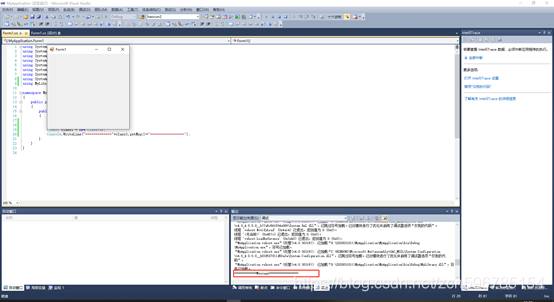
运行项目
三.运行结果

相关文章推荐
- 使用VS2013创建C#的dll文件
- 使用VS2013创建C#的dll文件
- C# 2.0:使用匿名方法、迭代程序和局部类来创建优雅的代码
- 使用C#创建webservice及三种调用方式
- VS2005 C#创建WebService使用线程
- C# 2.0:使用匿名方法、迭代程序和局部类来创建优雅的代码
- 在C#中使用 makecert 创建自签名的证书
- 使用C#创建SQL Server的存储过程
- 如何使用C# WEBSERVICE 创建一个三层的数据库应用程序 http://www.xxju.net/article/200412/29_0004326567.htm
- C#中创建和使用资源动态链接库
- HOWTO:在 Visual C# .NET 中使用自动化创建 Excel 宏
- 在C#中使用 makecert 创建自签名的证书
- 使用vs2005创建智能设备的C#和C++混合项目
- 转 :AD:使用C#批量创建帐号 http://www.itepub.net
- 使用C#创建SQL Server的存储过程(2)
- 创建和使用 C# DLL
- C#中创建和使用资源动态链接库收藏
- C# 2.0:使用匿名方法、迭代程序和局部类来创建优雅的代码
- 企业信息化系统基础——AD:使用C#批量创建帐号
- 使用C#创建webservice及三种调用方式