小程序三级联动,实现三级分类,顶部导航栏,左侧分类栏,右侧数据列表
2021-03-28 11:39
846 查看
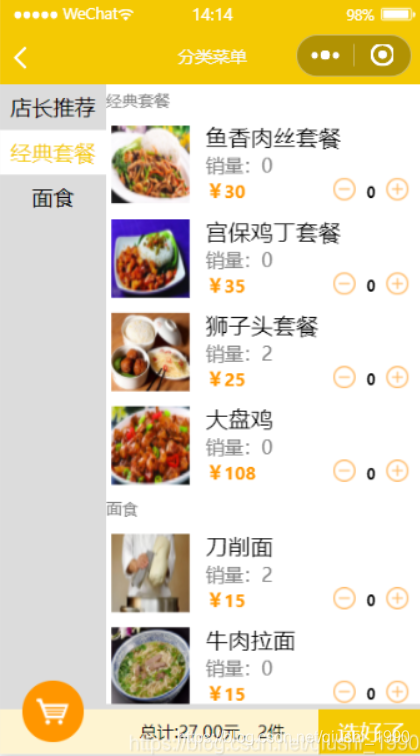
如果大家一直读石头哥的文章,或者看石头哥的视频,肯定知道,石头哥的点餐小程序有实现二级菜品或者商品分类。
如下图
但是有时候我们想实现三级分类,该怎么做呢,今天就来教大家如何实现三级分类。随便教下大家如何把excel数据批量的导入到云开发数据库
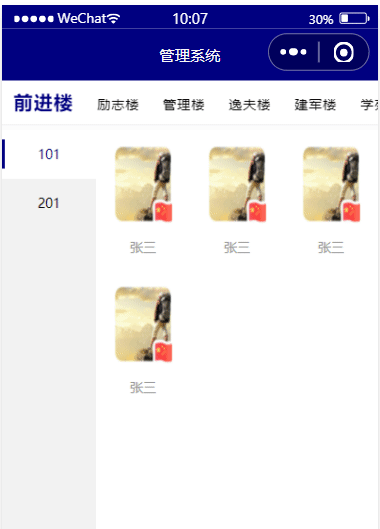
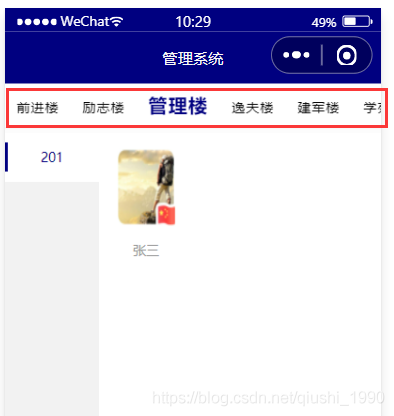
一,老规矩,先看效果图
先来给大家分析下原理
二,原理分析
首先来分析下有那三级
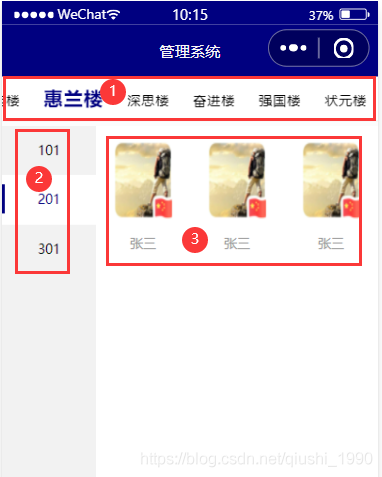
可以看出,我们最顶部是一级菜单,左侧是二级菜单,右侧是最终的三级列表。
我们来理一理层级关系
- =宿舍楼号
- ====宿舍号
- ========学生
聪明的人肯定知道,我们是一个宿舍楼里包含很多宿舍,宿舍里有包含很多学生。这样我们的三级就是 楼号》宿舍》学生。
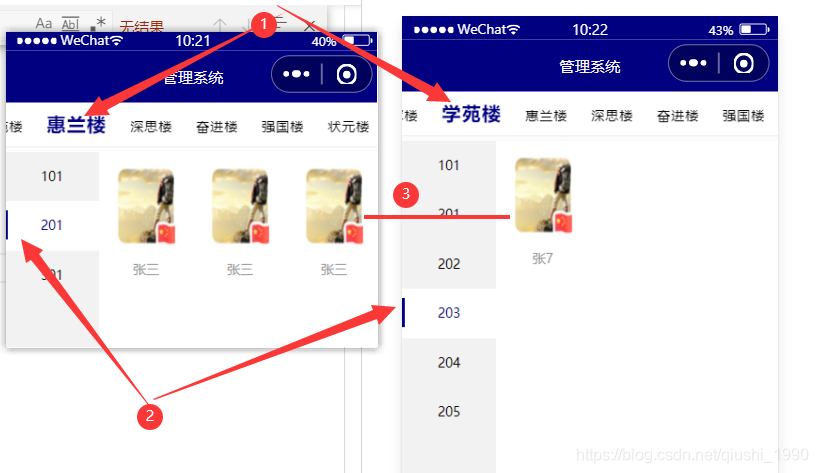
当我们切换楼号时,就会重新获取当前楼号包含的宿舍。
比如下图左为惠兰楼,右为学苑楼的数据,可以看出每个楼里的宿舍和学生信息。
分析完原理,我们就来看技术实现了。
三,获取分类数据
这里先给大家说下,我这里是用一张表来存的所有信息
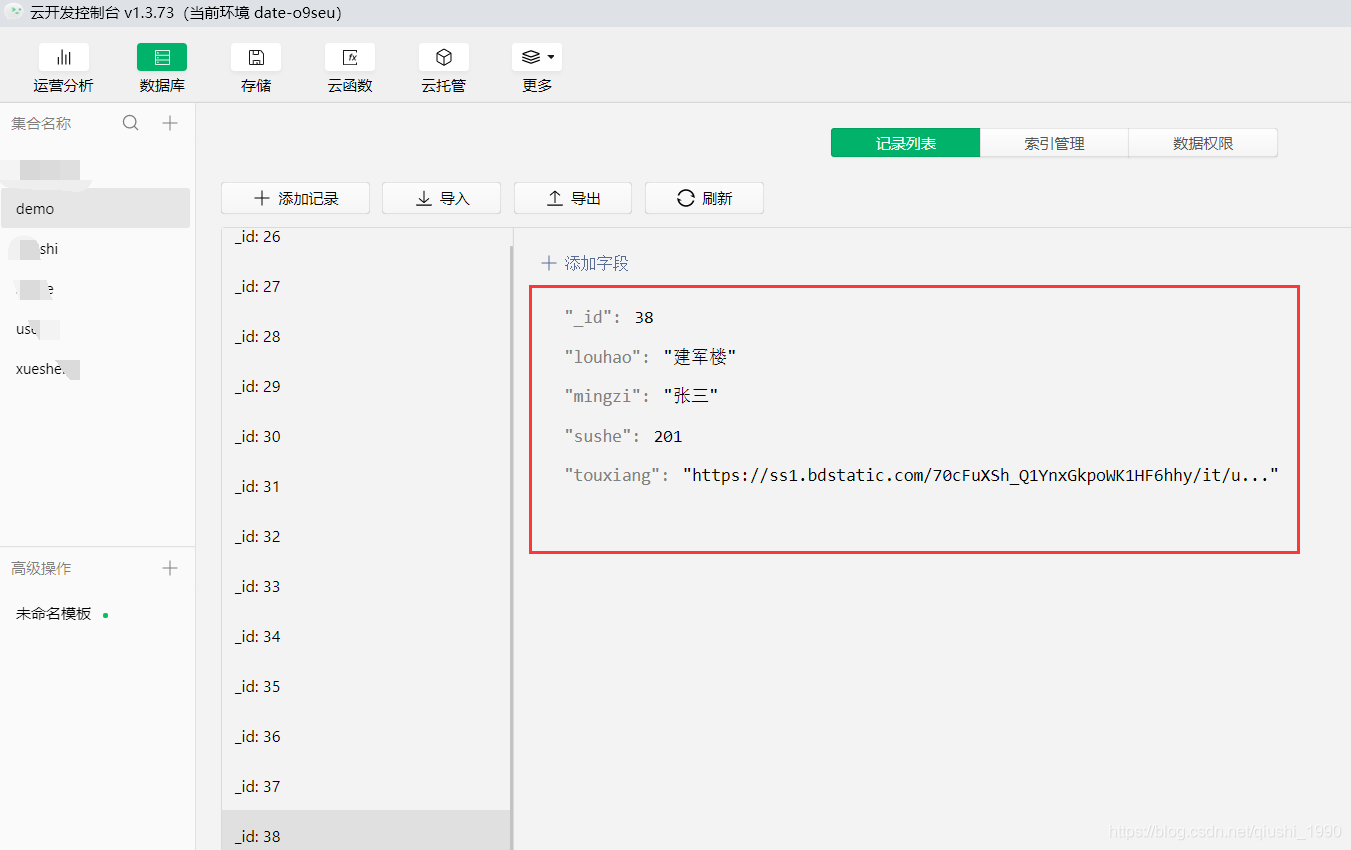
既然是一张表存所有数据,我们就要做下分组,看数据里都有哪些楼号。
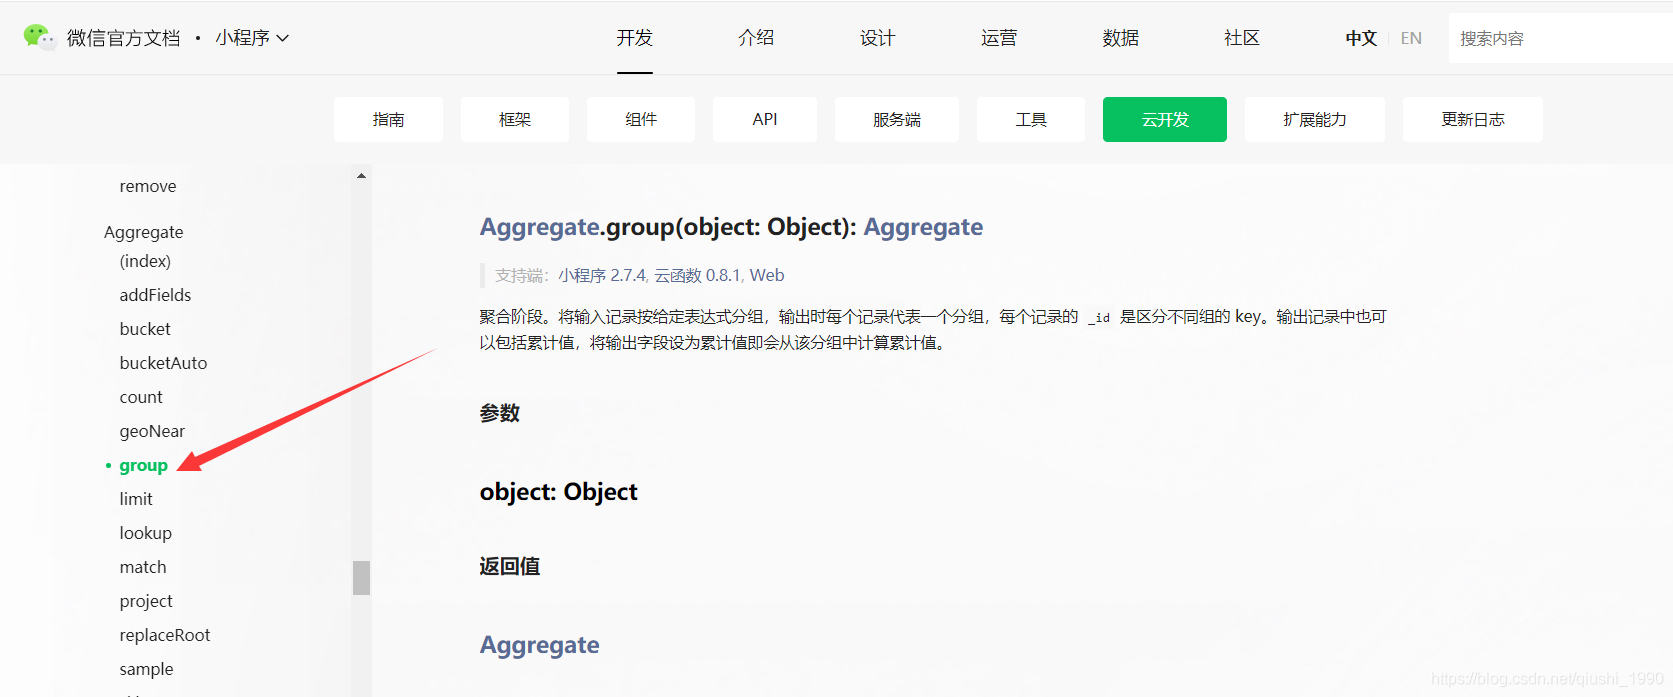
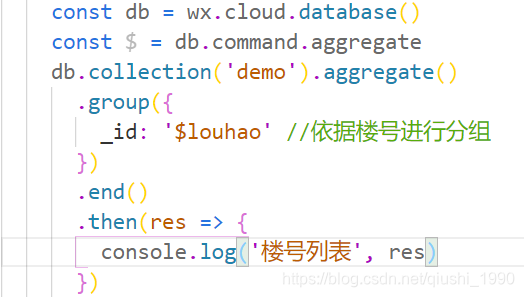
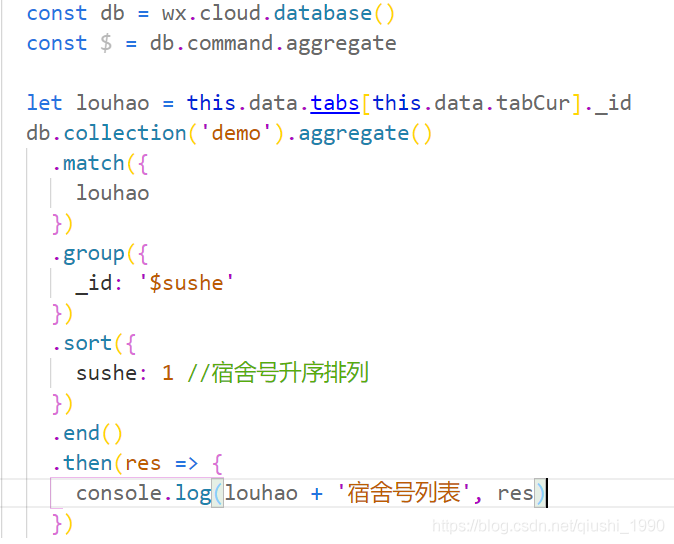
3-1,借助group实现楼号分组(一级数据)
具体代码如下
然后获取到的数据如下
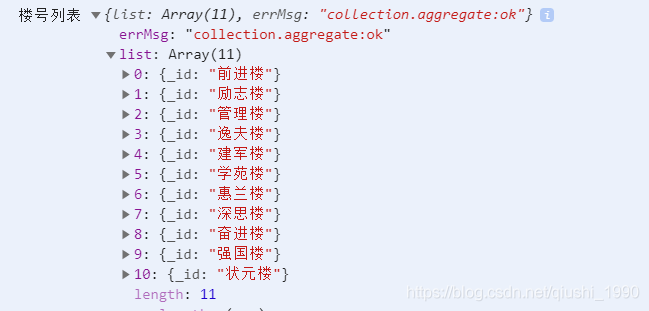
可以看出我们一共有11个宿舍楼。就是我们顶部的这些区域
3-2,借助group和match实现宿舍分组(二级数据)
这个时候,我们就要根据用户选择的楼号,来对当前楼号下所有数据进行分组了
分组后的数据如下
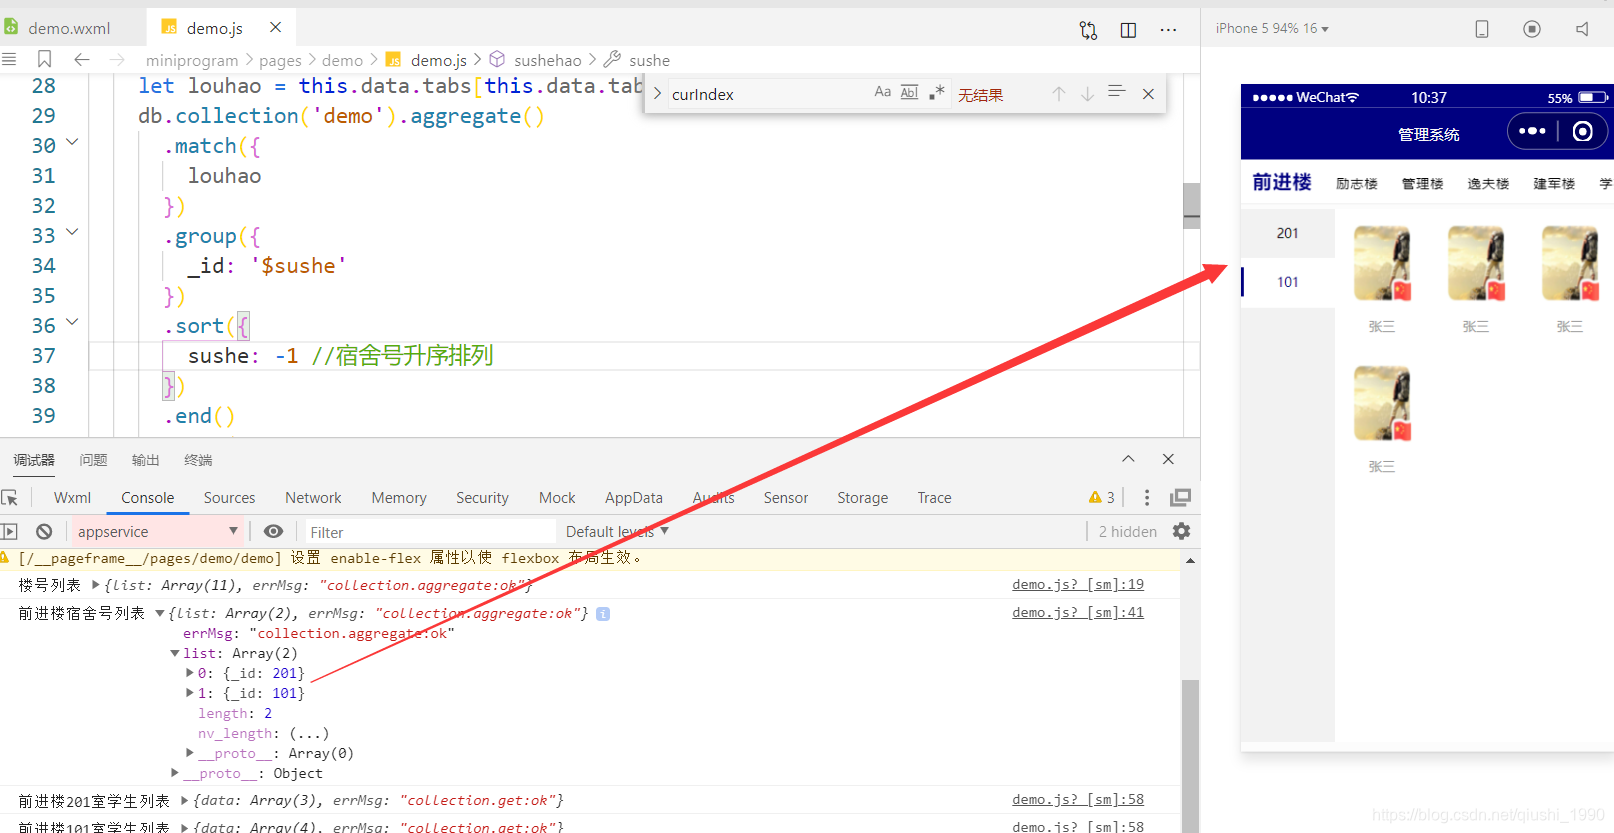
可以看出,前进楼有两个宿舍
3-3,借助where获取宿舍里的学生数据(三级)
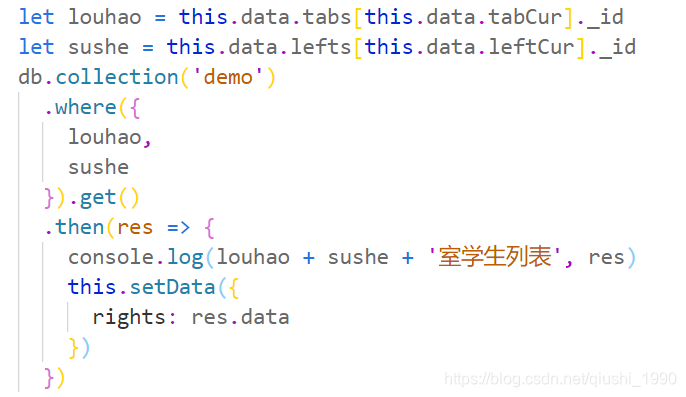
获取的数据如下
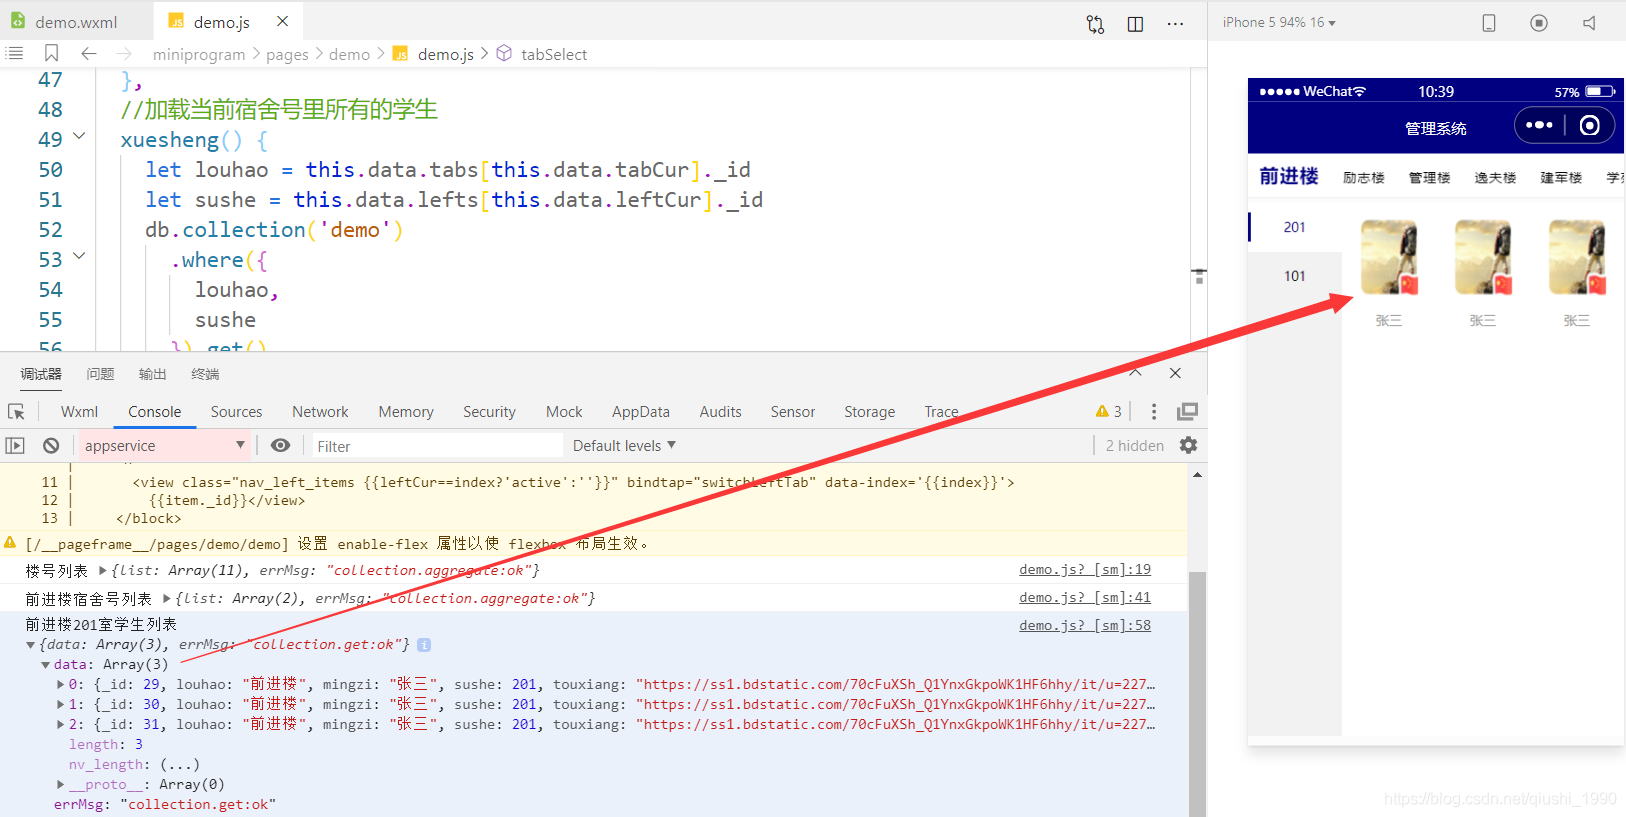
到这里我们的三级分类就实现了
四,完整项目代码
下面把完整项目代码,贴出来给大家
4-1,wxml
<!-- 导航栏 -->
<scroll-view scroll-x class="navbar" scroll-with-animation scroll-left="{{scrollLeft}}rpx">
<view class="nav-item" wx:for="{{tabs}}" wx:key="id" bindtap="tabSelect" data-id="{{index}}">
<view class="nav-text {{index==tabCur?'tab-on':''}}">{{item._id}}</view>
</view>
</scroll-view>
<view class="container">
<!-- 左边的  -->
<scroll-view class='nav_left' scroll-y='true'>
<block wx:for="{{lefts}}" wx:key="{{index}}">
<view class="nav_left_items {{leftCur==index?'active':''}}" bindtap="switchLeftTab" data-index='{{index}}'>
{{item._id}}</view>
</block>
</scroll-view>
<!-- 右边的 -->
<scroll-view class="nav_right" scroll-y="true">
<view class="{{topx}}">
<block wx:for="{{rights}}" wx:key="index">
<view class="nav_right_items" data-id="{{item._id}}">
<image src="{{item.touxiang}}"></image>
<text>{{item.mingzi}}</text>
</view>
</block>
</view>
</scroll-view>
</view>
4-2,wxss样式
/* 导航栏布局相关 */
.navbar {
width: 100%;
height: 90rpx;
/* 文本不换行 */
white-space: nowrap;
display: flex;
box-sizing: border-box;
border-bottom: 1rpx solid #eee;
background: #fff;
align-items: center;
/* 固定在顶部 */
position: fixed;
left: 0rpx;
top: 0rpx;
}

.nav-item {
padding-left: 25rpx;
padding-right: 25rpx;
height: 100%;
display: inline-block;
/* 普通文字大小 */
font-size: 28rpx;
}

.nav-text {
width: 100%;
height: 100%;
display: flex;
align-items: center;
justify-content: center;
letter-spacing: 4rpx;
box-sizing: border-box;
}

.tab-on {
color: #000080;
/* 选中放大 */
font-size: 38rpx !important;
font-weight: 600;
border-bottom: 4rpx solid #000080 !important;
}

/* 正文部分 */
.container {
position: fixed;
width: 100%;
height: 90%;
top: 100rpx;
background-color: #FFF;
}

.nav_left {
width: 25%;
height: 100%;
background: #F2F2F2;
text-align: center;
position: absolute;
top: 0;
left: 0;
}

.nav_left .nav_left_items {
height: 100rpx;
line-height: 100rpx;
font-size: 28rpx;
}

.nav_left .nav_left_items.active {
position: relative;
background: #FFF;
color: #000080;
}

.nav_left .nav_left_items.active::before {
display: inline-block;
width: 6rpx;
height: 60rpx;
background: #000080;
content: '';
position: absolute;
top: 20rpx;
left: 0;
}

.nav_right {
position: absolute;
top: 0;
right: 0;
width: 75%;
height: 100%;
}

.nav_right .nav_right_items {
float: left;
width: 33.33%;
text-align: center;
padding: 30rpx 0;
}

.nav_right .nav_right_items image {
width: 120rpx;
height: 160rpx;
}

.nav_right .nav_right_items text {
display: block;
margin-top: 20rpx;
font-size: 28rpx;
overflow: hidden;
white-space: nowrap;
text-overflow: ellipsis;
}

.nocate {
padding: 100rpx;
text-align: c
8000
enter;
}

.nocate image {
width: 70rpx;
height: 70rpx;
}

.nocate text {
font-size: 28rpx;
display: block;
color: #BBB;
}

/*隐藏滚动条*/
::-webkit-scrollbar {
width: 0;
height: 0;
color: transparent;
}

.topx {
width: 90%;
/* height: 700rpx; */
margin: 30rpx auto;
z-index: 1;
border-radius: 10rpx;
background-size: cover;
}
4-3,js实现分类逻辑
const db = wx.cloud.database()
const $ = db.command.aggregate
Page({
data: {
tabs: [],
tabCur: 0, //默认选中
lefts: [],
leftCur: 0,
rights: [],

},
onLoad: function (options) {
db.collection('demo').aggregate()
.group({
_id: '$louhao'
})
.end()
.then(res => {
console.log('楼号列表', res)
this.setData({
tabs: res.list
})
this.sushehao(res.list[0]._id)
})
},
//加载当前楼号所有的宿舍号
sushehao() {
let louhao = this.data.tabs[this.data.tabCur]._id
db.collection('demo').aggregate()
.match({
louhao
})
.group({
_id: '$sushe'
})
.sort({
sushe: -1 //宿舍号升序排列
})
.end()
.then(res => {
console.log(louhao + '宿舍号列表', res)
this.setData({
lefts: res.list
})
this.xuesheng()
})
},
//加载当前宿舍号里所有的学生
xuesheng() {
let louhao = this.data.tabs[this.data.tabCur]._id
let sushe = this.data.lefts[this.data.leftCur]._id
db.collection('demo')
.where({
louhao,
sushe
}).get()
.then(res => {
console.log(louhao + sushe + '室学生列表', res)
this.setData({
rights: res.data
})
})
},
//顶部选择分类条目
tabSelect(e) {
this.setData({
tabCur: e.currentTarget.dataset.id,
scrollLeft: (e.currentTarget.dataset.id - 2) * 200
}, success => {
this.sushehao()
})
},
//左侧条目选择
switchLeftTab(e) {
let index = e.target.dataset.index;
this.setData({
leftCur: index,
}, success => {
this.xuesheng()
})
},
})
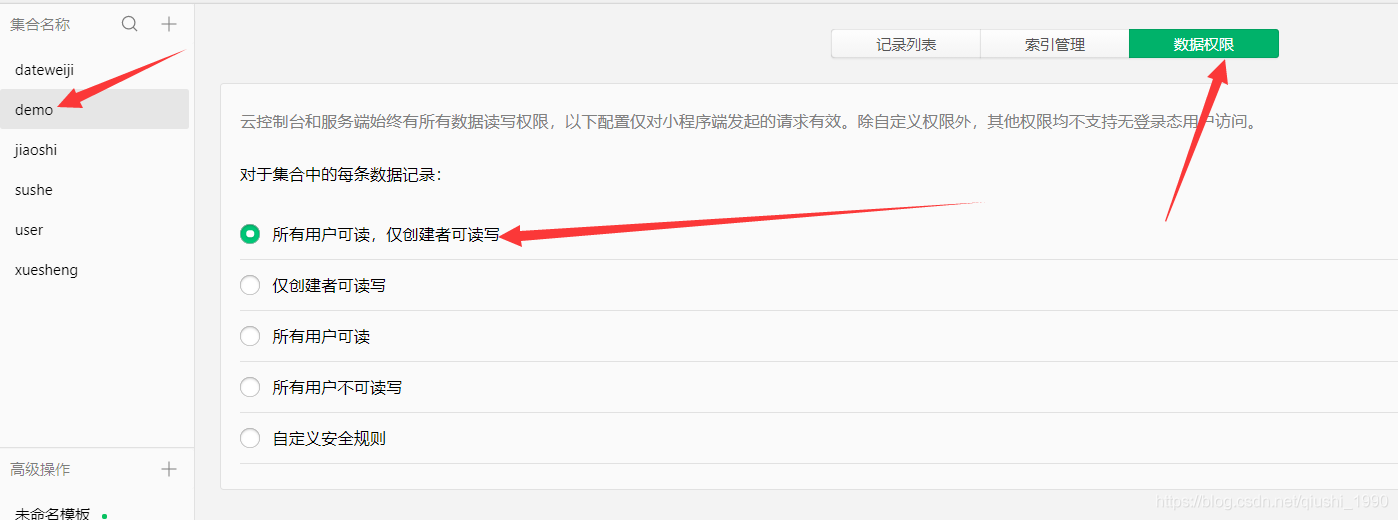
4-4,记得修改数据表权限
修改权限为所有用户可读,仅创建者可读写
到这里我们的三级分类就完整的实现了。关于excel数据批量导入,我下节再做讲解的。欢迎关注,欢迎留言交流。

相关文章推荐
- 实现三级联动下拉框 下拉列表… 分类: Android开发 2014-05-30 10:57 67人阅读 评论(0) 收藏
- 微信小程序前台开发——实现登录,底部导航栏,顶部导航栏(分类显示)
- 用Ajax实现多级联动下拉列表For JSP(无限级别,JSON传输数据,含全国地区数据库
- JSON 数据,实现省市县三级联动下拉菜单
- bootstrap如何实现左侧导航栏,右侧网页
- php jquery ajax json 全国省市区三级联动下拉列表 简单实现
- Android实现三级联动下拉框 下拉列表spinner的实例
- 用JavaScript实现点击左侧列表右侧显示列表内容的方法
- 微信小程序 数据 二级,多级列表展示效果实现
- 用DropDownList控件绑定XML数据实现省市区三级联动
- php jquery ajax json 全国省市区三级联动下拉列表 简单实现
- Android实现三级联动下拉框 下拉列表spinner
- [置顶] 小程序完美实现仿京东商城分类列表
- 微信小程序-实现省市区三级联动
- AngularJS(十一) ng-options结合ng-model实现三级联动下拉列表
- 小程序自学系列(零基础学小程序)---实现底部导航栏和顶部导航栏及微信开发工具常用快捷键
- 用DropDownList控件绑定XML数据实现省市区三级联动
- TreeView加载数据库数据的三种方法实现三级联动
- Ado.Net实现简易(省、市、县)三级联动查询,还附加Access数据
- Android实现三级联动下拉框 下拉列表spinner的实例代码