基于kubernetes实现efk日志收集--aliyun
EFK平台搭建(ALIYUN)
环境准备:k8s-master01 k8s-node2 k8s-node2
注意;该环境需要10G左右的内存分配,需要给pod节点配置多点内存
Meter节点:
添加 aliyun、aliyuncs、 google 仓库
helm repo add aliyun https://kubernetes.oss-cn-hangzhou.aliyuncs.com/charts
helm repo add aliyuncs https://apphub.aliyuncs.com
helm repo add incubator http://storage.googleapis.com/kubernetes-charts-incubator
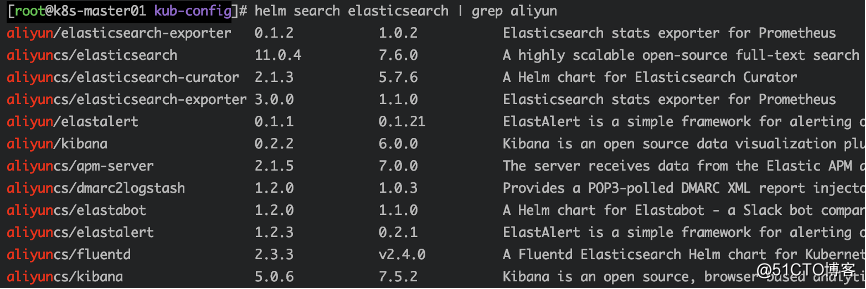
查看可用版本
helm search elasticsearch | grep aliyun
创建文件目录
mkdir efk
cd efk/
创建namespace命名空间
kubectl create namespace efk
下载elasticsearch、fluentd、kibana文件
helm fetch aliyuncs/elasticsearch --version=11.0.4
helm fetch incubator/fluentd-elasticsearch --version=2.0.7
helm fetch aliyuncs/kibana --version=5.0.6
解压
tar -xf elasticsearch-11.0.4.tgz
tar -xf kibana-5.0.6.tgz
tar -xf fluentd-elasticsearch-2.0.7.tgz
部署 ELASTICSEARCH
基于,实验的资源有限,所以需要降低配置
vim elasticsearch/values.yaml
master: name: master
## Number of master-eligible node(s) replicas to deploy
##
replicas: 1 #副本数为1
…
persistence:
## If true, use a Persistent Volume Claim, If false, use emptyDir
##
enabled: false #关闭pv磁盘挂载
…
coordinating:
## Number of coordinating-only node(s) replicas to deploy
##
replicas: 1 #副本数为1
…
data:
name: data
## Number of data node(s) replicas to deploy
##
replicas: 1 #副本数为1
…
persistence:
## If true, use a Persistent Volume Claim, If false, use emptyDir
##
enabled: false #关闭pv磁盘挂载
…
ingest:
enabled: false
name: ingest
## Number of ingest node(s) replicas to deploy
##
replicas: 1 #副本数为1
指定es目录下values所在,部署es
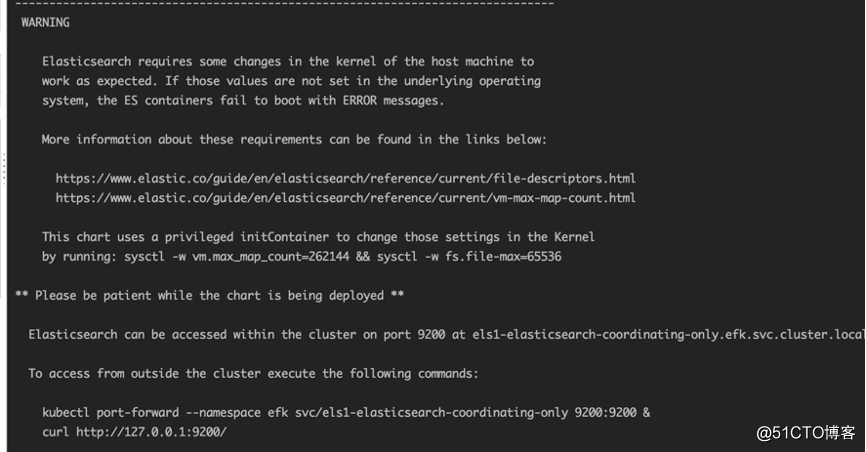
cd elasticsearch
helm  install --name els1 --namespace=efk -f values.yaml .
查看pod
kubectl get pod -n efk
查看svc
kubectl get svc -n efk

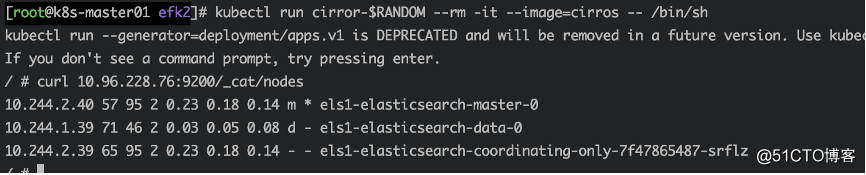
运行pod获取es集群数据测试
kubectl run cirror-$RANDOM --rm -it --image=cirros -- /bin/sh
通过curl Elasticsearch:Port/_cat/nodes获取es数据
curl 10.96.228.76:9200/_cat/nodes
部署FLUENTD
cd fluentd-elasticsearch
vim  values.yaml
# 更改其中 Elasticsearch 访问地址
host: 'elasticsearch-client' 改为
host: '10.96.228.76’
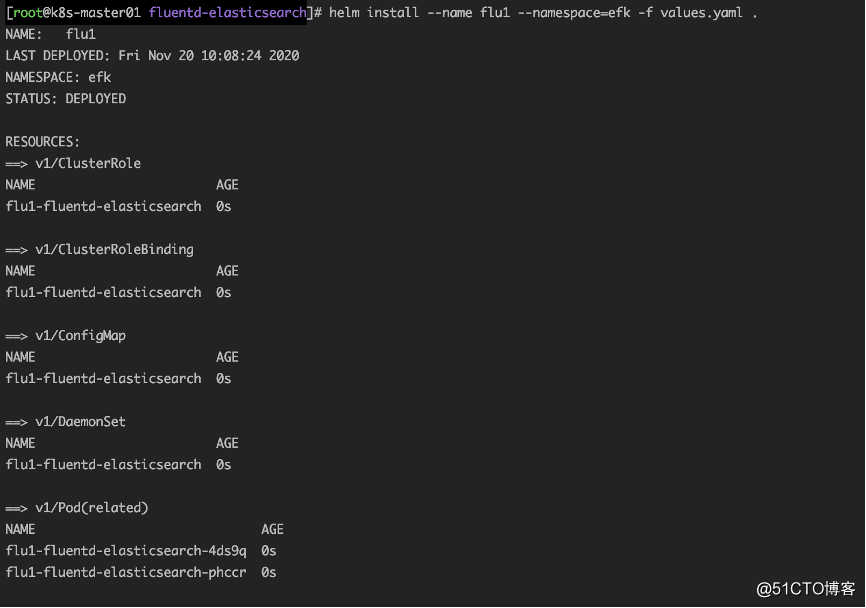
在fluentd目录下values所在,部署fluentd-elasticsearch
helm install --name flu1 --namespace=efk -f values.yaml .
查看pod
kubectl get pod -n efk | grep flu

部署 KIBANA
cd kibana
vim  values.yaml
persistence:
enabled: false #关闭pv磁盘挂载
service:
port: 80
type: NodePort #svc网络模式
elasticsearch:
hosts:
- 10.96.228.76 #es的地址
port: 9200 #es端口
指定kibana目录下values所在,部署kibana
helm install --name kib1 --namespace=efk -f values.yaml .
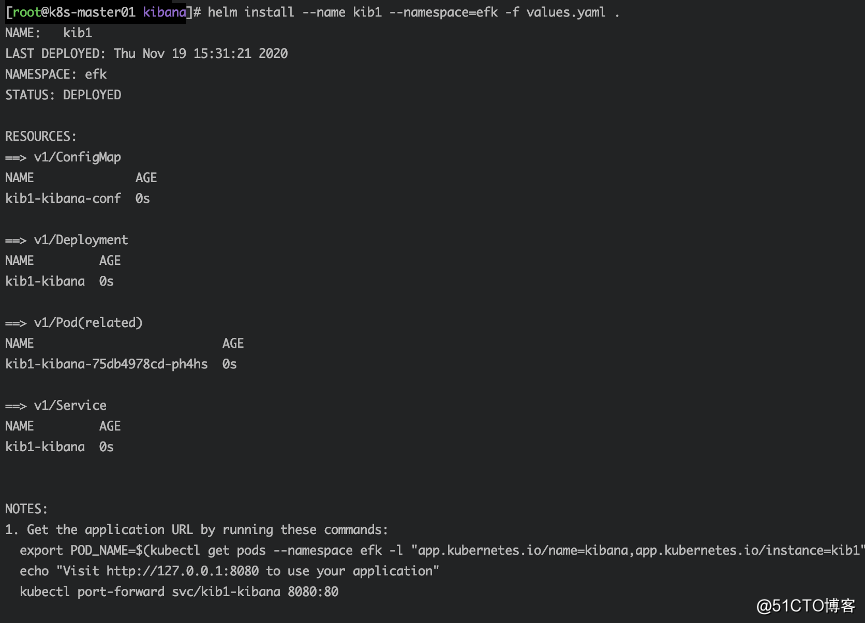
查看pod
kubectl get pod -n efk | grep kib1

查看svc,获取端口
kubectl get svc -n efk

访问KIBANA
google访问
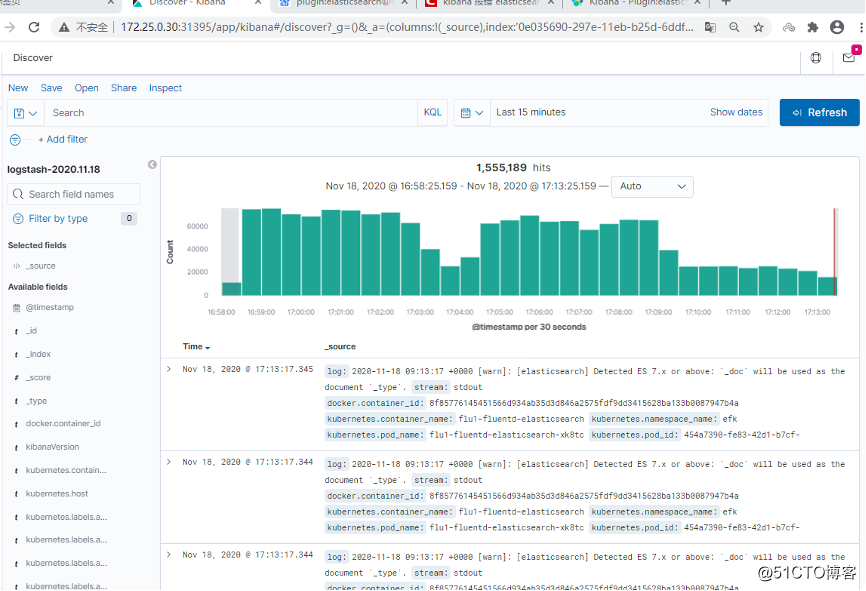
新建索引
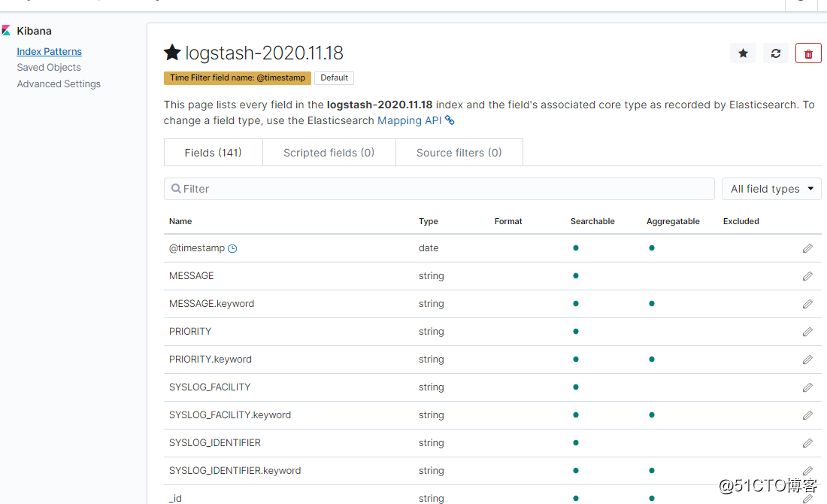
查看获取的数据
到此已经完成了

- Kubernetes 系列(八):搭建EFK日志收集系统
- 基于fluentd和mongod实现CloudFoundry的日志收集过程中遇到的问题!(切身感受,遇到什么写什么了)
- EFK收集Kubernetes应用日志
- 基于python实现日志收集
- 基于网络抓包实现kubernetes中微服务的应用级监控
- 基于Flume的美团日志收集系统
- 基于ELK打造强大的日志收集分析系统(springboot2+logback+logstash+elasticsearch+kibana)
- 基于Flume的美团日志收集系统(二)改进和优化
- nginx+lua+kafka实现日志统一收集汇总
- 如何基于日志,同步实现数据的一致性和实时抽取?
- kubernetes上部署Fluentd+Elasticsearch+kibana日志收集系统
- 10044---基于Flume的美团日志收集系统(一)架构和设计
- 基于面部识别的日志系统的设计与实现
- 基于flume与solr搭建的日志收集系统
- 基于Flume的美团日志收集系统(二)改进和优化
- logstash实现分布式日志收集
- 基于Flume的美团日志收集系统(二)改进和优化
- 基于Spring的AspectJ操作日志实现
- 基于Flume的美团日志收集系统(二)改进和优化
- 4.基于Golang协程实现流量统计系统-用GO批量模拟生成log日志