Kite的学习历程SpringCloud之Zipkin链路监控
2020-07-02 17:19
519 查看
Kite学习历程的第二十六天
目录
- Kite学习历程的第二十六天
- 1.Zilpin配置文件的下载以及运行
- 2. 在服务端8001,客户端80进行配置
- 2.1 cloud-provider-payment-8001配置
- 2.1.1 映入新的依赖文件
- 2.1.3 修改application.yml配置文件
- 2.1.4 在controller中添加测试方法
1.Zilpin配置文件的下载以及运行
- 在官网就可以进行下载

- 运行,在控制台输入 java -jar加文件名

表明Zipkin启动成功 - 访问: http://localhost:9411

2. 在服务端8001,客户端80进行配置
2.1 cloud-provider-payment-8001配置
2.1.1 映入新的依赖文件
<dependency>
<groupId>org.springframework.cloud</groupId>
<artifactId>spring-cloud-starter-zipkin</artifactId>
</dependency>
2.1.3 修改application.yml配置文件
添加部分:设置了zipkin的访问端口
zipkin:
base-url: http://localhost:9411
sleuth:
sampler:
probability: 1
server:
port: 8001

spring:
application:
name: cloud-payment-service

datasource:
type: com.alibaba.druid.pool.DruidDataSource   #当前数据源的操作类型
driver-class-name: com.mysql.jdbc.Driver #mysql驱动包
url: jdbc:mysql:///db2020?characterEncoding=utf8&serverTimezone=GMT%2B8
username: root
password: 25002500
jpa:
show-sql: true

zipkin:
base-url: http://localhost:9411
sleuth:
sampler:
probability: 1mybatis:
mapper-locations: classpath:mapper/*.xml
type-aliases-package: cn.kitey.springcloud.entities  #所有的Entity所在的包

eureka:
client:
register-with-eureka: true # 是否注册自己的信息到EurekaServer,默认是true
fetch-registry: true # 是否拉取其它服务的信息,默认是true
service-url: # EurekaServer的地址,现在是自己的地址,如果是集群,需要加上其它Server的地址。
#      defaultZone: http://localhost:7001/eureka
#下面的为集群版
defaultZone: http://eureka7001.com:7001/eureka,http://eureka7002.com:7002/eureka
# 单机模式
#      defaultZone: http://eureka7001.com:7001/eureka
instance:
#    主机名的修改
instance-id: payment8001
#访问路径可以显示ip地址
prefer-ip-address: true

#
#    #Eureka客户端向服务器发送的时间间隔,默认30秒
#    lease-renewal-interval-in-seconds: 1
#    #Eureke服务端在收到最后一次信息后等待的时间上线,默认90秒
#    lease-expiration-duration-in-seconds: 2
2.1.4 在controller中添加测试方法
成功访问则会返回:
hello Zipkin
@GetMapping("/payment/zipkin")
public String paymentZipkin(){
return "hello Zipkin";
}
2.2 配置cloud-consumer-order-80微服务
2.2.1 在pom.xml中引入依赖
<dependency>
<groupId>org.springframework.cloud</groupId>
<artifactId>spring-cloud-starter-zipkin</artifactId>
</dependency>
2.2.2 修改application配置文件
添加:
跟8001添加的一样
zipkin:
base-url: http://localhost:9411
sleuth:
sampler:
probability: 1
2.2.3 在controller中添加测试方法
调用8001中的方法
@GetMapping("consumer/payment/zipkin")
public String paymentZipkin(){
String result = restTemplate.getForObject("http://localhost:8001"+
"/payment/zipkin/", String.class);
return result;
}
3 进行测试
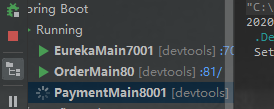
- 打开注册中心7001,服务端8001,客户端80
- 访问:http://localhost:81/consumer/payment/zipkin
访问成功,多点几次

- 在Zipkin进行查看


可以查看到链路监控

相关文章推荐
- Kite的学习历程SpringCloud之Sentinel监控热点规则介绍
- 学习笔记:微服务-23 调用链路监控spring cloud zikpin+kafka+mysql
- Kite的学习历程SpringCloud之Seata安装
- Spring Cloud 应用篇 之 Spring Cloud Sleuth + Zipkin(一)链路监控
- springcloud(十二):使用Spring Cloud Sleuth和Zipkin进行分布式链路跟踪
- SpringCloud之全链路监控Slueth
- springcloud1.5.9+zipkin链路跟踪配置
- SpringCloud 学习笔记------服务链路追踪(Spring Cloud Sleuth)
- Spring Boot + Spring Cloud 构建微服务系统(八):分布式链路追踪(Sleuth、Zipkin)
- 全链路spring cloud sleuth+zipkin
- Spring Cloud Sleuth服务链路追踪(zipkin)(转)
- Kubernetes 开发 SpringCloud (四)、Kubnernetes 部署 Zipkin 搭配 Kafka+ElasticSearch 实现链路追踪...
- Spring Cloud 微服务开发:入门、进阶与源码剖析 —— 10.1 Spring Cloud 全链路监控概述
- Spring Boot + Spring Cloud 实现权限管理系统 后端篇(二十二):链路追踪(Sleuth、Zipkin)
- 使用Spring Cloud Sleuth实现链路监控
- SpringCloud-sleuth-zipkin链路追踪
- spring cloud 系列第7篇 —— sleuth+zipkin 服务链路追踪 (F版本)
- 跟我学SpringCloud | 第十一篇:使用Spring Cloud Sleuth和Zipkin进行分布式链路跟踪
- Spring cloud(五)服务链路追踪(sleuth+zipkin)
- 跟我学SpringCloud | 第十一篇:使用Spring Cloud Sleuth和Zipkin进行分布式链路跟踪