centos7上zabbix监控lnmp(nginx)+wordpress服务
2020-06-06 05:00
183 查看
实验要求:
zabbix+grafana 并实现微信报警和邮件报警,使用lnmp+wordpress 完成web,并用zabbix监控,并实时告警
实现 lnmp+wordpress
1.安装epel-release
[root@localhost ~]# yum -y install epel-release
2.安装lnmp相关组件 上传WordPress包
[root@localhost ~]# yum -y install nginx mariadb mariadb-server php php-server php-mysql php-gd php-fpm php-devel
3.修改nginx配置文件
[root@192 ~]# cd /etc/nginx/
[root@192 nginx]# mv nginx.conf.default nginx.conf
[root@192 nginx]# vim nginx.conf
location = /50x.html {
root   html;
}
location ~ \.php$ {
root           html;
fastcgi_pass   127.0.0.1:9000;
fastcgi_index  index.php;
fastcgi_param  SCRIPT_FILENAME  $document_root$fastcgi_script_name;
include        fastcgi_params;
}
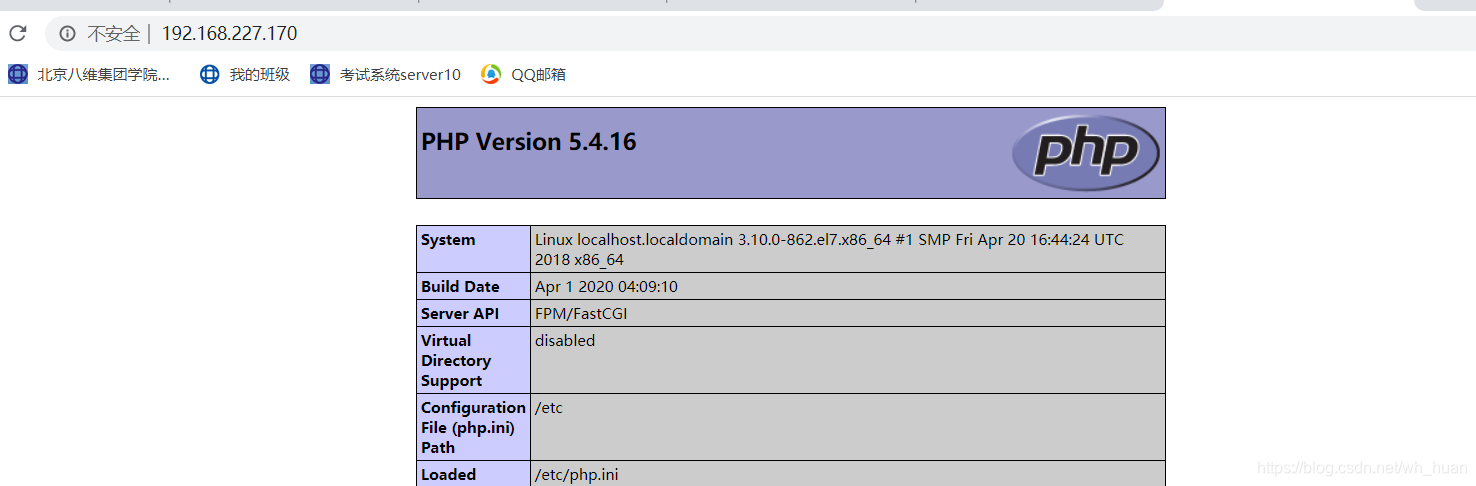
4.编写index.php
[root@localhost ~]# cat /var/www/html/index.php
<?php
phpinfo();
?>
启动服务
[root@localhost ~]# systemctl start nginx mariadb php-fpm
访问
部署wordpress,把wordpress包放到/var/www/html
[root@localhost html]# unzip wordpress-4.9.4-zh_CN.zip
[root@localhost html]# chmod -R 777 /var/www/html/
[root@192 html]# mysql
MariaDB [(none)]> create database wh character set utf8;
[root@192 html]# cp wp-config-sample.php wp-config.php
// ** MySQL 设置 - 具体信息来自您正在使用的主机 ** //
/** WordPress数据库的名称 */
define('DB_NAME', 'wh');

/** MySQL数据库用户名 */
define('DB_USER', 'root');

/** MySQL数据库密码 */
define('DB_PASSWORD', '');

/** MySQL主机 */
define('DB_HOST', 'localhost');


使用zabbix监控nginx
1 客户端配置yum源
[root@localhost ~]# cat /etc/yum.repos.d/zabbix.repo
[zabbix]
name=Zabbix Official Repository - $basearch
baseurl=http://mirrors.aliyun.com/zabbix/zabbix/4.4/rhel/7/$basearch/
enabled=1
gpgcheck=0
gpgkey=file:///etc/pki/rpm-gpg/RPM-GPG-KEY-ZABBIX-A14FE591

[zabbix-debuginfo]
name=Zabbix Official Repository debuginfo - $basearch
baseurl=http://mirrors.aliyun.com/zabbix/zabbix/4.4/rhel/7/$basearch/debuginfo/
enabled=0
gpgkey=file:///etc/pki/rpm-gpg/RPM-GPG-KEY-ZABBIX-A14FE591
gpgcheck=0

[zabbix-non-supported]
name=Zabbix Official Repository non-supported - $basearch
baseurl=http://mirrors.aliyun.com/zabbix/non-supported/rhel/7/$basearch/
enabled=1
gpgkey=file:///etc/pki/rpm-gpg/RPM-GPG-KEY-ZABBIX
gpgcheck=0
2 安装zabbix-agent
yum -y install zabbix-agent
3 编辑zabbix_agentd.conf

4 开启服务
systemctl enable zabbix-agent
systemctl start zabbix-agent
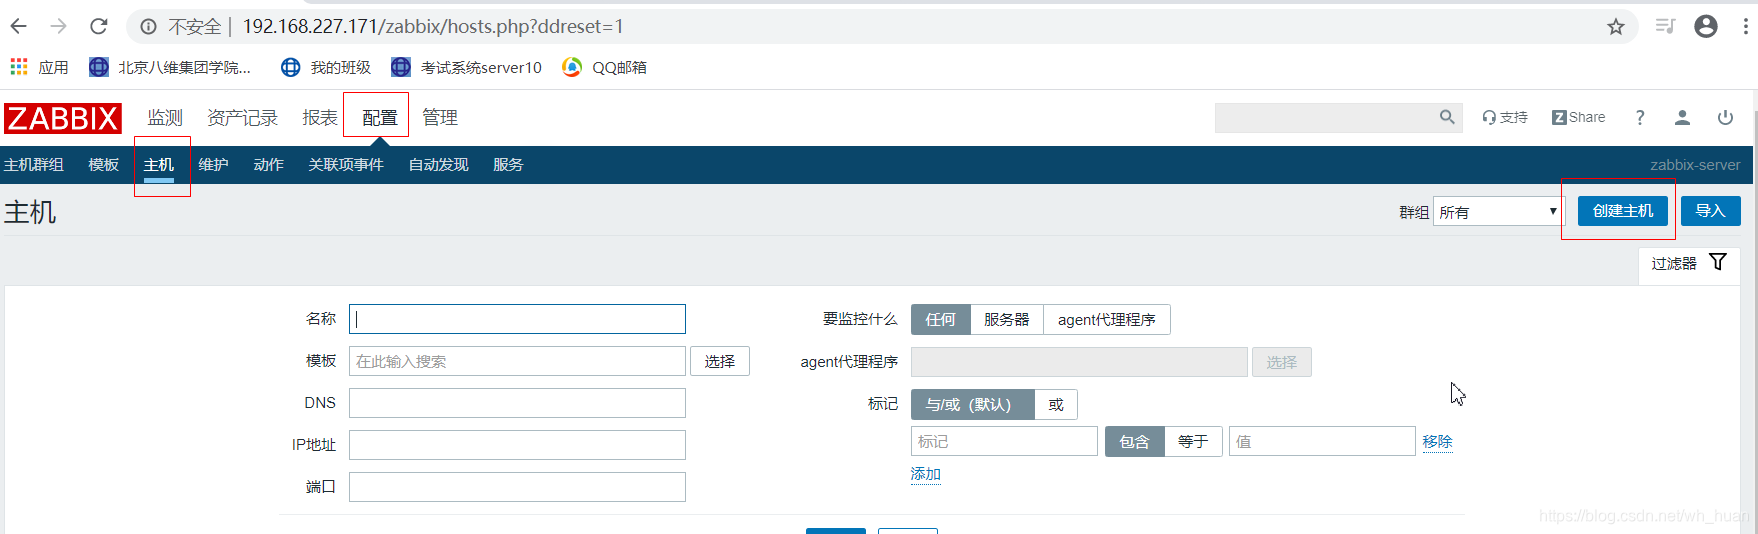
配置主机组


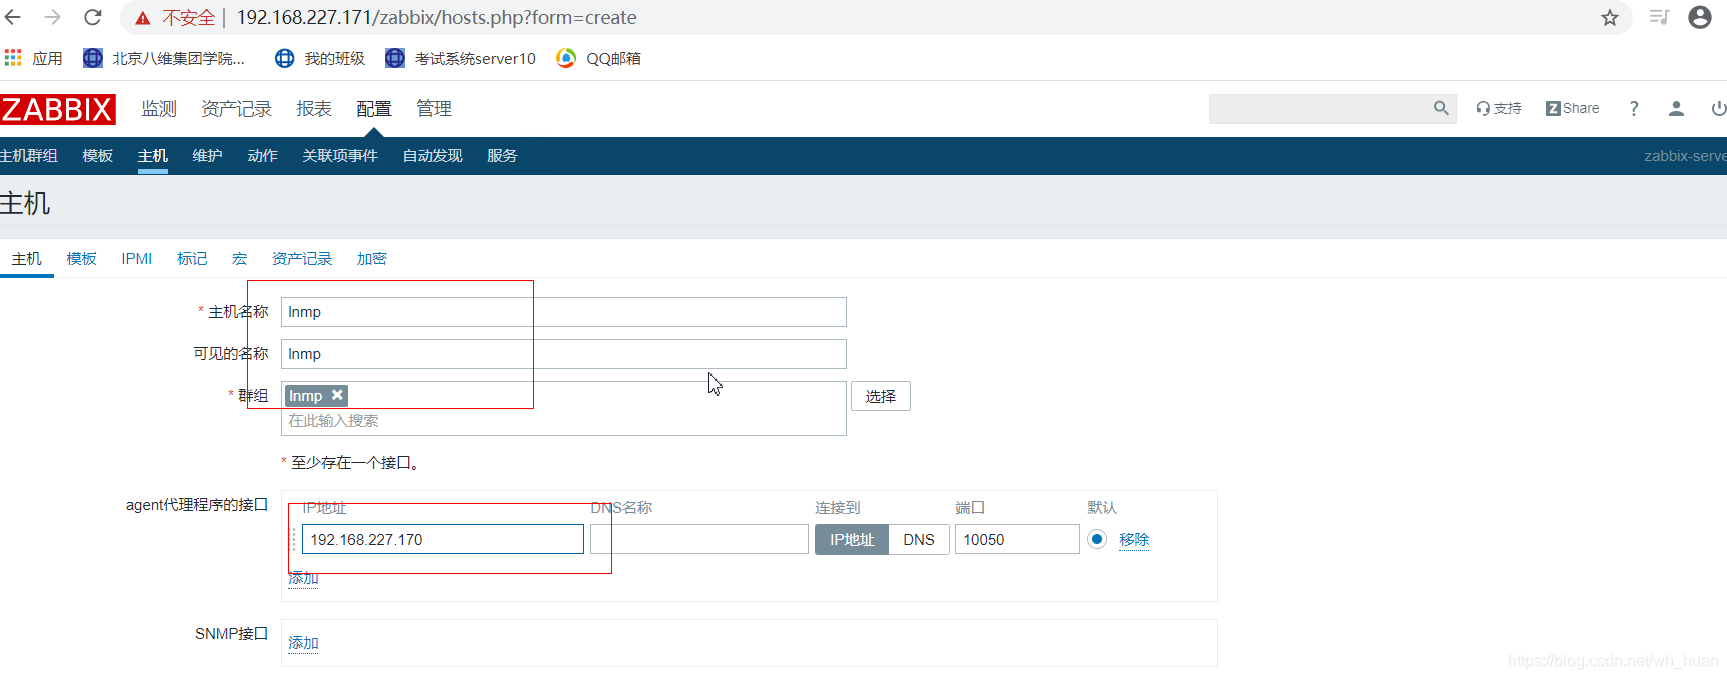
创建主机
在zabbix服务器上测试键值是否可以获取到数据
- 安装zabbix-get工具
yum -y install zabbix-get
- 通过zabbix_get命令测试键值
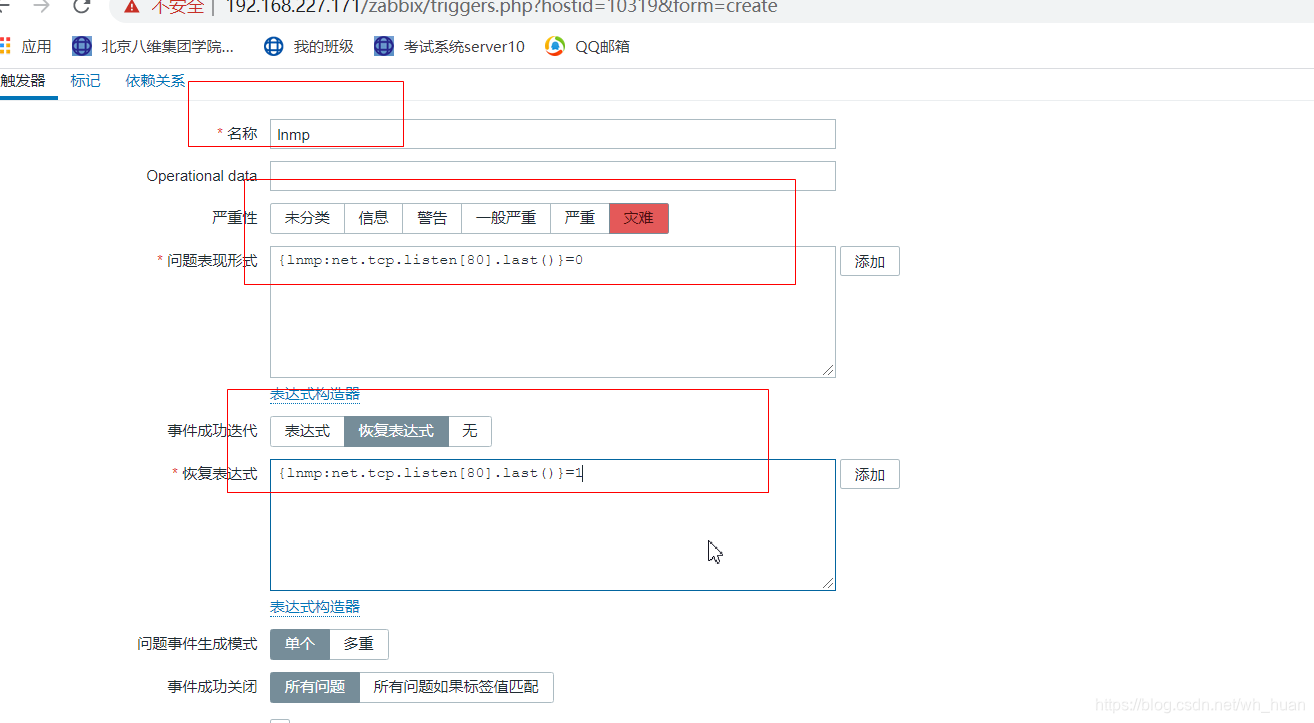
zabbix_get -s 192.168.227.170 -k net.tcp.listen[80]
若返回值是1的话,说明Apache端口正在监听
若返回值是0的话,说明Apache端口没有监听
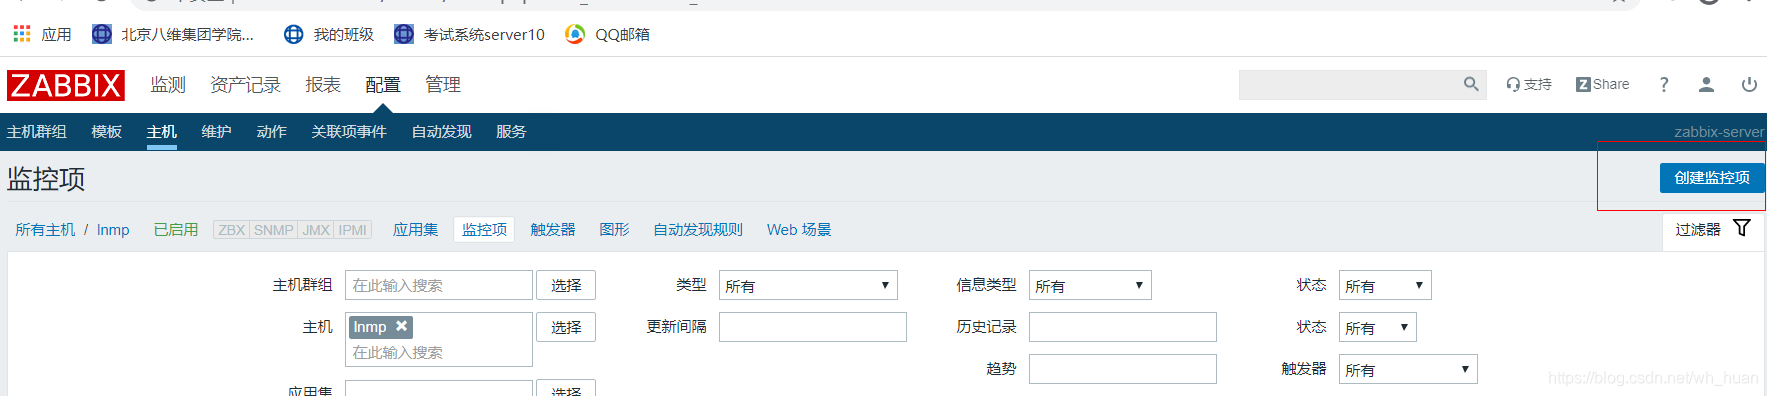
创建监控项

创建触发器

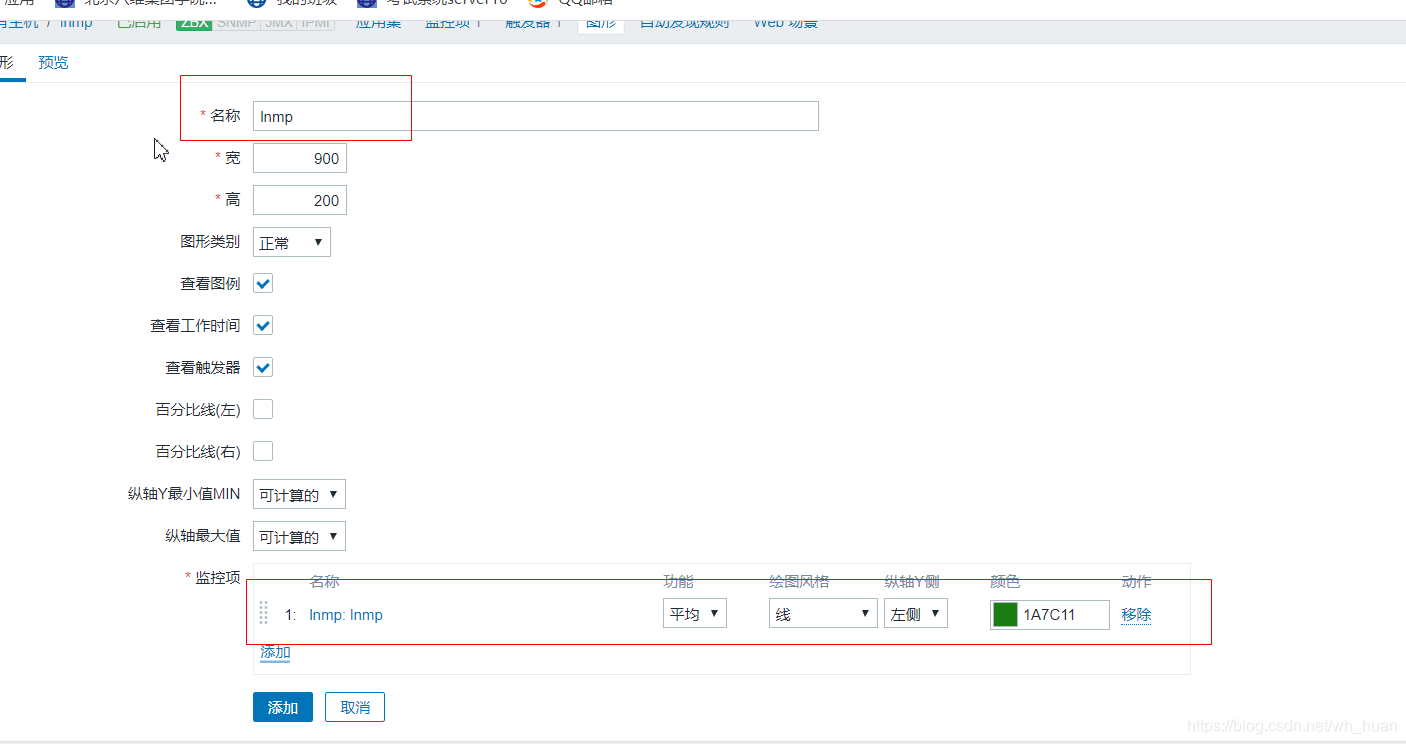
创建图形

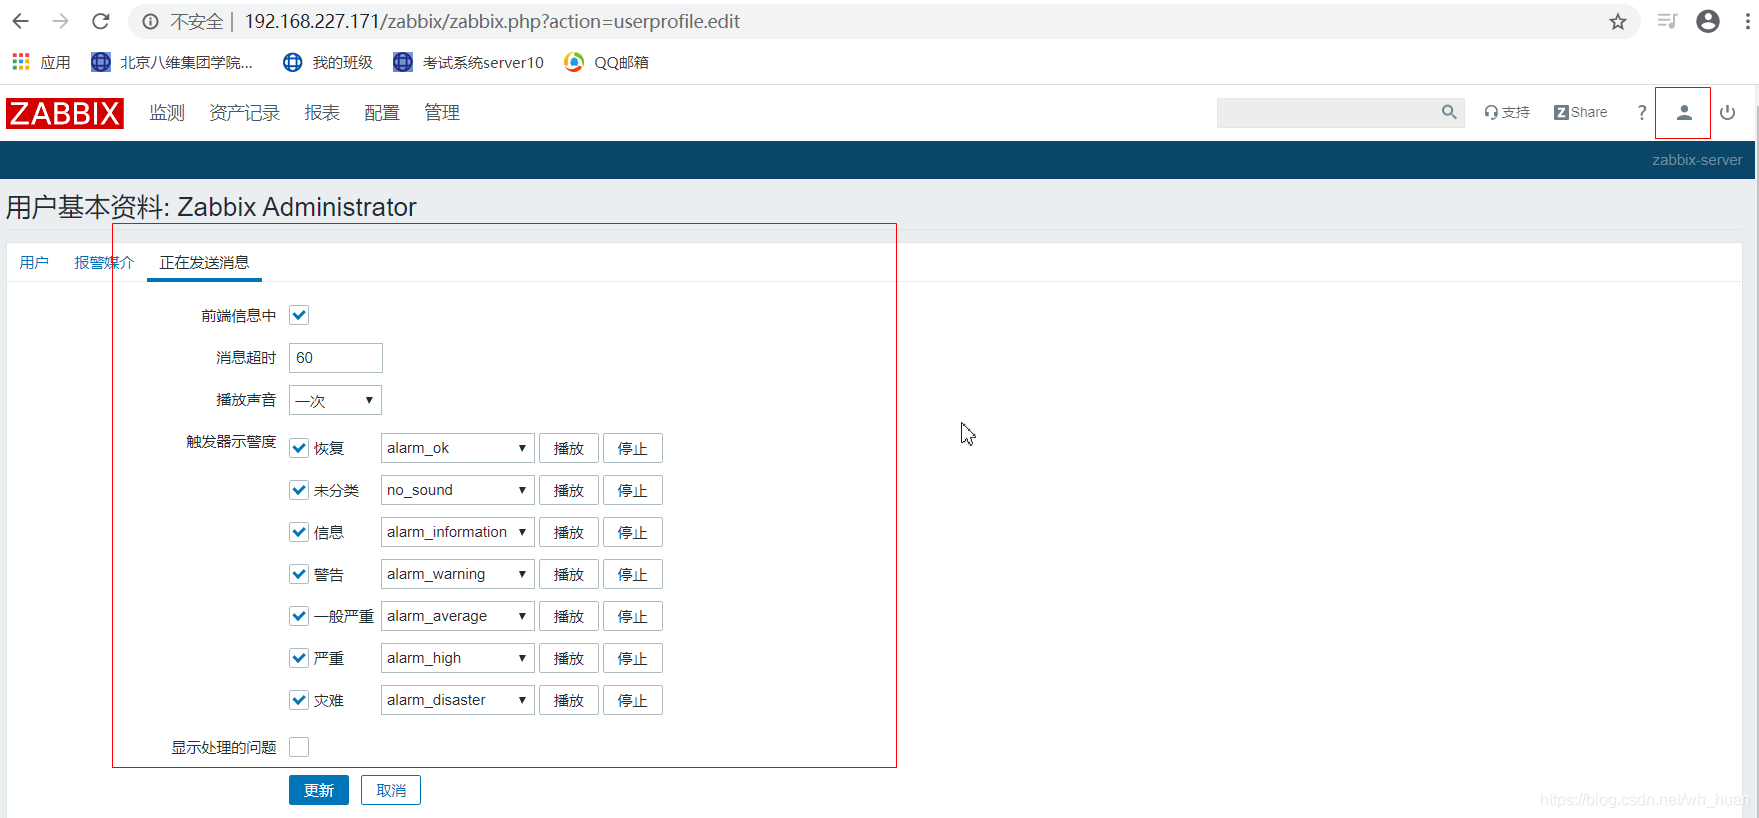
打开zabbix 前端告警
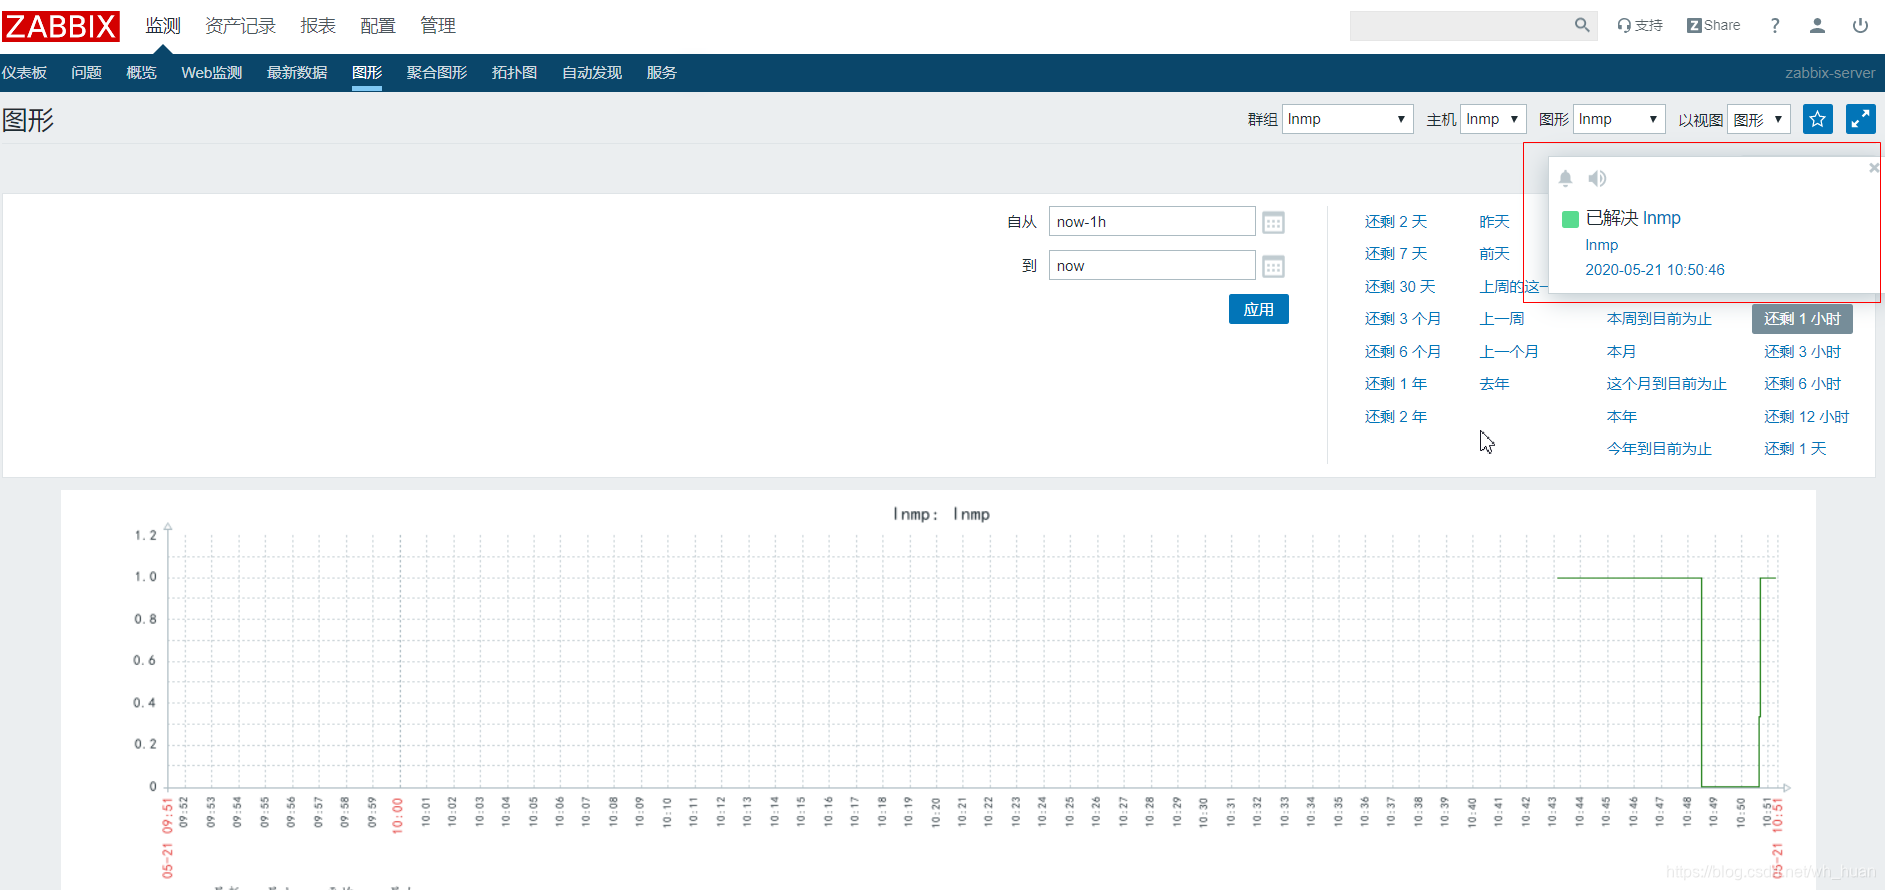
停止nginx服务验证告警
[root@localhost ~]# systemctl stop nginx

恢复服务
[root@localhost ~]# systemctl start nginx

相关文章推荐
- Nginx服务纳入到zabbix监控
- zabbix系列(四)Zabbix3.0.4添加对Nginx服务的监控
- Centos7安装部署zabbix4.0监控服务
- zabbix系列(四)Zabbix3.0.4添加对Nginx服务的监控
- 在CentOS 7 64位操作系统环境下搭建LNMP(Linux+Nginx+MySQL+PHP)来运行Zabbix监控程序
- zabbix系列(四)Zabbix3.0.4添加对Nginx服务的监控
- 如何在CentOS7上安装Zabbix监控服务
- Zabbix监控nginx服务进程状态
- Zabbix监控nginx服务进程状态
- zabbix3.0.4监控nginx服务
- zabbix监控服务——httpd,nginx,mysql,java
- CentOS 6.5 LNMP架构Zabbix 3.2.4监控端搭建
- zabbix 3.0.4 监控windows 服务
- LNMP环境搭建之Nginx服务启动失败
- nginx、tomcat、http服务shell监控脚本
- zabbix监控nginx、php-fpm的状态
- zabbix 3.0.4 监控windows 服务
- linux运维学习shell脚本监控nginx服务
- 两台主机搭建zabbix监控(lnmp)