ASP.NET Core Authentication and Authorization
最近把一个Asp .net core 2.0的项目迁移到Asp .net core 3.1,项目启动的时候直接报错:
InvalidOperationException: Endpoint CoreAuthorization.Controllers.HomeController.Index (CoreAuthorization) contains authorization metadata, but a middleware was not found that supports authorization.
Configure your application startup by adding app.UseAuthorization() inside the call to Configure(..) in the application startup code. The call to app.UseAuthorization() must appear between app.UseRouting() and app.UseEndpoints(...).
Microsoft.AspNetCore.Routing.EndpointMiddleware.ThrowMissingAuthMiddlewareException(Endpoint endpoint)
看意思是缺少了一个authorization的中间件,这个项目在Asp.net core 2.0上是没问题的。
startup是这样注册的:
public class Startup
{
public Startup(IConfiguration configuration)
{
Configuration = configuration;
}

public IConfiguration Configuration { get; }

// This method gets called by the runtime. Use this method to add services to the container.
public void ConfigureServices(IServiceCollection services)
{
services.AddAuthentication(CookieAuthenticationDefaults.AuthenticationScheme).AddCookie(options =>
{
options.LoginPath = "/account/Login";
});

services.AddControllersWithViews();
}

// This method gets called by the runtime. Use this method to configure the HTTP request pipeline.
public void Configure(IApplicationBuilder app, IWebHostEnvironment env)
{
if (env.IsDevelopment())
{
app.UseDeveloperExceptionPage();
}
else
{
app.UseExceptionHandler("/Home/Error");
// The default HSTS value is 30 days. You may want to change this for production scenarios, see https://aka.ms/aspnetcore-hsts.
app.UseHsts();
}
//app.UseHttpsRedirection();
app.UseStaticFiles();

app.UseRouting();

app.UseAuthentication();

app.UseEndpoints(endpoints =>
{
endpoints.MapControllerRoute(
name: "default",
pattern: "{controller=Home}/{action=Index}/{id?}");
});
}
}
查了文档后发现3.0的示例代码多了一个UseAuthorization,改成这样就可以了:
app.UseRouting();
app.UseAuthentication();
//use授权中间件
app.UseAuthorization();

app.UseEndpoints(endpoints =>
{
endpoints.MapControllerRoute(
name: "default",
pattern: "{controller=Home}/{action=Index}/{id?}");
});
看来Asp .net Core 3.1的认证跟授权又不太一样了,只能继续看文档学习了。
UseAuthentication and UseAuthorization
先说一下Authentication跟Authorization的区别。这两个单词长的十分相似,而且还经常一起出现,很多时候容易搞混了。
- Authentication是认证,明确是你谁,确认是不是合法用户。常用的认证方式有用户名密码认证。
- Authorization是授权,明确你是否有某个权限。当用户需要使用某个功能的时候,系统需要校验用户是否需要这个功能的权限。
所以这两个单词是不同的概念,不同层次的东西。UseAuthorization在asp.net core 2.0中是没有的。在3.0之后微软明确的把授权功能提取到了Authorization中间件里,所以我们需要在UseAuthentication之后再次UseAuthorization。否则,当你使用授权功能比如使用[Authorize]属性的时候系统就会报错。
Authentication(认证)
认证的方案有很多,最常用的就是用户名密码认证,下面演示下基于用户名密码的认证。新建一个MVC项目,添加AccountController:
[HttpPost]
public async Task<IActionResult> Login(
[FromForm]string userName, [FromForm]string password
)
{
//validate username password
...
var claims = new List<Claim>
{
new Claim(ClaimTypes.Name, userName),
new Claim(ClaimTypes.Role, "老师")
};

var claimsIdentity = new ClaimsIdentity(
claims, CookieAuthenticationDefaults.AuthenticationScheme);

await HttpContext.SignInAsync(
CookieAuthenticationDefaults.AuthenticationScheme,
new ClaimsPrincipal(claimsIdentity));

return Redirect("/");
}
public async Task<IActionResult> Logoff()
{
await HttpContext.SignOutAsync();

return Redirect("Login");
}

public IActionResult AccessDenied()
{
return Content("AccessDenied");
}
修改login.cshtml
@{
ViewData["Title"] = "Login Page";
}

<h1>
Login Page
</h1>

<form method="post">
<p>
用户名: <input name="userName" value="administrator" />
</p>
<p>
密码: <input name="password" value="123" />
</p>

<p>
<button>登录</button>
</p>
</form>
从前台传入用户名密码后进行用户名密码校验(示例代码省略了密码校验)。如果合法,则把用户的基本信息存到一个claim list里,并且指定cookie-base的认证存储方案。最后调用SignInAsync把认证信息写到cookie中。根据cookie的特性,接来下所有的http请求都会携带cookie,所以系统可以对接来下用户发起的所有请求进行认证校验。Claim有很多翻译,个人觉得叫“声明”比较好。一单认证成功,用户的认证信息里就会携带一串Claim,其实就是用户的一些信息,你可以存任何你觉得跟用户相关的东西,比如用户名,角色等,当然是常用的信息,不常用的信息建议在需要的时候查库。调用HttpContext.SignOutAsync()方法清除用户登认证信息。
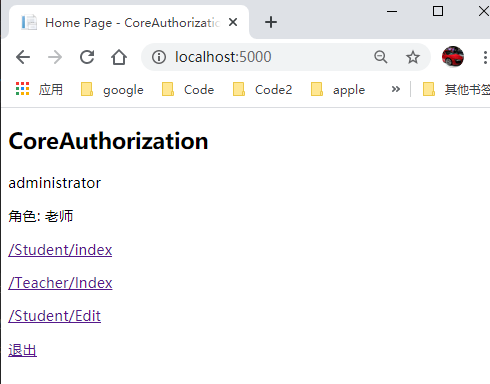
Claims信息我们可以方便的获取到:
@{
ViewData["Title"] = "Home Page";
}

<h2>
CoreAuthorization
</h2>

<p>
@Context.User.FindFirst(System.Security.Claims.ClaimTypes.Name)?.Value
</p>
<p>
角色:
@foreach (var claims in Context.User.Claims.Where(c => c.Type == System.Security.Claims.ClaimTypes.Role))
{
<span> @claims.Value </span>
}
</p>
<p>
<a href="/Student/index">/Student/index</a>
</p>
<p>
<a href="/Teacher/index">/Teacher/Index</a>
</p>
<p>
<a href="/Teacher/Edit">/Student/Edit</a>
</p>

<p>
<a href="/Account/Logoff">退出</a>
</p>
改一下home/Index页面的html,把这些claim信息展示出来。
以上就是一个基于用户名密码以及cookie的认证方案。
Authorization(授权)
有了认证我们还需要授权。刚才我们实现了用户名密码登录认证,但是系统还是没有任何管控,用户可以随意查库任意页面。现实中的系统往往都是某些页面可以随意查看,有些页面则需要认证授权后才可以访问。
AuthorizeAttribute
当我们希望一个页面只有认证后才可以访问,我们可以在相应的Controller或者Action上打上AuthorizeAttribute这个属性。修改HomeController:
[Authorize]
public class HomeController : Controller
{
public IActionResult Index()
{
return View();
}

}
重新启动网站,如果没有登录,访问home/index的时候网站会跳转到/account/AccessDenied。如果登录后则可以正常访问。AuthorizeAttribute默认授权校验其实是把认证跟授权合为一体了,只要认证过,就认为有授权,这是也是最最简单的授权模式。
基于角色的授权策略
显然上面默认的授权并不能满足我们开发系统的需要。AuthorizeAttribute还内置了基于Role(角色)的授权策略。
登录的时候给认证信息加上角色的声明:
[HttpPost]
public async Task<IActionResult> Login(
[FromForm]string userName,
[FromForm]string password
)
{
//validate username password

var claims = new List<Claim>
{
new Claim(ClaimTypes.Name, userName),
new Claim(ClaimTypes.Role, "老师"),
};

var claimsIdentity = new ClaimsIdentity(
claims, CookieAuthenticationDefaults.AuthenticationScheme);

await HttpContext.SignInAsync(
CookieAuthenticationDefaults.AuthenticationScheme,
new ClaimsPrincipal(claimsIdentity));

return Redirect("/");
}
新建一个TeacherController:
[Authorize(Roles = "老师")]
public class TeacherController : Controller
{
public IActionResult Index()
{
return Content("Teacher index");
}
}
给AuthorizeAttribute的属性设置Roles=老师,表示只有老师角色的用户才可以访问。如果某个功能可以给多个角色访问那么可以给Roles设置多个角色,使用逗号进行分割。
[Authorize(Roles = "老师,校长")]
public class TeacherController : Controller
{
public IActionResult Index()
{
return Content("Teacher index");
}

}
这样认证的用户只要具有老师或者校长其中一个角色就可以访问。
基于策略的授权
上面介绍了内置的基于角色的授权策略。如果现实中需要更复杂的授权方案,我们还可以自定义策略来支持。比如我们下面定义一个策略:编辑功能只能姓王的老师可以访问。
定义一个要求:
public class LastNamRequirement : IAuthorizationRequirement
{
public string LastName { get; set; }
}
IAuthorizationRequirement其实是一个空接口,仅仅用来标记,继承这个接口就是一个要求。这是空接口,所以要求的定义比较宽松,想怎么定义都可以,一般都是根据具体的需求设置一些属性。比如上面的需求,本质上是根据老师的姓来决定是否授权通过,所以把姓作为一个属性暴露出去,以便可以配置不同的姓。
除了要求,我们还需要实现一个AuthorizationHandler:
public class LastNameHandler : AuthorizationHandler<IAuthorizationRequirement>
{
protected override Task HandleRequirementAsync(AuthorizationHandlerContext context, IAuthorizationRequirement requirement)
{
var lastNameRequirement = requirement as LastNamRequirement;
if (lastNameRequirement == null)
{
return Task.CompletedTask;
}

var isTeacher = context.User.HasClaim((c) =>
{
return c.Type == System.Security.Claims.ClaimTypes.Role && c.Value == "老师";
});
var isWang = context.User.HasClaim((c) =>
{
return c.Type == "LastName" && c.Value == lastNameRequirement.LastName;
});

if (isTeacher && isWang)
{
context.Succeed(requirement);
}

return Task.CompletedTask;
}
}
AuthorizationHandler是一个抽象类,继承它后需要重写其中的HandleRequirementAsync方法。这里才是真正判断是否授权成功的地方。要求(Requirement)跟用户的声明(Claim)信息会被传到这方法里,然后我们根据这些信息进行判断,如果符合授权就调用context.Succeed方法。这里注意如果不符合请谨慎调用context.Failed方法,因为策略之间一般是OR的关系,这个策略不通过,可能有其他策略通过。
在ConfigureServices方法中添加策略跟注册AuthorizationHandler到DI容器中:
services.AddSingleton<IAuthorizationHandler, LastNameHandler>();
services.AddAuthorization(options =>
{
options.AddPolicy("王老师", policy =>
policy.AddRequirements(new LastNamRequirement { LastName = "王" })
);
});
使用AddSingleton生命周期来注册LastNameHandler,这个生命周期并不一定要单例,看情况而定。在AddAuthorization中添加一个策略叫"王老师"。这里有个个人认为比较怪的地方,为什么AuthorizationHandler不是在AddAuthorization方法中配置?而是仅仅注册到容器中就可以开始工作了。如果有一个需求,仅仅是需要自己调用一下自定义的AuthorizationHandler,而并不想它真正参与授权。这样的话就不能使用DI的方式来获取实例了,因为一注册进去就会参与授权的校验了。
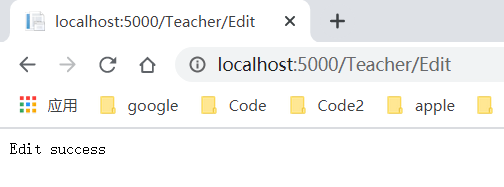
在TeacherController下添加一个 Edit Action:
[Authorize(Policy="王老师")]
public IActionResult Edit()
{
return Content("Edit success");
}
给AuthorizeAttribute的Policy设置为“王老师”。
修改Login方法添加一个姓的声明:
[HttpPost]
public async Task<IActionResult> Login(
[FromForm]string userName,
[FromForm]string password
)
{
//validate username password

var claims = new List<Claim>
{
new Claim(ClaimTypes.Name, userName),
new Claim(ClaimTypes.Role, "老师"),
new Claim("LastName", "王"),
};

var claimsIdentity = new ClaimsIdentity(
claims, CookieAuthenticationDefaults.AuthenticationScheme);

await HttpContext.SignInAsync(
CookieAuthenticationDefaults.AuthenticationScheme,
new ClaimsPrincipal(claimsIdentity));

return Redirect("/");
}
运行一下程序,访问一下/teacher/edit,可以看到访问成功了。如果修改Login方法,修改LastName的声明为其他值,则访问会拒绝。
使用泛型Func方法配置策略
如果你的策略比较简单,其实还有个更简单的方法来配置,就是在AddAuthorization方法内直接使用一个Func来配置策略。 使用Func来配置一个女老师的策略:
options.AddPolicy("女老师", policy =>
policy.RequireAssertion((context) =>
{
var isTeacher = context.User.HasClaim((c) =>
{
return c.Type == System.Security.Claims.ClaimTypes.Role && c.Value == "老师";
});
var isFemale = context.User.HasClaim((c) =>
{
return c.Type == "Sex" && c.Value == "女";
});

return isTeacher && isFemale;
}
)
);
总结
- Authentication跟Authorization是两个不同的概念。Authentication是指认证,认证用户的身份;Authorization是授权,判断是否有某个功能的权限。
- Authorization内置了基于角色的授权策略。
- 可以使用自定义AuthorizationHandler跟Func的方式来实现自定义策略。
吐槽
关于认证跟授权微软为我们考虑了很多很多,包括identityserver,基本上能想到的都有了,什么oauth,openid,jwt等等。其实本人是不太喜欢用的。虽然微软都给你写好了,考虑很周到,但是学习跟Trouble shooting都是要成本的。其实使用中间件、过滤器再配合redis等组件,很容易自己实现一套授权认证方案,自由度也更高,有问题修起来也更快。自己实现一下也可以更深入的了解某项的技术,比如jwt是如果工作的,oauth是如何工作的,这样其实更有意义。

- Building Secure ASP.NET Applications: Authentication, Authorization, and Secure Communication
- ASP.NET authentication and authorization
- Authentication and Authorization in ASP.NET Web API
- ASP.NET authentication and authorization
- ASP.NET authentication and authorization
- Authentication and Authorization for ASP.Net Application
- Asp.Net Core Authentication Middleware And Generate Token
- (待翻译)Building Secure ASP.NET Applications: Authentication, Authorization, and Secure Communication
- User Authentication with Angular and ASP.NET Core
- Building Secure ASP.NET Applications: Authentication, Authorization, and Secure Communication (转)
- Authentication and Authorization for ASP.Net Application
- Asp.Net Core Authentication Middleware And Generate Token
- ASP.NET authentication and authorization
- Building Secure ASP.NET Applications: Authentication, Authorization, and Secure Communication
- Building Secure ASP.NET Applications: Authentication, Authorization, and Secure Communication
- Building Secure ASP.NET Applications: Authentication, Authorization, and Secure Communication
- ASP.NET Core 运行原理解剖[5]:Authentication
- [转]教你实践ASP.NET Core Authorization
- Understanding ASP.NET AJAX Authentication and Profile Application Services
- [转]Migrating HTTP handlers and modules to ASP.NET Core middleware