spring boot + mybatis +aop 注解实现多数据源动态切换
多数据源配置,在实际开发中,我们一个项目可能会用到多个数据库,通常一个数据库对应一个数据,而且在大数据量的业务下通常都会有多个数据源的。最近在有一个Spring cloud+ sping. Boot + mybatis 框架的多数据源配置切换的业务,所以就研究了一下关于Springboot+ mybatis 多数据源切换,具体没有经过实际业务的测试,只是记录一下实现及学习的心得。请见谅。
不多说了,以下是具体的实现过程:
一 .构建一个 “timer-service “ maven 项目
此功能的实现代码只有common 包下的代码,datasource 包下为数据源加载信息配置,annotanion 和advice 是实现了基于aop的通过注解的方式动态切换数据源。
1.配置pom.xml
<?xml version="1.0" encoding="UTF-8"?>
<project xmlns="http://maven.apache.org/POM/4.0.0" xmlns:xsi="http://www.w3.org/2001/XMLSchema-instance"
xsi:schemaLocation="http://maven.apache.org/POM/4.0.0 http://maven.apache.org/xsd/maven-4.0.0.xsd">
<modelVersion>4.0.0</modelVersion>

<groupId>com.hdsxtech</groupId>
<artifactId>timer-service</artifactId>
<version>0.0.1-SNAPSHOT</version>
<packaging>jar</packaging>

<name>timer-service</name>
<description>timer-service</description>

<parent>
<groupId>org.springframework.boot</groupId>
<artifactId>spring-boot-starter-parent</artifactId>
<version>1.5.18.BUILD-SNAPSHOT</version>
<relativePath /> <!-- lookup parent from repository -->
</parent>

<properties>
<project.build.sourceEncoding>UTF-8</project.build.sourceEncoding>
<project.reporting.outputEncoding>UTF-8</project.reporting.outputEncoding>
<java.version>1.8</java.version>
<spring-cloud.version>Edgware.BUILD-SNAPSHOT</spring-cloud.version>
</properties>

<dependencies>
<dependency>
<groupId>org.springframework.cloud</groupId>
<artifactId>spring-cloud-starter</artifactId>
</dependency>
<dependency>
<groupId>org.springframework.boot</groupId>
<artifactId>spring-boot-starter-test</artifactId>
<scope>test</scope>
</dependency>
<dependency>
<groupId>com.oracle</groupId>
<artifactId>ojdbc6</artifactId>
<version>11.2.0.3</version>
</dependency>
<dependency>
<groupId>com.alibaba</groupId>
<artifactId>druid</artifactId>
<version>1.1.10</version>
</dependency>
<!-- 配置log4j 日志,过滤掉spring-boot 默认日志系统 -->
<dependency>
<groupId>org.springframework.boot</groupId>
<artifactId>spring-boot-starter</artifactId>
<exclusions>
<exclusion>
<groupId>org.springframework.boot</groupId>
<artifactId>spring-boot-starter-logging</artifactId>
</exclusion>
</exclusions>
</dependency>
<dependency>
<groupId>org.springframework.boot</groupId>
<artifactId>spring-boot-starter-log4j2</artifactId>
</dependency>
<dependency>
<groupId>org.springframework.boot</groupId>
<artifactId>spring-boot-starter-web</artifactId>
</dependency>
<dependency>
<groupId>org.springframework.cloud</groupId>
<artifactId>spring-cloud-starter-eureka</artifactId>
</dependency>
<!-- 健康检查 -->
<dependency>
<groupId>org.springframework.boot</groupId>
<artifactId>spring-boot-starter-actuator</artifactId>
</dependency>
<dependency>
<groupId>org.springframework.boot</groupId>
<artifactId>spring-boot-starter-jdbc</artifactId>
</dependency>
<dependency>
<groupId>org.springframework.boot</groupId>
<artifactId>spring-boot-starter-aop</artifactId>
</dependency>
<dependency>
<groupId>com.alibaba</groupId>
<artifactId>druid-spring-boot-starter</artifactId>
<version>1.1.10</version>
</dependency>
<dependency>
<groupId>org.mybatis.spring.boot</groupId>
<artifactId>mybatis-spring-boot-starter</artifactId>
<version>1.3.1</version>
</dependency>
<dependency>
<groupId>org.mybatis</groupId>
<artifactId>mybatis</artifactId>
<version>3.4.4</version>
</dependency>
</dependencies>

<dependencyManagement>
<dependencies>
<dependency>
<groupId>org.springframework.cloud</groupId>
<artifactId>spring-cloud-dependencies</artifactId>
<version>${spring-cloud.version}</version>
<type>pom</type>
<scope>import</scope>
</dependency>
</dependencies>
</dependencyManagement>

<build>
<plugins>
<plugin>
<groupId>org.springframework.boot</groupId>
<artifactId>spring-boot-maven-plugin</artifactId>
</plugin>
</plugins>
</build>

<repositories>
<repository>
<id>spring-snapshots</id>
<name>Spring Snapshots</name>
<url>https://repo.spring.io/snapshot</url>
<snapshots>
<enabled>true</enabled>
</snapshots>
</repository>
<repository>
<id>spring-milestones</id>
<name>Spring Milestones</name>
<url>https://repo.spring.io/milestone</url>
<snapshots>
<enabled>false</enabled>
</snapshots>
</repository>
</repositories>

<pluginRepositories>
<pluginRepository>
<id>spring-snapshots</id>
<name>Spring Snapshots</name>
<url>https://repo.spring.io/snapshot</url>
<snapshots>
<enabled>true</enabled>
</snapshots>
</pluginRepository>
<pluginRepository>
<id>spring-milestones</id>
<name>Spring Milestones</name>
<url>https://repo.spring.io/milestone</url>
<snapshots>
<enabled>false</enabled>
</snapshots>
</pluginRepository>
</pluginRepositories>

</project>
二 .配置文件
pom.xml 添加了项目所需用的jar 包以来,接下来是配置文件信息,在 application.properties 中做以下配置
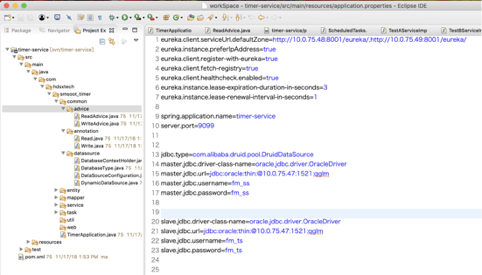
eureka.client.serviceUrl.defaultZone=http://localhost:8001/eureka/,http://localhost:8001/eureka/
eureka.instance.preferIpAddress=false
eureka.client.register-with-eureka=false
eureka.client.fetch-registry=false
eureka.client.healthcheck.enabled=true
eureka.instance.lease-expiration-duration-in-seconds=3
eureka.instance.lease-renewal-interval-in-seconds=1

spring.application.name=timer-service
server.port=9099

jdbc.type=com.alibaba.druid.pool.DruidDataSource
master.jdbc.driver-class-name=oracle.jdbc.driver.OracleDriver
master.jdbc.url=jdbc:oracle:thin:@localhost:1521:orcl
master.jdbc.username=ss_t1
master.jdbc.password=ss_t1

slave.jdbc.driver-class-name=oracle.jdbc.driver.OracleDriver
slave.jdbc.url=jdbc:oracle:thin:@localhost:1521:orcl
slave.jdbc.username=ss_t2
slave.jdbc.password=ss_t2

# mybatis 配置信息
mybatis.mapper-locations=classpath*:mybatis/*.xml
# sql 日志
logging.level.com.hdsxtech.smsoot_timer.mapper=debug
从第一行开始 到 jdbc.type 这行上部分主要为 sping cloud 所需要的配置信息,可以不用做过多的了解。之后为 配置了两个数据源,master 库和 slave 库,master为主库,也是默认库。
三.上代码,加载并配置数据源
1.DatabaseType
/**
* Copyright (c)  FESCOTech Team
* All rights reserved.
*
* This file DatabaseType.java creation date: [2018年11月15日 上午8:23:08] by 姓名
* http://www.fescoetc.com.cn
*/

package com.hdsxtech.smsoot_timer.common.datasource;

/**
* <descption>列出所有的数据源key</descption>
* 这里的数据源与数据库是一对一的
* @author mawen
* @version 1.0.0
*/

public enum DatabaseType {
MASTER,SLAVE
}
作用:列举数据源的key.
2.DatabaseContextHolder
/**
* Copyright (c)  FESCOTech Team
* All rights reserved.
*
* This file DatabaseContextHolder.java creation date: [2018年11月15日 上午8:25:15] by 姓名
* http://www.fescoetc.com.cn
*/

package com.hdsxtech.smsoot_timer.common.datasource;

/**
* <descption>保存一个线程安全的DatabaseContextHolder</descption>
* @author maen
* @version 1.0.0
*/

public class DatabaseContextHolder {

// 线程局部变量
private static final ThreadLocal<DatabaseType> contextHolder = new ThreadLocal<DatabaseType>();

// 往线程里边set 数据类型
public static void setDatabaseType(DatabaseType type){
if(type ==null) throw new NullPointerException();
contextHolder.set(type);
}

// 从容器中获取数据类型
public static DatabaseType getDatabaseType(){
return contextHolder.get() ==null ?DatabaseType.MASTER:contextHolder.get();
}

// 清空容器中的数据类型
public static void clear(){
contextHolder.remove();
}
}
作用:构建一个DatabaseType 容器,并提供了向其中设置 ,获取,清除 DatabaseType 的方法。
3.DynamicDataSource
/**
* Copyright (c)  FESCOTech Team
* All rights reserved.
*
* This file DynamicDataSourec.java creation date: [2018年11月15日 上午8:34:37] by 姓名
* http://www.fescoetc.com.cn
*/

package com.hdsxtech.smsoot_timer.common.datasource;

import org.springframework.jdbc.datasource.lookup.AbstractRoutingDataSource;

/**
* <descption>动态数据源(需要继承AbstractRoutingDataSource)</descption>
* @author mawen
* @version 1.0.0
*/

public class DynamicDataSource extends AbstractRoutingDataSource{

@Override
protected Object determineCurrentLookupKey() {
return DatabaseContextHolder.getDatabaseType();
}

}
作用:使用DatabaseContextHolder 获取当前线程的DatabaseType
4.DataSourceConfiguration
/**
* Copyright (c)  FESCOTech Team
* All rights reserved.
*
* This file DataSourceConfiguration.java creation date: [2018年11月15日 上午8:37:19] by 姓名
* http://www.fescoetc.com.cn
*/

package com.hdsxtech.smsoot_timer.common.datasource;

import java.util.HashMap;
import java.util.Map;

import javax.sql.DataSource;

import org.apache.ibatis.session.SqlSessionFactory;
import org.mybatis.spring.SqlSessionFactoryBean;
import org.slf4j.Logger;
import org.slf4j.LoggerFactory;
import org.springframework.beans.factory.annotation.Autowired;
import org.springframework.beans.factory.annotation.Qualifier;
import org.springframework.beans.factory.annotation.Value;
import org.springframework.boot.autoconfigure.jdbc.DataSourceBuilder;
import org.springframework.boot.context.properties.ConfigurationProperties;
import org.springframework.context.annotation.Bean;
import org.springframework.context.annotation.Configuration;
import org.springframework.context.annotation.Primary;
import org.springframework.core.env.Environment;
import org.springframework.core.io.support.PathMatchingResourcePatternResolver;
import org.springframework.jdbc.datasource.DataSourceTransactionManager;

/**
* <descption>配置并创建数据源</descption>
* @author mawen
* @version 1.0.0
*/
@Configuration
public class DataSourceConfiguration {

private static final Logger LOGGER = LoggerFactory.getLogger(DataSourceConfiguration.class) ;

@Autowired
private Environment env;

@Value("${jdbc.type}")
private Class<? extends DataSource> dataSourceType;

@Bean(name="masterDataSource")
@ConfigurationProperties(prefix="master.jdbc")
@Primary
public  DataSource masterDataSource(){
DataSource masterDataSource = DataSourceBuilder.create().type(dataSourceType).build();
LOGGER.info("========= MASTER :{} =======",masterDataSource);
return masterDataSource;
}

@Bean(name="slaveDataSource")
@ConfigurationProperties(prefix="slave.jdbc")
public DataSource slaveDataSource(){
DataSource slaveDataSource = DataSourceBuilder.create().type(dataSourceType).build();
LOGGER.info("========= SLAVE :{} ========",slaveDataSource);
return slaveDataSource;
}

/**
* @Primary 给注解表示在同一个接口有多个实现类可以注入的时候,默认选择那个,而不是让@Autowied 注解报错
* @Qualifier 根据名称进行注入,通常是在具有相同的多个类型的实力的一个注入(列如有多个DataSource 的类型)
*/
@Bean
public DynamicDataSource dataSource(@Qualifier("masterDataSource") DataSource masterDataSource,
@Qualifier("slaveDataSource") DataSource slaveDataSource){
Map<Object,Object> targetDataSources = new HashMap<>();
targetDataSources.put(DatabaseType.MASTER, masterDataSource);
targetDataSources.put(DatabaseType.SLAVE, slaveDataSource);

DynamicDataSource dataSource = new DynamicDataSource();
dataSource.setTargetDataSources(targetDataSources); // 给方法是AbstractRoutingDataSource 的方法
dataSource.setDefaultTargetDataSource(masterDataSource); // 默认的datasource 设置为  masterDataSource
return dataSource;
}

/**
*
* <descption> 根据数据源创建SqlSessionFactory </descption>
*
* @param
* @return
* @throws Exception
*/
@Bean
public SqlSessionFactory seqSessionFactory(DynamicDataSource ds) throws Exception{
SqlSessionFactoryBean fb = new SqlSessionFactoryBean();
fb.setDataSource(ds);  // 指定数据源(这个必须有,否则报错)

// 下边这两句仅仅用于*.xml文件,如果这个持久层操作不需要使用的xml 的话(只用注解就可以搞定) ,则不加
fb.setTypeAliasesPackage("mybatis.typeAliasesPackage");  // 指定基包
fb.setMapperLocations(new PathMatchingResourcePatternResolver().getResources(env.getProperty("myb
19f08
atis.mapper-locations")));
return fb.getObject();
}

/**
*
* <descption> 配置事务管理 </descption>
*
* @param
* @return
*/
@Bean
public DataSourceTransactionManager tracsactionManager(DynamicDataSource ds){
return new DataSourceTransactionManager(ds);
}
}
作用:
- 3.1 通过读取application.properties 文件中的两个数据源(master,slave )
- 3.2 使用以上生成的两个数据源构造动态数据源dataSource
- @Primary:指定在同一个接口有多个实现类可以注入的时候,默认选择哪一个,而不是 @Autowire注解报错(一般用于多数据源的情况下)
- @Qualifier:指定名称的注入,当一个接口有多个实现类的时候使用(在本例中,有两个DataSource类型的实例,需要指定名称注入)
- @Bean:生成的bean实例的名称是方法名(例如上边的@Qualifier注解中使用的名称是前边两个数据源的方法名,而这两个数据源也是使用@Bean注解进行注入的)
- 3.3 通过动态数据源构造SqlSessionFactory和事务管理器(如果不需要事务,后者可以去掉)
四.注解
1.Write 写注解
/**
* Copyright (c)  FESCOTech Team
* All rights reserved.
*
* This file Write.java creation date: [2018年11月15日 上午9:42:32] by 姓名
* http://www.fescoetc.com.cn
*/

package com.hdsxtech.smsoot_timer.common.annotation;

import java.lang.annotation.ElementType;
import java.lang.annotation.Retention;
import java.lang.annotation.RetentionPolicy;
import java.lang.annotation.Target;

/**
* <descption>写</descption>
* @author mawen
* @version 1.0.0
*/
@Target({ElementType.METHOD,ElementType.TYPE}) // 该注解用在方法上
@Retention(RetentionPolicy.RUNTIME) // 在运行时加载
public @interface Write {

}
作用:此注解标识 主数据库
2.Read 读注解
/**
* Copyright (c)  FESCOTech Team
* All rights reserved.
*
* This file ReadOnlyConn.java creation date: [2018年11月15日 上午9:39:51] by 姓名
* http://www.fescoetc.com.cn
*/

package com.hdsxtech.smsoot_timer.common.annotation;

import java.lang.annotation.ElementType;
import java.lang.annotation.Retention;
import java.lang.annotation.RetentionPolicy;
import java.lang.annotation.Target;

/**
* <descption>只读</descption>
* @author mawen
* @version 1.0.0
*/
@Target({ElementType.METHOD,ElementType.TYPE}) // 该注解用在方法上
@Retention(RetentionPolicy.RUNTIME) // 在运行时加载
public @interface Read {

}
作用:此注解表示为从库
五.加载注解
1. WriteAdvice // 加载Write 注解
/**
* Copyright (c)  FESCOTech Team
* All rights reserved.
*
* This file WriteAdvice.java creation date: [2018年11月15日 上午9:58:27] by 姓名
* http://www.fescoetc.com.cn
*/

package com.hdsxtech.smsoot_timer.common.advice;

import org.aspectj.lang.ProceedingJoinPoint;
import org.aspectj.lang.annotation.Around;
import org.aspectj.lang.annotation.Aspect;
import org.slf4j.Logger;
import org.slf4j.LoggerFactory;
import org.springframework.context.annotation.EnableAspectJAutoProxy;
import org.springframework.core.Ordered;
import org.springframework.stereotype.Component;

import com.hdsxtech.smsoot_timer.common.annotation.Write;
import com.hdsxtech.smsoot_timer.common.datasource.DatabaseContextHolder;
import com.hdsxtech.smsoot_timer.common.datasource.DatabaseType;

/**
* <descption>执行写注解</descption>
* @author mawen
* @version 1.0.0
*/
@Aspect
@Component
@EnableAspectJAutoProxy(exposeProxy=true,proxyTargetClass=true)
public class WriteAdvice implements Ordered {

public static final Logger LOGGER = LoggerFactory.getLogger(WriteAdvice.class);

@Around("@annotation(write)") // 在注解上加入切人点语法,实现方法
public Object proceed(ProceedingJoinPoint proceedingJoinPoint,Write write) throws Throwable{

try {
LOGGER.info("-----------------set database connection write only---------------------");
DatabaseContextHolder.setDatabaseType(DatabaseType.MASTER);
return proceedingJoinPoint.proceed();  // 让这个方法执行完毕
}finally{
DatabaseContextHolder.clear();
LOGGER.info("---------------clear database connection---------------");
}
}

@Override
public int getOrder() {
return 1;
}

}
2.ReadAdvice // 加载read 注解
/**
* Copyright (c)  FESCOTech Team
* All rights reserved.
*
* This file ReadAdvice.java creation date: [2018年11月15日 上午9:43:46] by 姓名
* http://www.fescoetc.com.cn
*/

package com.hdsxtech.smsoot_timer.common.advice;

import org.aspectj.lang.ProceedingJoinPoint;
import org.aspectj.lang.annotation.Around;
import org.aspectj.lang.annotation.Aspect;
import org.slf4j.Logger;
import org.slf4j.LoggerFactory;
import org.springframework.context.annotation.EnableAspectJAutoProxy;
import org.springframework.core.Ordered;
import org.springframework.stereotype.Component;

import com.hdsxtech.smsoot_timer.common.annotation.Read;
import com.hdsxtech.smsoot_timer.common.datasource.DatabaseContextHolder;
import com.hdsxtech.smsoot_timer.common.datasource.DatabaseType;

/**
* <descption>执行只读注解</descption>
* @author maen
* @version 1.0.0
*/
@Aspect
@Component
@EnableAspectJAutoProxy(exposeProxy=true,proxyTargetClass=true)
public class ReadAdvice implements Ordered{

public static final Logger LOGGER = LoggerFactory.getLogger(ReadAdvice.class);

@Around("@annotation(read)") // 在注解上加入切人点语法,实现方法
public Object proceed(ProceedingJoinPoint proceedingJoinPoint,Read read) throws Throwable{
try {
LOGGER.info("----------------set database connection read only----------------------");
DatabaseContextHolder.setDatabaseType(DatabaseType.SLAVE);
return proceedingJoinPoint.proceed(); // 让这个方法执行完
}finally{
DatabaseContextHolder.clear();
LOGGER.info("-----------------clear database connection --------------------");
}
}

@Override
public int getOrder() {
return 1;
}

}
以上的代码是用来实现 多数据源配置加载,以及通过注解来实现数据源的动态切换功能。
六.使用
1.启动类 TimerApplication
package com.hdsxtech.smsoot_timer;

import org.mybatis.spring.annotation.MapperScan;
import org.springframework.boot.SpringApplication;
import org.springframework.boot.autoconfigure.SpringBootApplication;
import org.springframework.cloud.client.discovery.EnableDiscoveryClient;

@SpringBootApplication
@EnableDiscoveryClient
@MapperScan("com.hdsxtech.*.mapper")
public class TimerApplication {

public static void main(String[] args) {
SpringApplication.run(TimerApplication.class, args);
}
}
2. TestBMapper
package com.hdsxtech.smsoot_timer.mapper;

import java.util.List;

import org.apache.ibatis.annotations.Mapper;

import com.hdsxtech.smsoot_timer.entity.TestB;

@Mapper
public interface TestBMapper {

List<TestB> queryAll();

void save(TestB testB);

void update(TestB testB);

}
3.TestBServiceImpl
package com.hdsxtech.smsoot_timer.service.impl;

import java.util.List;

import org.springframework.beans.factory.annotation.Autowired;
import org.springframework.stereotype.Service;
import org.springframework.transaction.annotation.Transactional;

import com.hdsxtech.smsoot_timer.common.annotation.Read;
import com.hdsxtech.smsoot_timer.common.annotation.Write;
import com.hdsxtech.smsoot_timer.entity.TestB;
import com.hdsxtech.smsoot_timer.mapper.TestBMapper;
import com.hdsxtech.smsoot_timer.service.TestBService;

@Service
@Transactional
public class TestBServiceImpl implements TestBService {

@Autowired
TestBMapper testBMapper;

@Read
@Override
public List<TestB> queryAll() {
return testBMapper.queryAll();
}

@Read
@Override
public void save(List<TestB> testbList) {
for (TestB testB : testbList) {
testBMapper.save(testB);
}

}

@Read
@Override
public void update(List<TestB> testbList) {

for (TestB testB : testbList) {
testBMapper.update(testB);
}
}

}
注意:在调用mapper 接口的方法上,需要通过注解来注入对应的数据源,否则就会已默认的 master 数据源操作数据。
4.TestBService
package com.hdsxtech.smsoot_timer.service;

import java.util.List;

import com.hdsxtech.smsoot_timer.entity.TestB;

public interface TestBService {

List<TestB> queryAll();

void save(List<TestB> testbList);

void update(List<TestB> testbList);
}
文档写的不是太好,请大家多多包含。
源代码
码云:https://gitee.com/sugnup/timer-service.git
个人博客:http://121.42.10.167
转载于:https://my.oschina.net/hen/blog/2985334
- 点赞
- 收藏
- 分享
- 文章举报
 chuqi2604
发布了0 篇原创文章 · 获赞 0 · 访问量 2
私信
关注
chuqi2604
发布了0 篇原创文章 · 获赞 0 · 访问量 2
私信
关注

- SPRINGAOP实现基于注解的数据源动态切换(转)
- springboot + mybatis + 利用注解动态切换多数据源
- springboot+aop+自定义注解,实现多数据源切换(有坑版)
- spring boot + mybatis 实现不确定多少数据源的情况下,动态切换数据源
- springboot+mybatis实现动态切换数据源
- spring boot + mybatis实现动态切换数据源实例代码
- spring mybatis 用注解方式实现动态切切换数据源
- SpringBoot入门-19(springboot集成mybatis注解形式增删查改properties配置,利用《script》实现动态SQL)
- (十一)Spring Boot整合Mybatis使用druid实现多数据源自动切换
- 基于Mybatis+Spring+SpringAOP实现Mybatis多数据源切换
- springboot + mybatis + 多数据源 (AOP实现)
- Spring Boot + Mybatis 实现动态数据源案例分析
- Spring学习总结(16)——Spring AOP实现执行数据库操作前根据业务来动态切换数据源
- Spring Boot + Mybatis 实现动态数据源
- Spring学习总结(16)——Spring AOP实现执行数据库操作前根据业务来动态切换数据源
- Spring + Mybatis 项目实现动态切换数据源实例详解
- Spring整合Mybatis实现动态数据源切换教程配置
- Spring Boot中自定义注解结合AOP实现主备库切换问题
- Spring AOP之四:利用AOP实现动态数据源切换
- 第九章 springboot + mybatis + 多数据源 (AOP实现)