第三课:springboot+自定义注解做接口的权限校验
2020-02-03 08:52
417 查看
简介
项目中经常能碰到有些接口是需要用户登录之后才能访问的,而有些的是不要做登录校验的;
当然可以使用到一些权限管理的框架;但是有些简单的业务功能的就可以通过自定义注解+自定义的拦截器设置指定的消息内容;
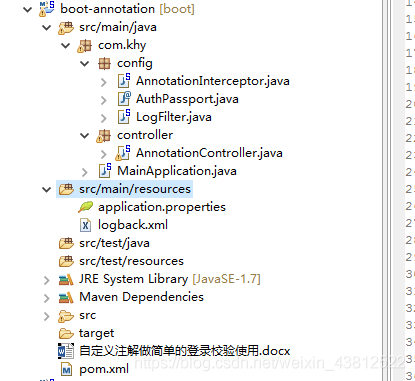
项目的目录
项目的代码内容
1.自定义的注解内容
主要通过添加在指定的方法判断接口访问是不是需要登录
/***
* 设置拦截器通过注解设定某种属性
* @author kanghanyu
* 自定义的注解内容设定对应的内容信息
*
*/
@Retention(RetentionPolicy.RUNTIME)
@Target(ElementType.METHOD)
public @interface AuthPassport {

/**
* 是否需要登录
* @return
*/
boolean auth() default false;
}
2.自定义的拦截器
/**
* 自定义拦截器的 通过获取请求接口自定义的注解判定是否需要登录返回对应的信息
* @author khy
* @createTime 2019年10月9日上午11:37:02
*/
@Configuration
public class AnnotationInterceptor extends WebMvcConfigurerAdapter {
public void addInterceptors(InterceptorRegistry registry) {
registry.addInterceptor(new HandlerInterceptorAdapter() {
@Override
public boolean preHandle(HttpServletRequest request, HttpServletResponse response, Object handler)
throws Exception {

// 验证用户权限
if (handler.getClass().isAssignableFrom(HandlerMethod.class)) {
AuthPassport authPassport = ((HandlerMethod) handler).getMethodAnnotation(AuthPassport.class);
if (authPassport != null) {
boolean auth = authPassport.auth();
//如果是需要登录校验的
if(auth){
String userName = AnnotationController.userName;
String password = AnnotationController.password;
if(StringUtils.isAnyBlank(userName,password)){
auth = false;
}
if(!userName.equals(password) || !userName.equals(AnnotationController.LOGIN_FLAG)){
auth = false;
}
if(!auth){
JSONObject json = new JSONObject();
json.put("code", "10000");
json.put("msg", "用户未登录不能访问");
response.setCharacterEncoding("UTF-8");
response.setContentType("application/json;charset=utf-8");
response.getWriter().write(JSON.toJSONString(json));
return false;
}
}
}
}
return true;
}

@Override
public void afterCompletion(HttpServletRequest request, HttpServletResponse response, Object handler,
Exception ex) throws Exception {
if (ex != null) {
Enumeration<String> enu = request.getParameterNames();
Map<String, Object> param = new HashMap<String, Object>();
while (enu.hasMoreElements()) {
String paraName = (String) enu.nextElement();
param.put(paraName, request.getParameter(paraName));
}
} else {
super.afterCompletion(request, response, handler, ex);
}
}

@Override
public void afterConcurrentHandlingStarted(HttpServletRequest request, HttpServletResponse response,
Object handler) throws Exception {
super.afterConcurrentHandlingStarted(request, response, handler);
}

}).addPathPatterns("/annotation/**");//拦截的请求路径地址内容
}

}
3. 自定义controller
@RestController
@RequestMapping("/annotation")
public class AnnotationController {
private static final Logger khy = LoggerFactory.getLogger("KHY");
public static final String LOGIN_FLAG = "admin";
public static String userName = "test";
public static String password = "test";
/**
* 这个是模拟登录的接口内容
* http://localhost:8080/annotation/login?userName=admin&password=admin
* @param userName
* @param password
* @return
*/
@RequestMapping("/login")
public String login(String userName,String password){
if(StringUtils.isNotBlank(userName)){
this.userName = userName;
}
if(StringUtils.isNotBlank(password)){
this.password = password;
}
return "登录成功";
}

/**
* 这个是模拟保存需要登录
* http://localhost:8080/annotation/save?userName=admin&password=admin
* @param userName
* @param password
* @return
*/
@AuthPassport(auth=true)
@RequestMapping("/save")
public String save(String userName,String password){
khy.debug("保存用户userName={},password={}",userName,password);
return "登录成功";
}

/**
* 这个是模拟查询接口不需要登录
* http://localhost:8080/annotation/query?userName=admin&password=admin
* @param userName
* @param password
* @return
*/
@AuthPassport(auth=false)
@RequestMapping("/query")
public String query(String userName,String password){
khy.debug("查询用户userName={},password={}",userName,password);
return "查询成功";
}
项目的执行流程
首先AnnotationController 里面的三个方法
1.login方法没有自定义的注解@AuthPassport
所以请求http://localhost:8080/annotation/login 接口会被AnnotationInterceptor拦截器拦截但是不符合注解条件直接进入接口执行.
2.query 方法上面虽然有指定的 @AuthPassport 但是里面的auth=false
在拦截器里面执行但是也不去校验登录的信息内容;所以在不调用login 的接口之前也可以通过 http://localhost:8080/annotation/query 直接调用此接口
3.save 方法上有指定的@AuthPassport 注解并且auth=true 标识需要登录之后才能访问;如果项目启动就直接调用http://localhost:8080/annotation/save 会因为在AnnotationInterceptor 拦截器里面的去匹配校验的信息内容.
总结:项目中的登录接口只是用来模拟使用的;真正的项目中校验的登录的信息是在AnnotationInterceptor 拦截器里面根据用户的信息去获取用户是否有对应的接口访问权限然后再判断是否去调用指定的接口.
- 点赞
- 收藏
- 分享
- 文章举报
 小康康_
发布了4 篇原创文章 · 获赞 0 · 访问量 169
私信
关注
小康康_
发布了4 篇原创文章 · 获赞 0 · 访问量 169
私信
关注

相关文章推荐
- SpringBoot 自定义注解 + AOP 实现必填参数非空校验、接口传入参数和应答数据打印、方法耗时统计
- springMvc,SpringBoot自定义注解校验接收参数不能为空
- springboot项目通过自定义注解及拦截器Interceptor校验前端传参
- springcloud中常用注解, spring boot常见get 、post请求参数处理、参数注解校验、参数自定义注解校验
- 使用SpringBoot通过自定义注解+AOP+全局异常处理实现参数统一非空校验
- springboot hibenate 自定义注解校验复杂业务
- SpringBoot使用自定义注解实现权限拦截的示例
- spring boot 自定义校验注解
- springboot自定义注解进行登录权限的验证
- springboot+aop+自定义注解,打造通用的全局异常处理和参数校验切面(通用版)
- springboot + security 自定义csrf校验结果
- Springboot自定义注解
- spring boot 集成 shiro 自定义密码验证 自定义freemarker标签根据权限渲染不同页面(推荐
- spring boot 自定义请求参数解析注解
- springboot + shiro 权限注解、统一异常处理、请求乱码解决
- Spring Boot 自定义注解
- [SpringBoot实践]spring-data-mongo自定义Repository接口及其实现
- Spring boot 自定义注解
- 自定义注解实现权限设计,实现pojo校验
- Springboot+Security用户无权限返回自定义信息