C#基础04
介绍:泛型介绍,索引,Foreach遍历的解释,yield方法,path文件操作,Directory类基本操作<目录>
一:泛型
百度资料:泛型是 2.0 版 C# 语言和公共语言运行库 (CLR) 中的一个新功能。泛型将类型参数的概念引入 .NET Framework,类型参数使得设计如下类和方法成为可能:这些类和方法将一个或多个类型的指定推迟到客户端代码声明并实例化该类或方法的时候。例如,通过使用泛型类型参数 T,您可以编写其他客户端代码能够使用的单个类,而不致引入运行时强制转换或装箱操作的成本或风险,
使用泛型类型可以最大限度地重用代码、保护类型的安全以及提高性能。泛型最常见的用途是创建集合类。.NET Framework 类库在 System.Collections.Generic 命名空间中包含几个新的泛型集合类。应尽可能地使用这些类来代替普通的类,如 System.Collections 命名空间中的 ArrayList。您可以创建自己的泛型接口、泛型类、泛型方法、泛型事件和泛型委托。可以对泛型类进行约束以访问特定数据类型的方法。关于泛型数据类型中使用的类型的信息可在运行时通过反射获取。
* 泛型的好处:代码的重用。通过使用<T>来进行重用。可以往里面传递不同的参数类型,我们也可以将其定义为泛型方法,泛型类,泛型接口。
* 自定义泛型
里面有泛型类,泛型方法,泛型接口。
eg 1:
/// 自定义泛型类
public class MyClass1<T>
{
public void SayHi(T teg)
{
Console.WriteLine(teg);
}
}
//泛型方法
public class Myclass2
{
public void Say<T>(T er)
{
Console.WriteLine(er);
}
}
//泛型接口
public interface IMyClass3<T>
{
T Sayhi();                        //返回值类型
void SayHello(T msg);             //参数类型
}
//实现泛型接口的两种情况
//1:普通类实现泛型接口
public class Class2 : IMyClass3<String>
{
public void SayHello(string msg)
{
Console.WriteLine(msg);
}
public string Sayhi()
{
throw new NotImplementedException();
}
}
//2:泛型类实现泛型接口
//这里的IMyClass3<U>的U是根据类接口中的U来决定的。
public class Class3<U> : IMyClass3<U>
{
public void SayHello(U msg)
{
Console.WriteLine(msg);
}

public U Sayhi()
{
throw new NotImplementedException();
}
}二:创建一个索引
public class MyClass
{
private string[] _data = new string[5];
/// <summary>
/// 定义一个索引
/// </summary>
public string this[int index]
{
get { return _data[index]; }
set { _data[index] = value; }
}
}创建泛型索引public class MyClass<T>
{
private T[] _data = new T[5];
/// <summary>
/// 定义一个索引
/// </summary>
///
public T this[int index]
{
get { return _data[index]; }
set { _data[index] = value; }
}
} 三:泛型约束
就是在泛型的后面加上where T:struct/class等。说明泛型以后会在定义的这个约束中来进行T的更换。

四:foreach(*) 是只读方法
使用条件:凡是具有GetEnumerator()方法的类型都可以进行遍历。
定义:调用枚举器来实现的。
通过上面的解释,我们应该知道只要实现了具有GetEnumerator()方法就可以实现froeach的遍历。
实例
1:先在类中实现IEnumerable接口,拥有GetEnumerator()方法,接着在写个Enumerator(枚举器)类且此类实现IEnumerator(枚举器接口)接口,这样我们这个类中就有了枚举器的所有的功能。
//不使用foreach来实现遍历。 foreach主要是调用了枚举器这个方法,我们只需要自己重新写个方法就行。实现IEnumerable接口就可以实现GetEnumerator
Main()中的写法
var p = new Person();
var etor = p.GetEnumerator();
while(etor.MoveNext())
{
Console.WriteLine(etor.Current.ToString());
}
Console.WriteLine("OK");
Console.ReadKey();具体类的实现
public class Person:IEnumerable
{

private string [] friends=new string[]{"11","22","33"};
public string Name { get; set; }
public int Age { get; set; }

public IEnumerator GetEnumerator()
{
return new PersonEnumerator(this.friends); //这里返回的是Object类型
}
}

public class PersonEnumerator:IEnumerator
{
private string[] _friends;
public PersonEnumerator(string[] fs)
{
_friends = fs;
}
private int index = -1;                        //下标 指代0号前面位
//获取数据
public object Current
{
get
{
if(index>=0&&index<_friends.Length)
{
return _friends[index];   //通过下标来返回值。
}
else
{
throw new Exception();
}
}
}
//移动下标
public bool MoveNext()
{
if(index+1<_friends.Length)
{
index++;
return true;
}
return false;
}
//将下标还原,初始化
public void Reset()
{
index = -1;
}
}五:yield方法yield 关键字向编译器指示它所在的方法是迭代器块。编译器生成一个类来实现迭代器块中表示的行为。在迭代器块中,yield 关键字与 return 关键字结合使用,向枚举器对象提供值。这是一个返回值,例如,在 foreach 语句的每一次循环中返回的值。yield 关键字也可与 break 结合使用,表示迭代结束。
六:文件操作
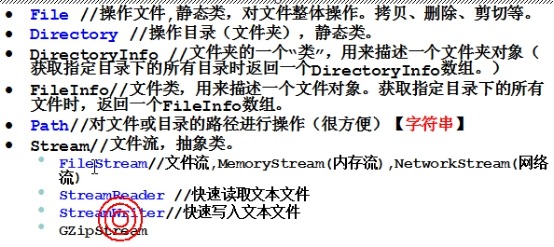
*:File:操作文件,静态类,对文件整体操作。(拷贝,赋值,剪切等)
*:Directory:操作目录的类,目录夹
*:DirectoryInfo:文件夹的一个类,用来描述文件夹对象,(获取指定目录下所有目录时返回一个DirectoryInfo数组)
*:FileInfo:文件夹,用来描述一个文件对象。获取指定目录下的所有文件时,返回一个FileInfo数组。
*:Path:对文件”目录和路径”进行操作,<字符串>。
*:Stream :文件流,抽象类。
1:FileStream 文件流 MemoryStream内存流 NetworkStream网络流
2:StreamReader:快速读取文本文件
3:StreamWriter:快速写入文本文件
* Path文件操作
我们通过使用Path类来获取我们文件名,路径,修改文件名等。
string path = @"F:\VS2008\Projects\ShiPinJiChu__HeiMa\文件操作\bin\Debug\文件操作.exe.config";
//获取文件名
Console.WriteLine(Path.GetFileName(path));
//获取文件的后缀
Console.WriteLine(Path.GetExtension(path));
//获取不带后缀的文件名
Console.WriteLine(Path.GetFileNameWithoutExtension(path));
//获取该路径的目录部分
Console.WriteLine(Path.GetDirectoryName(path));
//更改文件后缀名
Console.WriteLine(Path.ChangeExtension(path, "dll"));
//合并两个路径
string path1 = @"F:\VS2008\Projects\";
string path2 = "xiaohui.exe";
Console.WriteLine(Path.Combine(path1 + path2));
//返回当前用户的临时文件夹的路径。
Console.WriteLine(Path.GetTempPath());
//创建磁盘上唯一命名的零字节的临时文件并返回该文件的完整路径。
Console.WriteLine(Path.GetTempFileName());
Console.ReadKey();* Directory类基本操作<目录>
//创建目录
for (int i = 0; i < 10; i++)
{
Directory.CreateDirectory(@"C:\" + i);
}
Console.WriteLine("OK");
Console.ReadKey();

//删除目录
for (int i = 0; i < 10; i++)
{
//Directory.Delete(@"C:\" + i); //只能删除空目录
Directory.Delete(@"C:\" + i, true);
}
Console.WriteLine("OK");
Console.ReadKey();

//剪切
Directory.Move(@"C:\11", @"C:\222\11");

//重命名       <利用剪切来实现>
Directory.Move(@"C:\222", @"C:\333");
Console.WriteLine("OK");
Console.ReadKey();

//获取文件下面的所有的子目录
string path = @"C:\333\11";
var file= Directory.GetFiles(path);
foreach (var item in file)
{
Console.WriteLine(item);
}
//删除目录
Directory.Delete(@"C:\333",true);
Console.WriteLine("OK");
Console.ReadKey();转载于:https://my.oschina.net/Andyahui/blog/611580
- 点赞
- 收藏
- 分享
- 文章举报

 chuhe8332
发布了0 篇原创文章 · 获赞 0 · 访问量 1417
私信
关注
chuhe8332
发布了0 篇原创文章 · 获赞 0 · 访问量 1417
私信
关注

- C#基础精华04(文件流,文件操作,File、Directory、Path,Directory)
- C#基础精华04(文件流,文件操作,File、Directory、Path,Directory)
- 2012- 04-17 C#基础学习笔记(12)
- c#基础04(流程控制语句)
- 【C#基础】【语法04】课堂作业题 01-08
- 04C#基础知识
- 《C#妹妹和Objective-C阿姨对话录》(04)垃圾回收基础--拆迁队那点事
- 黑马程序员----c#基础知识04
- C#基础04
- 开源Math.NET基础数学类库使用(04)C#解析Matrix Marke数据格式
- 《C#妹妹和Objective-C阿姨对话录》(04)垃圾回收基础--拆迁队那点事
- 【原创】开源Math.NET基础数学类库使用(04)C#解析Matrix Marke数据格式
- 《C#妹妹和Objective-C阿姨对话录》(04)垃圾回收基础--拆迁队那点事
- 【C#基础】【控件04】课后作业题——C#第二阶段测试题
- 【C#进阶系列】04 类型基础
- .Net学习笔记----2015-07-21(C#基础复习04,面向对象语法和继承复习)
- [Selenium With C#基础教程] Lesson-04 按钮
- 【C#进阶系列】04 类型基础
- C# 面试前的准备_基础知识点的回顾_04
- C#基础04