分分钟带你读懂 ButterKnife 的源码
为什么要写这一系列的博客呢?
因为在 Android 开发的过程中, 泛型,反射,注解这些知识进场会用到,几乎所有的框架至少都会用到上面的一两种知识,如 Gson 就用到泛型,反射,注解,Retrofit 也用到泛型,反射,注解 。学好这些知识对我们进阶非常重要,尤其是阅读开源框架源码或者自己开发开源框架。
前言
ButterKnife 这个开源库火了有一段时间了,刚开始它的实现原理是使用反射实现的,性能较差。再后面的 版本中逐渐使用注解+放射实现,性能提高了不少。
ButterKnife是基于编译时的框架,它能够帮助我们减去每次写 FindViewById 的麻烦,截止到 2017.5.1 ,在 github 上面的 start 已经超过 15000.
本篇博客要分析的 ButterKnife 的源码主要包括以下三个部分,版本号是8.5.1
- butterknife-annotations
- butterknife-compiler
- butterknife
其中 butterknife-annotations 库主要用来存放自定义注解;butterknife-compiler 主要是用来扫描哪些地方使用到我们的自定义注解,并进行相应的处理,生成模板代码等;butterknife 主要是用来注入我们的代码的。
我们先来先一下要怎样使用 butterknife:
ButterKnife 的基本使用
在 moudle 的 build.gradle 增加依赖
dependencies {
compile 'com.jakewharton:butterknife:8.5.1'
annotationProcessor 'com.jakewharton:butterknife-compiler:8.5.1'
}
public class SimpleActivity extends Activity {
private static final ButterKnife.Action<View> ALPHA_FADE = new ButterKnife.Action<View>() {
@Override public void apply(@NonNull View view, int index) {
AlphaAnimation alphaAnimation = new AlphaAnimation(0, 1);
alphaAnimation.setFillBefore(true);
alphaAnimation.setDuration(500);
alphaAnimation.setStartOffset(index * 100);
view.startAnimation(alphaAnimation);
}
};

@BindView(R2.id.title) TextView title;
@BindView(R2.id.subtitle) TextView subtitle;
@BindView(R2.id.hello) Button hello;
@BindView(R2.id.list_of_things) ListView listOfThings;
@BindView(R2.id.footer) TextView footer;

@BindViews({ R2.id.title, R2.id.subtitle, R2.id.hello }) List<View> headerViews;

private SimpleAdapter adapter;

@OnClick(R2.id.hello) void sayHello() {
Toast.makeText(this, "Hello, views!", LENGTH_SHORT).show();
ButterKnife.apply(headerViews, ALPHA_FADE);
}

@OnLongClick(R2.id.hello) boolean sayGetOffMe() {
Toast.makeText(this, "Let go of me!", LENGTH_SHORT).show();
return true;
}

@OnItemClick(R2.id.list_of_things) void onItemClick(int position) {
Toast.makeText(this, "You clicked: " + adapter.getItem(position), LENGTH_SHORT).show();
}

@Override protected void onCreate(Bundle savedInstanceState) {
super.onCreate(savedInstanceState);
setContentView(R.layout.simple_activity);
ButterKnife.bind(this);

// Contrived code to use the bound fields.
title.setText("Butter Knife");
subtitle.setText("Field and method binding for Android views.");
footer.setText("by Jake Wharton");
hello.setText("Say Hello");

adapter = new SimpleAdapter(this);
listOfThings.setAdapter(adapter);
}
}
调用 gradle build 命令,我们在相应的目录下将可以看到生成类似这样的代码。
public class SimpleActivity_ViewBinding<T extends SimpleActivity> implements Unbinder {
protected T target;

private View view2130968578;

private View view2130968579;

@UiThread
public SimpleActivity_ViewBinding(final T target, View source) {
this.target = target;

View view;
target.title = Utils.findRequiredViewAsType(source, R.id.title, "field 'title'", TextView.class);
target.subtitle = Utils.findRequiredViewAsType(source, R.id.subtitle, "field 'subtitle'", TextView.class);
view = Utils.findRequiredView(source, R.id.hello, "field 'hello', method 'sayHello', and method 'sayGetOffMe'");
target.hello = Utils.castView(view, R.id.hello, "field 'hello'", Button.class);
view2130968578 = view;
view.setOnClickListener(new DebouncingOnClickListener() {
@Override
public void doClick(View p0) {
target.sayHello();
}
});
view.setOnLongClickListener(new View.OnLongClickListener() {
@Override
public boolean onLongClick(View p0) {
return target.sayGetOffMe();
}
});
view = Utils.findRequiredView(source, R.id.list_of_things, "field 'listOfThings' and method 'onItemClick'");
target.listOfThings = Utils.castView(view, R.id.list_of_things, "field 'listOfThings'", ListView.class);
view2130968579 = view;
((AdapterView<?>) view).setOnItemClickListener(new AdapterView.OnItemClickListener() {
@Override
public void onItemClick(AdapterView<?> p0, View p1, int p2, long p3) {
target.onItemClick(p2);
}
});
target.footer = Utils.findRequiredViewAsType(source, R.id.footer, "field 'footer'", TextView.class);
target.headerViews = Utils.listOf(
Utils.findRequiredView(source, R.id.title, "field 'headerViews'"),
Utils.findRequiredView(source, R.id.subtitle, "field 'headerViews'"),
Utils.findRequiredView(source, R.id.hello, "field 'headerViews'"));
}

@Override
@CallSuper
public void unbind() {
T target = this.target;
if (target == null) throw new IllegalStateException("Bindings already cleared.");

target.title = null;
target.subtitle = null;
target.hello = null;
target.listOfThings = null;
target.footer = null;
target.headerViews = null;

view2130968578.setOnClickListener(null);
view2130968578.setOnLongClickListener(null);
view2130968578 = null;
((AdapterView<?>) view2130968579).setOnItemClickListener(null);
view2130968579 = null;

this.target = null;
}
}
ButterKnife 的执行流程
总的来说,大概可以分为以下几步:
- 在编译的时候扫描注解,并做相应的处理,生成 java 代码,生成 Java 代码是调用 javapoet 库生成的。
- 当我们调用 ButterKnife.bind(this); 方法的时候,他会根据类的全限定类型,找到相应的代码,并执行。完成 findViewById 和 setOnClick ,setOnLongClick 等操作。
第一步:在编译的时候扫描注解,并做相应的处理,生成 java 代码。这一步,可以拆分为几个小步骤:
- 定义我们的注解,声明我们的注解是否保存到 java doc 中,可以作用于哪些区域(Filed ,Class等),以及是源码时注解,编译时注解还是运行时注解等)
- 继承 AbstractProcessor,表示支持哪些类型的注解,支持哪些版本,
- 重写 process 方法,处理相关的注解,存进 Map 集合中
- 根据扫描到的注解信息(即 Map 集合),调用 javapoet 库生成 Java 代码。
butterknife-annotations 讲解
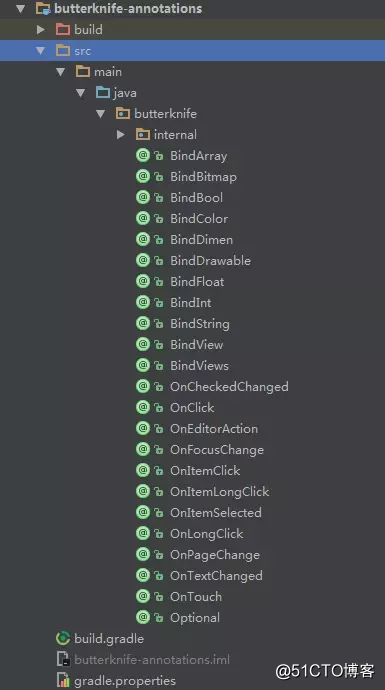
我们知道 ButterKnife 自定义很多的注解,有 BindArray,BindBitmap,BindColor,BindView 等,这里我们以 BindView 为例子讲解就 OK 了,其他的也是基本类似的,这里就不再讲解了。
//编译时注解
@Retention(CLASS)
//成员变量, (includes enum constants)
@Target(FIELD)
public @interface BindView {
/** View ID to which the field will be bound. */
@IdRes int value();
}
Processor 解析器说明
我们先来看一些基本方法:在 init 方法里面得到一些辅助工具类,这样有一个好处,确保工具类是单例的,因为 init 方法只会在初始化的时候调用。
public synchronized void init(ProcessingEnvironment env) {
super.init(env);

---

//辅助工具类
elementUtils = env.getElementUtils();
typeUtils = env.getTypeUtils();
filer = env.getFiler();

---
}
接着重写 getSupportedAnnotationTypes 方法,返回我们支持的注解类型。
@Override
public Set<String> getSupportedAnnotationTypes() {
Set<String> types = new LinkedHashSet<>();
for (Class<? extends Annotation> annotation : getSupportedAnnotations()) {
types.add(annotation.getCanonicalName());
}
//返回支持注解的类型
return types;
}

private Set<Class<? extends Annotation>> getSupportedAnnotations() {
Set<Class<? extends Annotation>> annotations = new LinkedHashSet<>();

annotations.add(BindArray.class);
annotations.add(BindBitmap.class);
annotations.add(BindBool.class);
annotations.add(BindColor.class);
annotations.add(BindDimen.class);
annotations.add(BindDrawable.class);
annotations.add(BindFloat.class);
annotations.add(BindInt.class);
annotations.add(BindString.class);
annotations.add(BindView.class);
annotations.add(BindViews.class);
annotations.addAll(LISTENERS);

return annotations;
}
接下来来看我们的重点, process 方法。所做的工作大概就是拿到我们所有的注解信息,存进 map 集合,遍历 map 集合,做相应的 处理,生成 java 代码。
@Override
public boolean process(Set<? extends TypeElement> elements, RoundEnvironment env) {
//  拿到所有的注解信息,TypeElement 作为 key,BindingSet 作为 value
Map<TypeElement, BindingSet> bindingMap = findAndParseTargets(env);
// 遍历 map 里面的所有信息,并生成 java 代码
for (Map.Entry<TypeElement, BindingSet> entry : bindingMap.entrySet()) {
TypeElement typeElement = entry.getKey();
BindingSet binding = entry.getValue();

JavaFile javaFile = binding.brewJava(sdk);
try {
javaFile.writeTo(filer);
} catch (IOException e) {
error(typeElement, "Unable to write binding for type %s: %s", typeElement, e
.getMessage());
}
}

return false;
}
这里我们进入 findAndParseTargets 方法,看里面到底是怎样将注解信息存进 map 集合的?
findAndParseTargets 方法里面 针对每一个自定义注解(BindArray,BindBitmap,BindColor,BindView) 等都做了处理,这里我们重点关注 @BindView 的处理即可。其他注解的处理思想也是一样的。
我们先来看一下 findAndParseTargets 方法的前半部分,遍历 env.getElementsAnnotatedWith(BindView.class) 集合,并调用 parseBindView 方法去转化。
private Map<TypeElement, BindingSet> findAndParseTargets(RoundEnvironment env) {
Map<TypeElement, BindingSet.Builder> builderMap = new LinkedHashMap<>();
Set<TypeElement> erasedTargetNames = new LinkedHashSet<>();

scanForRClasses(env);

// Process each @BindView element.
for (Element element : env.getElementsAnnotatedWith(BindView.class)) {
// we don't SuperficialValidation.validateElement(element)
// so that an unresolved View type can be generated by later processing rounds
try {
parseBindView(element, builderMap, erasedTargetNames);
} catch (Exception e) {
logParsingError(element, BindView.class, e);
}
}

---

// 后半部分,待会再讲

}
可以看到牵绊部分的主要逻辑在 parseBindView 方法里面,主要做了以下几步操作:
-
判断被注解 @BindView 修饰的成员变量是不是合法的,private 或者 static 修饰的,则出错。
private void parseBindView(Element element, Map<TypeElement, BindingSet.Builder> builderMap,
Set<TypeElement> erasedTargetNames) {
TypeElement enclosingElement = (TypeElement) element.getEnclosingElement();

// 判断是否被注解在属性上,如果该属性是被 private 或者 static 修饰的,则出错
// 判断是否被注解在错误的包中,若包名以“android”或者“java”开头,则出错
boolean hasError = isInaccessibleViaGeneratedCode(BindView.class, "fields", element)
|| isBindingInWrongPackage(BindView.class, element);

// Verify that the target type extends from View.
TypeMirror elementType = element.asType();
if (elementType.getKind() == TypeKind.TYPEVAR) {
TypeVariable typeVariable = (TypeVariable) elementType;
elementType = typeVariable.getUpperBound();
}
Name qualifiedName = enclosingElement.getQualifiedName();
Name simpleName = element.getSimpleName();
// 判断元素是不是View及其子类或者Interface
if (!isSubtypeOfType(elementType, VIEW_TYPE) && !isInterface(elementType)) {
if (elementType.getKind() == TypeKind.ERROR) {
note(element, "@%s field with unresolved type (%s) "
+ "must elsewhere be generated as a View or interface. (%s.%s)",
BindView.class.getSimpleName(), elementType, qualifiedName, simpleName);
} else {
error(element, "@%s fields must extend from View or be an interface. (%s.%s)",
BindView.class.getSimpleName(), qualifiedName, simpleName);
hasError = true;
}
}
// 如果有错误,直接返回
if (hasError) {
return;
}

// Assemble information on the field.
int id = element.getAnnotation(BindView.class).value();
// 根据所在的类元素去查找 builder
BindingSet.Builder builder = builderMap.get(enclosingElement);
QualifiedId qualifiedId = elementToQualifiedId(element, id);
// 如果相应的 builder 已经存在
if (builder != null) {
// 验证 ID 是否已经被绑定
String existingBindingName = builder.findExistingBindingName(getId(qualifiedId));
// 被绑定了,出错,返回
if (existingBindingName != null) {
error(element, "Attempt to use @%s for an already bound ID %d on '%s'. (%s.%s)",
BindView.class.getSimpleName(), id, existingBindingName,
enclosingElement.getQualifiedName(), element.getSimpleName());
return;
}
} else {
// 如果没有相应的 builder,就需要重新生成,并别存放到  builderMap 中
builder = getOrCreateBindingBuilder(builderMap, enclosingElement);
}

String name = simpleName.toString();
TypeName type = TypeName.get(elementType);
boolean required = isFieldRequired(element);

builder.addField(getId(qualifiedId), new FieldViewBinding(name, type, required));

// Add the type-erased version to the valid binding targets set.
erasedTargetNames.add(enclosingElement);
}
parseBindView 方法分析完毕之后,我们在回过头来看一下 findAndParseTargets 方法的后半部分,主要做的工作是对 bindingMap 进行重排序。
private Map<TypeElement, BindingSet> findAndParseTargets(RoundEnvironment env) {

// 省略前半部分

// Associate superclass binders with their subclass binders. This is a queue-based tree walk
// which starts at the roots (superclasses) and walks to the leafs (subclasses).
Deque<Map.Entry<TypeElement, BindingSet.Builder>> entries =
new ArrayDeque<>(builderMap.entrySet());
Map<TypeElement, BindingSet> bindingMap = new LinkedHashMap<>();
while (!entries.isEmpty()) {
Map.Entry<TypeElement, BindingSet.Builder> entry = entries.removeFirst();

TypeElement type = entry.getKey();
BindingSet.Builder builder = entry.getValue();
//获取 type 的父类的 TypeElement
TypeElement parentType = findParentType(type, erasedTargetNames);
// 为空,存进 map
if (parentType == null) {
bindingMap.put(type, builder.build());
} else {
// 获取 parentType 的 BindingSet
BindingSet parentBinding = bindingMap.get(parentType);
if (parentBinding != null) {
builder.setParent(parentBinding);
bindingMap.put(type, builder.build());
} else {
// Has a superclass binding but we haven't built it yet. Re-enqueue for later.
// 为空,加到队列的尾部,等待下一次处理
entries.addLast(entry);
}
}
}

return bindingMap;
}
到这里为止,我们已经分析完 ButterKnifeProcessor 是怎样处理注解的相关知识,并存进 map 集合中的,下面我们回到 process 方法,看一下是怎样生成 java 模板代码的。
public boolean process(Set<? extends TypeElement> elements, RoundEnvironment env) {
//  拿到所有的注解信息,TypeElement 作为 key,BindingSet 作为 value
Map<TypeElement, BindingSet> bindingMap = findAndParseTargets(env);
// 遍历 map 里面的所有信息,并生成 java 代码
for (Map.Entry<TypeElement, BindingSet> entry : bindingMap.entrySet()) {
TypeElement typeElement = entry.getKey();
BindingSet binding = entry.getValue();
// 生成 javaFile 对象
JavaFile javaFile = binding.brewJava(sdk);
try {
//  生成 java 模板代码
javaFile.writeTo(filer);
} catch (IOException e) {
error(typeElement, "Unable to write binding for type %s: %s", typeElement, e
.getMessage());
}
}

return false;
}
生成代码的核心代码只有这几行
// 生成 javaFile 对象
JavaFile javaFile = binding.brewJava(sdk);
try {
//  生成 java 模板代码
javaFile.writeTo(filer);
} catch (IOException e) {
error(typeElement, "Unable to write binding for type %s: %s", typeElement, e
.getMessage());
}
跟踪进去,发现是调用 square 公司开源的库 javapoet 开生成代码的。关于 javaPoet 的使用可以参考官网地址
JavaFile brewJava(int sdk) {
return JavaFile.builder(bindingClassName.packageName(), createType(sdk))
.addFileComment("Generated code from Butter Knife. Do not modify!")
.build();
}
private TypeSpec createType(int sdk) {
TypeSpec.Builder result = TypeSpec.classBuilder(bindingClassName.simpleName())
.addModifiers(PUBLIC);
if (isFinal) {
result.addModifiers(FINAL);
}
if (parentBinding != null) {
result.superclass(parentBinding.bindingClassName);
} else {
result.addSuperinterface(UNBINDER);
}

if (hasTargetField()) {
result.addField(targetTypeName, "target", PRIVATE);
}
// 如果是 View 或者是 View 的子类的话,添加构造方法
if (isView) {
result.addMethod(createBindingConstructorForView());
} else if (isActivity) { // 如果是 Activity 或者是 Activity 的子类的话,添加构造方法
result.addMethod(createBindingConstructorForActivity());
} else if (isDialog) {  // 如果是 Dialog 或者是 Dialog 的子类的话,添加构造方法
result.addMethod(createBindingConstructorForDialog());
}
//  如果构造方法不需要 View 参数,添加 需要 View 参数的构造方法
if (!constructorNeedsView()) {
// Add a delegating constructor with a target type + view signature for reflective use.
result.addMethod(createBindingViewDelegateConstructor());
}
result.addMethod(createBindingConstructor(sdk));

if (hasViewBindings() || parentBinding == null) {
//生成unBind方法
result.addMethod(createBindingUnbindMethod(result));
}

return result.build();
}
接着我们一起来看一下 createBindingConstructor(sdk) 方法,大概做的事情就是

- 判断是否有设置监听,如果有监听,将 View 设置为 final
- 遍历 viewBindings ,调用 addViewBinding 生成 findViewById 形式的代码。
private MethodSpec createBindingConstructor(int sdk) {
MethodSpec.Builder constructor = MethodSpec.constructorBuilder()
.addAnnotation(UI_THREAD)
.addModifiers(PUBLIC);
// 如果有方法绑定,比如 @onClick,那么增加一个 targetTypeName 类型 的方法参数 target,并且是 final 类型的
if (hasMethodBindings()) {
constructor.addParameter(targetTypeName, "target", FINAL);
} else { // 如果没有 ,不是 final 类型的
constructor.addParameter(targetTypeName, "target");
}
//如果有注解的 View,那么添加 VIEW 类型 source 参数
if (constructorNeedsView()) {
constructor.addParameter(VIEW, "source");
} else {
// 添加 Context 类型的 context 参数
constructor.addParameter(CONTEXT, "context");
}
if (hasUnqualifiedResourceBindings()) {
// Aapt can change IDs out from underneath us, just suppress since all will work at
// runtime.
constructor.addAnnotation(AnnotationSpec.builder(SuppressWarnings.class)
.addMember("value", "$S", "ResourceType")
.build());
}
// 如果 @OnTouch 绑定 View,添加 @SuppressLint("ClickableViewAccessibility")
if (hasOnTouchMethodBindings()) {
constructor.addAnnotation(AnnotationSpec.builder(SUPPRESS_LINT)
.addMember("value", "$S", "ClickableViewAccessibility")
.build());
}
// 如果 parentBinding 不为空,调用父类 的构造方法
if (parentBinding != null) {
if (parentBinding.constructorNeedsView()) {
constructor.addStatement("super(target, source)");
} else if (constructorNeedsView()) {
constructor.addStatement("super(target, source.getContext())");
} else {
constructor.addStatement("super(target, context)");
}
constructor.addCode("\n");
}
//  添加成员变量
if (hasTargetField()) {
constructor.addStatement("this.target = target");
constructor.addCode("\n");
}

if (hasViewBindings()) {
if (hasViewLocal()) {
// Local variable in which all views will be temporarily stored.
constructor.addStatement("$T view", VIEW);
}
//   遍历  viewBindings,生成  source.findViewById($L) 代码
for (ViewBinding binding : viewBindings) {
addViewBinding(constructor, binding);
}
for (FieldCollectionViewBinding binding : collectionBindings) {
constructor.addStatement("$L", binding.render());
}

if (!resourceBindings.isEmpty()) {
constructor.addCode("\n");
}
}

if (!resourceBindings.isEmpty()) {
if (constructorNeedsView()) {
constructor.addStatement("$T context = source.getContext()", CONTEXT);
}
if (hasResourceBindingsNeedingResource(sdk)) {
constructor.addStatement("$T res = context.getResources()", RESOURCES);
}
for (ResourceBinding binding : resourceBindings) {
constructor.addStatement("$L", binding.render(sdk));
}
}

return constructor.build();
}
下面我们一起来看一下 addViewBinding 方法是怎样生成代码的。
private void addViewBinding(MethodSpec.Builder result, ViewBinding binding) {
if (binding.isSingleFieldBinding()) {
// Optimize the common case where there's a single binding directly to a field.
FieldViewBinding fieldBinding = binding.getFieldBinding();
// 注意这里直接使用了 target. 的形式,所以属性肯定是不能 private 的
CodeBlock.Builder builder = CodeBlock.builder()
.add("target.$L = ", fieldBinding.getName());
boolean requiresCast = requiresCast(fieldBinding.getType());
if (!requiresCast && !fieldBinding.isRequired()) {
builder.add("source.findViewById($L)", binding.getId().code);
} else {
builder.add("$T.find", UTILS);
builder.add(fieldBinding.isRequired() ? "RequiredView" : "OptionalView");
if (requiresCast) {
builder.add("AsType");
}
builder.add("(source, $L", binding.getId().code);
if (fieldBinding.isRequired() || requiresCast) {
builder.add(", $S", asHumanDescription(singletonList(fieldBinding)));
}
if (requiresCast) {
builder.add(", $T.class", fieldBinding.getRawType());
}
builder.add(")");
}
result.addStatement("$L", builder.build());
return;
}
**ButterKnife 是怎样实现代码注入的**
使用过 ButterKnife 得人基本都知道,我们是通过 bind 方法来实现注入的,即自动帮我们 findViewById ,解放我们的双手,提高工作效率。下面我们一起来看一下 bind 方法是怎样实现注入的。
[p]@NonNull[url=mailto:br/>@UiThread@UiThread

- ButterKnife的源码解析(2)
- 五分钟读懂源码——Square开源网络请求库OkHttp的工作原理解析
- Android Butterknife 框架源码解析(1)——ButterKnife的使用
- 编译时注解Butterknife源码解析之深入篇(雷惊风)
- butterknife 源码分析
- 开源中国源码学习(六)——ButterKnife的使用
- 从源码入手,一文带你读懂Spring AOP面向切面编程
- 一次读懂 Android 热门图片框架 Picasso 源码
- Butterknife的源码解析(仅作学习参考用)
- 读懂Dubbo源码必备知识点之三
- Android Butterknife 框架源码解析(3)——Butterknife 8.7.0源码分析
- 如何读懂源码成为高手
- 读懂源码:一步一步实现一个 Vue
- Android UI注解框架 ButterKnife源码及原理分析
- 读懂tomact源码4:Container
- 转-如何读懂源码(下)
- 手把手教你读懂源码,View事件的注册和接收详细剖析
- 手把手教你读懂源码,View的加载流程详细剖析
- 深入读懂 Retrofit 2.0 源码
- ButterKnife源码分析及简单实现