使用Spring Boot发送邮件
2019-08-12 20:22
441 查看
版权声明:本文为博主原创文章,遵循 CC 4.0 by-sa 版权协议,转载请附上原文出处链接和本声明。
本文链接:https://blog.csdn.net/cm_mm_hhh/article/details/99325039
最近没什么事,就试着学习用Spring Boot发送邮件。发现还是很简单的,就写一篇博客记录一下,与大家共享,万一以后要使用呢。
目录:
- 发送简易邮件
- 发送Html格式的可带附件的邮件
- 发送基于thymeleaf模板引擎的可带附件的邮件
POM文件:
在pom文件中添加:
<lombok.version>1.16.10</lombok.version>

<dependency>
<groupId>org.springframework.boot</groupId>
<artifactId>spring-boot-starter-thymeleaf</artifactId>
</dependency>

<dependency>
<groupId>org.projectlombok</groupId>
<artifactId>lombok</artifactId>
<version>${lombok.version}</version>
</dependency>

<dependency>
<groupId>org.springframework.boot</groupId>
<artifactId>spring-boot-starter-mail</artifactId>
</dependency>
配置文件:
application.properties:
#thymeleaf
spring.thymeleaf.mode=HTML
spring.thymeleaf.cache=false
spring.thymeleaf.prefix=classpath:/templates/

spring.mail.properties.mail.smtp.auth=true
spring.mail.properties.mail.smtp.starttls.enable=true
spring.mail.properties.mail.smtp.starttls.required=true
spring.mail.default-encoding=UTF-8
#使用qq发送邮件
spring.profiles.active=qq
application-qq.properties:
# JavaMailSender 邮件发送的配置
spring.mail.host=smtp.qq.com
spring.mail.username=发件人qq
#QQ邮箱的授权码
spring.mail.password=你的qq邮箱授权码
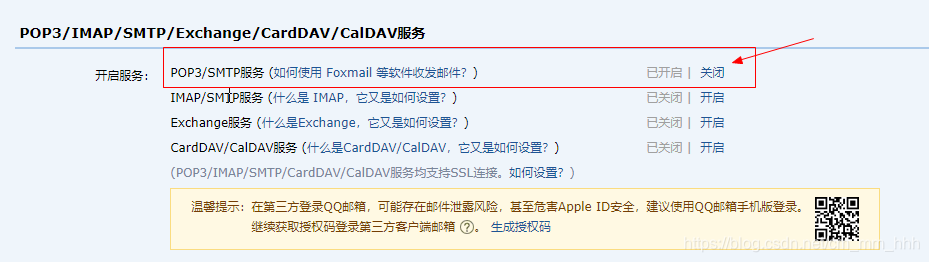
登录QQ邮箱,按下面步骤操作获取授权码
1.

2.
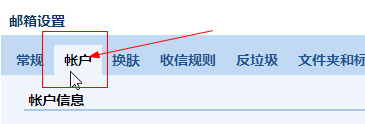
3.往下走,开启smtp,获取验证码,如果你之前开启了,就点击下面的生成授权码获取
application-163.properties:
spring.mail.host=smtp.163.com
spring.mail.username=xxx@163.com
#163邮箱密码
spring.mail.password=xxxxxx
Email实体类:
private Integer id;
/** 邮件主题 */
private String subject;
/** 邮件显示内容 */
private String content;
/** 发送人 */
private String sender;
/** 收件人 */
private String[] recipient;
/** 抄送人 */
private String[] cc;
/** 内容是否是html */
private boolean isHtml;
/** 附件列表 一个map存储一个附件的名称和路径 */
private List<Map<String, String>> attachFiles;
set/get ...
发送简易邮件:
1.编写一个发送邮件的工具类EmailUtils:添加下面内容
private static final Logger logger = LoggerFactory.getLogger(EmailUtils.class);
@Autowired
private JavaMailSender javaMailSender;

/**
* 发送简易邮件
*
* @param email
* @return
*/
public boolean sendSimpleMail(Email email) {
boolean flag = true;
try {
SimpleMailMessage simpleMailMessage = new SimpleMailMessage();
//发件人
simpleMailMessage.setFrom(email.getSender());
//收件人
simpleMailMessage.setTo(email.getRecipient());
//抄送人
simpleMailMessage.setCc(email.getCc());
//邮件主题
simpleMailMessage.setSubject(email.getSubject());
//邮件内容
simpleMailMessage.setText(email.getContent());
javaMailSender.send(simpleMailMessage);
} catch (MailException e) {
logger.error("邮件发送失败:{}", e.getMessage());
flag = false;
}
return flag;
}
2.编写单元测试:
private static final Logger logger = LoggerFactory.getLogger(EmailUtilsTest.class);
@Autowired
private EmailUtils emailUtils;
@Autowired
private Environment env;

@Test
public void sendSimpleMail() {
Email email = new Email();
email.setSender(env.getProperty("spring.mail.username"));
email.setRecipient(new String[]{"收件人"});
email.setCc(new String[]{"抄送人"});
email.setSubject("主题");
email.setContent("内容");
boolean isSend = emailUtils.sendSimpleMail(email);
logger.info("邮件发送:{}", isSend);
}
效果如下:

发送Html格式的可带附件的邮件
1.新建一个常量类保存附件的名称和路径:
public static final String FILE_NAME = "fileName";
public static final String FILE_PATH = "filePath";
2.在工具类EmailUtils中添加下面方法:
/**
* 发送html格式的可带附件的邮件
* 可多个附件
*
* @param email
*/
public boolean sendHtmlMailWithAttachment(Email email) {
boolean flag = true;
try {
MimeMessage mimeMessage = javaMailSender.createMimeMessage();
MimeMessageHelper mimeMessageHelper = new MimeMessageHelper(mimeMessage, true);
mimeMessageHelper.setSubject(email.getSubject());
mimeMessageHelper.setText(email.getContent(), email.isHtml());
mimeMessageHelper.setFrom(email.getSender());
mimeMessageHelper.setTo(email.getRecipient());
if (email.getCc() != null) {
mimeMessageHelper.setCc(email.getCc());
}
if (email.getAttachFiles() != null) {
FileSystemResource file = null;
for (Map<String, String> attachment : email.getAttachFiles()) {
file = new FileSystemResource(attachment.get(FileConstant.FILE_PATH));
mimeMessageHelper.addAttachment(attachment.get(FileConstant.FILE_NAME), file);
}
}
javaMailSender.send(mimeMessage);
} catch (MessagingException e) {
logger.error("邮件发送失败:{}", e.getMessage());
flag = false;
}
return flag;
}
3.编写单元测试:
@Test
public void sendHtmlMailWithAttachment() {
Email email = new Email();
email.setSender(env.getProperty("spring.mail.username"));
email.setRecipient(new String[]{"收件人"});
email.setCc(new String[]{"抄送人"});
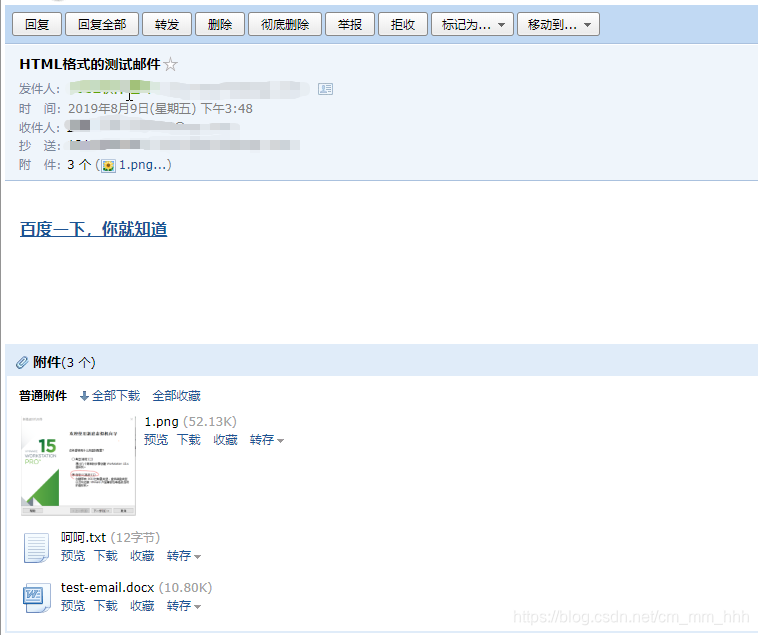
email.setSubject("HTML格式的测试邮件");
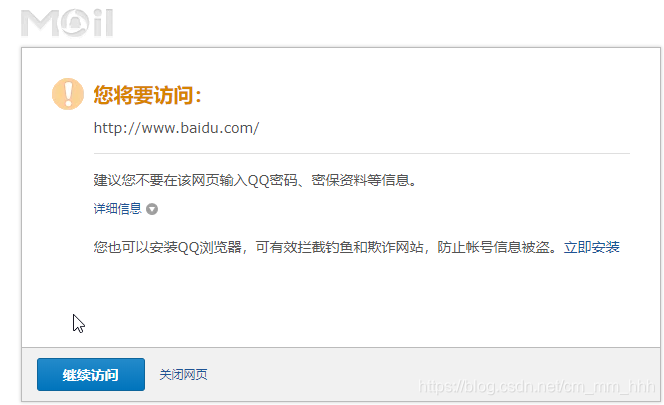
email.setContent("<h3><a href='http://www.baidu.com'>百度一下,你就知道</a></h3>");
email.setHtml(true);
List<Map<String, String>> maps = new ArrayList<>();
Map<String, String> map1 = new TreeMap<>();
map1.put(FileConstant.FILE_NAME, "名称1");
map1.put(FileConstant.FILE_PATH, "路径1");
maps.add(map1);
Map<String, String> map2 = new TreeMap<>();
map2.put(FileConstant.FILE_NAME, "名称2t");
map2.put(FileConstant.FILE_PATH, "路径2");
maps.add(map2);
Map<String, String> map3 = new TreeMap<>();
map3.put(FileConstant.FILE_NAME, "名称3");
map3.put(FileConstant.FILE_PATH, "路径3");
maps.add(map3);
email.setAttachFiles(maps);
boolean isSend = emailUtils.sendHtmlMailWithAttachment(email);
logger.info("邮件发送:{}", isSend);
}
效果如下:
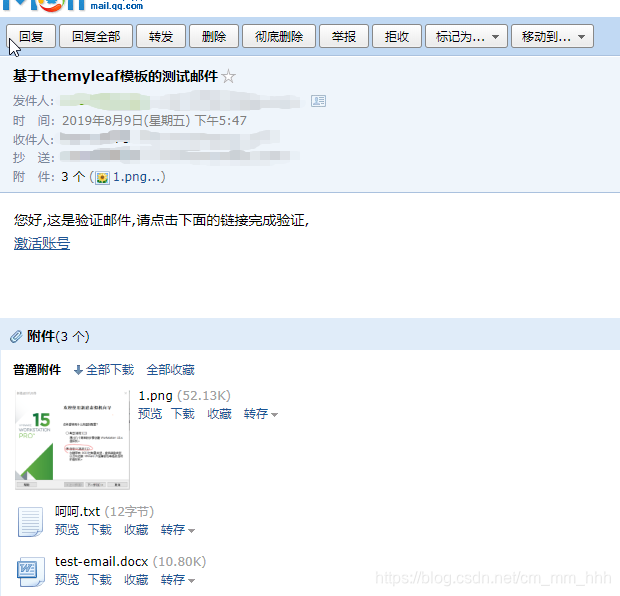
发送基于thymeleaf模板引擎的可带附件的邮件
1.在resources/templates目录下新建email.html:
<!DOCTYPE html>
<html lang="en" xmlns:th="http://www.thymeleaf.org">
<head>
<meta charset="UTF-8">
<title>Title</title>
</head>
<body>
您好,这是验证邮件,请点击下面的链接完成验证,<br/>
<a th:href="@{${href}}">激活账号</a>
</body>
</html>
2.基于thymeleaf模板引擎发送和前面Html格式的发送其实差不多,只是html格式的邮件是把邮件内容用html代码输入,而thymeleaf模板引擎是获取上下文,设置模板的参数、把解析模板的值作为邮件内容。所以可以复用sendHtmlMailWithAttachment()。
3.编写单元测试
@Autowired
private TemplateEngine templateEngine;

@Test
public void sendFullMailWithTemplate() {
Context context = new Context();
context.setVariable("href", "http://www.baidu.com");
//解析模板
String content = templateEngine.process("email", context);

Email email = new Email();
email.setSender(env.getProperty("spring.mail.username"));
email.setRecipient(new String[]{"收件人"});
email.setCc(new String[]{"抄送人"});
email.setSubject("HTML格式的测试邮件");
email.setContent(content );
email.setHtml(true);
List<Map<String, String>> maps = new ArrayList<>();
Map<String, String> map1 = new TreeMap<>();
map1.put(FileConstant.FILE_NAME, "名称1");
map1.put(FileConstant.FILE_PATH, "路径1");
maps.add(map1);
Map<String, String> map2 = new TreeMap<>();
map2.put(FileConstant.FILE_NAME, "名称2t");
map2.put(FileConstant.FILE_PATH, "路径2");
maps.add(map2);
Map<String, String> map3 = new TreeMap<>();
map3.put(FileConstant.FILE_NAME, "名称3");
map3.put(FileConstant.FILE_PATH, "路径3");
maps.add(map3);
email.setAttachFiles(maps);
boolean isSend = emailUtils.sendHtmlMailWithAttachment(email);
logger.info("邮件发送:{}", isSend);
}
效果如下:
是不是很简单,希望可以帮到正在阅读的你。
如果你有更好想法,欢迎评论。
源码地址:https://github.com/yundiangeqian/email-demo
共同成长,不足之处,请大家指正!!!

相关文章推荐
- Spring Boot 使用465端口发送邮件
- 使用spring boot email 发送邮件
- SpringBoot中使用新线程发送邮件
- 使用job自动抓取网页数据发送邮件,以springboot服务启动
- Spring Boot中使用JavaMailSender发送邮件
- 使用spring-boot-starter-mail实现邮件发送
- spring-boot实战【12】:Spring Boot中使用JavaMailSender发送邮件
- Spring Boot中使用JavaMailSender发送邮件
- springboot2 开启ssl 使用465端口 多线程 发送邮件 ( mail )
- 在Spring Boot中使用JavaMailSender发送各类邮件
- Spring Boot中使用JavaMailSender发送邮件
- Spring Boot中使用JavaMailSender发送邮件
- 使用springboot发送邮件(前后端分离:使用freemark模板技术)
- 使用Springboot Email实现邮件发送
- Spring Boot中使用JavaMailSender发送邮件
- Spring Boot中使用JavaMailSender发送邮件
- Spring Boot中使用JavaMailSender发送邮件
- Spring Boot教程(十七)使用JavaMailSender发送邮件
- Spring Boot中使用JavaMailSender发送邮件
- 在Spring Boot中使用JavaMailSender发送各类邮件