SpringBoot整合Spring Data Redis
2019-07-11 07:14
2675 查看
Redis版本为3.0.6
运行环境为:Linux
1.安装Redis
去Redis官网https://redis.io/中下载一个Redis的压缩包
然后把压缩包复制到Linux系统中,也可以直接在Linux系统中根据下载路径下载压缩包
解压压缩包
找到你的压缩包在终端输入解压命令
tar -zxvf redis-3.0.6.tar.gz
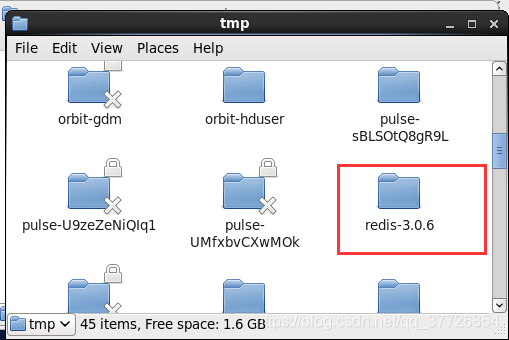
解压完成后发现系统中多了一个redis-3.0.6的文件夹
解压完成后进入解压后的目录中进行编译

然后输入make命令 $make进行编译
编译完成后将Redis安装到指定的目录
make PREFIX=/usr/local/redis install
如果提示没有权限则在前面加上一个sudo即可
sudo make PREFIX=/usr/local/redis install
启动redis
redis-server
以上就是redis的安装过程
2.Spring Boot整合Spring Data Redis
Spring Data Redis属于Spring Data下的模块。主要作用是简化redis的操作
修改pom文件添加Spring Data Redis的坐标
<!-- Spring Data Redis启动器 -->
<dependency>
<groupId>org.springframework.boot</groupId>
<artifactId>spring-boot-starter-data-redis</artifactId>
</dependency>
编写Spring Data Redis的配置类(注意点)
package com.liuzhe.config;

import org.springframework.context.annotation.Bean;
import org.springframework.context.annotation.Configuration;
import org.springframework.data.redis.connection.jedis.JedisConnectionFactory;
import org.springframework.data.redis.core.RedisTemplate;
import org.springframework.data.redis.serializer.StringRedisSerializer;

import redis.clients.jedis.JedisPoolConfig;

/**
* 完成对Redis整合的配置
* @author 机械革命
*
*/
@Configuration
public class RedisConfig {

/**
* 1.创建JedisPoolConfig对象,在该对象中完成一些连接池配置
*/
@Bean
public JedisPoolConfig jedisPoolConfig(){
JedisPoolConfig config = new JedisPoolConfig();

//最大空闲数
config.setMaxIdle(10);

//最小空闲数
config.setMinIdle(5);

//最大连接数
config.setMaxTotal(20);

return config;
}

/**
* 2.创建JedisConnectionFactory,配置redis连接信息
*/
@Bean
public JedisConnectionFactory jedisConnectionFactory(JedisPoolConfig config){

JedisConnectionFactory factory = new JedisConnectionFactory();
//关联链接池的配置对象
factory.setPoolConfig(config);

//配置连接Redis的信息
//主机地址
factory.setHostName("192.168.122.137");

//端口
factory.setPort(6379);

return factory;
}

/**
* 3.创建RedisTemplate:用于执行Redis操作的方法
*/
@Bean
public RedisTemplate< String, Object> redisTemplate(JedisConnectionFactory factory){

RedisTemplate<String, Object> template = new RedisTemplate<String, Object>();

//关联
template.setConnectionFactory(factory);

//设置key的序列化器
template.setKeySerializer(new StringRedisSerializer());

//为value设置序列化器
template.setValueSerializer(new StringRedisSerializer());

return template;
}

}
编写测试代码,测试整合环境
修改pom文件,注入测试依赖
<!-- test启动器 -->
<dependency>
<groupId>org.springframework.boot</groupId>
<artifactId>spring-boot-starter-test</artifactId>
</dependency>
编写测试代码
@RunWith(SpringJUnit4ClassRunner.class)
@SpringBootTest(classes=AppStart.class)
public class RedisTest {

@Autowired
private RedisTemplate<String, Object> redisTemplate;

//添加一个字符串
@Test
public void testSet(){
this.redisTemplate.opsForValue().set("key1", "第一个redis添加测试");
this.redisTemplate.opsForValue().set("key", "第二个redis添加测试");
}

}
运行结果如下

再编写一个获取字符串的测试代码
/**
* 获取一个字符串
*/
@Test
public void testGet(){
String value = (String) this.redisTemplate.opsForValue().get("key");
System.out.println(value);
}
运行结果如下

也可以用另一种方式对Redis进行配置
新建一个src/main/resources目录下新建一个application.properties配置文件,在文件中添加配置
注意:spring.redis.pool与spring.redis是一个前缀可以更改,但是后面的是必须相同的
spring.redis.pool.max-idle=10
spring.redis.pool.min-idle=5
spring.redis.pool.max-total=20

spring.redis.hostName=192.168.122.137
spring.redis.port=6379
然后修改配置类添加@ConfigurationProperties注解,注解中有个prefix属性,这个属性的作用就是将配置文件中前缀相同的内容创建一个实体
/**
* 完成对Redis整合的配置
* @author 机械革命
*
*/
@Configuration
public class RedisConfig {

/**
* 1.创建JedisPoolConfig对象,在该对象中完成一些连接池配置
* @ConfigurationProperties(prefix="spring.redis.pool")可以将配置文件中前缀相同的内容创建一个实体
*/
@Bean
@ConfigurationProperties(prefix="spring.redis.pool")
public JedisPoolConfig jedisPoolConfig(){

JedisPoolConfig config = new JedisPoolConfig();

return config;
}

/**
* 2.创建JedisConnectionFactory,配置redis连接信息
*/
@Bean
@ConfigurationProperties(prefix="spring.redis")
public JedisConnectionFactory jedisConnectionFactory(JedisPoolConfig config){

JedisConnectionFactory factory = new JedisConnectionFactory();
//关联链接池的配置对象
factory.setPoolConfig(config);

return factory;
}

/**
* 3.创建RedisTemplate:用于执行Redis操作的方法
*/
@Bean
public RedisTemplate< String, Object> redisTemplate(JedisConnectionFactory factory){

RedisTemplate<String, Object> template = new RedisTemplate<String, Object>();

//关联
template.setConnectionFactory(factory);

//设置key的序列化器
template.setKeySerializer(new StringRedisSerializer());

//为value设置序列化器
template.setValueSerializer(new StringRedisSerializer());

return template;
}

}
更改完成后测试运行没有任何问题
然后再来试一下存取一个对象
去创建一个实体类
package com.liuzhe.pojo;

import java.io.Serializable;

public class Users implements Serializable{

private Integer id;
private String name;
private Integer age;
public Integer getId() {
return id;
}
public void setId(Integer id) {
this.id = id;
}
public String getName() {
return name;
}
public void setName(String name) {
this.name = name;
}
public Integer getAge() {
return age;
}
public void setAge(Integer age) {
this.age = age;
}
@Override
public String toString() {
return "Users [id=" + id + ", name=" + name + ", age=" + age + "]";
}

}
编写测试代码
注意,在存储对象的时候并不能直接转化为配置类中配置的String格式,而是要先重新设置一个序列化器然后再转换成Stirng类型,反之取出的时候也是一样的,必须与存储对象时设置的序列化器是一样的,否则无法正常取出
/**
* 添加一个Users对象
*/
@Test
public void testSetUsers(){
Users users = new Users();
users.setAge(20);
users.setName("王五");
users.setId(1);
//重新设置序列化器
this.redisTemplate.setValueSerializer(new JdkSerializationRedisSerializer());
this.redisTemplate.opsForValue().set("users", users);
}

/**
* 从redis中取出Users对象
*/
@Test
public void testGetUsers(){
//重新设置序列化器
this.redisTemplate.setValueSerializer(new JdkSerializationRedisSerializer());
Users users = (Users) this.redisTemplate.opsForValue().get("users");
System.out.println(users);
}

相关文章推荐
- Springboot+spring-data系列之(二)redis整合示例
- springboot整合spring-data-redis中的坑
- SpringBoot整合Spring-data-redis实现集中式缓存
- 整合spring-boot-starter-data-redis报错解决
- springboot整合spring-data-redis遇到的坑
- Springboot整合Redis-sentinel哨兵模式集群
- springboot同时整合redis和ehcache
- 【转载】Springboot整合 一 集成 redis
- SpringBoot学习-(二十二)SpringBoot整合Redis(使用Jedis)
- java之redis篇(spring-data-redis整合)
- spring-boot-starter-data-redis(spring cloud 操作redis) RedisTemplate
- Docker 部署 SpringBoot 项目整合 Redis 镜像做访问计数示例代码
- spring boot 整合 redis基本使用
- SpringBoot整合常用技术--MyBatis、Redis、定时任务、分页插件、逆向生成
- 基于SpringBoot整合redis及shiro
- springboot2.x+redis整合
- SpringBoot整合集成redis
- Redis详解 - SpringBoot整合Redis,RedisTemplate和注解两种方式的使用
- Spring Boot + MyBatis + Redis整合小案例