SpringBoot整合MybatisPlus的简单教程实现(简单整合)
2019-05-15 18:02
1081 查看
最近在研究springboot,顺便就会看看数据库连接这一块的知识 ,所以当我发现有通用Mapper和MybatisPlus这两款网络上比较火的简化mybatis开发的优秀软件之后。就都想试一下,看看哪一款比较适合自己。
先创建一个springboot的项目,可以参考我之前的文章Spring Boot 的简单教程(一) Spring Boot 项目的创建。
创建好springboot之后就需要整合mybatis和mybatis-plus了。
打开pom.xml文件,将最新的mybatis相关的包都引用进来。
<!-- 这是mysql的依赖 -->
<dependency>
<groupId>mysql</groupId>
<artifactId>mysql-connector-java</artifactId>
<scope>runtime</scope>
</dependency>
<!-- 这是lombok的依赖 -->
<dependency>
<groupId>org.projectlombok</groupId>
<artifactId>lombok</artifactId>
<optional>true</optional>
</dependency>
<!-- 这是mybatis-plus依赖 -->
<dependency>
<groupId>com.baomidou</groupId>
<artifactId>mybatis-plus-boot-starter</artifactId>
<version>3.1.1</version>
</dependency>
<!-- 这是mybatis-plus的代码自动生成器 -->
<dependency>
<groupId>com.baomidou</groupId>
<artifactId>mybatis-plus-generator</artifactId>
<version>3.1.1</version>
</dependency>
<!-- 这是模板引擎依赖 -->
<dependency>
<groupId>org.freemarker</groupId>
<artifactId>freemarker</artifactId>
<version>2.3.28</version>
</dependency>
需要对application.yml进行相关的配置。
#端口号
server:
port: 8088
#数据库的配置信息
spring:
datasource:
url: jdbc:mysql://localhost:3306/*** #自己的数据库名称
username: root
password: 123456
mybatis:
#开启驼峰命名法
configuration:
map-underscore-to-camel-case: true
mybatis-plus:
# xml地址
mapper-locations: classpath:mapper/*Mapper.xml
# 实体扫描,多个package用逗号或者分号分隔
type-aliases-package: ***  #自己的实体类地址
configuration:
# 这个配置会将执行的sql打印出来,在开发或测试的时候可以用
log-impl: org.apache.ibatis.logging.stdout.StdOutImpl
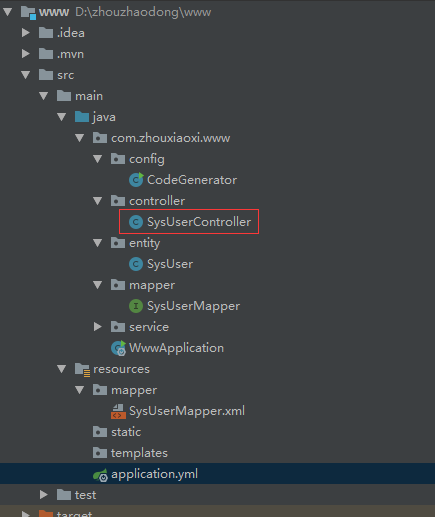
自动生成模块的方法,在相应的位置上添加上自己的一些包名就可以运行生成相应的Entity、Mapper、Mapper XML、Service、Controller 等各个模块的代码。
public class CodeGenerator {

/**
* <p>
* 读取控制台内容
* </p>
*/
public static String scanner(String tip) {
Scanner scanner = new Scanner(System.in);
StringBuilder help = new StringBuilder();
help.append("请输入" + tip + ":");
System.out.println(help.toString());
if (scanner.hasNext()) {
String ipt = scanner.next();
if (StringUtils.isNotEmpty(ipt)) {
return ipt;
}
}
throw new MybatisPlusException("请输入正确的" + tip + "!");
}

public static void main(String[] args) {
// 代码生成器
AutoGenerator mpg = new AutoGenerator();
// 全局配置
GlobalConfig gc = new GlobalConfig();
String projectPath = System.getProperty("user.dir");
gc.setOutputDir(projectPath + "/src/main/java");
gc.setAuthor("jobob");
gc.setOpen(false);
// gc.setSwagger2(true); 实体属性 Swagger2 注解
mpg.setGlobalConfig(gc);

// 数据源配置
DataSourceConfig dsc = new DataSourceConfig();
dsc.setUrl("jdbc:mysql://localhost:3306/***?useUnicode=true&useSSL=false&characterEncoding=utf8");
// dsc.setSchemaName("public");
dsc.setDriverName("com.mysql.cj.jdbc.Driver");
dsc.setUsername("root");
dsc.setPassword("***");
mpg.setDataSource(dsc);

// 包配置
PackageConfig pc = new PackageConfig();
//这里有个模块名的配置,可以注释掉不用。
//    pc.setModuleName(scanner("模块名"));
pc.setParent("com.zhouxiaoxi.www");
mpg.setPackageInfo(pc);

// 自定义配置
InjectionConfig cfg = new InjectionConfig() {
@Override
public void initMap() {
// to do nothing
}
};

// 如果模板引擎是 freemarker
String templatePath = "/templates/mapper.xml.ftl";
// 如果模板引擎是 velocity
//     String templatePath = "/templates/mapper.xml.vm";

// 自定义输出配置
List<FileOutConfig> focList = new ArrayList<>();
// 自定义配置会被优先输出
focList.add(new FileOutConfig(templatePath) {
@Override
public String outputFile(TableInfo tableInfo) {
// 自定义输出文件名 , 如果你 Entity 设置了前后缀、此处注意 xml 的名称会跟着发生变化!!
return projectPath + "/src/main/resources/mapper/"
//            + + pc.getModuleName() + 如果放开上面的模块名,这里就有一个模块名了
+ "/" + tableInfo.getEntityName() + "Mapper" + StringPool.DOT_XML;
}
});
/*
cfg.setFileCreate(new IFileCreate() {
@Override
public boolean isCreate(ConfigBuilder configBuilder, FileType fileType, String filePath) {
// 判断自定义文件夹是否需要创建
checkDir("调用默认方法创建的目录");
return false;
}
});
*/
cfg.setFileOutConfigList(focList);
mpg.setCfg(cfg);

// 配置模板
TemplateConfig templateConfig = new TemplateConfig();

// 配置自定义输出模板
//指定自定义模板路径,注意不要带上.ftl/.vm, 会根据使用的模板引擎自动识别
// templateConfig.setEntity("templates/entity2.java");
// templateConfig.setService();
// templateConfig.setController();

templateConfig.setXml(null);
mpg.setTemplate(templateConfig);

// 策略配置
StrategyConfig strategy = new StrategyConfig();
//数据库表映射到实体的明明策略
strategy.setNaming(NamingStrategy.underline_to_camel);
//数据库表字段映射到实体的命名策略, 未指定按照 naming 执行
strategy.setColumnNaming(NamingStrategy.underline_to_camel);
//自定义继承的Entity类全称,带包名
//    strategy.setSuperEntityClass("***");
strategy.setEntityLombokModel(true);
strategy.setRestControllerStyle(true);
//自定义继承的Controller类全称,带包名
//    strategy.setSuperControllerClass("***");
strategy.setInclude(scanner("表名,多个英文逗号分割").split(","));
//自定义基础的Entity类,公共字段(可添加更多)
//    strategy.setSuperEntityColumns("id");
//驼峰转连字符
strategy.setControllerMappingHyphenStyle(true);
//表前缀
//    strategy.setTablePrefix(pc.getModuleName() + "_");
mpg.setStrategy(strategy);
mpg.setTemplateEngine(new FreemarkerTemplateEngine());
mpg.execute();
}

}
在生成的controller里面添加对应的方法启动就可以正常进行访问了。
当然还需要在 Spring Boot 启动类中添加 @MapperScan 注解,扫描 Mapper 文件夹:
@SpringBootApplication
@MapperScan("***.*.mapper") //对应你的mapper存放的地址
public class Application {

public static void main(String[] args) {
SpringApplication.run(QuickStartApplication.class, args);
}

}
以上就是本文的全部内容,希望对大家的学习有所帮助,也希望大家多多支持脚本之家。
您可能感兴趣的文章:

相关文章推荐
- SpringBoot + Mybatis plus 实现多数据源整合
- 最简单的SpringBoot整合MyBatis教程
- spring boot入门(三) springboot整合mybatis(c3p0数据源)。最完整、简单易懂、详细的spring boot教程。
- SpringBoot入门——整合mybatis的增删改简单实现
- Springboot整合Mybatis实现简单CRUD
- spring boot mybatis 整合shiro简单实现登陆权限管理
- Spring Boot整合Spring Security简单实现登入登出从零搭建教程
- Spring boot整合mybatis实现Restful服务demo
- Spring Boot 整合 Mybatis 实现 Druid 多数据源详解
- spring整合mybatis(入门级简单教程2)
- Spring Boot 整合 Mybatis 实现 Druid 多数据源详解
- SpringBoot整合SpringSecurity简单实现登入登出从零搭建
- springboot整合com.baomidou.mybatisplus出现ID参数类型不匹配的问题
- springboot整合mybatis最简单的例子
- Spring Boot教程(十四)Spring Boot整合ActiveQ实现消息收发和订阅
- spring整合mybatis(入门级简单教程1)--在spring中配置c3p0,并成功测试
- SpringBoot(十五):SpringBoot整合Mybatis-Plus
- Springboot+mybatis+MySQL实现简单的多表查询
- Spring boot +Mybatis 实现多数据源(一:最简单版本)