php页面缓存——memcache
什么是memchache?
memcache是一套分布式的高速缓存系统,由LiveJournal的Brad Fitzpatrick开发,但目前被许多网站使用以提升网站的访问速度,尤其对于一些大型的、需要频繁访问数据库的网站访问速度提升效果十分显著
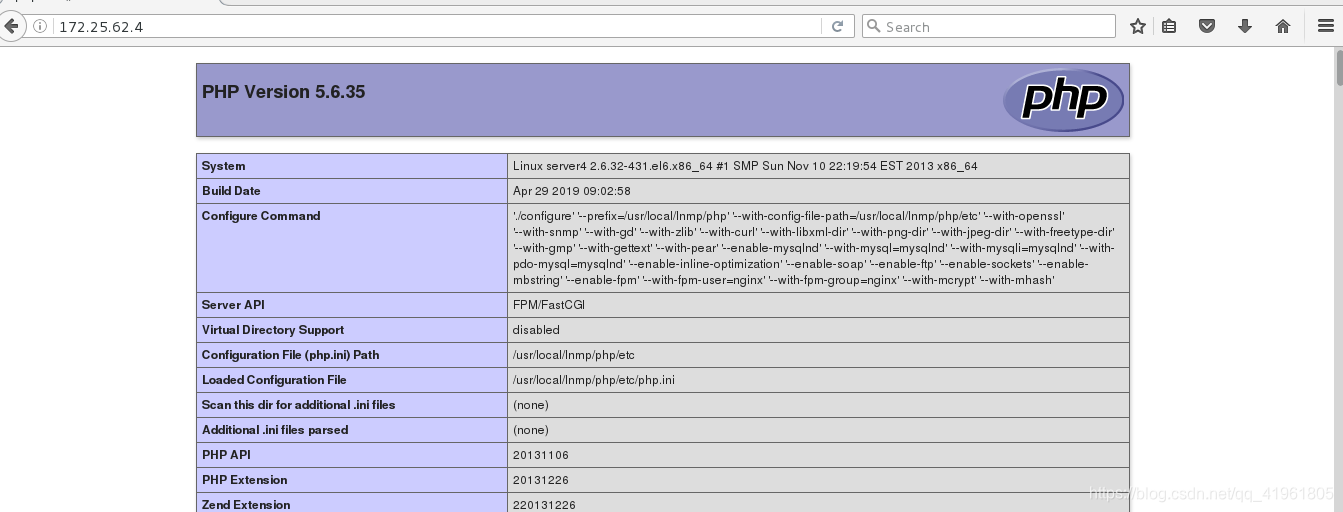
此篇博客承接上篇Linux运维——搭建nginx+php论坛也就是说此时已经下载好了nginx,能正常的访问php页面。
现在要做的就是将php页面进行缓存。
1.获得软件包资源,解压

[root@server4 ~]# tar xf memcache-2.2.5.tgz
解压。
2.进入目录安装

进入目录后查看,没有./configure的环境,所以要生成这个编译环境。
[root@server4 memcache-2.2.5]# vim ~/.bash_profile
 修改环境变量。
[root@server4 memcache-2.2.5]# source ~/.bash_profile
使修改的设置生效。
[root@server4 memcache-2.2.5]# phpize
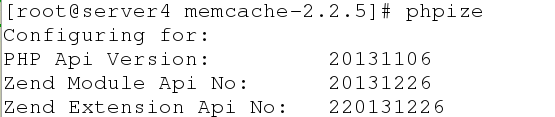
生成./configure的环境,之后就可以正常安装了。
[root@server4 memcache-2.2.5]# ./configure
[root@server4 memcache-2.2.5]# make && make install
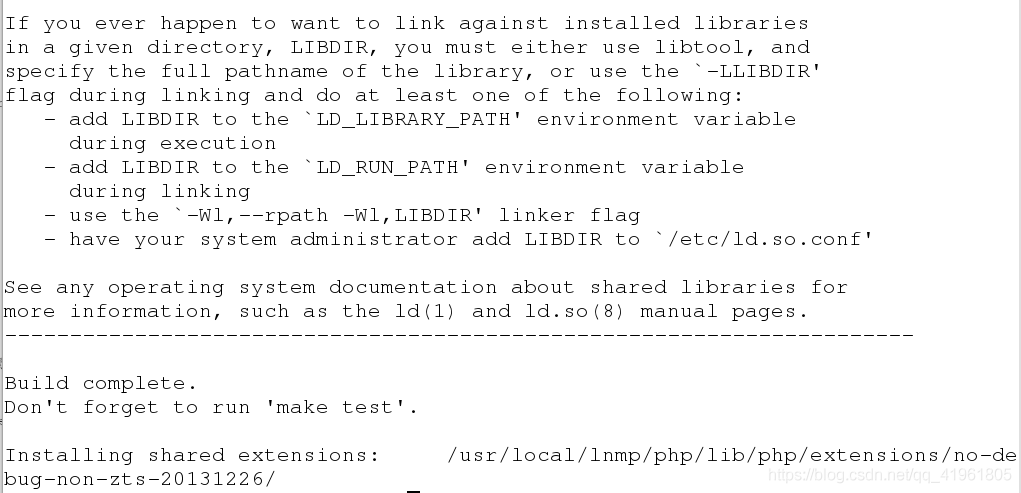
安装完成,完成后生成了/usr/local/lnmp/php/lib/php/extensions/no-debug-non-zts-20131226/目录。

进入目录正查看。这里有一个memcahe的模块,可以使memchache和php建立连接。
3.建立php和memcheache的链接
[root@server4 ~]# vim /usr/local/lnmp/php/etc/php.ini

[root@server4 ~]# /etc/init.d/php-fpm reload
重新加载配置。

查看php中是否加载出了这个模块
[root@server4 ~]# yum install -y memcached
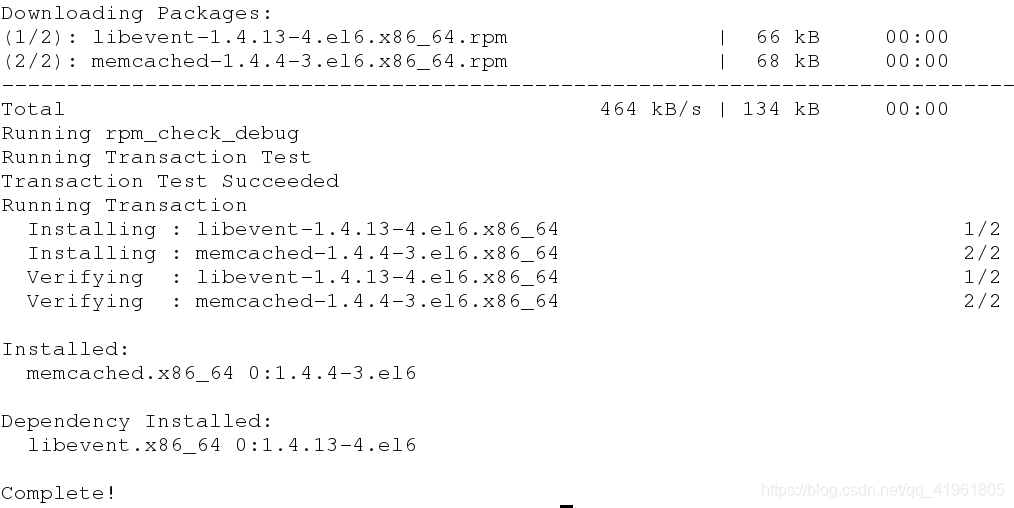
安装memcached。
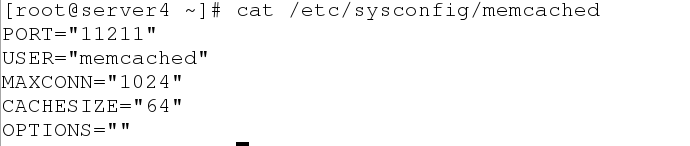
查看监控信息,可以看到这所使用的端口是11211端口。
[root@server4 ~]# /etc/init.d/memcached start
4.将memcache的发布页复制到nginx的发布目录下
[root@server4 memcache-2.2.5]# cp memcache.php example.php /usr/local/lnmp/nginx/html

复制完成后要对里面的内容进行编写。
20 $VERSION='$Id: memcache.php,v 1.2 2008/09/11 19:21:06 mikl Exp $';
21
22 define('ADMIN_USERNAME','memcache');    // Admin Username
23 define('ADMIN_PASSWORD','redhat');      // Admin Password
24 define('DATE_FORMAT','Y/m/d H:i:s');
25 define('GRAPH_SIZE',200);
26 define('MAX_ITEM_DUMP',50);
27
28 $MEMCACHE_SERVERS[] = '172.25.62.4:11211'; // add more as an array
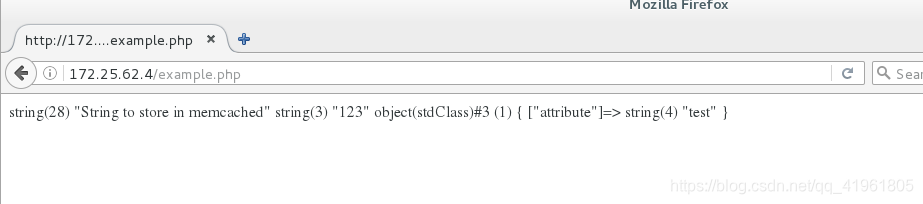
测试:
在浏览器输入
172.25.62.4/memcache.php
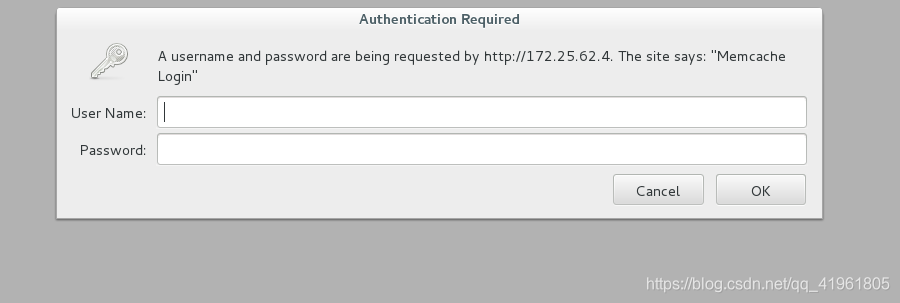
输入前面设置的帐号和密码。
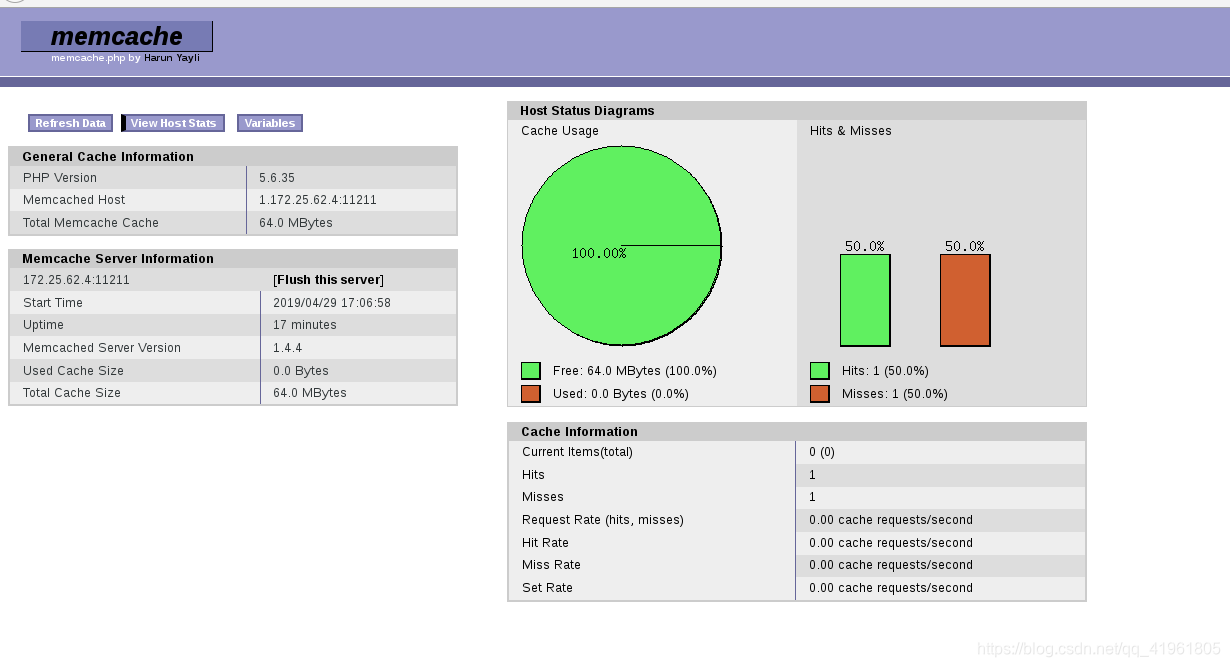
登陆进去之后是这样的页面。
在example页面进行刷新多次,之后在去查看memcache页面。
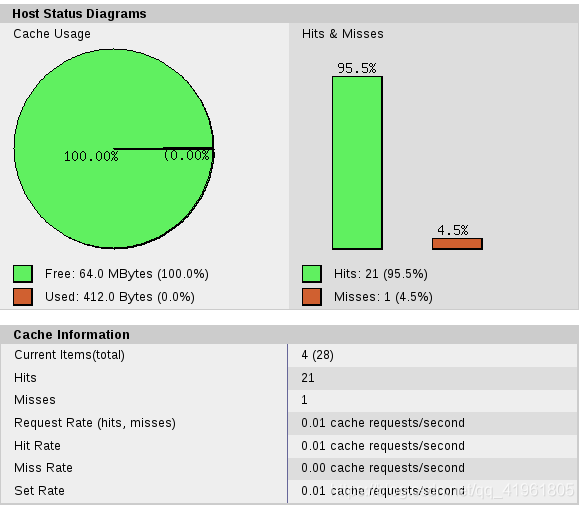
会发现,命中高达95%,也就是这个网页在缓存中取的数据占95%。
在另一台客户机进行测试:
[root@foundation62 ~]# ab -c 10 -n 5000 http://172.25.62.4/example.php
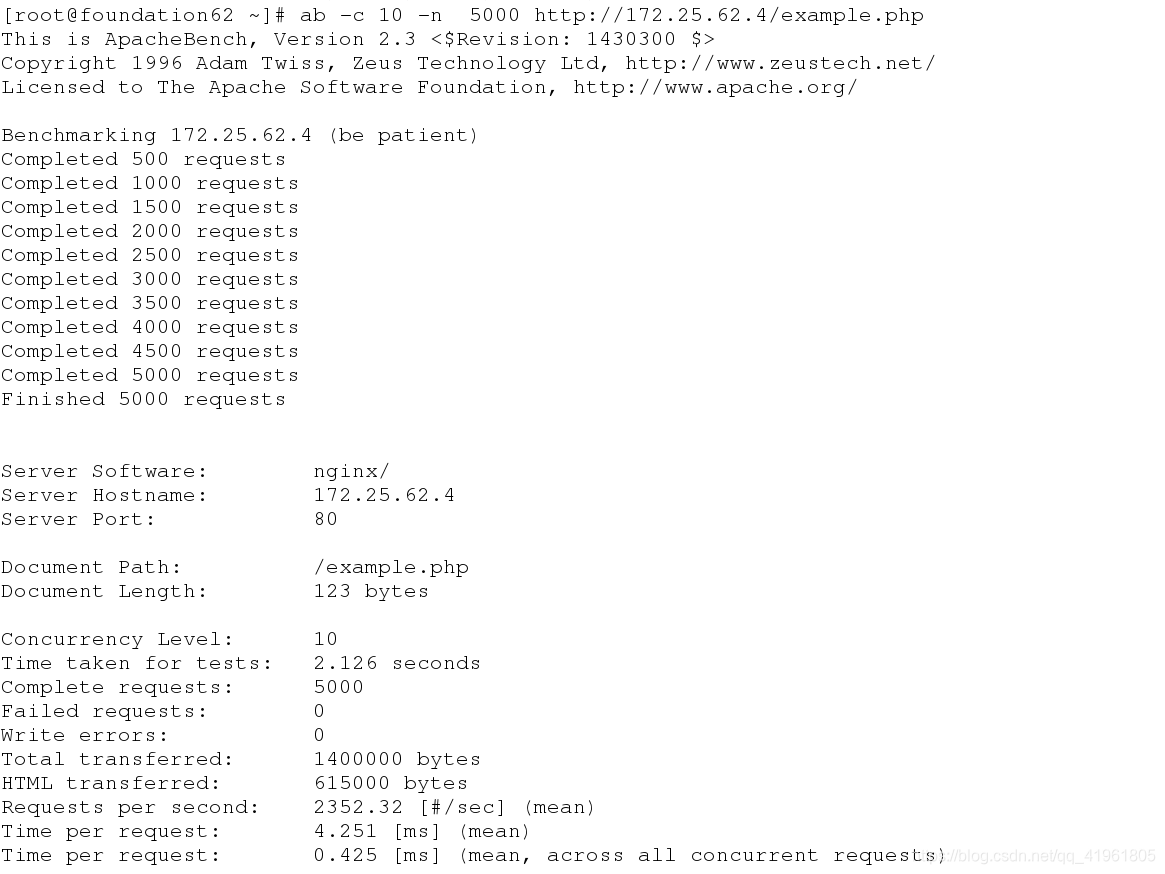
因为页面经过了缓存,所以在进行测试时的时间很短。
memchache缓存前移
前面安装的nginx是不带memcache的,要先关闭。
[root@server4 html]# nginx -s stop
关闭nginx。
1.获取openresty-1.13.6.1.tar.gz安装包,并解压,安装

[root@server4 ~]# tar zxf openresty-1.13.6.1.tar.gz
解压
[root@server4 openresty-1.13.6.1]# ./configure
[root@server4 openresty-1.13.6.1]# gmake && gmake install
进入安装目录进行安装,软件安装好之后默认安装在/usr/local目录下。
2.在发布目录下编写测试页
[root@server4 ~]# vim /usr/local/openresty/nginx/html/index.php

[root@server4 ~]# vim /usr/local/openresty/nginx/conf/nginx.conf
2 user  nginx nginx;
3 worker_processes  auto;
17 http {
18     include       mime.types;
19     default_type  application/octet-stream;
20         upstream memcache {		#添加模块
21         server localhost:11211;
22         keepalive 512;
22 }
46         locati
4000
on / {
47             root   html;
48             index  index.php index.html index.htm;
49         }
50         location /memc {
51             internal;
52             memc_connect_timeout 100ms;
53             memc_send_timeout 100ms;
54             memc_read_timeout 100ms;
55             set $memc_key $query_string;
56             set $memc_exptime 300;
57             memc_pass memcache;
58         }
68         location ~ \.php$ {
69             set $key $uri$args;
70             srcache_fetch GET /memc $key;
71             srcache_store PUT /memc $key;
72             root           html;
73             fastcgi_pass   127.0.0.1:9000;
74             fastcgi_index  index.php;
75             #fastcgi_param  SCRIPT_FILENAME  /scripts$fastcgi_script_name;
76             include        fastcgi.conf;
77         }
这些就是对这个文件全部的修改。
之后要对安装的openresty中的nginx进行启动。
[root@server4 ~]# /usr/local/openresty/nginx/sbin/nginx
测试:
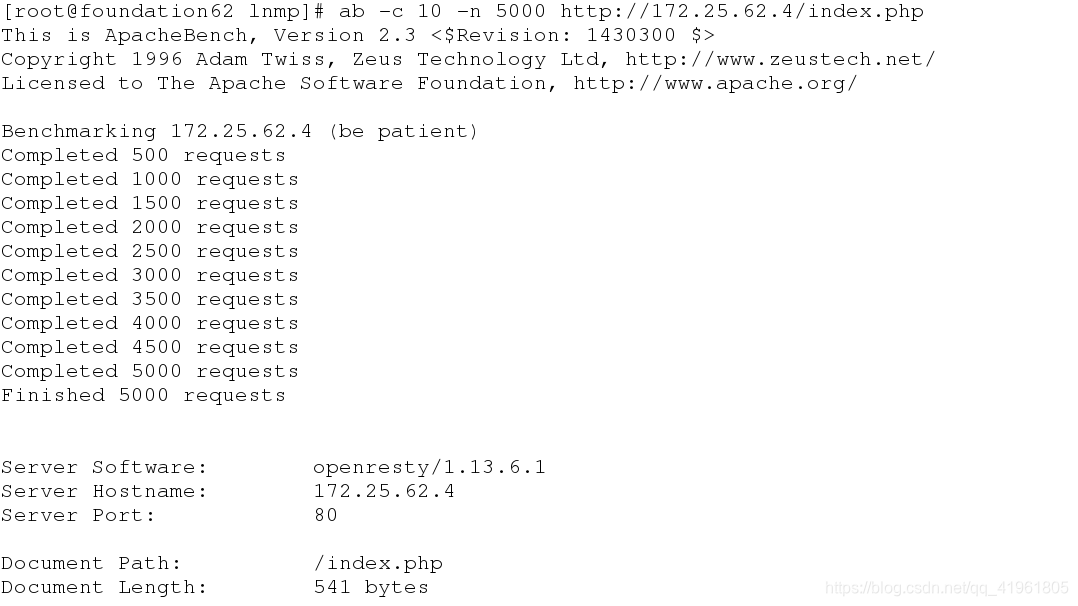
进行测试,可以看到这里进行缓存的软件为openresty/1.13.6.1。

- LNMP架构之PHP——MemCache对PHP页面的缓存加速优化
- php与memcache结合做部分重页面做缓存处理
- PHP应用系列之三:用Memcache守护程序把数据缓存到内存中
- [转]为 PHP 应用提速、提速、再提速!,第 3 部分: 用 Memcache 守护程序把数据缓存到内存中
- php 禁止页面缓存输出
- PHP MEMCACHE 详解(经典php缓存)
- php操作memcache缓存基础方法
- PHP缓存之内存缓存(Memcache)
- php window环境下扩展memcached实现页面缓存
- php防止页面缓存,实现网页过期的方法
- php_memcache 缓存 下载-安装-配置-学习
- php页面缓存ob系列函数介绍
- PHP禁止页面缓存
- PHP相关系列 - php缓存扩展频繁存储/读取数组引发CPU过高问题排查手记(php-memcache为例)
- PHP使用memcache缓存技术提高响应速度的方法
- PHP高级配置 ---将session存到Memcache缓存中
- php的ob缓存详解及页面静态化运用
- 整理php操作memcache缓存基础方法
- php禁止浏览器使用缓存页面的方法
- php操作memcache缓存基础方法