【C++设计模式】Decorator 装饰模式详解
文章目录
装饰模式可以在不改变一个对象本身功能的基础上给对象增加额外的新行为,在现实生活中,这种情况也到处存在,例如一张照片,我们可以不改变照片本身,给它增加一个相框,使得它具有防潮的功能,而且用户可以根据需要给它增加不同类型的相框,甚至可以在一个小相框的外面再套一个大相框。
装饰模式概述
装饰模式是一种用于替代继承的技术,它通过一种无须定义子类的方式来给对象动态增加职责,使用对象之间的关联关系取代类之间的继承关系。在装饰模式中引入了装饰类,在装饰类中既可以调用待装饰的原有类的方法,还可以增加新的方法,以扩充原有类的功能。
装饰模式定义如下:
|
装饰模式(Decorator Pattern):动态地给一个对象增加一些额外的职责,就增加对象功能来说,装饰模式比生成子类实现更为灵活。装饰模式是一种对象结构型模式。 |
装饰模式结构与实现
模式结构
在装饰模式中,为了让系统具有更好的灵活性和可扩展性,我们通常会定义一个抽象装饰类,而将具体的装饰类作为它的子类,装饰模式结构如下图所示:

在装饰模式结构图中包含如下几个角色:
- Component(抽象构件):它是具体构件和抽象装饰类的共同父类,声明了在具体构件中实现的业务方法,它的引入可以使客户端以一致的方式处理未被装饰的对象以及装饰之后的对象,实现客户端的透明操作。
- ConcreteComponent(具体构件):它是抽象构件类的子类,用于定义具体的构件对象,实现了在抽象构件中声明的方法,装饰器可以给它增加额外的职责(方法)。
- Decorator(抽象装饰类):它也是抽象构件类的子类,用于给具体构件增加职责,但是具体职责在其子类中实现。它维护一个指向抽象构件对象的引用,通过该引用可以调用装饰之前构件对象的方法,并通过其子类扩展该方法,以达到装饰的目的。
- ConcreteDecorator(具体装饰类):它是抽象装饰类的子类,负责向构件添加新的职责。每一个具体装饰类都定义了一些新的行为,它可以调用在抽象装饰类中定义的方法,并可以增加新的方法用以扩充对象的行为。
由于具体构件类和装饰类都实现了相同的抽象构件接口,因此装饰模式以对客户透明的方式动态地给一个对象附加上更多的责任,换言之,客户端并不会觉得对象在装饰前和装饰后有什么不同。
装饰模式可以在不需要创造更多子类的情况下,将对象的功能加以扩展。
模式实现
// 装饰模式简单框架
#include<iostream>
using namespace std;
/* 定义一个对象接口,可以给这些对象动态地添加职责 */
class Componet
{
public:
virtual void operation() = 0;
};
/* 定义一个具体对象,可以给这个对象添加一些职责 */
class ConcreteComponet : public Componet
{
public:
void operation()
{
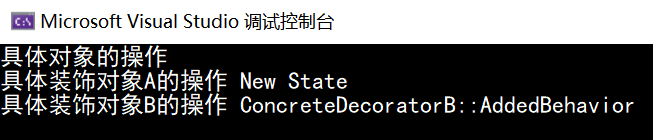
cout << "具体对象的操
289d1
作" << endl;
}
};
/* 装饰抽象类, 从外类来扩展Componet的功能 */
class Decorator : public Componet
{
public:
/* 设置Componet */
void setComponet(Componet* componet)
{
mcomponet = componet;
}
/* 重写operation,实际上执行的是component的operation()*/
void operation()
{
if (mcomponet != nullptr)
{
mcomponet->operation();
}
}
protected:
Componet* mcomponet;
};
/* 具体的装饰对象 */
class ConcreteDecoratorA : public Decorator
{
public:
/*
** 首先运行原Component的operation(),再执行本类的功能
** 如addedState,相当于对原Component进行了修饰
*/
void operation()
{
mcomponet->operation();
addedState = "New State";
cout << "具体装饰对象A的操作 " << addedState << endl;
}
private:
string addedState;
};
/* 具体的装饰对象 */
class ConcreteDecoratorB : public Decorator
{
public:
/*
** 首先运行原Component的operation(),再执行本类的功能
** 如AddedBehavior(),相当于对原Component进行了修饰
*/
void operation()
{
mcomponet->operation();
cout << "具体装饰对象B的操作 ";
AddedBehavior();
}
void AddedBehavior()
{
cout << "ConcreteDecoratorB::AddedBehavior " << endl;
}
};
int main()
{
ConcreteComponet* com = new ConcreteComponet();
ConcreteDecoratorA* d1 = new ConcreteDecoratorA();
ConcreteDecoratorB* d2 = new ConcreteDecoratorB();
/*
** 装饰的方法是:首先用ConcreteComponet实例化com,然后用
** d1来包装com, 再用d2来包装d1,最终执行d2的operation()
*/
d1->setComponet(com);
d2->setComponet(d1);
d2->operation();
delete d2;
delete d1;
delete com;
}
装饰模式的应用实例
#include <iostream>
using namespace std;
/* Person类:对应ConcreteComponent */
class Person
{
public:
Person(){}
Person(string name):mname(name) {}
virtual void show()
{
cout << "装扮" << mname << endl;
}
private:
string mname;
};
/* Finery类:对应Decoator */
class Finery : public Person
{
public:
Finery() {}
void Decorate(Person* component)
{
mcomponent = component;
}
void show()
{
if (mcomponent != nullptr)
{
mcomponent->show();
}
}
protected:
/* 维护一个指向抽象构件Component对象的引用,在此例中指向具体构件 */
Person* mcomponent;
};
/* Finery类:对应Decoator */
class TShirts : public Finery
{
public:
void show()
{
cout << "大T恤 ";
mcomponent->show();
}
};
/* 具体服饰类:对应ConcreteDecoator */
class BigTrouser : public Finery
{
public:
void show()
{
cout << "哈伦裤 ";
mcomponent->show();
}
};
class Sneakers : public Finery
{
public:
void show()
{
cout << "破球鞋 ";
mcomponent->show();
}
};
class Suit : public Finery
{
public:
void show()
{
cout << "西装 ";
mcomponent->show();
}
};
class Tie : public Finery
{
public:
void show()
{
cout << "领带 ";
mcomponent->show();
}
};
class LeatherShoes : public Finery
{
public:
void show()
{
cout << "皮鞋 ";
mcomponent->show();
}
};
int main()
{
Person* person1 = new Person("person1");
/* 装饰过程 */
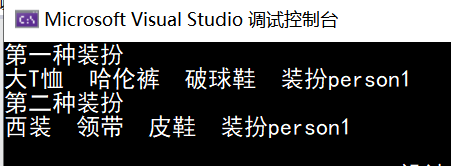
cout << "第一种装扮" << endl;
Sneakers* sn = new Sneakers();
BigTrouser* bi = new BigTrouser();
TShirts* ts = new TShirts();
sn->Decorate(person1);
bi->Decorate(sn);
ts->Decorate(bi);
ts->show();
/* 装饰过程 */
cout << "第二种装扮" << endl;
LeatherShoes* le = new LeatherShoes();
Tie* ti = new Tie();
Suit* su = new Suit();
le->Decorate(person1);
ti->Decorate(le);
su->Decorate(ti);
su->show();
}
装饰模式的适用场景
在以下情况下可以考虑使用装饰模式:
-
在不影响其他对象的情况下,以动态、透明的方式给单个对象添加职责。
-
当不能采用继承的方式对系统进行扩展或者采用继承不利于系统扩展和维护时可以使用装饰模式。不能采用继承的情况主要有两类:第一类是系统中存在大量独立的扩展,为支持每一种扩展或者扩展之间的组合将产生大量的子类,使得子类数目呈爆炸性增长;第二类是因为类已定义为不能被继承。
装饰模式的优缺点
装饰模式的主要优点如下:
- 对于扩展一个对象的功能,装饰模式比继承更加灵活性,不会导致类的个数急剧增加。
- 可以对一个对象进行多次装饰,通过使用不同的具体装饰类以及这些装饰类的排列组合,可以创造出很多不同行为的组合,得到功能更为强大的对象。
- 具体构件类与具体装饰类可以独立变化,用户可以根据需要增加新的具体构件类和具体装饰类,原有类库代码无须改变,符合“开闭原则”。
装饰模式的主要缺点如下:
- 使用装饰模式进行系统设计时将产生很多小对象,这些对象的区别在于它们之间相互连接的方式有所不同,而不是它们的类或者属性值有所不同,大量小对象的产生势必会占用更多的系统资源,在一定程序上影响程序的性能。
- 装饰模式提供了一种比继承更加灵活机动的解决方案,但同时也意味着比继承更加易于出错,排错也很困难,对于多次装饰的对象,调试时寻找错误可能需要逐级排查,较为繁琐。
参考:
刘伟《设计模式》
程杰《大话设计模式》

- C++设计模式之装饰(Decorator)模式
- Java开发中的23种设计模式详解----装饰模式(Decorator)
- c++设计模式----Decorator(装饰)
- C++模式设计:Decorator 装饰模式
- C++设计模式之九:Decorator(装饰)
- 设计模式c++实现(一):装饰(Decorator)模式
- 设计模式之装饰(Decorator)模式 代码详解
- C++设计模式之十四--Decorator装饰模式
- c++ 设计模式6 (Decorator 装饰模式)
- c++ 设计模式6 (Decorator 装饰模式)
- C++设计模式8--装饰模式(Decorator)--动态的增减功能
- C++设计模式之装饰模式(Decorator)
- 23种设计模式之装饰器模式(结构型,2 Decorator,c++实现)
- 设计模式C++描述----10.装饰(Decorator)模式
- C++设计模式<六>:Decorator装饰模式
- 设计模式C++描述----10.装饰(Decorator)模式
- Java设计模式之装饰模式原理与用法实例详解
- 设计模式之三:装饰模式(Decorator)
- 设计模式--装饰模式实现C++
- c++设计模式----装饰模式