kubeadm部署单Master节点K8S集群
2019-04-18 10:00
1311 查看
1 环境
| Host Name | Role | IP |
|---|---|---|
| master1 | master1 | 10.10.25.149 |
| node1 | node1 | 10.10.25.150 |
| node2 | node2 | 10.10.25.151 |
2 内核调优
vim /etc/sysctl.conf
net.ipv6.conf.all.disable_ipv6 = 1
net.ipv6.conf.default.disable_ipv6 = 1
net.ipv6.conf.lo.disable_ipv6 = 1

vm.swappiness = 0
net.ipv4.neigh.default.gc_stale_time=120
net.ipv4.ip_forward = 1

# see details in https://help.aliyun.com/knowledge_detail/39428.html
net.ipv4.conf.all.rp_filter=0
net.ipv4.conf.default.rp_filter=0
net.ipv4.conf.default.arp_announce = 2
net.ipv4.conf.lo.arp_announce=2
net.ipv4.conf.all.arp_announce=2

# see details in https://help.aliyun.com/knowledge_detail/41334.html
net.ipv4.tcp_max_tw_buckets = 5000
net.ipv4.tcp_syncookies = 1
net.ipv4.tcp_max_syn_backlog = 1024
net.ipv4.tcp_synack_retries = 2
kernel.sysrq = 1

net.bridge.bridge-nf-call-ip6tables = 1
net.bridge.bridge-nf-call-iptables = 1
net.bridge.bridge-nf-call-arptables = 1

modprobe br_netfilter
sysctl -p
3 设置文件最大描述符
echo "* soft nofile 65536" >> /etc/security/limits.conf
echo "* hard nofile 65536" >> /etc/security/limits.conf
echo "* soft nproc 65536"  >> /etc/security/limits.conf
echo "* hard nproc 65536"  >> /etc/security/limits.conf
echo "* soft  memlock  unlimited"  >> /etc/security/limits.conf
echo "* hard memlock  unlimited"  >> /etc/security/limits.conf
4 配置yum 源
cat <<EOF > /etc/yum.repos.d/kubernetes.repo
[kubernetes]
name=Kubernetes
baseurl=https://mirrors.aliyun.com/kubernetes/yum/repos/kubernetes-el7-x86_64/
enabled=1
gpgcheck=1
repo_gpgcheck=1
gpgkey=https://mirrors.aliyun.com/kubernetes/yum/doc/yum-key.gpg https://mirrors.aliyun.com/kubernetes/yum/doc/rpm-package-key.gpg
EOF

cd /etc/yum.repos.d
wget https://download.docker.com/linux/centos/docker-ce.repo
5 安装依赖和常用软件
yum install -y epel-release
yum install -y yum-utils device-mapper-persistent-data lvm2 net-tools conntrack-tools wget vim  ntpdate libseccomp libtool-ltdl lrzsz wget
6 时间同步
一个集群内的时间同步必不可少
systemctl enable ntpdate.service
echo '*/30 * * * * /usr/sbin/ntpdate time7.aliyun.com >/dev/null 2>&1' > /tmp/crontab2.tmp
crontab /tmp/crontab2.tmp
systemctl start ntpdate.service

ntpdate -u ntp.api.bz
7 关闭SELinux、防火墙
systemctl stop firewalld
systemctl disable firewalld
setenforce 0
sed -i "s/SELINUX=enforcing/SELINUX=disabled/g" /etc/selinux/config
8 关闭系统的Swap
swapoff -a
yes | cp /etc/fstab /etc/fstab_bak
cat /etc/fstab_bak |grep -v swap > /etc/fstab
9 安装docker
yum list docker-ce --showduplicates | sort -r
yum install docker-ce-<VERSION_STRING>

systemctl daemon-reload
systemctl enable docker
systemctl start docker
10 配置hosts 解析
127.0.0.1   localhost localhost.localdomain localhost4 localhost4.localdomain4
::1         localhost localhost.localdomain localhost6 localhost6.localdomain6
10.10.25.151 node2
10.10.25.149 master-1
10.10.25.150 node1
11 配置节点免密登录
ssh-keygen
ssh-copy-id -i ~/.ssh/id_rsa.pub  用户名字@192.168.x.xxx
12 配置ipvs模块
cat > /etc/sysconfig/modules/ipvs.modules <<EOF
#!/bin/bash
modprobe -- ip_vs
modprobe -- ip_vs_rr
modprobe -- ip_vs_wrr
modprobe -- ip_vs_sh
modprobe -- nf_conntrack_ipv4
EOF
chmod 755 /etc/sysconfig/modules/ipvs.modules && bash /etc/sysconfig/modules/ipvs.modules && lsmod | grep -e ip_vs -e nf_conntrack_ipv4

yum install ipset ipvsadm
13 master 和node 节点安装 kubelet kubeadm kubectl
yum install -y kubelet kubeadm kubectl  master
systemctl enable kubelet
暂不启动 kubelet
14 master节点进行集群初始化
kubeadm init --kubernetes-version=v1.14.1 --pod-network-cidr=10.244.0.0/16 --service-cidr=10.96.0.0/12
保存这段内容

mkdir -p $HOME/.kube
sudo cp -i /etc/kubernetes/admin.conf $HOME/.kube/config
sudo chown $(id -u):$(id -g) $HOME/.kube/config

You should now deploy a pod network to the cluster.
Run "kubectl apply -f [podnetwork].yaml" with one of the options listed at:
https://kubernetes.io/docs/concepts/cluster-administration/addons/

Then you can join any number of worker nodes by running the following on each as root:

kubeadm join 10.10.25.149:6443 --token r03k6k.rhc8lh0bhjzuz7vx \
--discovery-token-ca-cert-hash sha256:b6b354ce28904600e9e38b4803ca5834061f1ffce0cde08ab9fd002756fcfc14
15 创建相关文件夹
mkdir -p $HOME/.kube
cp -i /etc/kubernetes/admin.conf $HOME/.kube/config
16 初始化 flannel网络
kubectl apply -f https://raw.githubusercontent.com/coreos/flannel/master/Documentation/kube-flannel.yml
flannel 网络默认使用 vxlan 模式此外flannel 还有其他两种模式分别为 udp 模式和 host-gw 模式
flannel 模式介绍:
vxlan 模式: 属于隧道封装,豹纹会封装很多层增加了额外开销,vxlan 里面还有一种 "Directrouting": ture 模式效率相对很高
host-gw模式: 属于三层网络,采用的是将宿主机作为网关不进行封装传输,其效果还优于calico
udp模式: 是由于flannel网络出现的时候linux 内核还不支持,所以采用了udp方式,此种方式的效率比vxlan的但是还要更加的底所以无需考虑,这种模式也是造成业界任务flannel 网络效率底愿意之一

设计网络模式需要在部署k8s集群前规划好,以免中途改变费时费力
cd /etc/kubernetes/manifests
wget https://raw.githubusercontent.com/coreos/flannel/master/Documentation/kube-flannel.yml

vim kube-flannel.yml

修改网络模式 为host-gw模式

data:
cni-conf.json: |
{
"name": "cbr0",
"plugins": [
{
"type": "flannel",
"delegate": {
"hairpinMode": true,
"isDefaultGateway": true
}
},
{
"type": "portmap",
"capabilities": {
"portMappings": true
}
}
]
}
net-conf.json: |
{
"Network": "10.244.0.0/16",
"Backend": {
"Type": "host-gw"
}
}

kubectl apply -f kube-flannel.yml

查看路由信息是否已经改外host-gw
ip route show

default via 10.10.25.254 dev ens192 proto static metric 100
10.10.25.0/24 dev ens192 proto kernel scope link src 10.10.25.149 metric 100
10.244.0.0/24 dev cni0 proto kernel scope link src 10.244.0.1
10.244.1.0/24 via 10.10.25.151 dev ens192
10.244.2.0/24 via 10.10.25.150 dev ens192
172.17.0.0/16 dev docker0 proto kernel scope link src 172.17.0.1
17 拷贝kubelet 配置文件到node节点
scp /etc/sysconfig/kubelet  10.10.25.150:/etc/sysconfig/kubelet
scp /etc/sysconfig/kubelet  10.10.25.150:/etc/sysconfig/kubelet
18 将node节点加入到集群
在node节点运行以下命令
kubeadm join 10.10.25.149:6443 --token r03k6k.rhc8lh0bhjzuz7vx --discovery-token-ca-cert-hash sha256:b6b354ce28904600e9e38b4803ca5834061f1ffce0cde08ab9fd002756fcfc14
19 查看集群状态
kubectl get node
NAME       STATUS   ROLES    AGE    VERSION
master-1   Ready    master   109m   v1.14.1
node1      Ready    <none>   54m    v1.14.1
node2      Ready    <none>   54m    v1.14.1
20 查看kube-system 下的pod
kubectl get pod -n kube-system -o wide
因为使用kubeadm部署k8s集群默认pod组件pod运行在kebe-system命名空间内
21 启动ipvs
kube-proxy开启ipvs

修改ConfigMap的kube-system/kube-proxy中的config.conf,`mode: "ipvs"`:

kubectl edit cm kube-proxy -n kube-system
kubectl get pod -n kube-system | grep kube-proxy | awk '{system("kubectl delete pod "$1" -n kube-system")}'
22 创建一个测试pod 验证集群
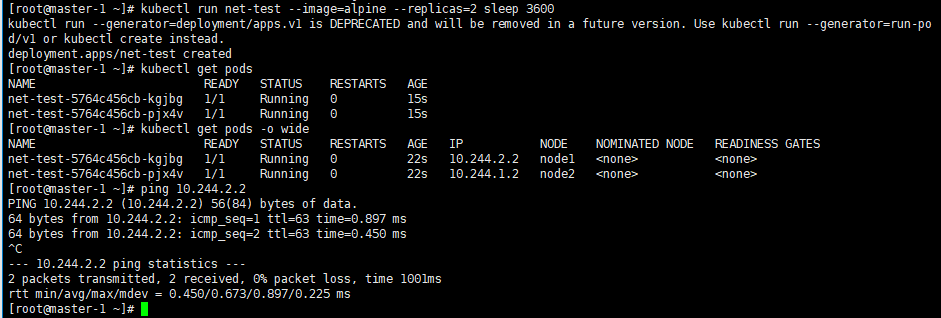
kubectl run net-test --image=alpine --replicas=2 sleep 3600
23 查看网卡信息
ifconfig

相关文章推荐
- Kubeadm部署基于Calico K8s集群
- Kubernetes学习之路(一)之Kubeadm部署K8S集群
- 使用kubeadm部署k8s集群03-扩容kube-apiserver到3节点
- 使用kubeadm部署k8s集群06-扩容kube-controller-manager到3节点
- 使用kubeadm部署k8s集群07-扩容kube-scheduler到3节点
- kubeadm部署k8s1.9高可用集群--4部署master节点
- Kubernetes(k8s)集群部署(k8s企业级Docker容器集群管理)系列之部署master/node节点组件(四)
- kubeadm部署1.11.1的k8s集群
- storm1.x支持主节点nimbus高可用 多master集群部署
- 搭建单节点(一个master和一个minion、k8s集群)多pod实验环境
- K8S部署--kubeadm
- 直播 | 准生产级的集群部署工具kubeadm原理解析
- kubeadm 生成的token过期后,集群增加节点
- kubeadm部署kubernetes 1.13.1集群
- Hadoop集群Master节点部署方案