SpringBoot2.x整合Swagger2
2019-04-06 18:08
931 查看
版权声明:本文为博主原创文章,遵循 CC 4.0 by-sa 版权协议,转载请附上原文出处链接和本声明。
本文链接:https://blog.csdn.net/l_learning/article/details/89058561
最好的API是使用Swagger工具构建的
Springfox参考文档
pom.xml中添加Swagger2坐标
<!-- swagger2配置 -->
<dependency>
<groupId>io.springfox</groupId>
<artifactId>springfox-swagger2</artifactId>
<version>2.7.0</version>
</dependency>

<dependency>
<groupId>io.springfox</groupId>
<artifactId>springfox-swagger-ui</artifactId>
<version>2.7.0</version>
</dependency>
新建Swagger2配置类
@EnableSwagger2
@Configuration
public class Swagger2Config {

//是否开启swagger
@Value(value = "${swagger.enabled}")
Boolean swaggerEnabled;

//过滤Swagger响应的API
@Bean
public Docket createRestApi() {
return new Docket(DocumentationType.SWAGGER_2)
.apiInfo(apiInfo())
.select()
.apis(RequestHandlerSelectors.basePackage("com.micro.user.controller"))
.paths(PathSelectors.any())
.build();
}

//自定义信息
private ApiInfo apiInfo() {
return new ApiInfoBuilder()
//标题
.title("Spring Boot 测试使用 Swagger2 构建RESTful API")
//创建人
//.contact(new Contact("xxx", "http://www.baidu.com", ""))
//版本号
.version("1.0")
//描述
.description("API 描述")
.build();
}

}
Controller层添加Swagger2文档注解
@RestController
@Api("用户接口")
public class UserController {
@Autowired
private UserInfoMapper userInfoMapper;
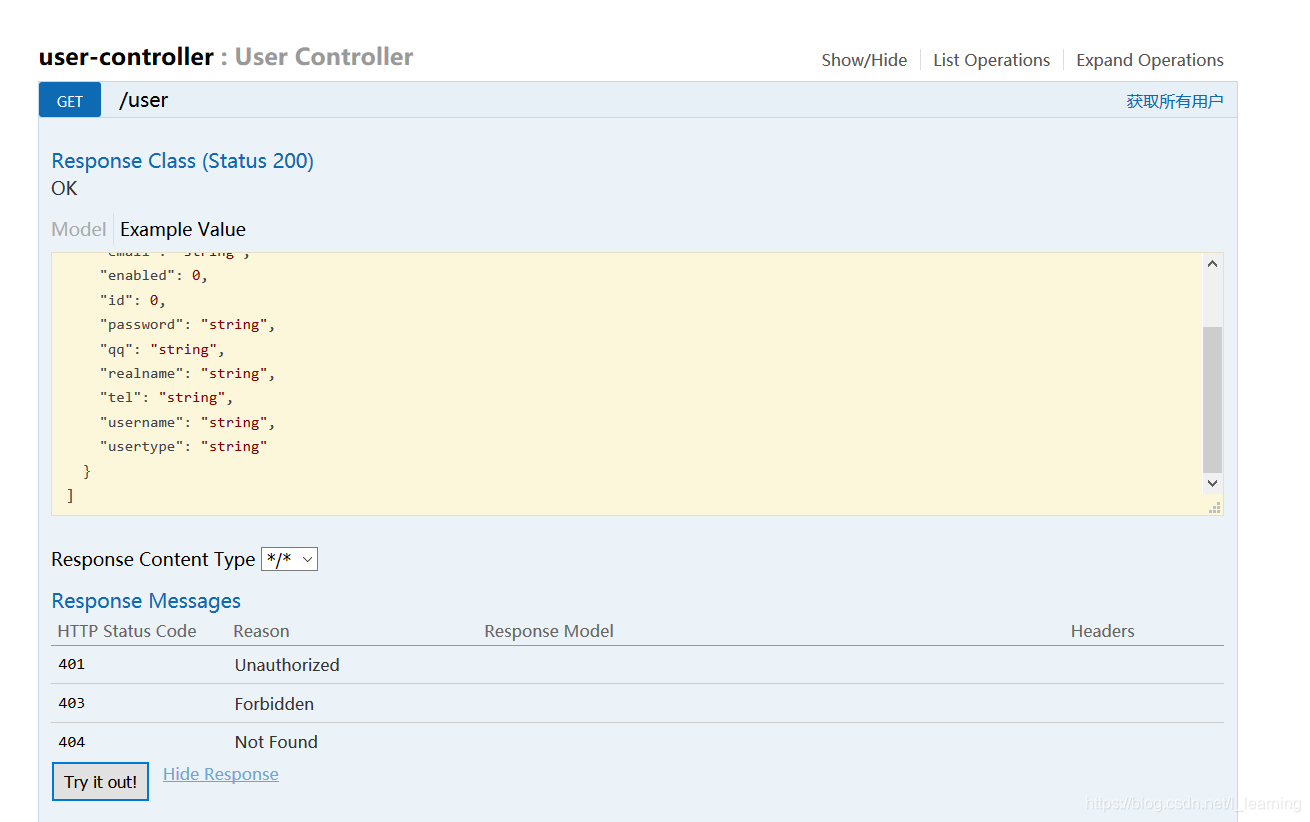
@ApiOperation("获取所有用户")
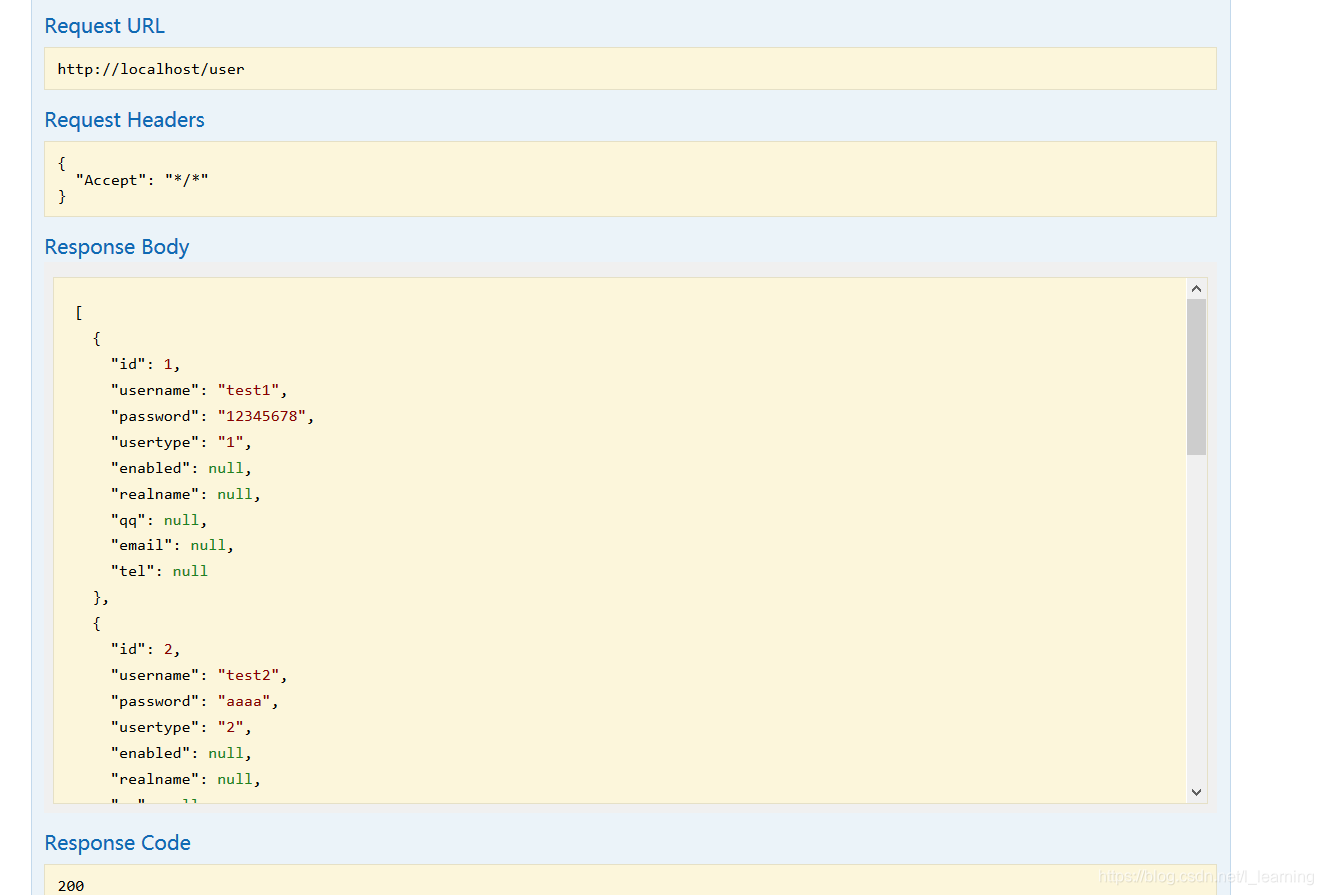
@GetMapping("/user")
@ResponseBody
public List<UserInfo> getUser(){
return userInfoMapper.selectAll();
}
}
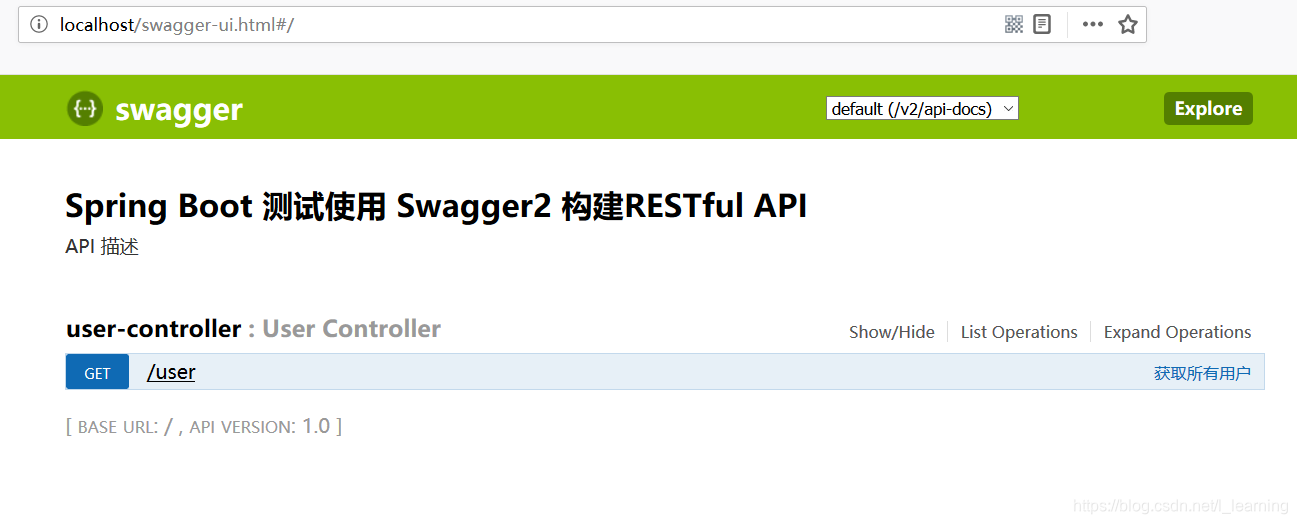
启动项目,打开网址

相关文章推荐
- 二、SpringBoot 整合 swagger2 (swagger2 版本 2.8.0)
- Swagger(一) SpringBoot整合Swagger2简单的例子
- SpringBoot2.X整合Shiro
- Springboot 2.X与redis整合
- Netty4.x整合SpringBoot2.x使用Protobuf3详解
- Swagger(一) SpringBoot整合Swagger2简单的例子
- spring boot整合引入swagger2
- Springboot整合swagger2进行接口管理
- SpringBoot(七):SpringBoot整合Swagger2
- spring boot 整合Swagger2
- SpringBoot整合Swagger2
- spring boot 整合swagger2 实现动态生成接口文档
- SpringBoot整合Swagger2,再也不用维护接口文档了!
- SpringBoot整合Swagger2
- spring boot整合Swagger2的示例代码
- springBoot 整合 swagger2 构建RESTful API文档
- springboot整合swagger2企业项目搭建
- Springboot2.x整合shrio进行简单的登录、登出与角色鉴权
- Springboot整合swagger2项目的部署问题
- SpringBoot2.0 整合 Swagger2 ,构建接口管理界面