SpringBoot注解与启动与配置文件介绍(2)
1:@SpringBootApplication
主要由下面的三个注解构成:
@SpringBootConfiguration :本质就是一个
@Configuration,代表是spring容器的主配置类;
@EnableAutoConfiguration:开启自动配置,springboot
使用这个标签自动的把内置的符合条件的@configuration类
加载进入应用。
@ComponentScan:自动扫描,扫描该包以及子包。
2:SpringApplication.run(Boot01Application.class, args);
这个是springboot为我们提供的最大的区别,在于springboot不再是一个
web应用,不需要自己打包,部署,启动tomcat;
springboot默认吧tomcat打包到应用中,我们可以以正常的运行jar的方式来运行springboot应用。
注解 作用类型 解释
@NotNull 任何类型 属性不能为null
@NotEmpty 集合 集合不能为null,且size大于0
@NotBlanck 字符串、字符 字符类不能为null,且去掉空格之后长度大于0
@AssertTrue Boolean、boolean 布尔属性必须是true
@Min 数字类型(原子和包装) 限定数字的最小值(整型)
@Max 同@Min 限定数字的最大值(整型)
@DecimalMin 同@Min 限定数字的最小值(字符串,可以是小数)
@DecimalMax 同@Min 限定数字的最大值(字符串,可以是小数)
@Range 数字类型(原子和包装) 限定数字范围(长整型)
@Length 字符串 限定字符串长度
@Size 集合 限定集合大小
@Past 时间、日期 必须是一个过去的时间或日期
@Future 时期、时间 必须是一个未来的时间或日期
@Email 字符串 必须是一个邮箱格式
@Pattern 字符串、字符 正则匹配字符串
tomcat插件启动项目
上面我们使用SpringApplocation.run();可以启动一个项目。
添加插件
<build>
<plugins>
<plugin>
<groupId>org.springframework.boot</groupId>
<artifactId>spring-boot-maven-plugin</artifactId>
</plugin>
</plugins>
</build>
在创建的项目当中,pom.xml文件中会带的有一个tomcat插件,我们还可
以通过该插件启动项目。
找到 Spring-boot:run 文件

jar启动项目

然后cmd命令 打开启动SpringBoot

配置文件
application.properties里配置端口号

在xxxx.yml文件

注意在(.yml)有空格 没有空格不然不会生效

多环境配置 自定义application -xxx .properties 同过application.properties里写入激活配置文件选用
//激活哪个配置文件 的
//application-aaa.properties
spring.profiles.active=aaa

自定义配置文件
先自定义配置

@value 用于逐个读取自定义配置
获取 自定义
package com.xxx.controller;
import org.springframework.beans.factory.annotation.Value;
import org.springframework.stereotype.Controller;
import org.springframework.web.bind.annotation.RequestMapping;
import org.springframework.web.bind.annotation.ResponseBody;
/**
* Created by Administrator on 2019\3\8 0008.
*/
@Controller
public class CoigController {
// value 读取的是application 的键
@Value("${boot.name}")
// 读到值注入变量里
private String name;
@Value("${boot.add}")
private String add;
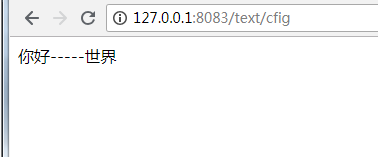
@RequestMapping("/text/cfig")
public @ResponseBody String cfig(){
return name+"-----"+add;
}
}
这样就获取到了
@ConfigurationProperties(prefix = “boot”)
banner.txt文件设置用于整个文件映射成一个对象
package com.xxx.pojo;

import org.springframework.boot.context.properties.ConfigurationProperties;

/**
* Created by Administrator on 2019\3\8 0008.
*/
//变成Spring的主键 才能用
@Component
//指定剑的前缀
@ConfigurationProperties(prefix = "boot")
public class Config {
//把值映射进来
private String name;

private  String add;

public String getName() {
return name;
}

public void setName(String name) {
this.name = name;
}

public String getAdd() {
return add;
}

public void setAdd(String add) {
this.add = add;
}
}
测试
package com.xxx.controller;

import com.xxx.pojo.Config;
import org.springframework.beans.factory.annotation.Autowired;
import org.springframework.beans.factory.annotation.Value;
import org.springframework.stereotype.Controller;
import org.springframework.web.bind.annotation.RequestMapping;
import org.springframework.web.bind.annotation.ResponseBody;

/**
* Created by Administrator on 2019\3\8 0008.
*/
@Controller
public class CoigController {
@Autowired
private Config config;

@RequestMapping("cfig")
@ResponseBody
public  String cfig(){

return config.getName()+"------"+config.getAdd();
}
}

banner.txt 配置 在控制输出自定义的图标


来banner.txt都准备好了 粘上就能使
////////////////////////////////////////////////////////////////////
//                          _ooOoo_                               //
//                         o8888888o                              //
//                         88" . "88                              //
//                         (| ^_^ |)                              //
//                         O\  =  /O                              //
//                      ____/`---'\____                           //
//                    .'  \\|     |//  `.                         //
//                   /  \\|||  :  |||//  \                        //
//                  /  _||||| -:- |||||-  \                       //
//                  |   | \\\  -  /// |   |                       //
//                  | \_|  ''\---/''  |   |                       //
//                  \  .-\__  `-`  ___/-. /                       //
//                ___`. .'  /--.--\  `. . ___                     //
//              ."" '<  `.___\_<|>_/___.'  >'"".                  //
//            | | :  `- \`.;`\ _ /`;.`/ - ` : | |                 //
//            \  \ `-.   \_ __\ /__ _/   .-` /  /                 //
//      ========`-.____`-.___\_____/___.-`____.-'========         //
//                           `=---='                              //
//      ^^^^^^^^^^^^^^^^^^^^^^^^^^^^^^^^^^^^^^^^^^^^^^^^^^        //
//            佛祖保佑       永不宕机      永无BUG                  //
////////////////////////////////////////////////////////////////////
1默认从application.properties文件中加载配置。
2资源文件(application.properties) 加载的顺序(1—>4:高—>低)
(1)当前项目/config子目录;
(2)当前项目下、
(3)classpath下的/config子目录;
(4)classpath下、
如果在上面的目录中出现相同的配置,按照最高级的覆盖低级的,如果配置不相同,则补充配置文件。

- Spring Boot 使用@ConfigurationProperties注解获取配置文件中的值
- SpringBoot配置Bean的两种方式--注解以及配置文件
- springboot(一)启动和配置文件的读取
- Springboot指定配置文件profile启动
- SpringBoot学习_yaml介绍和yaml配置文件值获取
- springboot项目使用@Value注解获取配置文件中的配置信息
- Spring Boot 配置文件介绍
- spring 注解与配置文件启动配置使用原理
- SpringBoot之Mybatis篇(注解&配置文件)(MVC版)
- spring boot:使用@ConfigurationProperties注解加载配置文件
- Springboot 项目pom.xml 配置文件以及启动类的一些配置
- SpringBoot系列三:SpringBoot基本概念(统一父 pom 管理、SpringBoot 代码测试、启动注解分析、配置访问路径、使用内置对象、项目打包发布)
- spring boot 入门学习(二)配置文件注解
- Spring Boot 2.0.0.M3使用案例,案例配置,常用命令,注解介绍,热部署
- spring-boot使用注解获取配置文件中的值
- springboot 修改启动时默认加载application.properties文件以及加载指定配置文件
- 【笔记】 Spring Boot [ 3 ] 之命令行启动方式和激活不同的配置文件
- spring boot启动时加载外部配置文件的方法
- SpringBoot 使用注解将配置文件自动映射到属性和实体类
- SpringBoot基础教程1-1-2 配置文件介绍