阿里云ECS上单机配置多例主从mongoDB部署方案
参考:https://www.geek-share.com/detail/2747741876.html
安装过程参考:https://blog.csdn.net/ashuntel/article/details/86648607
一、单机多实例搭建复制集
单机多实例只需要一台虚拟机,通过复制配置文件使用不同端口来实现。
本机centOs 7
以默认方式装好mongodB之后,配置文件在/etc/mongod.conf
我准备安装到/opt下,创建数据库,创建logs文件
cd /opt
mkdir mongo
cd mongo
创建文件夹分别存储数据,日志以及配置文件
mkdir db_master
mkdir db_slaver1
mkdir db_slaver2
mkdir logs
mkdir config
复制mongod.conf文件
cp /etc/mongod.conf  /opt/mongo/mongod1.conf
cp /etc/mongod.conf  /opt/mongo/mongod2.conf
cp /etc/mongod.conf  /opt/mongo/mongod3.conf
修改配置文件
vim /opt/mongo/mongod1.conf
systemLog:
destination: file
logAppend: true
path: /opt/mongo/logs/mongod1.log #日志文件存放目录
storage:
dbPath: /opt/mongo/db_master #数据文件存放目录
journal:
enabled: true

# how the process runs
processManagement:
fork: true  # fork and run in background
pidFilePath: /opt/mongo/logs/slaver1.pid  # location of pidfile

# network interfaces
net:
port: 27000
bindIp: 0.0.0.0
同理修改mongod2.conf和mongod3.conf,主要是路径和端口,端口不可重复
systemLog:
destination: file
logAppend: true
path: /opt/mongo/logs/mongod2.log #日志文件存放目录
storage:
dbPath: /opt/mongo/db_slaver1 #数据文件存放目录
journal:
enabled: true

# how the process runs
processManagement:
fork: true  # fork and run in background
pidFilePath: /opt/mongo/logs/mongod2.pid  # location of pidfile

# network interfaces
net:
port: 27001
bindIp: 0.0.0.0
启动mongodb
mongod -f /opt/mongo/mongod1.conf //启动服务
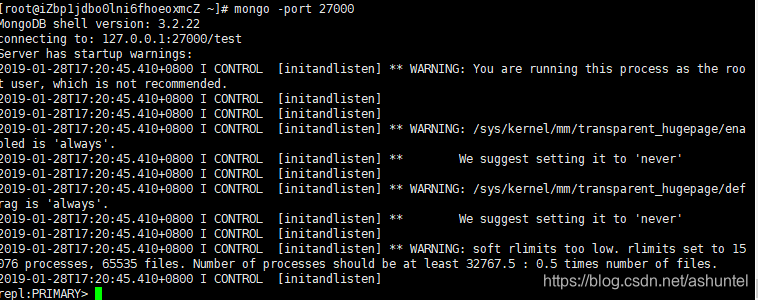
mongo --port 27000 //使用该端口号进行登录
设置为主
rs.initiate({_id:“repl”,members:[{_id:1,host:‘192.168.60.135:27000’}]})
使用rs.status()进行查看
rs.add(‘192.168.60.135:27001’)
rs.status() //查看
rs.add(‘192.168.60.135:27002’)
rs.status() //查看
设置账户密码
创建admin数据库
use admin
1.添加管理员用户
db.createUser({user:"admin",pwd:"123456",roles:["root"]})
认证
db.auth(“admin”, “123456”) #(用户名,密码)
- 以授权的方式启动Mongo,给使用的数据库添加用户
use test
2.创建用户
db.createUser(
2ad60
{user: "root", pwd: "123456", roles: [{ role: "dbOwner", db: "test" }]})
创建数据库 参考:
ps://blog.csdn.net/u014756827/article/details/78677311
2.创建数据库,需要插入至少一条数据才会显示,
use tt
show dbs 没有
这样就创建了一个数据库,如果什么都不操作离开的话,这个库就会被系统删除.所以我们还要执行下面的命令:
db.usr.insert({‘name’:‘tompig’});
db.usr.insert({‘name’:‘tompig1’,‘id’:1});
show dbs 出现了usr

- 阿里云ECS服务器Linux环境下配置php服务器(三)--项目部署篇
- MongoDB单机, 主从, 分布式部署
- 阿里云ECS centos7配置jdk-tomcat-mysql 并部署javaweb项目
- MySQL互为主从数据库配置方案
- 阿里云ECS部署hadoop
- 阿里云服务器Linux CentOS安装配置(五)jetty配置、部署
- 从零开始部署Node.js服务至阿里云ECS服务器并实现外网IP访问
- Linux下Mongodb的主从配置
- 阿里云ECS服务器初始化配置更新
- MongoDB_3.2.7 主从部署
- 阿里云ECS部署Grafana接入zabbix
- 阿里云服务器 ECS Ubuntu系统下PHP,MYSQL,APACHE2的安装配置
- 阿里云服务器部署方案(nginx+tomcat+mysql)
- 单机版的Mysql主从数据库配置
- 阿里云服务器 ECS Ubuntu系统安装配置
- MongoDB实战系列之三:MongoDB的主从部署
- 阿里云Ubuntu部署java web(1) - 系统配置
- 阿里云服务器ECS配置过程
- 阿里云(ECS)Linux服务器,以及LAMP环境配置笔记
- MySQL主从复制配置-windows单机环境