开源的物联网技术平台thingsboard安装测试及使用步骤
1.安装Java1.8
2.安装Maven
3.安装node js
4.安装git
5.安装npm依赖 以管理员权限运行cmd,然后分别执行如下命令:
npm install -g cross-env
npm install -g webpack
6.安装IDEA
IntelliJ IDEA :http://www.jetbrains.com/idea/download/download-thanks.html?platform=windowsZip
7.安装postgreSQL数据库
下载地址:https://get.enterprisedb.com/postgresql/postgresql-9.4.19-2-windows.exe
Postgresql数据库安装过程,请将用户postgres的密码设置成 postgres。方便后续操作。
Postgresql数据库安装完成后,创建数据库thingsboard,所有者为postgres,然后用数据库工具(我用的是Navicat Premium 12)分别运行D:\thingsboard-develop-1.5\dao\src\main\resources\sql目录下schema-entities.sql、schema-ts.sql、 system-data.sql
8.下载thingsboard源码
https://github.com/thingsboard/thingsboard
9.编译源码
mvn clean install -DskipTests
如下则代表编译成功:
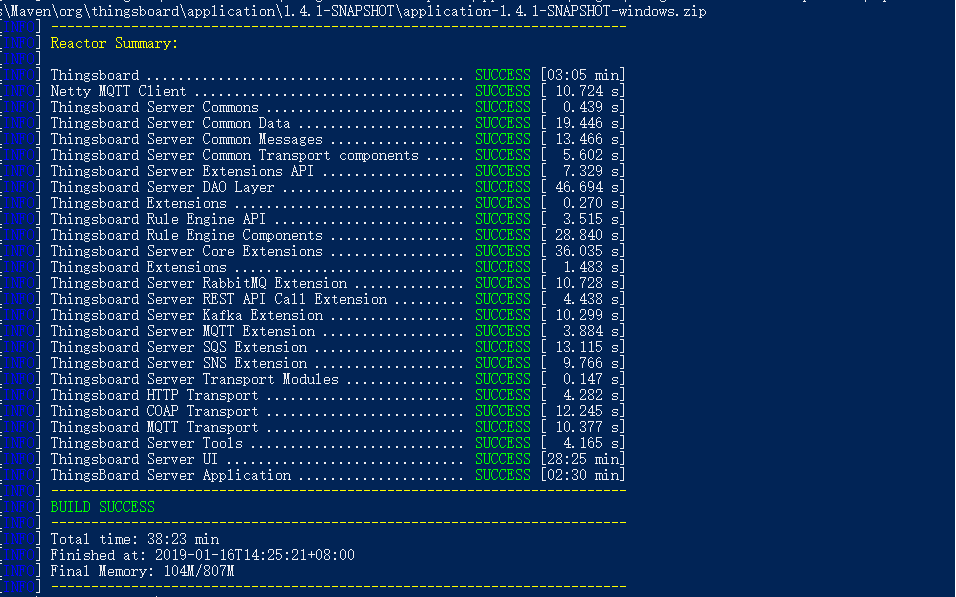
如果一次不成功则多试几次。
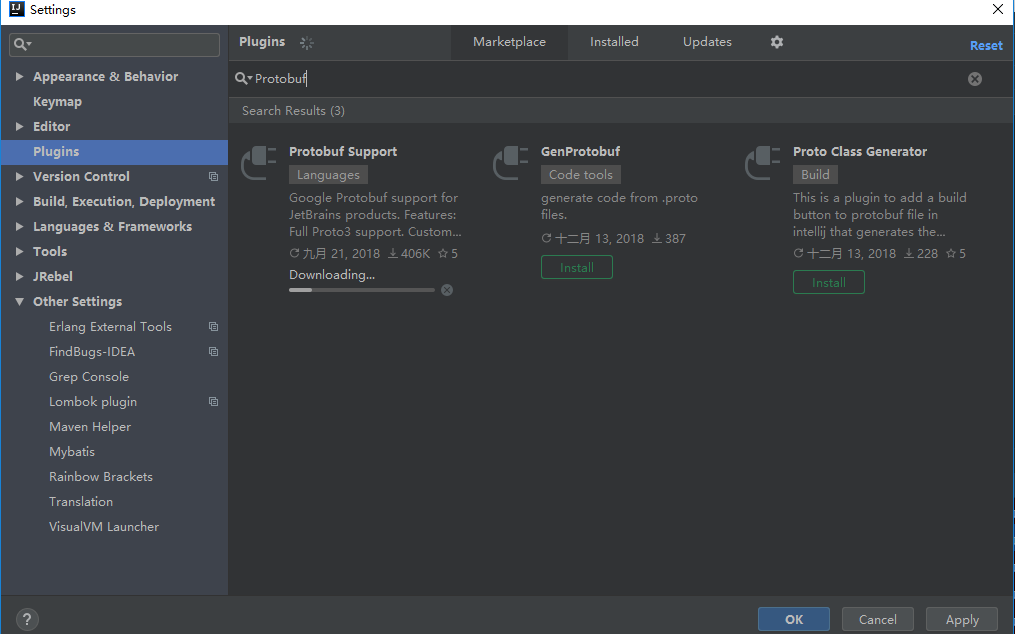
10.导入IDEA,运行 ThingsboardServerApplication
需要安装的插件:IntelliJ Lombok plugin, Protobuf Support
11.API测试工具安装及需要的测试文件 (win10下Ubuntu)
ubuntu:win10应用商店 Ubuntu 18.04 LTS

测试coap协议:安装coap-cli
sudo npm install coap-cli -g
测试脚本:coap-js.sh
# Set ThingsBoard host to "demo.thingsboard.io" or "localhost"
THINGSBOARD_HOST="localhost"
# Replace YOUR_ACCESS_TOKEN with one from Device details panel.
ACCESS_TOKEN="i5OqJGOWWV6vWku8v25B"
# Publish serial number and firmware version attributes
cat attributes-data.json | coap post coap://$THINGSBOARD_HOST/api/v1/$ACCESS_TOKEN/attributes
# Publish timeseries data as an object without timestamp (server-side timestamp will be used)
cat telemetry-data.json | coap post coap://$THINGSBOARD_HOST/api/v1/$ACCESS_TOKEN/telemetry
测试http协议:安装cURL
sudo apt-get update
sudo apt install curl
测试脚本:curl.sh
# Set ThingsBoard host to "demo.thingsboard.io" or "localhost"
THINGSBOARD_HOST="localhost"
# Set ThingsBoard port to 80 or 8080
THINGSBOARD_PORT=8080
# Replace YOUR_ACCESS_TOKEN with one from Device details panel.
ACCESS_TOKEN="i5OqJGOWWV6vWku8v25B"

# Publish serial number and firmware version attributes
# replace $THINGSBOARD_PORT with 8080 (in case of local installation) or 80 (in case of live-demo).
curl -v -X POST -d @attributes-data.json http://$THINGSBOARD_HOST:$THINGSBOARD_PORT/api/v1/$ACCESS_TOKEN/attributes --header "Content-Type:application/json"
# Publish timeseries data as an object without timestamp (server-side timestamp will be used)
# replace $THINGSBOARD_PORT with 8080 (in case of local installation) or 80 (in case of live-demo).
curl -v -X POST -d @telemetry-data.json http://$THINGSBOARD_HOST:$THINGSBOARD_PORT/api/v1/$ACCESS_TOKEN/telemetry --header "Content-Type:application/json"
测试mqtt协议:安装mqtt
npm install mqtt -g
测试脚本:mqtt-js.sh
#!/bin/sh

# Set ThingsBoard host to "demo.thingsboard.io" or "localhost"
export THINGSBOARD_HOST="localhost"

# Replace YOUR_ACCESS_TOKEN with one from Device details panel.
export ACCESS_TOKEN="i5OqJGOWWV6vWku8v25B"

# Read serial number and firmware version attributes
ATTRIBUTES=$( cat attributes-data.json )
export ATTRIBUTES

# Read timeseries data as an object without timestamp (server-side timestamp will be used)
TELEMETRY=$( cat telemetry-data.json )
export TELEMETRY

# publish attributes and telemetry data via mqtt client
node publish.js
测试mqtt协议:安装mosquitto
测试脚本:mosquitto.sh
resources/mosquitto.shCopy resources/mosquitto.sh to clipboard
#!/bin/sh

# Set ThingsBoard host to "demo.thingsboard.io" or "localhost"
THINGSBOARD_HOST="localhost"
# Replace YOUR_ACCESS_TOKEN with one from Device details panel.
ACCESS_TOKEN="i5OqJGOWWV6vWku8v25B"
# Publish serial number and firmware version attributes
mosquitto_pub -d -h "$THINGSBOARD_HOST" -t "v1/devices/me/attributes" -u "$ACCESS_TOKEN" -f "attributes-data.json"
# Publish timeseries data as an object without timestamp (server-side timestamp will be used)
mosquitto_pub -d -h "$THINGSBOARD_HOST" -t "v1/devices/me/telemetry" -u "$ACCESS_TOKEN" -f "telemetry-data.json"
测试脚本:attributes-data.json
{"firmware_version":"1.0.1", "serial_number":"SN-001"}
测试脚本:telemetry-data.json
{"temperature":21, "humidity":55.0, "active": false}
测试脚本:publish.js
var mqtt = require('mqtt');

console.log('Connecting to: %s using access token: %s', process.env.THINGSBOARD_HOST, process.env.ACCESS_TOKEN);

var client  = mqtt.connect('mqtt://'+ process.env.THINGSBOARD_HOST,{
username: process.env.ACCESS_TOKEN
});

client.on('connect', function () {
console.log('Client connected!');
client.publish('v1/devices/me/attributes', process.env.ATTRIBUTES);
console.log('Attributes published!');
client.publish('v1/devices/me/telemetry', process.env.TELEMETRY);
console.log('Telemetry published!');
client.end();
});
测试方法:
1.运行ubuntu terminal
2.新建thingsboads文件夹
mkdir thingsboard
3.将上述测试脚本添加到thingsboard文件加下
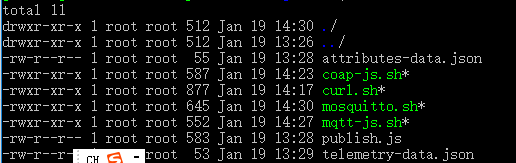
4.配置.sh文件可执行权限
chmod +x *.sh
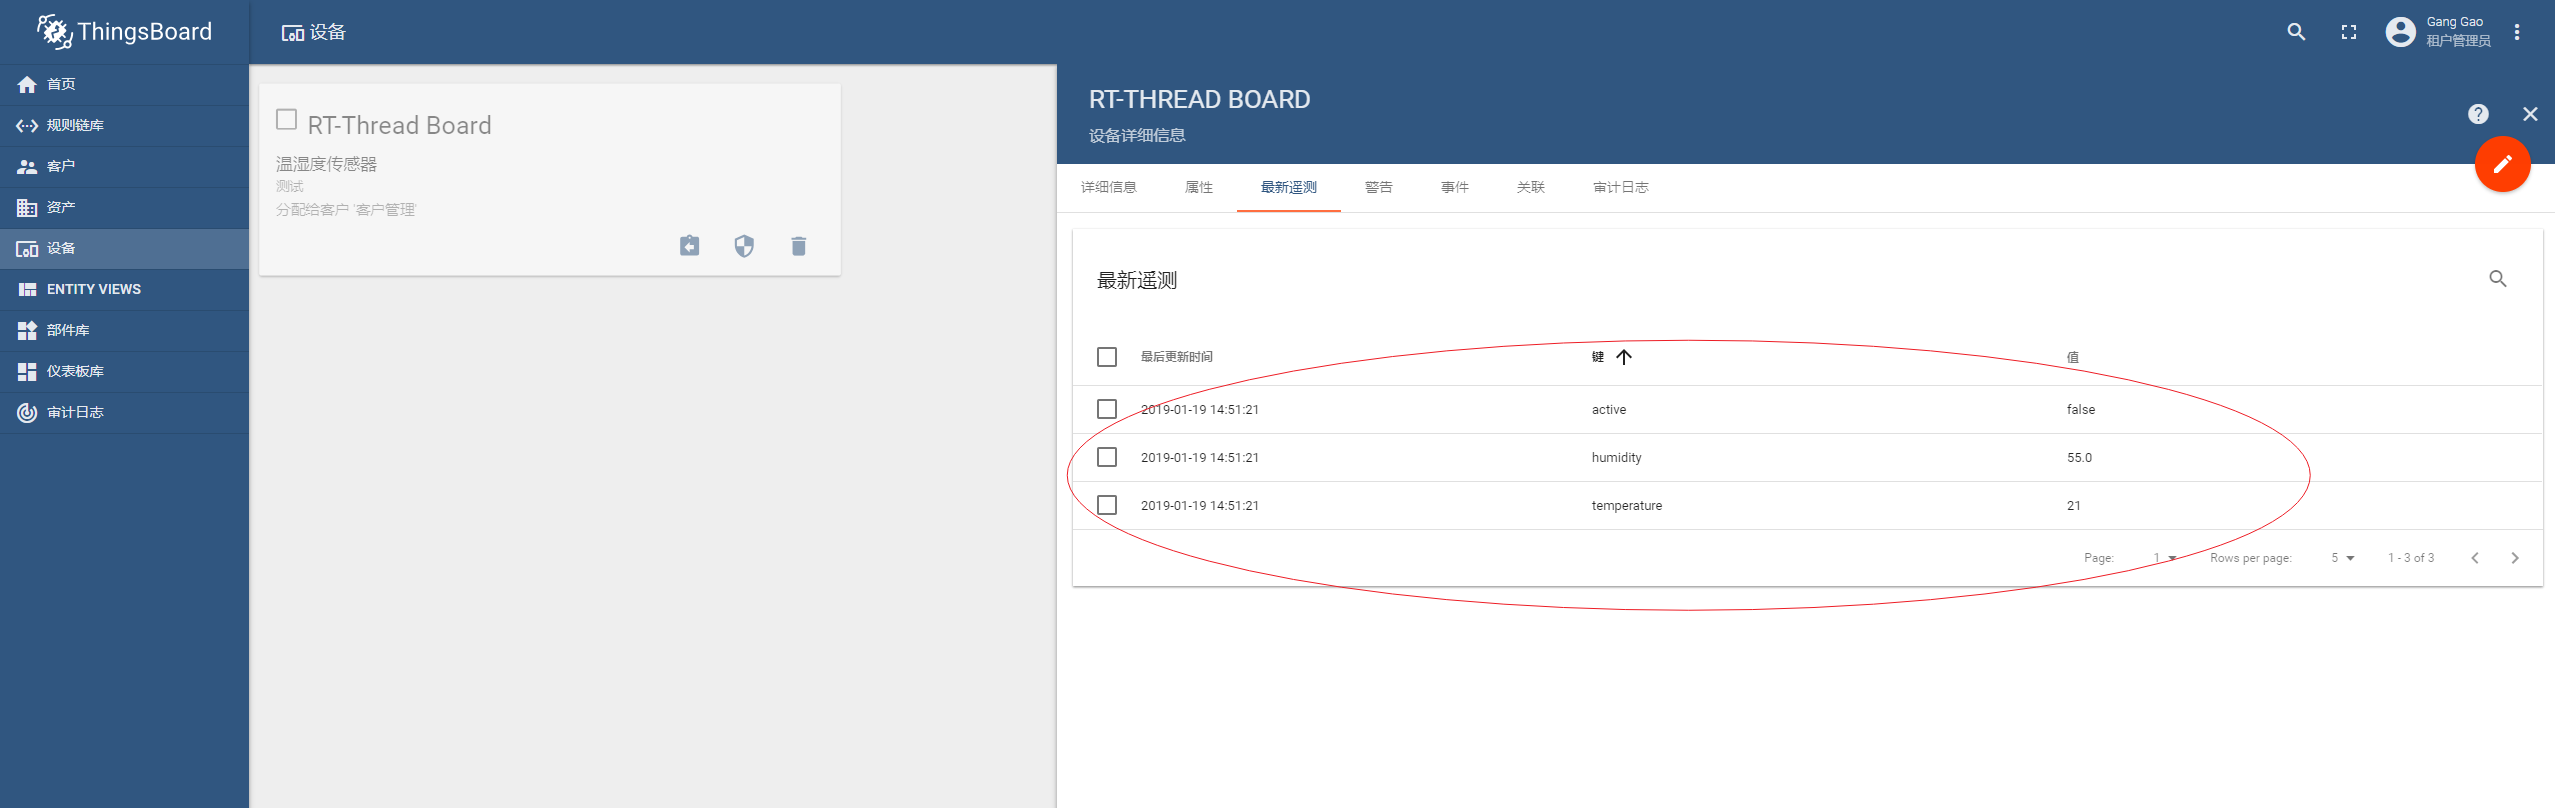
5.执行测试,比如测试coap协议上传
./coap-js.sh
返回成功标识 如下:

服务器接收到消息:
详细测试步骤,请参见官方文档:https://thingsboard.io/docs/getting-started-guides/helloworld/
12.官方文档
https://thingsboard.io/docs/getting-started-guides/helloworld/
https://thingsboard.io/docs/api/

- svn实战-基于windows平台下SVN的安装与使用详细步骤
- 前端接口自动化测试工具-DOClever(免费开源的接口管理平台)使用介绍
- LINUX开源监控平台Nagios(插件的安装和使用)
- svn实战-基于windows平台下SVN的安装与使用详细步骤
- svn实战-基于windows平台下SVN的安装与使用详细步骤
- 小米随身wifi win8.1驱动安装步骤 小米随身wifi win8.1使用测试详细介绍
- ios测试基础二:mac 安装并使用git下载代码步骤
- 使用DOClever接口管理平台,使用免费开源版本线下(linux(mac))该怎么安装部署?
- linux环境下安装nginx步骤(centos平台),并使用Nginx转发
- 使用DOClever接口管理平台,使用免费开源版本线下(windows环境)该怎么安装部署?
- LINUX开源监控平台Nagios(插件的安装和使用)
- bugfree测试软件平台安装与使用
- 第4代白盒测试方法实践之“使用VcTester构造持续集成及每日构建平台”
- Windows平台下GeoServer、uDig的安装和使用
- 使用开源的Profiler来测试你的Java应用程序的性能
- 安装 NIST net 的步骤及使用(nistnet-2.0.12b针对linux-2.4.20-8)on RedHat9.0
- Google Protocol Buffers之Visual Studio 2005安装配置及其测试步骤[基于C++]
- 使用开源Grid平台-GridGain实现网格计算
- sipp 在windows/linux下的安装和使用及性能测试
- BugFree在Windows平台上面的安装步骤