MySQL高可用架构-MMM安装教程
2018-11-01 13:18
645 查看
安装指南:
一、架构以及服务器信息
 基本安装包含至少2个数据库服务器和1个监视服务器。本例中使用2个监视服务器和5个数据库服务器(服务器系统为CentOS 7)
| 用途 | IP | 主机名 | Server-id |
| MMM-Monitor01 | 192.168.0.30 | mon01 | - |
| MMM-Monitor02 | 192.168.0.31 | mon02 | - |
| Master01 | 192.168.0.1 | db1 | 1 |
| Master02 | 192.168.0.2 | db2 | 2 |
| Slave01 | 192.168.0.11 | db3 | 11 |
| Slave02 | 192.168.0.12 | db4 | 12 |
| Slave03 | 192.168.0.13 | db5 | 13 |
我使用了以下虚拟IP。它们将由MMM分发给主机。
| IP | 角色 | 描述 |
| 192.168.0.100 | writer | 应用程序应连接到此IP以进行写入查询 |
| 192.168.0.101 | reader | 应用程序应连接到这两个IP之一以进行读取查询 |
| 192.168.0.102 | reader |
二、配置服务器上的MySQL
首先我们在所有的数据库服务器上安装MySQL。 配置YUM源:echo '''[mysql-release-$basearch] name = Percona-Release YUM repository - $basearch baseurl = https://mirror.tuna.tsinghua.edu.cn/mysql/yum/mysql57-community-el7/ gpgcheck=0''' > /etc/yum.repos.d/mysql.repo安装MySQL:
yum -y install mysql mysql-server然后我们编辑配置文件/etc/mysql/my.cnf并添加以下行 - 确保为所有主机使用不同的服务器ID:
[client]
default-character-set = utf8mb4

[mysql]
default-character-set = utf8mb4

[mysqld]
basedir=/var/lib/mysql
datadir=/var/lib/mysql
socket=/var/lib/mysql/mysql.sock
pid-file=/var/run/mysqld/mysqld.pid

# Disabling symbolic-links is recommended to prevent assorted security risks
symbolic-links=0

default-storage-engine = InnoDB

########basic settings########
#服务器ID,不能重复
server-id = 1
character_set_server=utf8mb4
skip_name_resolve = 1
max_connections = 1000
#MySQL读入缓冲区的大小
read_buffer_size = 16M
#MySQL的随机读缓冲区大小
read_rnd_buffer_size = 8M
#MySQL的顺序读缓冲区大小
sort_buffer_size = 8M

####innodb配置#################
innodb_buffer_pool_size=2G
innodb_log_file_size=256M
innodb_flush_method=O_DIRECT
#innodb独享表空间,优点很多,缺点会导致单个表文件过大
innodb_file_per_table = 1
# 从库需要加上只读选项,主库不需要此选项,另外super和replica权限的用户不受只读选项的影响。
#read_only=1

########log settings########
log_error = /var/log/mysql/error.log
#开启慢查询日志
slow_query_log = 1
#超出次设定值的SQL即被记录到慢查询日志
long_query_time = 5
slow_query_log_file = /var/log/mysql/slow.log
#表示记录下没有使用索引的查询
log_queries_not_using_indexes = 1
#记录管理语句
log_slow_admin_statements = 1
#开启复制从库复制的慢查询的日志
log_slow_slave_statements = 1
#设置每分钟增长的没有使用索引查询的日志数量
log_throttle_queries_not_using_indexes = 10
expire_logs_days = 90
min_examined_row_limit = 100

log-bin = mysql-bin
log-bin-index = mysql-bin.index
max-binlog-size = 100M
# binlog-do-db = test
# binlog-ignore-db = mysql
sync-binlog = 1
relay-log = mysql-relay
relay-log-index = mysql-relay.index
log-slave-updates = 1
# replicate-do-db = test
# replicate-ignore-db = mysql
#设置为主节点人数
auto_increment_increment = 2
#在每台服务器上设置为唯一的递增数字,小于auto_increment_increment(两台就是1,2)
auto_increment_offset = 1
最后启动MySQL:
systemctl enable mysql
#此处需要先创建mysql的日志文件夹
mkdir /var/log/mysql && chown -R mysql.mysql /var/log/mysqls
systemctl start mysql
查看MySQL的日志,可以看到如下信息:
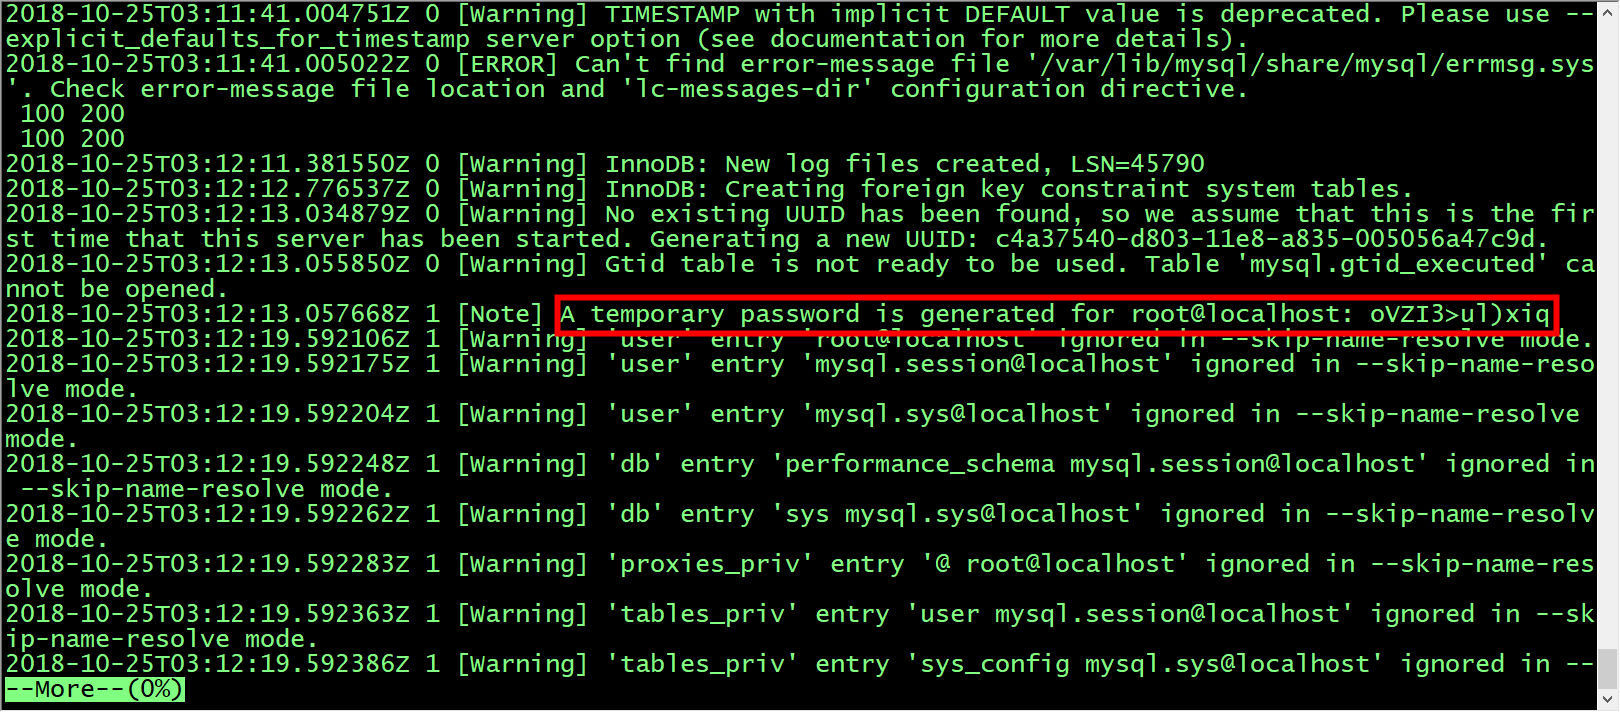 图中红色框内为mysql生成的临时密码,登陆mysql并修改密码:
mysql -uroot -p<password>
> set password for 'root'@'localhost'=password('123456')
其他db服务器按照同样步骤配置。
创建用户:
| 用途 | 描述 | 权限 |
| monitor user | mmm监视器使用它来检查MySQL服务器的运行状况 | REPLICATION CLIENT |
| agent user | mmm代理用于更改只读模式,复制主机等 | SUPER, REPLICATION CLIENT, PROCESS |
| replication user | 用于复制 | REPLICATION SLAVE |
> GRANT REPLICATION CLIENT                 ON *.* TO 'mmm_monitor'@'192.168.0.%' IDENTIFIED BY 'monitor_password';
> GRANT SUPER, REPLICATION CLIENT, PROCESS ON *.* TO 'mmm_agent'@'192.168.0.%'   IDENTIFIED BY 'agent_password';
> GRANT REPLICATION SLAVE                  ON *.* TO 'replication'@'192.168.0.%' IDENTIFIED BY 'replication_password';
注意:对于允许用户连接的主机会更加严格:mmm_monitor用于192.168.0.30/31。mmm_agent和replication用于192.168.0.1 - 192.168.0.20。 注意:不要用超过32个字符的replication_password
三、db之间的数据同步配置
配置同步的准备工作
我假设db1包含正确的数据。如果你有一个空数据库,你仍然需要同步我们刚刚创建的帐户。 首先确保在创建备份时没有人在改变数据。> FLUSH TABLES WITH READ LOCK;然后获取二进制日志中的当前位置。当我们在db2,db3,db4和db5上设置复制时,将需要这个值。
> SHOW MASTER STATUS;
+------------------+----------+--------------+------------------+
| File             | Position | Binlog_Do_DB | Binlog_Ignore_DB |
+------------------+----------+--------------+------------------+
| mysql-bin.000006 |      567 |              |                  |
+------------------+----------+--------------+------------------+
1 row in set (0.00 sec)
不要关闭这个mysql-shell。如果关闭它,将会删除数据库锁,不能保证数据库没有用户写入。 再打开第二个控制台并键入:
mysqldump -u root -p --all-databases> /tmp/database-backup.sql现在我们可以删除数据库锁。转到第一个shell:
> UNLOCK TABLES;将数据库备份复制到db2,db3,db4和db5:
scp /tmp/database-backup.sql <user> @ 192.168.0.2:/tmp
scp /tmp/database-backup.sql <user> @ 192.168.0.11:/tmp
scp /tmp/database-backup.sql <user> @ 192.168.0.12:/tmp
scp /tmp/database-backup.sql <user> @ 192.168.0.13:/tmp
然后将其导入db2,db3,db4和db5:
mysql -u root -p < /tmp/database-backup.sql
mysql -u root -p < /tmp/database-backup.sql
mysql -u root -p < /tmp/database-backup.sql
mysql -u root -p < /tmp/database-backup.sql
然后刷新db2,db3,db4和db5上的权限。我们更改了用户表,而mysql必须重新读取此表。
flush privileges;
flush privileges;
flush privileges;
flush privileges;
两个数据库现在都包含相同的数据。我们现在可以设置复制以保持这种方式。 注意:导入只是从转储文件中添加记录。你应该在导入转储文件之前删除所有数据库。
安装复制
使用以下命令在db2,db3,db4和db5上配置复制:> CHANGE MASTER TO master_host ='192.168.0.1',master_port = 3306,master_user ='replication', master_password ='replication_password',master_log_file ='<file>',master_log_pos = <position>; > CHANGE MASTER TO master_host ='192.168.0.1',master_port = 3306,master_user ='replication', master_password ='replication_password',master_log_file ='<file>',master_log_pos = <position>; > CHANGE MASTER TO master_host ='192.168.0.1',master_port = 3306,master_user ='replication', master_password ='replication_password',master_log_file ='<file>',master_log_pos = <position>; > CHANGE MASTER TO master_host ='192.168.0.1',master_port = 3306,master_user ='replication', master_password ='replication_password',master_log_file ='<file>',master_log_pos = <position>;请在db1“show master status”查看<file>和<position>。 在所有4台主机上启动slave-process:
> START SLAVE;
> START SLAVE;
> START SLAVE;
> START SLAVE;
现在检查复制是否在所有主机上正确运行:
> SHOW SLAVE STATUS\G
*************************** 1. row ***************************
Slave_IO_State: Waiting for master to send event
Master_Host: 192.168.0.1
Master_User: replication
Master_Port: 3306
Connect_Retry: 60
…
> SHOW SLAVE STATUS\G
*************************** 1. row ***************************
Slave_IO_State: Waiting for master to send event
Master_Host: 192.168.0.1
Master_User: replication
Master_Port: 3306
Connect_Retry: 60
…
> SHOW SLAVE STATUS\G
*************************** 1. row ***************************
Slave_IO_State: Waiting for master to send event
Master_Host: 192.168.0.1
Master_User: replication
Master_Port: 3306
Connect_Retry: 60
…
> SHOW SLAVE STATUS\G
*************************** 1. row ***************************
Slave_IO_State: Waiting for master to send event
Master_Host: 192.168.0.1
Master_User: replication
Master_Port: 3306
Connect_Retry: 60
…
现在我们需要配置db1为db2的从服务器,也就是主主之间的复制 在db2上执行如下命令:
> SHOW MASTER STATUS;
+------------------+----------+--------------+------------------+
| File             | Position | Binlog_Do_DB | Binlog_Ignore_DB |
+------------------+----------+--------------+------------------+
| mysql-bin.000003 |      189 |              |                  |
+------------------+----------+--------------+------------------+
1 row in set (0.00 sec)
现在我们可以使用下面的命令来配置db1的slave进程:
> CHANGE MASTER TO master_host = '192.168.0.2', master_port=3306, master_user='replication',
master_password='replication_password', master_log_file='<file>', master_log_pos=<position>;
启动db1上的从属进程:
> START SLAVE;现在检查复制是否在db1上正确运行:
SHOW SLAVE STATUS\G
*************************** 1. row ***************************
Slave_IO_State: Waiting for master to send event
Master_Host: 192.168.0.2
Master_User: <replication>
Master_Port: 3306
Connect_Retry: 60
…
现在应该完成节点之间的复制。通过在db1和db2中插入一些数据来检查它,并检查数据是否会出现在所有其他节点上。
四、安装MMM
创建用户
创建将成为MMM脚本和配置文件所有者的用户。这将提供一种更安全地管理监视器脚本的方法。useradd --comment “MMM Script owner” --shell / sbin / nologin mmmd
监控主机
yum install mysql-mmm mysql-mmm-agent mysql-mmm-tools mysql-mmm-monitor -y
数据库主机
yum install -y mysql-mmm-agent
配置MMM
所有通用配置选项都分组在一个名为/etc/mysql-mmm/mmm_common.conf的单独文件中。该文件在系统中的所有主机上都是相同的:active_master_role writer <host default> cluster_interface eno16777984 pid_path /run/mysql-mmm-agent.pid bin_path /usr/libexec/mysql-mmm/ replication_user replication replication_password replication_password agent_user mmm_agent agent_password agent_password </host> <host db1> ip 192.168.0.1 mode master peer db2 </host> <host db2> ip 192.168.0.2 mode master peer db1 </host> <host db3> ip 192.168.0.11 mode slave </host> <host db4> ip 192.168.0.12 mode slave </host> <host db5> ip 192.168.0.13 mode slave </host> <role writer> hosts db1, db2 ips 192.168.0.100 mode exclusive </role> <role reader> hosts db3, db4, db5 ips 192.168.0.101,192.168.0.102 mode balanced </role>不要忘记将此文件复制到所有其他主机(包括监控主机)。 在数据库主机上,我们需要编辑/etc/mysql-mmm/mmm_agent.conf。在其他主机上相应地更改“db1”:
include mmm_common.conf
this db1
在监视器主机上(两台,同样的配置,ip需要修改为主机对应地址),我们需要编辑/etc/mysql-mmm/mmm_mon.conf:
include mmm_common.conf

<monitor>
ip                  192.168.0.30
pid_path            /run/mysql-mmm-monitor.pid
bin_path            /usr/libexec/mysql-mmm
status_path         /var/lib/mysql-mmm/mmm_mond.status
ping_ips            192.168.0.254, 192.168.0.1, 192.168.0.2, 192.168.0.11, 192.168.0.12, 192.168.0.13
auto_set_online     10

# The kill_host_bin does not exist by default, though the monitor will
# throw a warning about it missing.  See the section 5.10 "Kill Host
# Functionality" in the PDF documentation.
#
# kill_host_bin     /usr/libexec/mysql-mmm/monitor/kill_host
#
</monitor>

<host default>
monitor_user        mmm_monitor
monitor_password    monitor_password
</host>

debug 0
ping_ips是一些被ping的ips,用于确定监视器的网络连接是否正常。我使用了交换机地址(192.168.0.254)和四个数据库服务器。
启动MMM
启动agent
systemctl enable mysql-mmm-agent
systemctl start mysql-mmm-agent
启动monitor
systemctl enable mysql-mmm-monitor
systemctl start mysql-mmm-monitor
等待几秒钟让mmmd_mon启动。几秒钟后,您可以使用mmm_control检查集群的状态:
$ mmm_control show
db1(192.168.0.1) master/AWAITING_RECOVERY. Roles:
db2(192.168.0.2) master/AWAITING_RECOVERY. Roles:
db3(192.168.0.11) slave/AWAITING_RECOVERY. Roles:
db4(192.168.0.12) slave/AWAITING_RECOVERY. Roles:
db4(192.168.0.13) slave/AWAITING_RECOVERY. Roles:
因为它是第一次启动,监视器不知道我们的主机,所以它将所有主机设置为AWAITING_RECOVERY状态并记录一条警告消息:
$ tail /var/log/mysql-mmm/mmm_mon.warn
…
0000/10/28 23:15:28  WARN Detected new host 'db1': Setting its initial state to 'AWAITING_RECOVERY'. Use 'mmm_control set_online db1' to switch it online.
0000/10/28 23:15:28  WARN Detected new host 'db2': Setting its initial state to 'AWAITING_RECOVERY'. Use 'mmm_control set_online db2' to switch it online.
0000/10/28 23:15:28  WARN Detected new host 'db3': Setting its initial state to 'AWAITING_RECOVERY'. Use 'mmm_control set_online db3' to switch it online.
0000/10/28 23:15:28  WARN Detected new host 'db4': Setting its initial state to 'AWAITING_RECOVERY'. Use 'mmm_control set_online db4' to switch it online.
0000/10/28 23:15:28  WARN Detected new host 'db5': Setting its initial state to 'AWAITING_RECOVERY'. Use 'mmm_control set_online db5' to switch it online.
由于我们配置文件中setonline的时间设置为10s,等待10s或者手动online:
$ mmm_control set_online db1
OK: State of 'db1' changed to ONLINE. Now you can wait some time and check its new roles!
$ mmm_control set_online db2
OK: State of 'db2' changed to ONLINE. Now you can wait some time and check its new roles!
$ mmm_control set_online db3
OK: State of 'db3' changed to ONLINE. Now you can wait some time and check its new roles!
$ mmm_control set_online db4
OK: State of 'db4' changed to ONLINE. Now you can wait some time and check its new roles!
$ mmm_control set_online db5
OK: State of 'db5' changed to ONLINE. Now you can wait some time and check its new roles!
OK,现在整个集群已经配置完毕,但是还是存在一个问题,mmm的monitor节点目前只有一个,那么就存在单点故障,如何处理这个问题那,这就是我们第二个monitor节点的用途了。 方案罗列如下: 1、使用keepalived进行monitor高可用的保障。 2、现在使用的方案,自己编写脚本监控节点状态,脚本如下:
cat /opt/scripts/mysql-mmm-backup.sh
#!/bin/bash

remote_port_status=`nc -z -w 5 192.168.0.1 9988;echo $?`
local_mmm_svc_status=`systemctl status mysql-mmm-monitor.service | grep Active | awk -F '[(,)]' '{print $2}'`

if [ $remote_port_status -eq 0 ];then
echo "远端服务正常!"
if [ $local_mmm_svc_status = 'running' ];then
echo "本地服务需要关闭!"
systemctl stop mysql-mmm-monitor.service
echo "远端服务器Mysql-mmm-monitor服务恢复,关闭备用服务!" | mail -s 'Mysql-mmm' admin@local.com
fi
else
echo "远端服务异常!"
if [ $local_mmm_svc_status = 'dead' ];then
echo "本地服务需要开启!"
systemctl start mysql-mmm-monitor.service
echo "远端服务器Mysql-mmm-monitor服务异常,启动备用服务!" | mail -s 'Mysql-mmm' admin@local.com
fi
fi

#配置cron任务
vim /etc/crontab
*/1 * * * * root for i in {1..59};do /opt/scripts/mysql-mmm-backup.sh;sleep 1; done >> /opt/scripts/mysql-mmm-backup.log
注:MMM安装借鉴文章http://mysql-mmm.org/mmm2:guide
注:本作品采用知识共享署名-非商业性使用-相同方式共享 4.0 国际许可协议进行许可。

相关文章推荐
- MySQL 高可用架构之MMM
- 分布式架构高可用架构篇_06_MySQL源码编译安装(CentOS-6.7+MySQL-5.6)
- MySQL 高可用架构之MMM
- MySQL高可用MMM方案安装部署分享
- 【MySQL运维】MySQL双主高可用架构之MMM实战 推荐
- 高可用架构篇 MySQL源码编译安装(CentOS-6.6+MySQL-5.6)
- 64位Win7下安装mysql教程(原创亲测可用)
- 分布式架构高可用架构篇_06_MySQL源码编译安装(CentOS-6.7+MySQL-5.6)
- MySQL 5.6通过MMM实现读写分离的高可用架构
- MySQL 高可用架构之MMM
- 详解MySQL高可用MMM搭建方案及架构原理
- mysql-mmm高可用架构
- 高可用架构篇 MySQL源码编译安装(CentOS-6.6+MySQL-5.6)
- MySQL 高可用MMM架构及部署
- MySQL 高可用架构之MMM
- 高可用架构篇 MySQL源码编译安装(CentOS-6.6+MySQL-5.6)
- [MySQL] 高可用架构MMM简单介绍
- MySQL 高可用架构之MMM
- mysql5.6基于主从复制的mmm高可用架构详解
- MySQL 高可用架构之MMM