springboot 中事件监听模式的一种实现
2018-10-15 23:41
861 查看
前言: 事件监听模式是一种常用的设计模式,在springboot 中我们如何实现呢?
首先我们要理解事件监听中需要的几个角色

我们访问接口
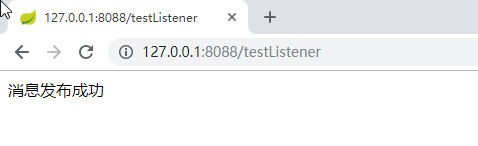
三个监听者都得到了消息。。
首先我们要理解事件监听中需要的几个角色
- 事件发布者 (即事件源)
- 事件监听者
- 事件本身
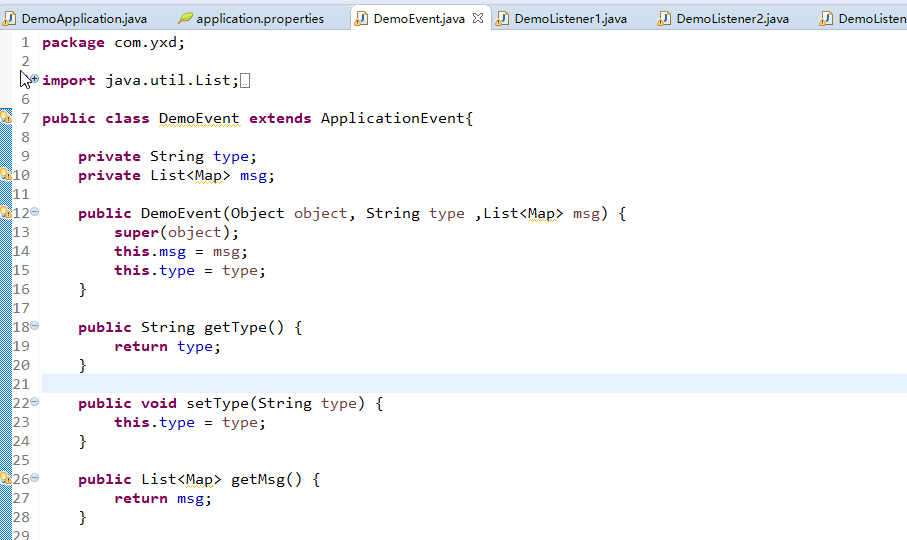
定义事件本身
事件本身需要继承ApplicationEventpackage com.yxd;
import java.util.List;
import java.util.Map;
import org.springframework.context.ApplicationEvent;
public class DemoEvent extends ApplicationEvent{
private String type;
private List<Map> msg;
public DemoEvent(Object object, String type ,List<Map> msg) {
super(object);
this.msg = msg;
this.type = type;
}
public String getType() {
return type;
}
public void setType(String type) {
this.type = type;
}
public List<Map> getMsg() {
return msg;
}
public void setMsg(List<Map> msg) {
this.msg = msg;
}
}
如图:
定义事件源
事件源需要注入 ApplicationContextpackage com.yxd;
import java.util.List;
import java.util.Map;
import org.springframework.beans.factory.annotation.Autowired;
import org.springframework.context.ApplicationContext;
import org.springframework.stereotype.Component;
@Component
public class DemoPublisher {
@Autowired
ApplicationContext applicationContext;
public void publish(String type , List<Map> msg) {
applicationContext.publishEvent(new DemoEvent(this,type, msg ));
}
}
如图:
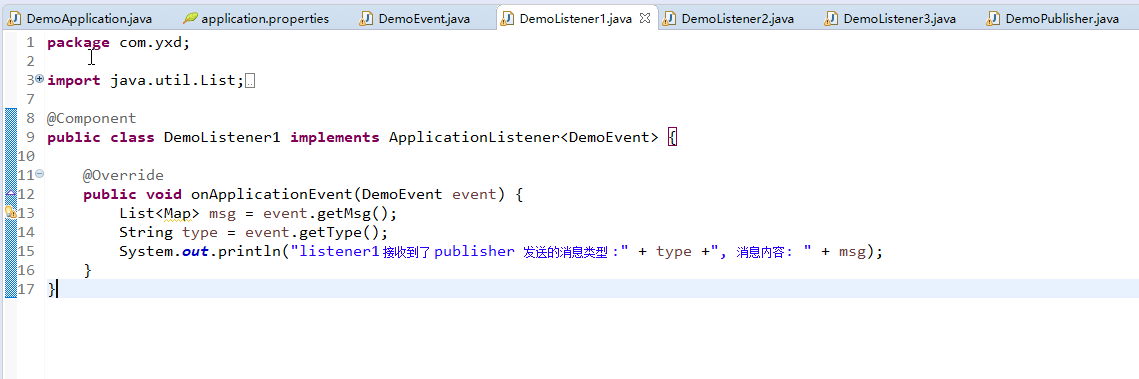
定义监听者
监听者需要实现 ApplicationListenerpackage com.yxd;
import java.util.List;
import java.util.Map;
import org.springframework.context.ApplicationListener;
import org.springframework.stereotype.Component;
@Component
public class DemoListener1 implements ApplicationListener<DemoEvent> {
@Override
public void onApplicationEvent(DemoEvent event) {
List<Map> msg = event.getMsg();
String type = event.getType();
System.out.println("listener1 接收到了 publisher 发送的消息类型 :" + type +", 消息内容: " + msg);
}
}
如图:
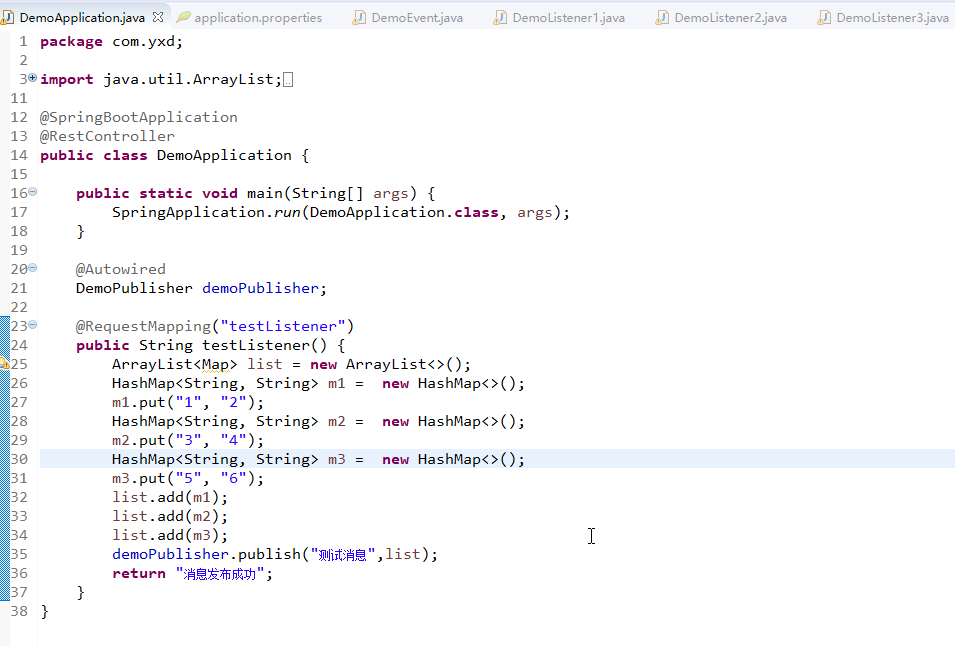
测试
package com.yxd;

import java.util.ArrayList;
import java.util.HashMap;
import java.util.Map;
import org.springframework.beans.factory.annotation.Autowired;
import org.springframework.boot.SpringApplication;
import org.springframework.boot.autoconfigure.SpringBootApplication;
import org.springframework.web.bind.annotation.RequestMapping;
import org.springframework.web.bind.annotation.RestController;

@SpringBootApplication
@RestController
public class DemoApplication {

public static void main(String[] args) {
SpringApplication.run(DemoApplication.class, args);
}

@Autowired
DemoPublisher demoPublisher;

@RequestMapping("testListener")
public String testListener() {
ArrayList<Map> list = new ArrayList<>();
HashMap<String, String> m1 =  new HashMap<>();
m1.put("1", "2");
HashMap<String, String> m2 =  new HashMap<>();
m2.put("3", "4");
HashMap<String, String> m3 =  new HashMap<>();
m3.put("5", "6");
list.add(m1);
list.add(m2);
list.add(m3);
demoPublisher.publish("测试消息",list);
return "消息发布成功";
}
}
如图:
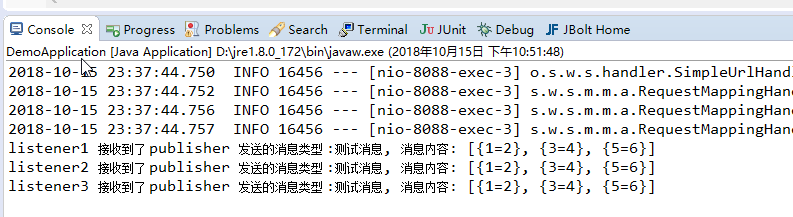
我们访问接口
三个监听者都得到了消息。。
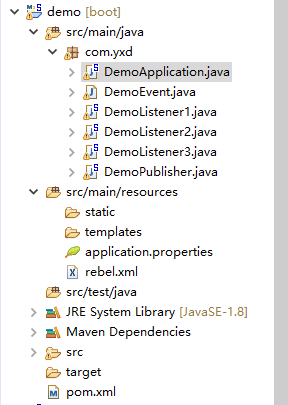
项目结构

相关文章推荐
- Java基于Spring Boot、RabbitMQ实现事件驱动模式
- Spinner实现下来菜单以及监听事件(图文模式)
- 设计模式学习----观察者模式(事件监听实现)
- springboot学习----事件监听
- spring 注解实现事件监听
- springboot入门--springboot集成redis实现消息发布订阅模式
- 利用接口实现自定义监听事件以及观察者模式
- java事件监听机制,spring中的event listener模式和解耦
- Spring Boot实现一个监听用户请求的拦截器
- Spring 中的事件监听的实现
- 微信公众平台开发模式,成为开发者,实现自动回复和用户的关注事件的监听
- spring boot实战(第二篇)事件监听
- spring boot实战(第三篇)事件监听源码分析
- Spring 中的事件监听的实现
- (转)spring boot实战(第三篇)事件监听源码分析
- 2.1、Spring Web MVC是什么 Spring Web MVC是一种基于Java的实现了Web MVC设计模式的请求驱动类型的轻量级Web框架,即使用了MVC架构模式的思想,将web层进行职
- Security-OAuth2 密码模式之服务器实现(工具IDEA+Maven+springboot)
- SpringBoot事件监听
- rabbitMq与spring boot搭配实现监听
- Unity3d基于订阅者模式实现事件机制_解决装箱拆箱问题和注册的监听事件单一问题