零配置简单搭建SpringMVC 项目
SpringMVC是比较常用的JavaWeb框架,非常轻便强悍,能简化Web开发,大大提高开发效率,在各种Web程序中广泛应用。本文采用Java Config的方式搭建SpringMVC项目,并对SpringMVC启动时加载顺序做简单的说明。
1、SpringMVC启动流程图

2、SpringMVC项目启动流程介绍
SpringMVC 是Spring 框架的重要模块,借助于Spring 的容器技术,可以非常方面的搭建Web项目。
SpringMVC项目启动时要完成Spring 容器的初始化和SpringMVC配置的初始化。
2.1 Spring容器的初始化:
1、项目中需要配置ContextLoadListener监听器,它会监听项目的启动,在项目启动时调用容器初始化方法完成Spring容器的初始化
如果采用XML配置,通常需要在web.xml文件里面添加如下配置:
<listener>
<listener-class>org.springframework.web.context.ContextLoaderListener</listener-class>
</listener>
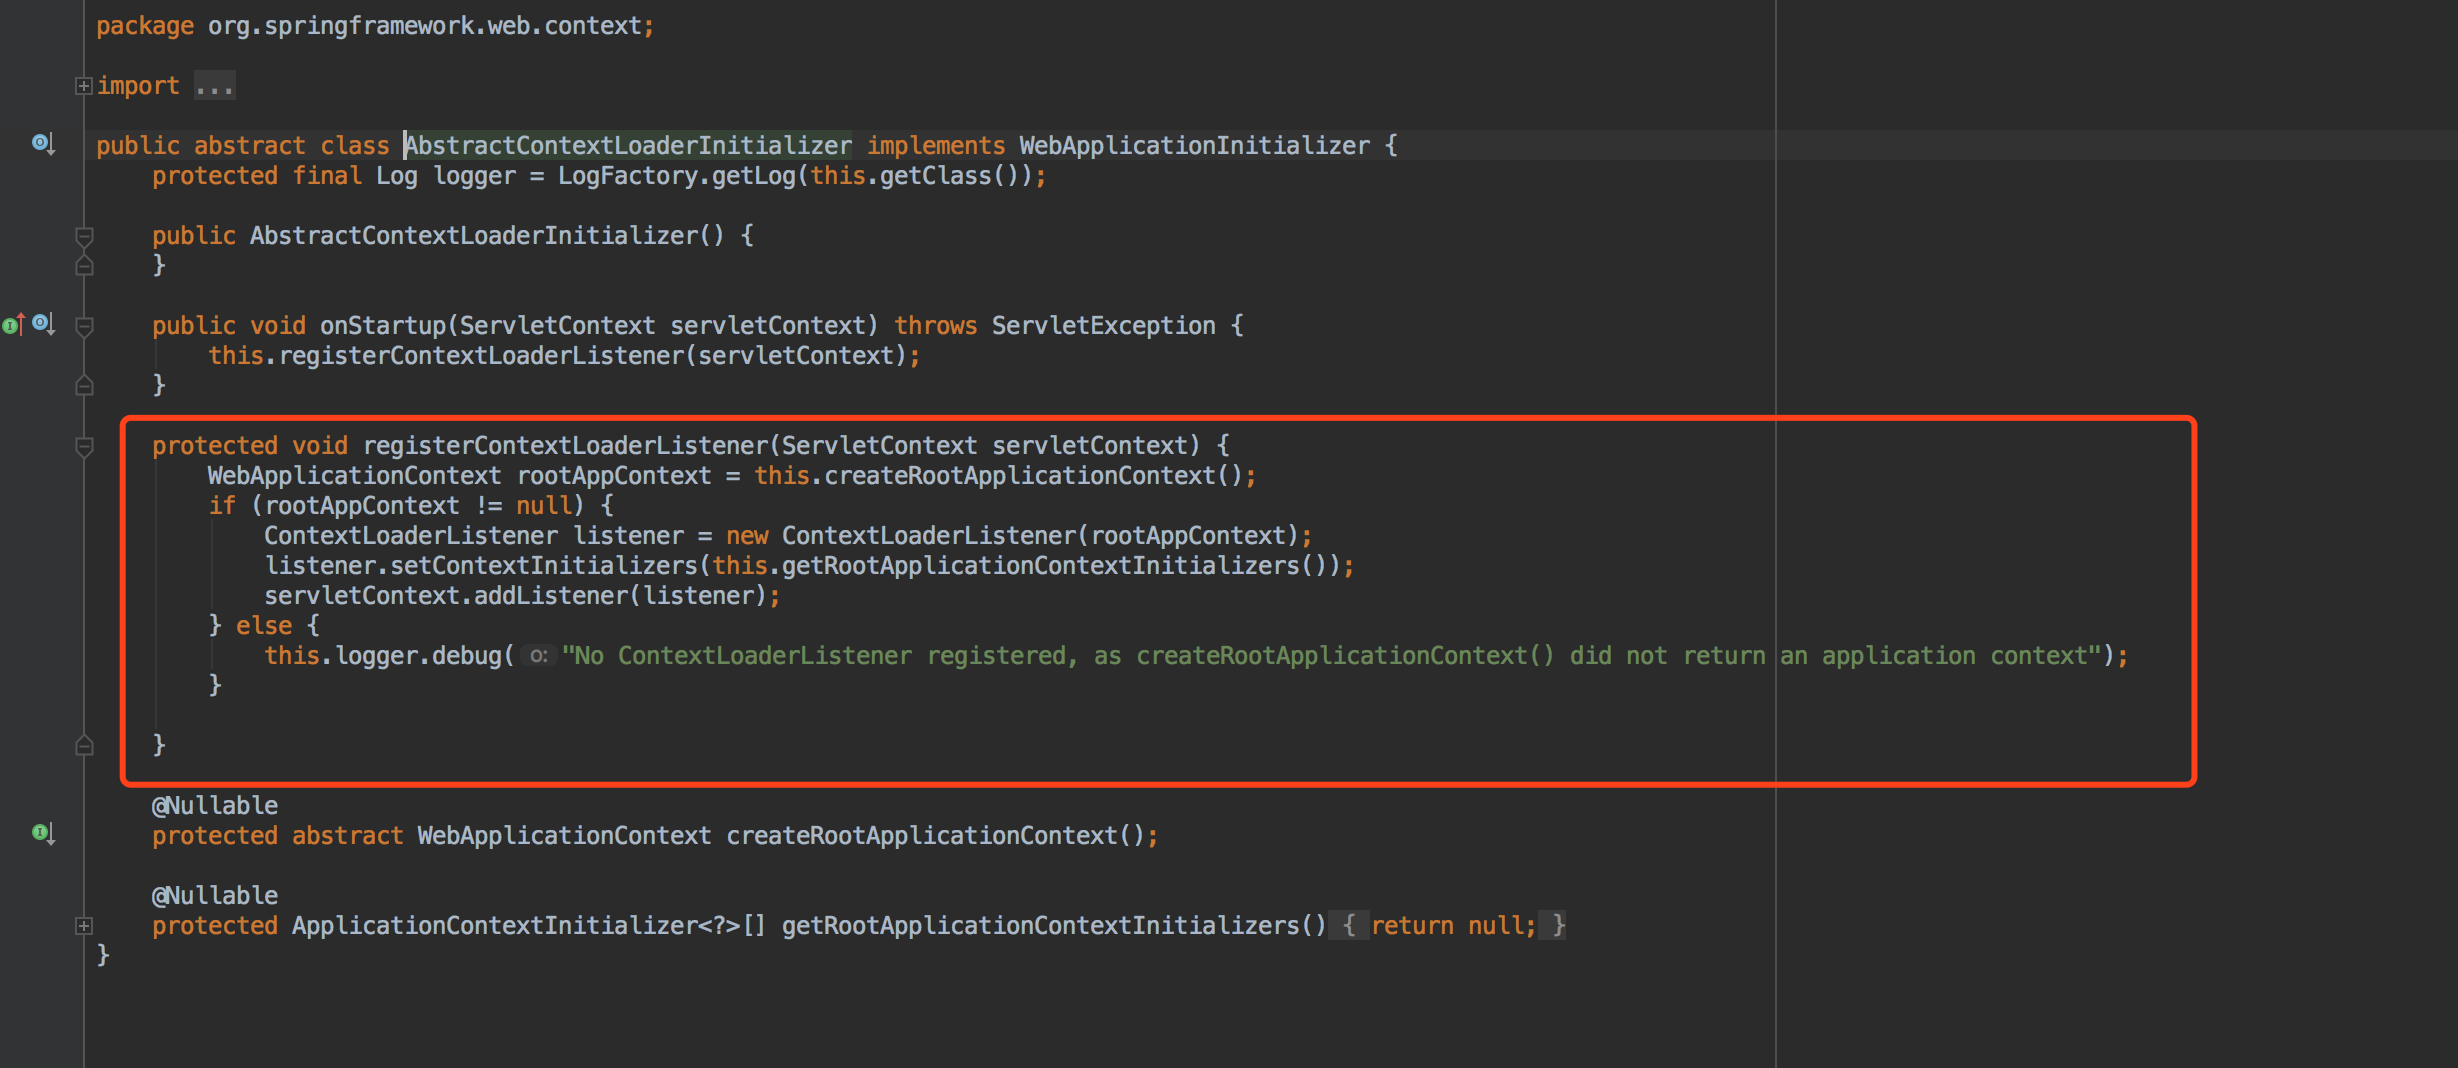
本文采用Java Config 实现,所以在配置中继承了AbstractAnnotationConfigDispatcherServletInitializer 这个抽象类,这个类的继承关系如下:

在父类AbstractContextLoaderInitializer中注册了ContextLoadListener监听器:
2、在需要在容器初始化时创建的类上面加上注解,就可以实现Bean的自动装配了。
@Controller @Service @Bean @Conponent等注解都可以显示表明Bean需要自动装配
3、配置Bean初始化的范围
2.2 SpringMVC 的配置
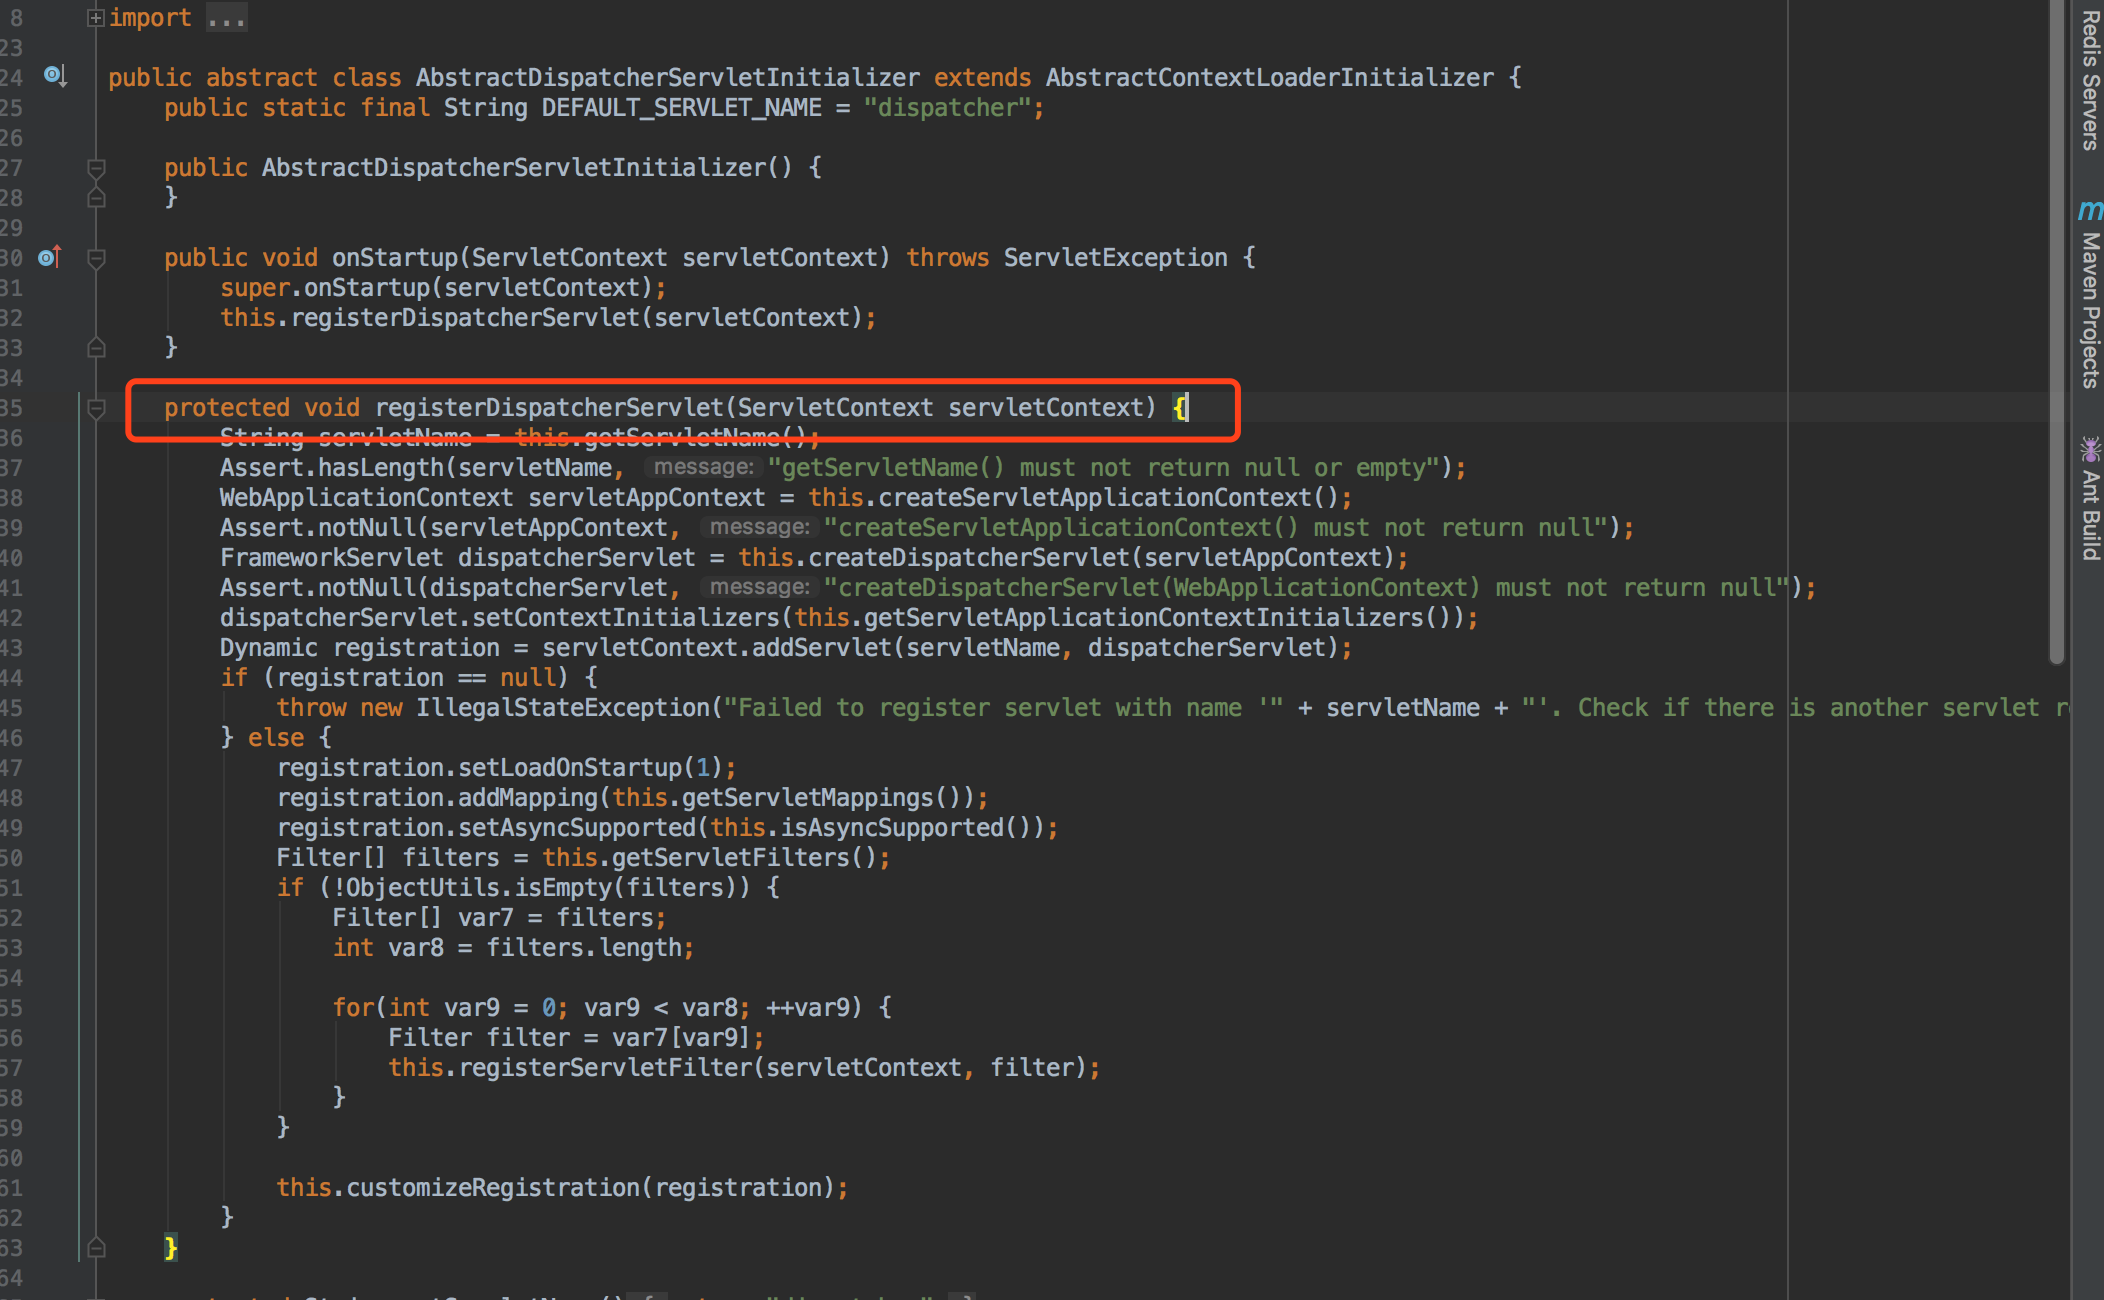
1、配置SpringMVC需要添加DispatchServlet ,DispatcherServlet主要负责前端调用URL的分发,他在Web容器初始化的时候被注册。在2.1中,我们已经知道,本文配置中继承了DispatchServlet 的一个抽象类AbstractAnnotationConfigDispatcherServletInitializer ,此抽象类的父类在实例化的时候会注册一个DispatchServlet到容器中,方法名如下。
2、定义视图解析器
前端访问URL,DispatchServlet 会把URL 匹配到Controller中相应的@RequstMapper的方法上去,该方法处理完请求后返回需要的业务数据模型,然后会调用自己的视图解析器把数据渲染到前端页面中,渲染之后返回给浏览器。
视图解析器定义如下:
3、其实SpringMVC 项目启动时配置的东西还有很多,HandlerException 异常处理,数据校验等,这些Spring提供的抽象类WebMvcConfigurerAdapter中已经实现好了,我们在项目中直接继承就行了。
3、代码实现:
项目采用Maven管理:pom.xml如下:
<?xml version="1.0" encoding="UTF-8"?>

<project xmlns="http://maven.apache.org/POM/4.0.0" xmlns:xsi="http://www.w3.org/2001/XMLSchema-instance"
xsi:schemaLocation="http://maven.apache.org/POM/4.0.0 http://maven.apache.org/xsd/maven-4.0.0.xsd">
<modelVersion>4.0.0</modelVersion>

<groupId>lime</groupId>
<artifactId>web</artifactId>
<version>1.0-SNAPSHOT</version>
<packaging>war</packaging>

<name>web Maven Webapp</name>
<!-- FIXME change it to the project's website -->
<url>http://www.example.com</url>

<properties>
<project.build.sourceEncoding>UTF-8</project.build.sourceEncoding>
<maven.compiler.source>1.7</maven.compiler.source>
<maven.compiler.target>1.7</maven.compiler.target>
</properties>

<dependencies>
<dependency>
<groupId>junit</groupId>
<artifactId>junit</artifactId>
<version>4.11</version>
<scope>test</scope>
</dependency>
<!-- https://mvnrepository.com/artifact/org.springframework/spring-webmvc -->
<dependency>
<groupId>org.springframework</groupId>
<artifactId>spring-webmvc</artifactId>
<version>5.1.0.RELEASE</version>
</dependency>
</dependencies>

<build>
<finalName>web</finalName>
<pluginManagement><!-- lock down plugins versions to avoid using Maven defaults (may be moved to parent pom) -->
<plugins>
<plugin>
<artifactId>maven-clean-plugin</artifactId>
<version>3.0.0</version>
</plugin>
<!-- see http://maven.apache.org/ref/current/maven-core/default-bindings.html#Plugin_bindings_for_war_packaging -->
<plugin>
<artifactId>maven-resources-plugin</artifactId>
<version>3.0.2</version>
</plugin>
<plugin>
<artifactId>maven-compiler-plugin</artifactId>
<version>3.7.0</version>
</plugin>
<plugin>
<artifactId>maven-surefire-plugin</artifactId>
<version>2.20.1</version>
</plugin>
<plugin>
<artifactId>maven-war-plugin</artifactId>
<version>3.2.0</version>
</plugin>
<plugin>
<artifactId>maven-install-plugin</artifactId>
<version>2.5.2</version>
</plugin>
<plugin>
<artifactId>maven-deploy-plugin</artifactId>
<version>2.8.2</version>
</plugin>
</plugins>
</pluginManagement>
</build>
</project>
项目结构如下:
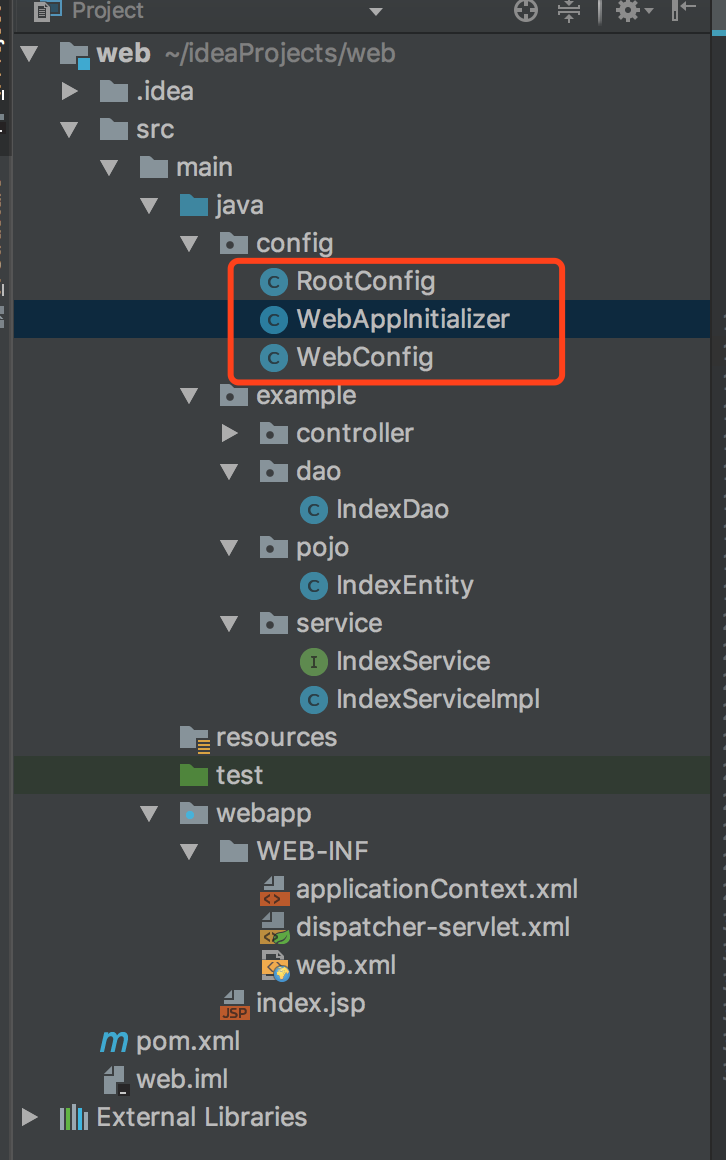
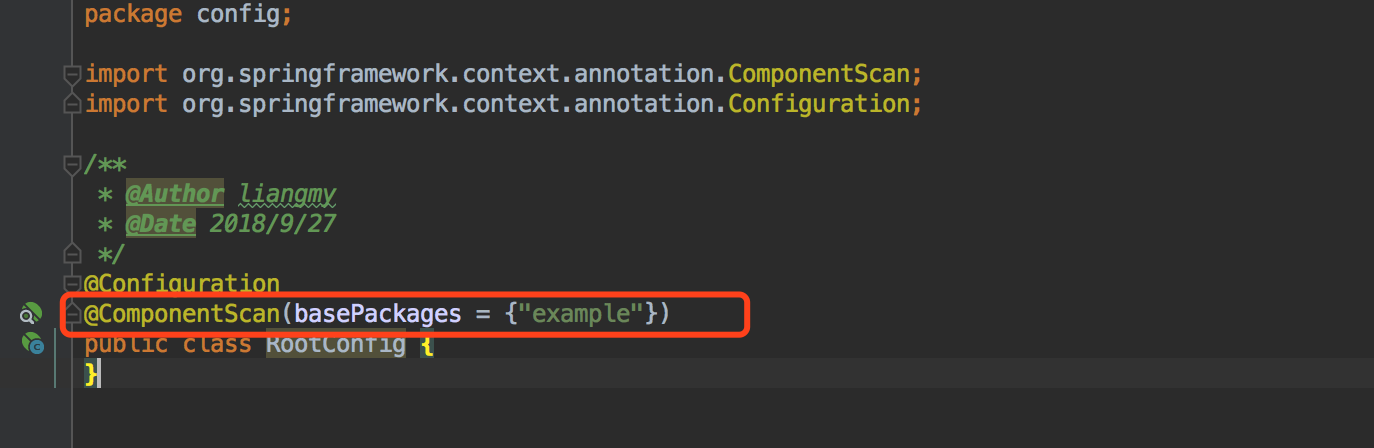
RootConfig类中配置了包扫描的范围:
package config;

import org.springframework.context.annotation.ComponentScan;
import org.springframework.context.annotation.Configuration;

/**
* @Author liangmy
* @Date 2018/9/27
*/
@Configuration
@ComponentScan(basePackages = {"example"})
public class RootConfig {
}
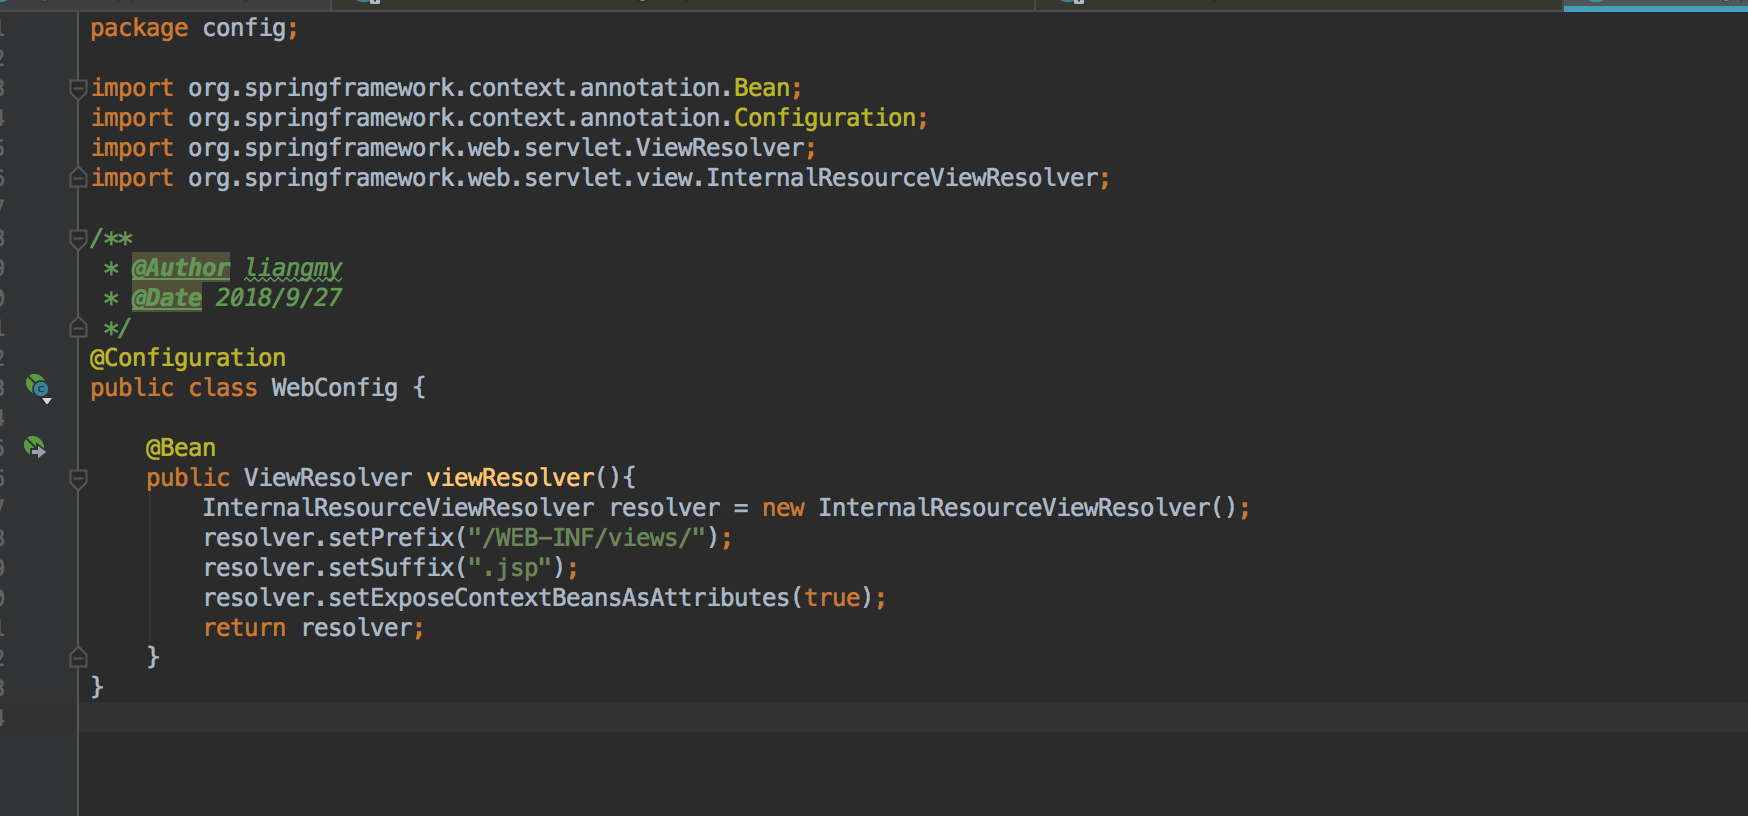
WebConfig 中配置了视图解析器以及RequestMapper的扫描范围
package config;

import org.springframework.context.annotation.Bean;
import org.springframework.context.annotation.ComponentScan;
import org.springframework.context.annotation.Configuration;
import org.springframework.web.servlet.ViewResolver;
import org.springframework.web.servlet.config.annotation.DefaultServletHandlerConfigurer;
import org.springframework.web.servlet.config.annotation.EnableWebMvc;
import org.springframework.web.servlet.config.annotation.WebMvcConfigurerAdapter;
import org.springframework.web.servlet.view.InternalResourceViewResolver;

/**
* @Author liangmy
* @Date 2018/9/27
*/
@Configuration
@EnableWebMvc
@ComponentScan("example.controller")
public class WebConfig extends WebMvcConfigurerAdapter{

@Bean
public ViewResolver viewResolver(){
InternalResourceViewResolver resolver = new InternalResourceViewResolver();
resolver.setPrefix("/WEB-INF/views/");
resolver.setSuffix(".jsp");
resolver.setExposeContextBeansAsAttributes(true);
return resolver;
}

/**
* 启用spring mvc 的注解
* @param configurer
*/
@Override
public void configureDefaultServletHandling(DefaultServletHandlerConfigurer configurer) {
configurer.enable();
}
}
WebAppInitializer类配置了容器初始化时需要加载的配置类
package config;

import org.springframework.web.servlet.support.AbstractAnnotationConfigDispatcherServletInitializer;

/**
* @Author liangmy
* @Date 2018/9/27
*/
public class WebAppInitializer extends AbstractAnnotationConfigDispatcherServletInitializer {

// Spring Ioc 容器配置
@Override
protected Class<?>[] getRootConfigClasses() {
// 可以返回Spring的Java配置文件数组
return new Class<?>[]{
RootConfig.class
};
}

// DispatcherServlet 的URI映射关系配置
@Override
protected Class<?>[] getServletConfigClasses() {
// 可以返回Spring的Java配置文件数组
return new Class<?>[]{
WebConfig.class
};
}

// DispatcherServlet 拦截请求匹配
@Override
protected String[] getServletMappings() {
return new String[]{
"/"
};
}
}
TestController中定义了测试用的URL:
package example.controller;

import org.springframework.stereotype.Controller;
import org.springframework.web.bind.annotation.RequestMapping;
import org.springframework.web.bind.annotation.RequestMethod;

/**
* @Author liangmy
* @Date 2018/9/27
*/
@Controller
public class TestController {

@RequestMapping(value = "/test", method = RequestMethod.GET)
public String test(){
return "test";
}
}
啦啦啦

- 零配置简单搭建SpringMVC 项目
- springMVC框架的搭建最简单项目(没有数据库的配置)
- springMVC初探--环境搭建和第一个HelloWorld简单项目
- 【WEB开发技术】一个简单的WEB项目验证码校验(如何从前端到后台一步一步的搭建、配置、发布整个Web项目?)
- Step by Step 搭建SpringMVC项目[3]-配置SpringMVC环境
- 创建maven项目 并搭建简单的springMVC
- SpringMVC框架入门配置 IDEA下搭建Maven项目
- IDEA进行springmvc项目开发三(springboot搭建简单springmvc)
- 最简单的11g Active DataGuard(ADG)搭建配置过程(项目步骤)
- Activiti环境配置、项目搭建、与Spring集成、简单示例
- [转]SpringMVC框架入门配置 IDEA下搭建Maven项目
- IntelliJ IDEA 2017-初学者搭建简单MAVEN的SpringMVC项目
- 最简单的11g Active DataGuard(ADG)搭建配置过程(项目步
- SSH框架,AjaxJson显示数据,项目框架搭建;注意action跳转不用叹号,springMVC和springAnnotation要修改spring配置文件
- Activiti环境配置、项目搭建、与Spring集成、简单示例
- Activiti环境配置、项目搭建、与Spring集成、简单示例
- SpringMVC,MyBatis项目中兼容Oracle和MySql的解决方案及其项目环境搭建配置、web项目中的单元测试写法、HttpClient调用post请求等案例
- 搭建SpringMVC项目——02 配置文件pom.xml
- SpringMVC框架入门配置 IDEA下搭建Maven项目(zz)
- SpringMVC框架入门配置 IDEA下搭建Maven项目