ASP.NET MVC Webuploader实现上传功能
2018-09-08 15:02
841 查看
本文实例为大家分享了Android九宫格图片展示的具体代码,供大家参考,具体内容如下
1.简介:WebUploader是由Baidu WebFE(FEX)团队开发的一个简单的以HTML5为主,FLASH为辅的现代文件上传组件。在现代的浏览器里面能充分发挥HTML5的优势,同时又不摒弃主流IE浏览器,沿用原来的FLASH运行时,兼容IE6+,iOS 6+, android 4+。两套运行时,同样的调用方式,可供用户任意选用。
2.引入资源:使用Web Uploader文件上传需要引入三种资源:JS, CSS, SWF。
<!--引入CSS-->
<link rel="stylesheet" type="text/css" href="webuploader文件夹/webuploader.css">
<!--引入JS-->
<script type="text/javascript" src="webuploader文件夹/webuploader.js"></script>
<!--SWF在初始化的时候指定,在后面将展示-->
3.HTML部分
<div id="uploader" class="wu-example">
<!--用来存放文件信息-->
<ul id="thelist" class="list-group"></ul>
<div class="uploader-list"></div>
<div class="btns">
<div id="picker" style="float:left;">选择文件</div>
<input id="ctlBtn" type="button" value="开始上传" class="btn btn-default" style="width:78px;height:37px;margin-left:10px;" />
</div>
</div>
4.JS部分
//初始化上传控件
function initUpload() {
var $ = jQuery;
var $list = $('#thelist');
var uploader = WebUploader.create({
// 选完文件后,是否自动上传。
auto: false,
// swf文件路径
swf: applicationPath + '../Content/scripts/plugins/webuploader/Uploader.swf',
// 文件接收服务端。
server: applicationPath + 'PublicInfoManage/Upload/Upload',
// 选择文件的按钮。可选。
// 内部根据当前运行是创建,可能是input元素,也可能是flash.
pick: '#picker',
chunked: true,//开始分片上传
chunkSize: 2048000,//每一片的大小
formData: {
guid: GUID //自定义参数,待会儿解释
},
// 不压缩image, 默认如果是jpeg,文件上传前会压缩一把再上传!
resize: false
});
// 当有文件被添加进队列的时候
uploader.on('fileQueued', function (file) {
$list.append('<li id="' + file.id + '" class="list-group-item">' +
'<span class="fileName" dataValue="">' + file.name + '</span>' +
'<span class="state" style=\" margin-left: 10px;\">等待上传</span>' +
'<span class="filepath" dataValue="0" style=\" margin-left: 10px;display: none;\"></span>' +
'<span class="download" style="margin-left:20px;"></span>' +
'<span class="webuploadDelbtn"style=\"float: right;display: none; \">删除<span>' +
'</li>');
});
// 文件上传过程中创建进度条实时显示。
uploader.on('uploadProgress', function (file, percentage) {
var $li = $('#' + file.id),
$percent = $li.find('.progress .progress-bar');
// 避免重复创建
if (!$percent.length) {
$percent = $('<div class="progress progress-striped active">' +
'<div class="progress-bar" role="progressbar" style="width: 0%">' +
'</div>' +
'</div>').appendTo($li).find('.progress-bar');
}
$li.find('span.state').text('上传中');
$percent.css('width', percentage * 100 + '%');
});
// 文件上传成功,给item添加成功class, 用样式标记上传成功。
uploader.on('uploadSuccess', function (file, response) {
var $li = $('#' + file.id);
//$('#' + file.id).find('p.state').text('已上传');
$.post('../../PublicInfoManage/Upload/Merge', { guid: GUID, fileName: file.name }, function (data) {
$li.find('span.state').html("上传成功");
$li.find('span.filepath').attr("dataValue", 1);
$li.find('span.fileName').attr("dataValue", data.filename);
$li.find('span.fileName').html(data.filename);
$li.find('span.download').html("<a href=\"../../PublicInfoManage/Upload/DownFile?filePath=" + data.filepath + "&fileName=" + data.filename + "\">下载</a>")
$li.find('span.webuploadDelbtn').show();
$li.find('span.filepath').html(data.filepath);
//增加列表存储
files.push(data);
});
});
// 文件上传失败,显示上传出错。
uploader.on('uploadError', function (file, reason) {
$('#' + file.id).find('p.state').text(reason);
});
// 完成上传完了,成功或者失败,先删除进度条。
uploader.on('uploadComplete', function (file) {
$('#' + file.id).find('.progress').fadeOut();
});
//所有文件上传完毕
uploader.on("uploadFinished", function () {
//提交表单
});
//开始上传
$("#ctlBtn").click(function () {
uploader.upload();
});
//删除
$list.on("click", ".webuploadDelbtn", function () {
debugger
var $ele = $(this);
var id = $ele.parent().attr("id");
var file = uploader.getFile(id);
uploader.removeFile(file);
$ele.parent().remove();
//移除数组
var destFile = findFile(file.name)
var index = files.indexOf(destFile);
if (index > -1) {
files.splice(index, 1);
}
});
}
5.C# Controller后台处理
/// <summary>
/// 上传文件
/// </summary>
/// <returns></returns>
[HttpPost]
public ActionResult Upload()
{
string fileName = Request["name"];
int lastIndex = fileName.LastIndexOf('.');
string fileRelName = lastIndex == -1? fileName: fileName.Substring(0, fileName.LastIndexOf('.'));
fileRelName = fileRelName.Replace("[", "").Replace("]", "").Replace("{", "").Replace("}", "").Replace(",", "");
int index = Convert.ToInt32(Request["chunk"]);//当前分块序号
var guid = Request["guid"];//前端传来的GUID号
var dir = Server.MapPath("~/Upload/file");//文件上传目录
string currentTime = DateTime.Now.ToString("yyyy-MM-dd");
dir += "\\" + currentTime;
dir = Path.Combine(dir, fileRelName);//临时保存分块的目录
if (!System.IO.Directory.Exists(dir))
System.IO.Directory.CreateDirectory(dir);
string filePath = Path.Combine(dir, index.ToString());//分块文件名为索引名,更严谨一些可以加上是否存在的判断,防止多线程时并发冲突
var data = Request.Files["file"];//表单中取得分块文件
//if (data != null)//为null可能是暂停的那一瞬间
//{
data.SaveAs(filePath);//报错
//}
return Json(new { erron = 0 });//Demo,随便返回了个值,请勿参考
}
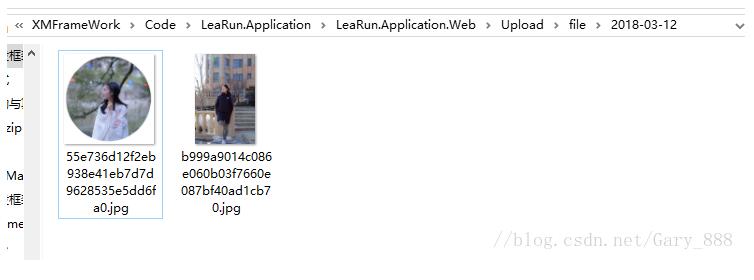
6.实现效果
以上就是本文的全部内容,希望对大家的学习有所帮助,也希望大家多多支持脚本之家。
您可能感兴趣的文章:
- JQuery.uploadify 上传文件插件的使用详解 for ASP.NET
- asp.net+FCKeditor上传图片显示叉叉图片无法显示的问题的解决方法
- asp.net fileupload控件上传文件与多文件上传
- asp.net(c#)开发中的文件上传组件uploadify的使用方法(带进度条)
- asp.net MVC实现无组件上传图片实例介绍
- asp.net 多文件上传,兼容IE6/7/8,提供完整代码下载
- Asp.net实现MVC处理文件的上传下载功能实例教程
- asp.net图片上传实例
- Asp.Net 无刷新文件上传并显示进度条的实现方法及思路
- asp.net下文件上传和文件删除的代码

相关文章推荐
- WebUploader+SpringMVC实现文件上传功能
- 实现Asp.net mvc上传头像加剪裁功能
- 实现Asp.net mvc上传头像加剪裁功能
- Asp.Net Mvc 使用WebUploader 多图片上传
- Asp.net MVC使用swupload实现多图片上传功能
- Asp.net实现MVC处理文件的上传下载功能实例教程
- asp.net mvc+webuploader大文件分片上传
- [代码示例]用Fine Uploader+ASP.NET MVC实现ajax文件上传
- 用Fine Uploader+ASP.NET MVC实现ajax文件上传[代码示例]
- Asp.Net Mvc 使用WebUploader 多图片上传
- Asp.net实现MVC处理文件的上传下载功能实例教程
- 用Fine Uploader+ASP.NET MVC实现ajax文件上传[代码示例]
- WebUploader+SpringMVC实现文件上传功能
- [Fine Uploader] 用Fine Uploader+ASP.NET MVC实现ajax文件上传[代码示例]
- asp.net MVC实现简单的上传功能
- asp.net MVC实现简单的上传功能
- [代码示例]用Fine Uploader+ASP.NET MVC实现ajax文件上传
- 用Fine Uploader+ASP.NET MVC实现ajax文件上传[代码示例]
- Asp.Net Mvc 使用WebUploader 多图片上传
- Asp.Net MVC实现优酷(youku)Web的上传