如何优雅的打包 Spring Boot 应用
2018-08-08 15:43
766 查看
阅读前请先思考下如果让你将 Spring Boot 应用打成一个压缩包、解压直接运行如何实现?
下面看老司机是如何做的。
解压下载的文件,删除无用的文件只保留
在
在打开的明了窗口执行

首先在
配置文件内容
application.properties
messages_en.properties
env-config.properties 注意每个环境下都要配置
start.bat
start.sh
5x 使用

解压文件
进入

下面看老司机是如何做的。
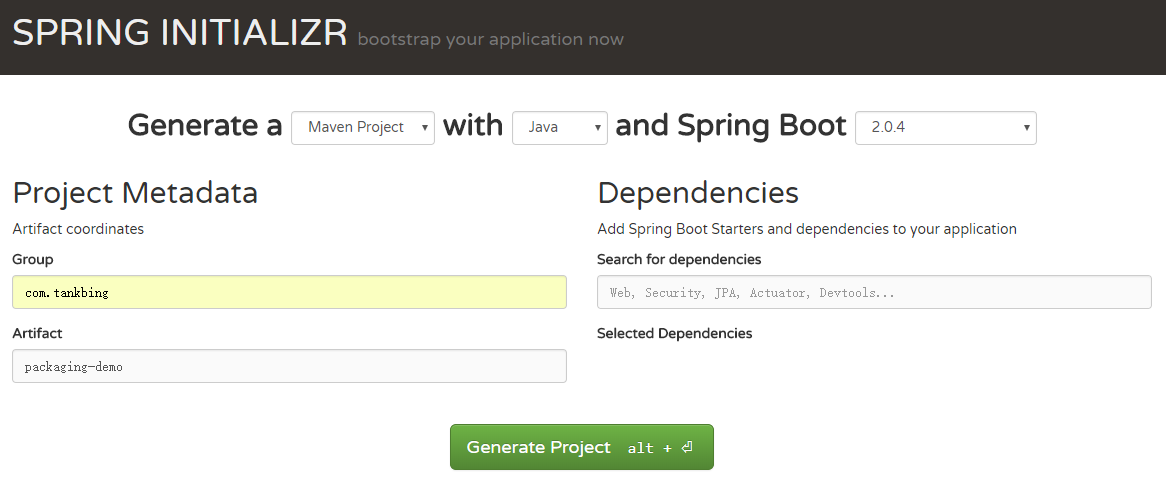
0x 下载 Spring Boot 程序示例
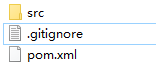
下载示例解压下载的文件,删除无用的文件只保留
src目录、
pom.xml、
.gitignore
在
packaging-demo目录按住
shift在空白区域点击鼠标右键选择
在此处打开命令窗口
在打开的明了窗口执行
mvn clean compile提前下载依赖的文件,加速IDEA导入速度
1x 导入IDEA
2x 项目中添加配置文件
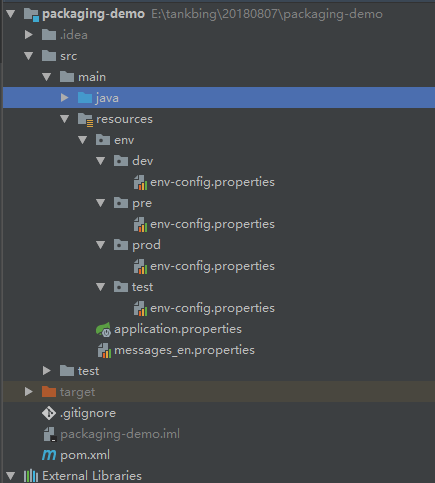
在src/main/resources目录添加以下配置文件
application.properties(修改默认端口号、添加其他配置)
messages_en.properties(一些额外的配置信息)
首先在
src/main/resources建立
env目录,然后在
env目录下建立
dev、test、pre、prod目录,分别对应开发、测试、预发布、生产环境,最后在每个目录下建立
env-config.properties文件用于配置不同环境相关信息
配置文件内容
application.properties
# Server Port Configuration
server.port=8888
#Management Configuration
management.server.port=9001
management.server.servlet.context-path=/management
# Logging Configuration
logging.level.org.springframework.web=ERROR
#Access log configuration
server.tomcat.accessLogEnabled=true
server.tomcat.basedir=../logs
server.tomcat.accessLogPattern=%t %s %a %D "%r" %b
messages_en.properties
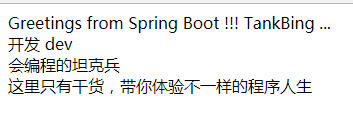
#Spring boot greeting message
message.greetings=Greetings from Spring Boot !!! TankBing ...
env-config.properties 注意每个环境下都要配置
com.tankbing.env=开发 dev
com.tankbing.name=会编程的坦克兵
com.tankbing.introduce=这里只有干货,带你体验不一样的程序人生
3x 编码
加载配置文件MessageConfigProperties.java
@Component
@ConfigurationProperties(prefix = "message")
@PropertySource(value = {"classpath:messages_en.properties"})
public class MessageConfigProperties {
private String greetings;

public String getGreetings() {
return greetings;
}

public void setGreetings(String greetings) {
this.greetings = greetings;
}
}HelloController.java注入
MessageConfigProperties输出欢迎信息到前端
@RestController
public class HelloController {
private static final Logger LOGGER = LoggerFactory.getLogger(HelloController.class);
@Autowired
private MessageConfigProperties messageConfigProperties;

@GetMapping("/")
public String index() {
String greetingsMessage = messageConfigProperties.getGreetings();
LOGGER.info("Inside index() method, returning :" + greetingsMessage);
return greetingsMessage;
}
}
4x 创建启动脚本
src/main/resources目录下创建
bin目录,编写启动脚本
start.bat
set ENV=%1
IF [%1]==[] (
set ENV=dev
)
echo %ENV%
java -Xms256m -Xmx512m -server -Dspring.config.location=../config/application.properties,../config/messages_en.properties,../config/env/%ENV%/env-config.properties -jar ../lib/packaging-demo.jar
start.sh
ENV=$1
if [ $ENV == '' ]
then
$ENV = "dev";
fi
java -Xms256m -Xmx512m -server -Dspring.config.location=../config/application.properties,../config/messages_en.properties,../config/env/%ENV%/env-config.properties -jar ../lib/packaging-demo.jar
5x 使用 Maven-Assembly-Plugin
进行打包
src/main/resources目录新建
distribution目录,添加
distribution.xml文件
<assembly>
<id>assembly</id>
<formats>
<format>tar</format>
<format>zip</format>
</formats>
<fileSets>
<fileSet>
<directory>src/main/resources/bin</directory>
<outputDirectory>bin</outputDirectory>
<includes>
<include>start.sh</include>
<include>start.bat</include>
</includes>
<fileMode>0755</fileMode>
</fileSet>
<fileSet>
<directory>src/main/resources</directory>
<outputDirectory>config</outputDirectory>
<includes>
<include>*.properties</include>
<include>*.xml</include>
<include>env/dev/*</include>
<include>env/qa/*</include>
<include>env/uat/*</include>
<include>env/prod/*</include>
</includes>
</fileSet>
<fileSet>
<directory>target</directory>
<outputDirectory>lib</outputDirectory>
<includes>
<include>*.jar</include>
</includes>
</fileSet>
<fileSet>
<directory>src/main/resources</directory>
<outputDirectory>logs</outputDirectory>
<fileMode>0755</fileMode>
<excludes>
<exclude>**/*</exclude>
</excludes>
</fileSet>
</fileSets>
</assembly>
pom.xml添加
assembly打包插件
<plugin>
<artifactId>maven-assembly-plugin</artifactId>
<configuration>
<descriptors>
<descriptor>src/main/resources/distribution/distribution.xml</descriptor>
</descriptors>
</configuration>
<executions>
<execution>
<phase>package</phase>
<goals>
<goal>single</goal>
</goals>
</execution>
</executions>
</plugin>
6x 构建项目
mvn clean package -Dmaven.test.skip=true
7x 运行程序
拷贝压缩文件ZIP/TAR到需要部署的机器上解压文件
tar –zxvf packaging-demo-assembly.tar
进入
bin目录执行
start.sh dev/test/pre/prod
8x 测试是否符合预期
打开浏览器输入http://localhost:8888访问
github
源码地址

相关文章推荐
- spring boot(六)如何优雅的使用mybatis
- 如何把vuejs打包出来的文件整合到springboot里
- 转载:Spring Boot (六):如何优雅的使用mybatis
- Spring boot-应用打包部署
- Springboot中如何引入本地jar包,并通过maven把项目成功打包成jar包部署
- SpringBoot如何优雅的将静态资源配置注入到工具类中
- Spring Boot配置的第一个应用(如何启动)
- Springboot Web应用中Tomcat SSL是如何工作的
- springboot(十二):springboot如何测试打包部署
- 【Springboot】 学习一 应用打包部署
- Spring boot(4)-应用打包部署
- springboot--如何优雅的使用mybatis
- 如何在Ubuntu 14.04服务器上自动化部署Spring Boot的应用
- spring boot(六):如何优雅的使用mybatis
- springboot如何测试打包部署
- 如何将spring boot项目打包成war包
- Spring boot(4)-应用打包部署
- springboot优雅的关闭应用
- spring boot 应用打包war在tomcat 不能运行的问题
- spring boot之如何优雅的使用mybatis