Django orm简单操作流程
2018-07-06 21:44
393 查看
我们可以先定义数据表的结构
创建一个出版社的id和name(models.py文件)
# 出版社
class Publisher(models.Model):
# 自增的主键id
id = models.AutoField(primary_key=True)
# 创建一个varchar(64)的唯一的不为空的字段
name = models.CharField(max_length=64, null=False, unique=True)
将改动记录下来
python manage.py makemigrations
去数据库执行
python manage.py migrate
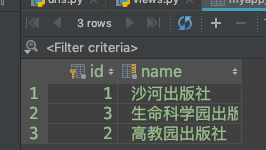
然后可以通过pycharm中的database工具进行数据库的编辑
下一步就是建立url对应关系(urls.py)
from django.conf.urls import url
from django.contrib import admin
from myapp import views

urlpatterns = [
url(r'^admin/', admin.site.urls),
# 出版社列表
url(r'^publisher_list/', views.publisher_list),
]
去views.py文件中建立publisher_list函数
函数内部要完成的功能是
- 去数据库查询出所有出版社,
- 填充到html中,
- 返回给用户
from django.shortcuts import render, HttpResponse
from myapp import models

def publisher_list(request):
ret = models.Publisher.objects.all()
# 输出一个列表对象[<Publisher: Publisher object>, <Publisher: Publisher object>, <Publisher: Publisher object>]
# print(ret[1].id, ret[1].name)
#id和名字拿出来了

#render渲染页面
#在publisher_list.html页面通过publisher_list变量就可以获取到ret了
return render(request, "publisher_list.html", {"publisher_list": ret})
在templates目录下新建publisher_list.html文件来进行展示给用户
<table border="1">
<thead>
<tr>
<th>id值</th>
<th>name</th>
</tr>
</thead>
<tbody>
{% for publisher in publisher_list %}
<tr>
<td>{{ publisher.id }}</td>
<td>{{ publisher.name }}</td>
</tr>
{% endfor %}
</tbody>
</table>
- 特殊的模板循环语言
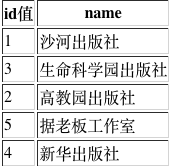
这样运行django项目,访问对应的url就可以看到将数据表的信息展示出来了
在浏览器页面的内容如下(http://127.0.0.1:8000/publisher_list/):
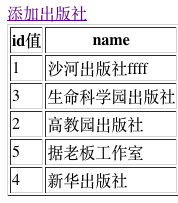
然后我们可以在页面添加功能,比如:添加出版社, 删除出版社, 编辑出版社
添加出版社
1,在urls.py文件中添加对应URl对应关系
# 添加出版社
url(r'^add_publisher/', views.add_publisher),
2,在views.py中创建对应的逻辑函数
# 添加出版社
def add_publisher(request):

if request.method == "POST":
# 用户填写了新的用户名,并发送了post请求过来
new_publisher = request.POST.get('new_publisher')
if new_publisher:
# 去数据库中创建一条数据库记录
models.Publisher.objects.create(name=new_publisher)
else:
return HttpResponse("出版社名字不能为空")
# 添加成功之后将publisher_list页面返回给用户
return redirect('/publisher_list/')
# 点击添加用户时,返回一个页面,有个框,用于添加数据
return render(request, "add_publisher.html")
3在templates目录下建立add_publisher.html用于添加出版社页面
<!DOCTYPE html>
<html lang="en">
<head>
<meta charset="UTF-8">
<title>出版社列表</title>
</head>
<body>
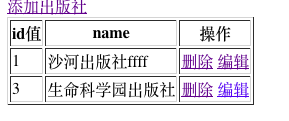
<a href="/add_publisher/">添加出版社</a>
<table border="1">
<thead>
<tr>
<th>id值</th>
<th>name</th>
<th>操作</th>
</tr>
</thead>
<tbody>
{% for publisher in publisher_list %}
<tr>
<td>{{ publisher.id }}</td>
<td>{{ publisher.name }}</td>
<td>
<a href="/delete_publisher/?id={{ publisher.id }}">删除</a>
<a href="/edit_publisher/?id={{ publisher.id }}">编辑</a>
</td>
</tr>
{% endfor %}
</tbody>
</table>
</body>
</html>
这样就完成了添加出版社的功能了

接下来就是删除出版社的功能(根据id来删除)
urls.py中
# 删除出版社
url(r'^delete_publisher', views.delete_publisher),
views.py中
# 删除出版社
def delete_publisher(request):
# 删除制定的数据
# 1从GET请求的参数里面拿到将要删除的id值
delete_id = request.GET.get('id',None)
# 如果能够获取到数据
if delete_id:
# 根据id值查找到数据
delete_obj = models.Publisher.objects.get(id=delete_id)
# 删除
delete_obj.delete()
# 返回删除后的页面,跳转到出版社的列表页,查看是否删除成功
return redirect("/publisher_list/")
else:
return HttpResponse("要删除的数据不存在")
现在就可以删除数据了,点击删除就会在数据库中删除数据
接下来就是编辑功能了(用来实现更改出版社的name)
urls.py文件
# 编辑出版社
url(r'^edit_publisher', views.edit_publisher),
views.py文件
# 编辑出版社
def edit_publisher(request):
# 用户修改完出版社的名称,点击提交,在这里获取到
if request.method == "POST":
# print(request.POST) #检查post能够获取那些信息
#取新出版社的名字
edit_id = request.POST.get("_id")
new_name = request.POST.get("_name")
# 根据id,来编辑出版社
edit_publisher = models.Publisher.objects.get(id=edit_id)
edit_publisher.name = new_name
edit_publisher.save() #更新到数据库
# 跳转到出版社列表页,查看是否修改成功
return redirect("/publisher_list/")

# 从GET请求的url中取到id属性
edit_id = request.GET.get("id")
if edit_id:
# 获取到当前编辑的出版社
publisher_obj = models.Publisher.objects.get(id=edit_id)
return render(request, "edit_publisher.html", {"publisher":publisher_obj})
edit_publisher.html文件
<!DOCTYPE html>
<html lang="en">
<head>
<meta charset="UTF-8">
<title>编辑出版社</title>
</head>
<body>
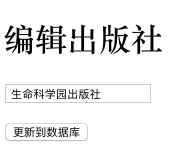
<h1>编辑出版社</h1>
<form action="/edit_publisher/" method="post">
<p>
<input type="text" name="_id" value="{{ publisher.id }}" style="display: none">
</p>
<p>
<input type="text" name="_name" value="{{ publisher.name }}">
</p>
<p>
<input type="submit" value="更新到数据库">
</p>
</form>
</body>
</html>
最后的效果
阅读更多

相关文章推荐
- Django---orm多表操作
- HDFS的存储结构以及写入、读取hdfs数据操作流程简单总结
- python——Django(ORM连表操作)
- Django之ORM操作
- Pycharm 操作Django Model的简单运用方法
- django上课笔记1-目录介绍-路由系统-ORM操作
- django-orm进阶操作
- 【django】利用fbv模型与orm进行页面登录操作
- Django ORM 中的批量操作
- Django---orm单表操作
- activiti5.20简单介绍(八) -- 流程操作续
- 循序渐进Python3(十二) --2-- web框架之django简单实现oracle数据库操作
- 通过动态代理(Proxy)实现的数据库连接池的创建连接与归还链接的操作的简单的实现流程
- Django当中的ORM操作
- Django ORM操作数据库常用API
- Python自动化之django的ORM操作——Python源码
- Django基于ORM操作数据库的方法详解
- Django 之 ORM 一对多、多对多 及 ajax 操作
- 简单聊下django的工作流程
- Django ORM相关操作|F、Q查询、事务、外键正向反向查询、聚合分组