利用bootstrap框架实现静态登录页面
2018-07-04 20:24
387 查看
版权声明:本文为博主原创文章,未经博主允许不得转载。 https://blog.csdn.net/qq_35616167/article/details/80917930
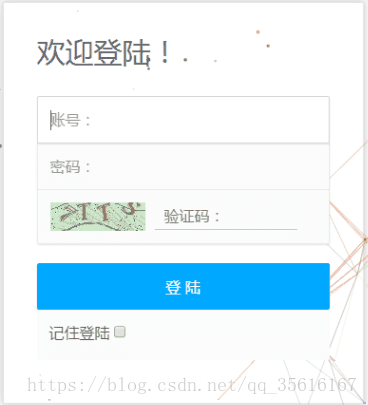
暑期实训第一天,主要串讲了html+css的基础知识,实现了计算器的静态页面,计算器就不在这里展示了。一天的学习结束,留下了作业,实现静态的登录页面,可以借助于bootstrap框架,待实现的页面如下图所示。
不得不说bootstrap框架真的好用,再加上老师提供了背景实现粒子的js,很快就实现了页面。
工程包链接https://download.csdn.net/download/qq_35616167/10520327
bootstrap开源包链接:https://pan.baidu.com/s/1xIbFspdVSx2iA8WxFemH9g 密码:p4k4
代码如下:<!DOCTYPE html>
<html>
<style>
#box{
width: 370px;
height: 400px;
border: 1px solid #E2E3E5;
position: absolute;
left: 50%;
top: 50%;
margin-left: -185px;
margin-top: -200px;
}
#logo{
width: 370px;
height: 95px;
font-size: 30px;
color: #676A6C;
line-height: 95px;
margin-left: 40px;
}
#user{
width: 295px;
height: 50px;
margin-left: 40px;
}
#pass{
width: 295px;
height: 50px;
margin-left: 40px;
}
.input-group{
margin-left: 40px;
}
#img-submit {
width: 95px;
height: 30px;
margin-top: 15px;
border-radius: 2px;
cursor: pointer;
position: absolute;
z-index: 3;
left: 10px;
top: 0;
}
#validateCode {
height: 55px;
padding-left: 120px;
width: 295px;
}
#verify{
width: 295px;
height: 60px;
margin-left: 40px;
border: 1px solid #EDEDEE;
}
#btn-login{
width: 295px;
height: 50px;
margin-left: 40px;
margin-top: 20px;
}
#remember{
width: 80px;
height: 20px;
margin-left: 50px;
margin-top: 20px;
color: #676A6C;
font-size: 15px;
}
</style>
<head>
<meta charset="UTF-8">
<title>登录页面</title>
<meta name="description" content="particles.js is a lightweight JavaScript library for creating particles.">
<meta name="author" content="Vincent Garreau" />
<meta name="viewport" content="width=device-width, initial-scale=1.0, minimum-scale=1.0, maximum-scale=1.0, user-scalable=no">
<link rel="stylesheet" href="../bootstrap.min.css">
<script src="jquery.min.js"></script>
<script src="particle.js"></script>
</head>
<body>
<canvas class="particle"></canvas>
<div id="box">
<div id="logo">欢迎登陆!</div>
<div id="info">
<input type="text" class="form-control" id="user" placeholder="账号:">
<input type="password" class="form-control" id="pass" placeholder="密码:">
<div class="input-group">
<img id="img-submit" src="submit.jpg">
<u><input type="text" class="form-control"
id="validateCode" name="validateCode"
placeholder="验证码:"></u>
</div>
<button class="btn btn-info" id="btn-login" onclick="VerifyLogin()">登录</button>
<div id="remember">记住登陆 <input type="checkbox"></div>
</div>
</div>
</body>
</html>
阅读更多

相关文章推荐
- 基于Metronic的Bootstrap开发框架经验总结(13)--页面链接收藏夹功能的实现2(利用Sortable进行拖动排序)
- 【干货】利用MVC5+EF6搭建博客系统(四)(上)前后台页面布局页面实现,介绍使用的UI框架以及JS组件
- html静态页面传递参数-利用JavaScript方法实现静态
- 基于Metronic的Bootstrap开发框架经验总结(9)--实现Web页面内容的打印预览和保存操作
- 利用Mircosoft URLRewriter.dll实现asp.net页面伪静态
- 利用js方法实现html静态页面间参数传递
- Ext6.x+springmvc+shiro框架下实现session过期跳转到登录页面
- 利用flex布局实现小的的~(用户登录页面)效果如下图!其他有需要的小伙伴可以联系我o
- UI设计实战篇——利用Bootstrap框架制作查询页面的界面
- 利用Mircosoft URLRewriter.dll实现页面伪静态
- 实现jsp页面显示用户登录信息,利用session保存。
- 利用Mircosoft URLRewriter.dll实现asp.net页面伪静态
- 利用js方法实现html静态页面间参数传递
- (转)基于Metronic的Bootstrap开发框架经验总结(9)--实现Web页面内容的打印预览和保存操作
- 利用URLRewriting.dll实现asp.net页面伪静态!(不用安装Rewriter)
- 利用Mircosoft URLRewriter.dll实现asp.net页面伪静态
- 利用Bootstrap框架制作查询页面的界面
- 利用Mircosoft URLRewriter.dll实现asp.net页面伪静态
- 利用Mircosoft URLRewriter.dll实现页面伪静态
- 基于Metronic的Bootstrap开发框架经验总结(9)--实现Web页面内容的打印预览和保存操作