基于SpringBoot开发一套完整的项目(六)准备工作
集成Spring Security
说到程序的权限管理时,人们往往想到“角色”这一概念。例如, 一个用户以关联了“管理员”角色的账号登录系统,那这个用户就可以做管理员能做的所有事情。这种权限控制方法就称为基于角色的访问控制。
权限概念
权限是对资源的一种保护访问.用户要访问A资源前提是用户必须有A资源的访问权限.
角色概念
我们不会直接把权限赋予给用户,而是通过角色来赋予给用户,因为用户拥有某一种权限是因为用户扮演着某一种角色。
小王 是 个经理,他管理着B公司,他拥有1.2.3的权限。实际不是小王有这个权限,而是因为小王是经理。因为经理拥有1.2.3 权限,所以在权限划分上,我们会把权限赋予给某一个角色,而不是赋予给个人。这样带来的好处是如果公司换了经理,那 么只要再聘用一个人来做经理就可以了,而不会出现因为权 限在个人手里导致权限被带走的情况,
分组概念
只有角色是不够的,B公司发现小王有财务问题成立了一个财务调查小组,然后我们赋予了这个小组财务调查员的角色(注意 是赋予小组这个角色). 这样这个小组所有人员都有财务调查的资格。而不需要给小组的每个人都赋予这个角色,分组概念 也适合部门,因为任何一个部门在公司里或者社会上都在扮演着一个泛的角色。
判断用户有没有访问资源的权限就看这个用户有没有访问这个资源的权限,也就是说分组,分部门,分角色最终是以权限来实 现对资源的访问控制
在Java 平台,有很多现成的现代权限管理框架可供选择,
Apache Shiro 和SpringSecurity
一个是以简洁好用而被业界广泛应用,而另一个则以功能强大而著称。
Spring Security 概述
在应用程序安全性的两个主要领域是 : 认证与授权。
( 1 )认证:认证是建立主体的过程。主体通常是指可以在应用程序中执行操作
的用户、设备或其他系统。
( 2 )授权:或称为访问控制,授权是指决定是否允许主体在应用程序中执
行操作。
在认证级别, Spring Security 支持各种各样的认证模型,也包括自己的一组认证功能:
有三个主要领域。
对Web 请求进行授权。
授权某个方法是否可以被调用。
授权访问单个领域对象实例。
针对Web 方面的开发, Spring Security 提供了如下高级功能:
1. Remember-Me认证:指网站能够记住身份之间的会话,通常是通过发送cookie 到浏览
器, cookie 在未来会话中被检测到,并导致自动登录发生。
2. 使用HTTPS :可以使用< intercept-url >上的requires-channel 属性直接支持这些URL 采用HTTPS 协议。
3. 会话管理: 提供了诸如检测超时、控制并发会话、防御会话固定攻击等方面的内容。
Spring Security 与Spring Boot 集成
另外 Thymeleaf 提供了Thymeleaf 与Spring Security 集成模块需要手动添加这个依赖。
<dependency>
<groupId>org.springframework.boot</groupId>
<artifactId>spring-boot-starter-security</artifactId>
</dependency>
<dependency>
<groupId>org.thymeleaf.extras</groupId>
<artifactId>thymeleaf-extras-springsecurity4</artifactId>
</dependency>
后台代码
创建config包,然后创建创建SecurityConfig配置安全配置类
@EnableWebSecurity
public class SecurityConfig extends WebSecurityConfigurerAdapter{
/**
* 自定义配置
*/
protected void configure(HttpSecurity httpSecurity) throws Exception{
httpSecurity.authorizeRequests()
.antMatchers("/css/**","/js/**","/fonts/**","/index")
.permitAll()//都可以访问
.antMatchers("user/**").hasRole("ADMIN")//需要管理员权限
.and()
.formLogin()//基于Form表单登录验证
.loginPage("/login").failureUrl("/login-error");//自定义登录界面
}
/**
* 认证信息管理
*/
public void configureGlobal(AuthenticationManagerBuilder auth) throws Exception{
auth.inMemoryAuthentication()//认证信息存储于内存中
.withUser("duxihu").password("888888").roles("ADMIN");
}
}
安全配置类SecurityConfig 继承自WebSecurityConfiguerAdapter。WebSecurityConfigurerAdapter
提供用于创建一个Websecurityconfigure 实例方便的基类,允许自定义重写其方法。这里重写了configure方法。
( 1 ) permitAll( ) : 是指允许任何人访问的方法,包括匹配css 、js 、font路径的URL 及index页面。
( 2)所有匹配/user的URL 请求需要用户进行身份验证。在本例中,用户必须并且具备admin
角色,才有权限访问/user路径下的资源。
( 3 )formLogin( ) : 表明这是个基于表单的身份验证,指明了登录的URL 路径及登录失败的URL 。
configureGlobal方法创建了基于内存的身份认证管理器。在本例,存储了用户名为duxihu 密码为 888888、角色为ADMIN 的身份信息。configureGlobal方法可以是任意名称,但在类中必须要有@ EnableWebSecurity 或者@ EnableMethodSecurity 或@EnableGlobalAuthentication 注解。
创建MainController 控制器
@Controller public class MainController { @GetMapping("/") public String root() { return "redirect:/index"; } @GetMapping("/index") public String index() { return "index"; } @GetMapping("/login") public String login() { return "login"; } @GetMapping("/login-error") public String loginError(Model model) { model.addAttribute("loginError", true); model.addAttribute("errorMsg", "登录失败,用户名或密码错误"); return "login"; } }
① 当访问根路径或/index路径时将会跳转到index.html页面。② 访问/login路径时,将会跳转到login.html页面。
③ 登录失败,将会重定向到/login-error路径,最终会跳转到login.html页面。在页面中绑定了错误提示信息。
前端代码
创建index . html 作为主页
<!DOCTYPE html>
<html xmlns:th="http://www.thymeleaf.org"
xmlns:layout="http://www.ultraq.net.nz/thymeleaf/layout"
xmlns:sec="http://www.thymeleaf.org/thymeleaf-extras-springsecurity4">
<head th:replace="~{common/header :: header}">
</head>
<body>
<div class="container blog-content-container">
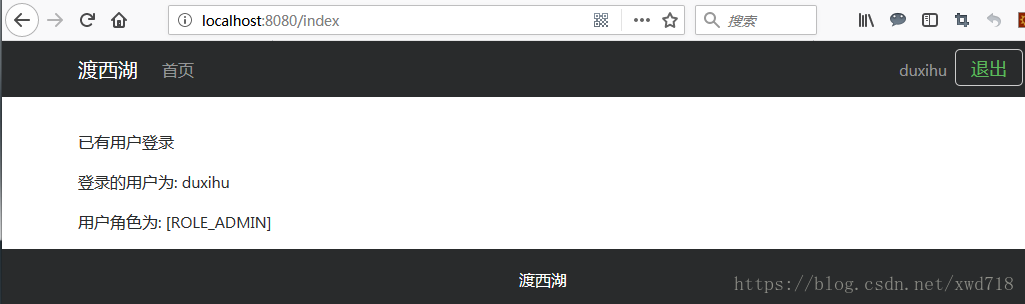
<div sec:authorize="isAuthenticated()">
<p>已有用户登录</p>
<p>登录的用户为: <span sec:authentication="name"></span></p>
<p>用户角色为: <span sec:authentication="principal.authorities"></span></p>
</div>
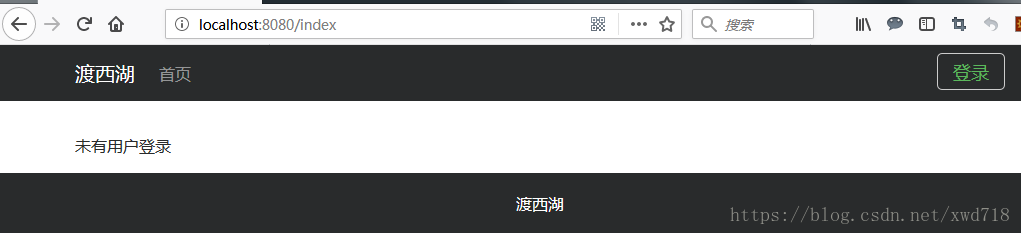
<div sec:authorize="isAnonymous()">
<p>未有用户登录</p>
</div>
</div>
<div th:replace="~{common/footer :: footer}"></div>
</body>
</html>( 1 ) sec:authorize="isAnonymous()" :判断用户是不是匿名(未认证)
( 2 ) sec:authorize="isAuthenticated":判断用户是否经过认证。
( 3 ) sec:authentication="name":获取到用户的名称。
( 4 ) sec:authentication="principal.authorities”:获取到用户的角色。
( 了解该库的更多信息,可以参阅 https://github.com/thymeleaf/thymeleaf-extras-springsecurity 。)
header.html
......
<body>
<nav class="navbar navbar-inverse bg-inverse navbar-toggleable-md">
<div class="container">
<button class="navbar-toggler navbar-toggler-right" type="button" data-toggle="collapse"
data-target="#navbarsContainer">
<span class="navbar-toggler-icon"></span>
</button>
<a class="navbar-brand" href="/" th:href="@{~/}">渡西湖</a>

<div class="collapse navbar-collapse" id="navbarsContainer">

<ul class="navbar-nav mr-auto">
<li class="nav-item">
<a class="nav-link" th:href="@{~/users}"  >首页 <span class="sr-only">(current)</span></a>
</li>
</ul>

<!-- 登录判断 -->
<div sec:authorize="isAuthenticated()"  class="row" >
<ul class="navbar-nav mr-auto">
<li class="nav-item">
<span class="nav-link"  sec:authentication="name"></span>
</li>
</ul>
<form action="/logout" th:action="@{/logout}" method="post">
<input class="btn btn-outline-success " type="submit" value="退出">
</form>
</div>

<div sec:authorize="isAnonymous()">
<a href="/login" th:href="@{~/login}" class="btn btn-outline-success my-2 my-sm-0" type="submit">登录</a>
</div>
</div>

</div>
</nav>
</body>
......
菜单栏会根据用户是否认证来显示不同的信息。
( 1 )未认证: 显示“登录”按钮。
( 2 )已认证:显示用户的名称。
( 3 )要退出时发送logout表单请求到后台。
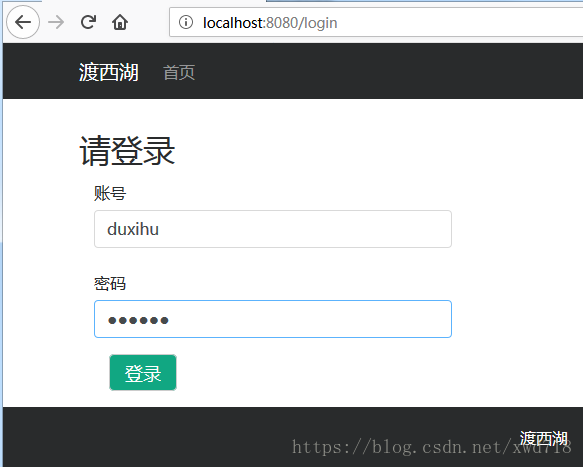
增加login.html页面
<!DOCTYPE html>
<html xmlns:th="http://www.thymeleaf.org"
xmlns:layout="http://www.ultraq.net.nz/thymeleaf/layout"
xmlns:sec="http://www.thymeleaf.org/thymeleaf-extras-springsecurity4">
<head th:replace="~{common/header :: header}">
</head>
<body>
<!-- Page content -->
<div class="container blog-content-container">
<form th:action="@{/login}" method="post">
<h2 >请登录</h2>
<div class="form-group col-md-5">
<label for="username" class="col-form-label">账号</label>
<input type="text" class="form-control" id="username" name="username" maxlength="50" placeholder="请输入账号">
</div>
<div class="form-group col-md-5">
<label for="password" class="col-form-label">密码</label>
<input type="password" class="form-control" id="password" name="password" maxlength="30" placeholder="请输入密码" >
</div>
<div class="form-group col-md-5">
<button type="submit" class="btn btn-primary">登录</button>
</div>
<div class=" col-md-5" th:if="${loginError}">
<p class="blog-label-error" th:text="${errorMsg}"></p>
</div>
</form>
</div><!-- /.container -->
<div th:replace="~{common/footer :: footer}"></div>
</body>
</html>
运行后,登录 localhost:8080

- 基于springboot+bootstrap+mysql+redis搭建一套完整的权限架构【四】【编写基础开发工具】
- 基于springboot+redis+bootstrap+mysql开发一套属于自己的分布式springcloud云权限架构(十)【权限架构生产者(用户管理)】
- 基于springboot+redis+bootstrap+mysql开发一套属于自己的分布式springcloud云权限架构(一)【云架构前言】
- 基于springboot+redis+bootstrap+mysql开发一套属于自己的分布式springcloud云权限架构(七)【权限架构生产者(数据字典)】
- 从零部署Spring boot项目到云服务器(准备工作)
- 基于VS Code创建Spring Boot项目开发REST API(一)
- 基于springboot+redis+bootstrap+mysql开发一套属于自己的分布式springcloud云权限架构(十七)【权限架构系统(基础框架搭建)】
- 基于springboot+redis+bootstrap+mysql开发一套属于自己的分布式springcloud云权限架构(二)【构建实体模型】
- 基于springboot+redis+bootstrap+mysql开发一套属于自己的分布式springcloud云权限架构(十四)【权限架构消费者(通用类编写)】
- 基于springboot+bootstrap+mysql+redis搭建一套完整的权限架构【一】【构建工程】
- 基于springboot+redis+bootstrap+mysql开发一套属于自己的分布式springcloud云权限架构(三)【构建注册中心】
- 从零部署Spring boot项目到云服务器(准备工作)
- 如何基于Spring Boot搭建一个完整的项目
- 基于springboot+redis+bootstrap+mysql开发一套属于自己的分布式springcloud云权限架构(十二)【权限架构生产者(菜单管理)】
- 基于springboot+bootstrap+mysql+redis搭建一套完整的权限架构【五】【编写基础代码快速生成工具】
- maven 项目(四) spring集成springMVC开发统一接入API(准备工作:第二部分)
- maven 项目(四) spring集成springMVC开发统一接入API(准备工作:第一部分)
- 基于springboot+redis+bootstrap+mysql开发一套属于自己的分布式springcloud云权限架构(四)【构建链路调用监控系统】
- 基于springboot+bootstrap+mysql+redis搭建一套完整的权限架构【六】【引入bootstrap前端框架】
- 基于springboot+bootstrap+mysql+redis搭建一套完整的权限架构【二】【整合springSecurity】